Getting Started#
Prerequisites#
Setup#
NVIDIA AI Enterprise License: NVIDIA NIM for NV-CLIP (NV-CLIP NIM) is available for self-hosting under the NVIDIA AI Enterprise (NVAIE) License.
NVIDIA GPU(s): NV-CLIP NIM runs on any NVIDIA GPU with sufficient GPU memory, but some model/GPU combinations are optimized. See the Support Matrix for more information.
CPU: x86_64 & aarch64 architectures are supported in this release
OS: any Linux distributions which:
Are supported by the NVIDIA Container toolkit
Have
glibc>= 2.35 in the output ofld -v
CUDA Drivers: Follow the installation guide.
We recommend:
Using a network repository as part of a package manager installation, skipping the CUDA toolkit installation as the libraries are available within the NIM container
Installing the open kernels for a specific version:
Major Version
EOL
Data Center & RTX/Quadro GPUs
GeForce GPUs
> 550
TBD
X
X
550
Feb 2025
X
X
545
Oct 2023
X
X
535
June 2026
X
525
Nov 2023
X
470
Sept 2024
X
Install Docker.
Install the NVIDIA Container Toolkit.
After installing the toolkit, follow the instructions in the Configure Docker section in the NVIDIA Container Toolkit documentation.
To ensure that your setup is correct, run the following command:
docker run --rm --runtime=nvidia --gpus all ubuntu nvidia-smi
This command should produce output similar to the following, where you can confirm the CUDA driver version and available GPUs.
+-----------------------------------------------------------------------------------------+
| NVIDIA-SMI 550.54.14              Driver Version: 550.54.14      CUDA Version: 12.4     |
|-----------------------------------------+------------------------+----------------------+
| GPU  Name                 Persistence-M | Bus-Id          Disp.A | Volatile Uncorr. ECC |
| Fan  Temp   Perf          Pwr:Usage/Cap |           Memory-Usage | GPU-Util  Compute M. |
|                                         |                        |               MIG M. |
|=========================================+========================+======================|
|   0  NVIDIA H100 80GB HBM3          On  |   00000000:1B:00.0 Off |                    0 |
| N/A   36C    P0            112W /  700W |   78489MiB /  81559MiB |      0%      Default |
|                                         |                        |             Disabled |
+-----------------------------------------+------------------------+----------------------+

+-----------------------------------------------------------------------------------------+
| Processes:                                                                              |
|  GPU   GI   CI        PID   Type   Process name                              GPU Memory |
|        ID   ID                                                               Usage      |
|=========================================================================================|
|  No running processes found                                                             |
+-----------------------------------------------------------------------------------------+
Installing WSL2 for Windows#
Certain downloadable NIMs can be used on an RTX Windows system with Windows System for Linux (WSL). To enable WSL2, perform the following steps.
Be sure your computer can run WSL2 as described in the Prerequisites section of the WSL2 documentation.
Enable WSL2 on your Windows computer by following the steps in Install WSL command. By default, these steps install the Ubuntu distribution of Linux. For alternative installations, see Change the default Linux distribution installed.
Launch NVIDIA NIM for NV-CLIP#
You can download and run the NIM of your choice from either the API catalog or the NGC.
Option 1: From API Catalog#
Checkout this video, which illustrates the following steps.
Generate an API Key#
Navigate to the API Catalog.
Select a model.
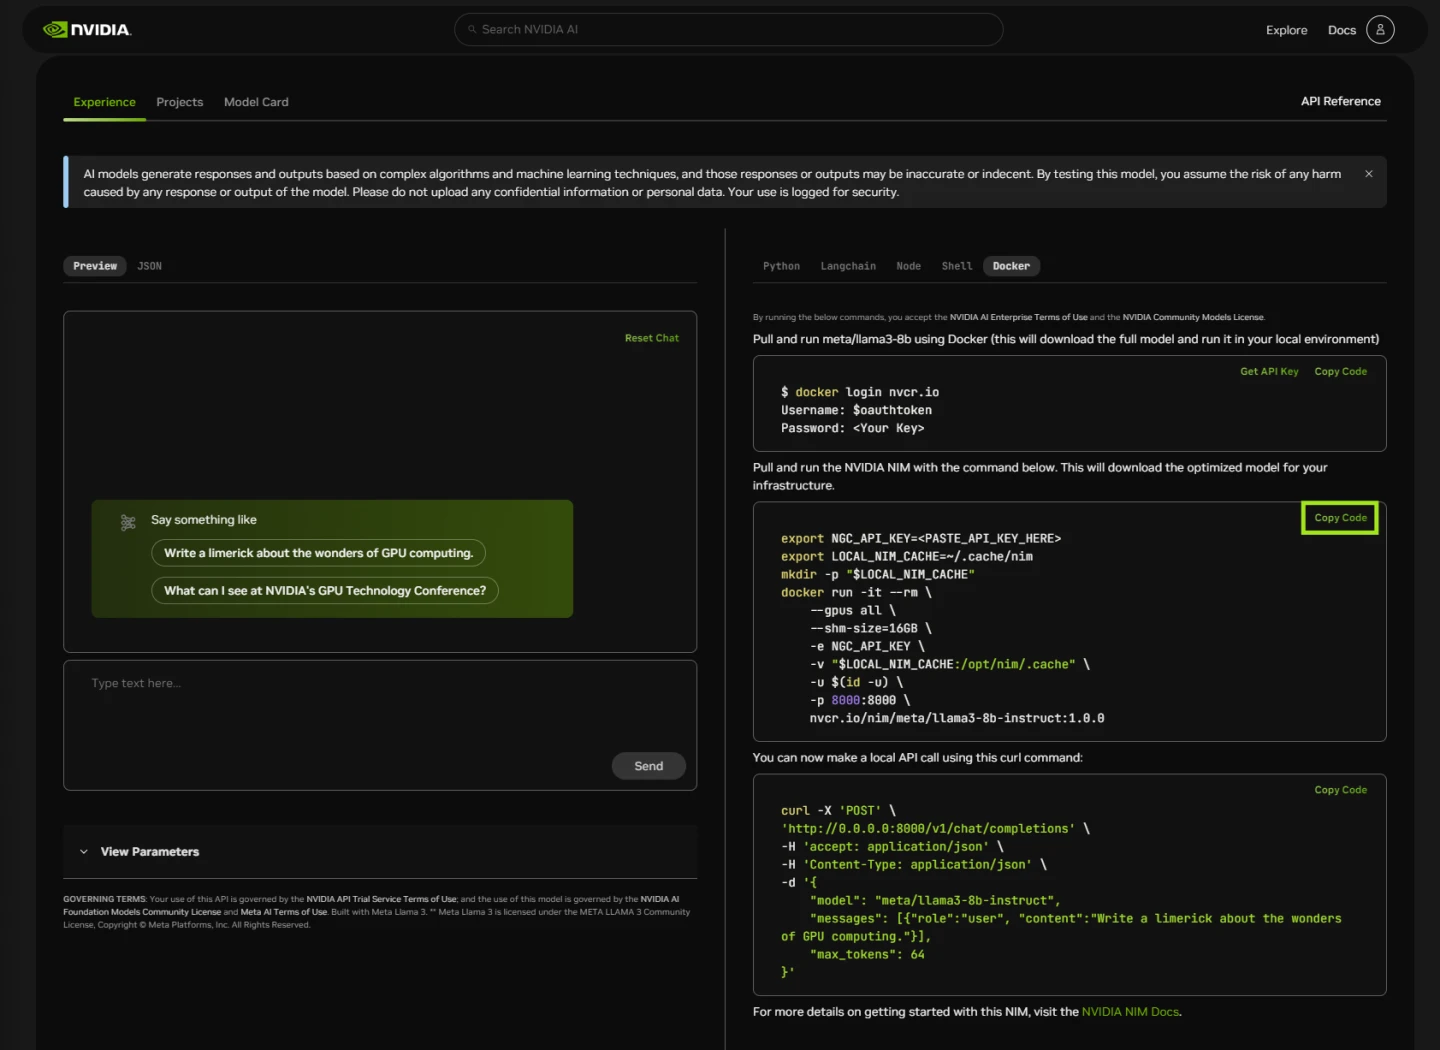
Select an Input option. The following example is of a model that offers a Docker option. Not all of the models offer this option, but all include a “Get API Key” link.
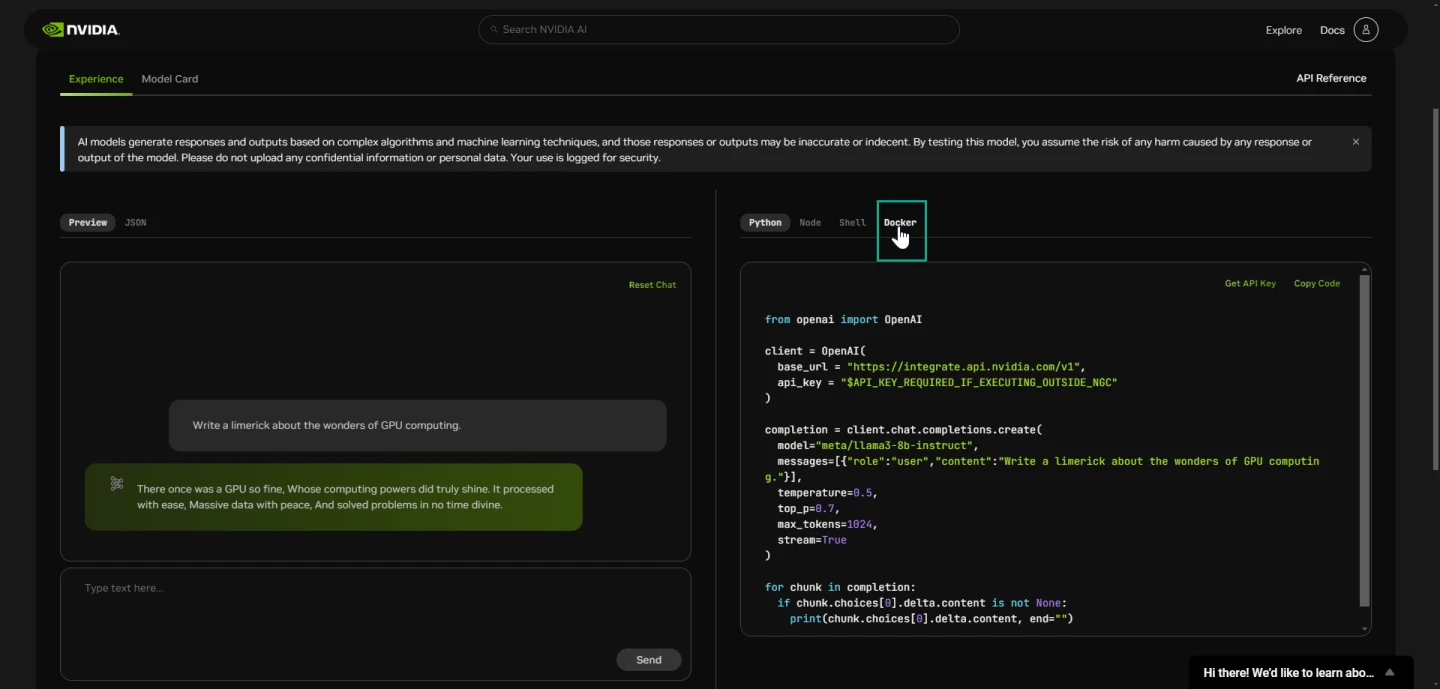
Select Get API Key and login if prompted.
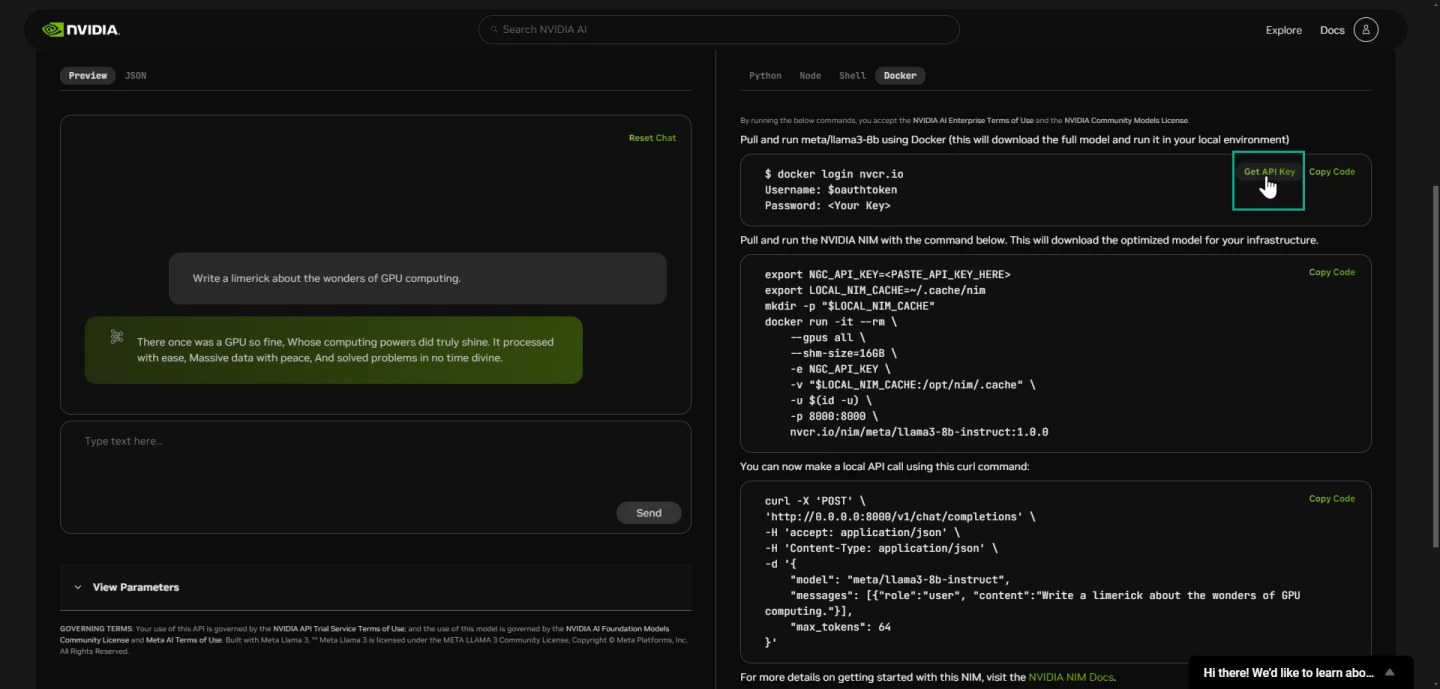
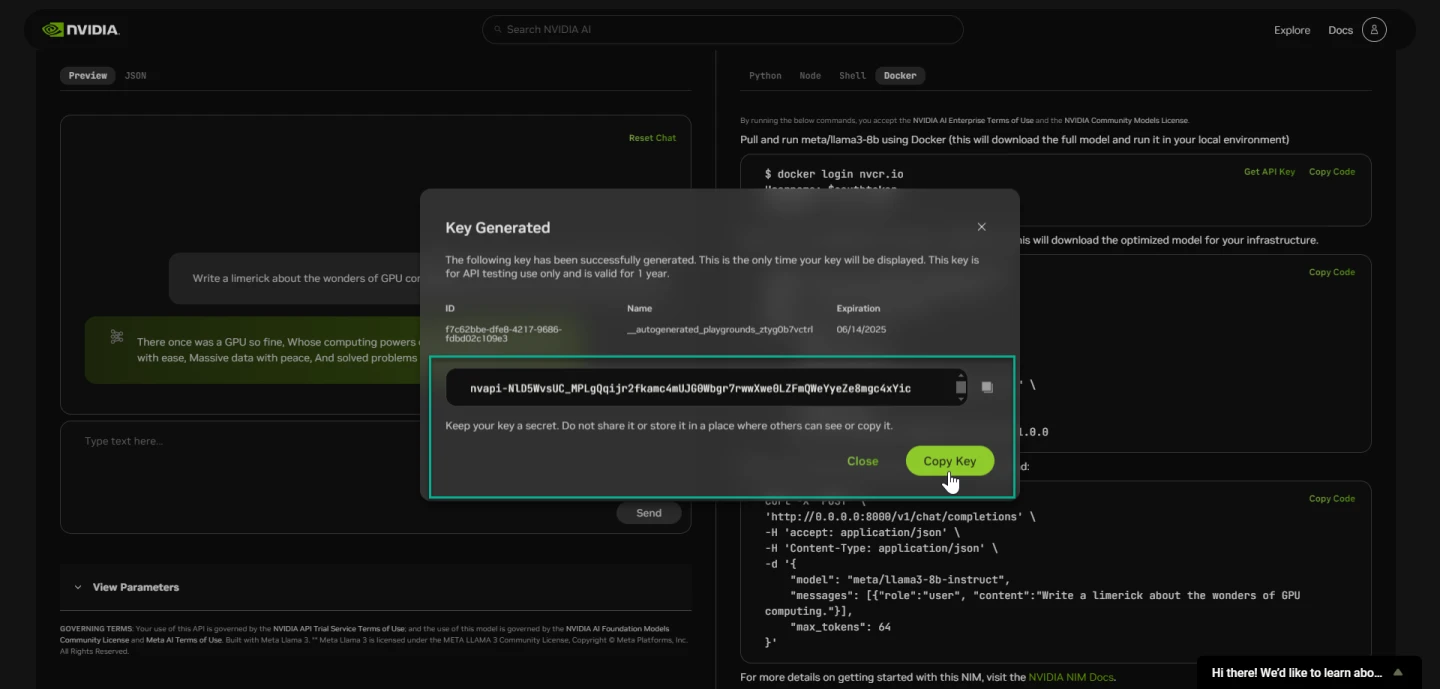
Select Generate Key.

Copy your key and store it in a secure place. Do not share it.
Login to Docker#
Use the docker login command, as shown in the following screenshot, to log in to Docker. Replace the placeholders for Username and Password with your values.
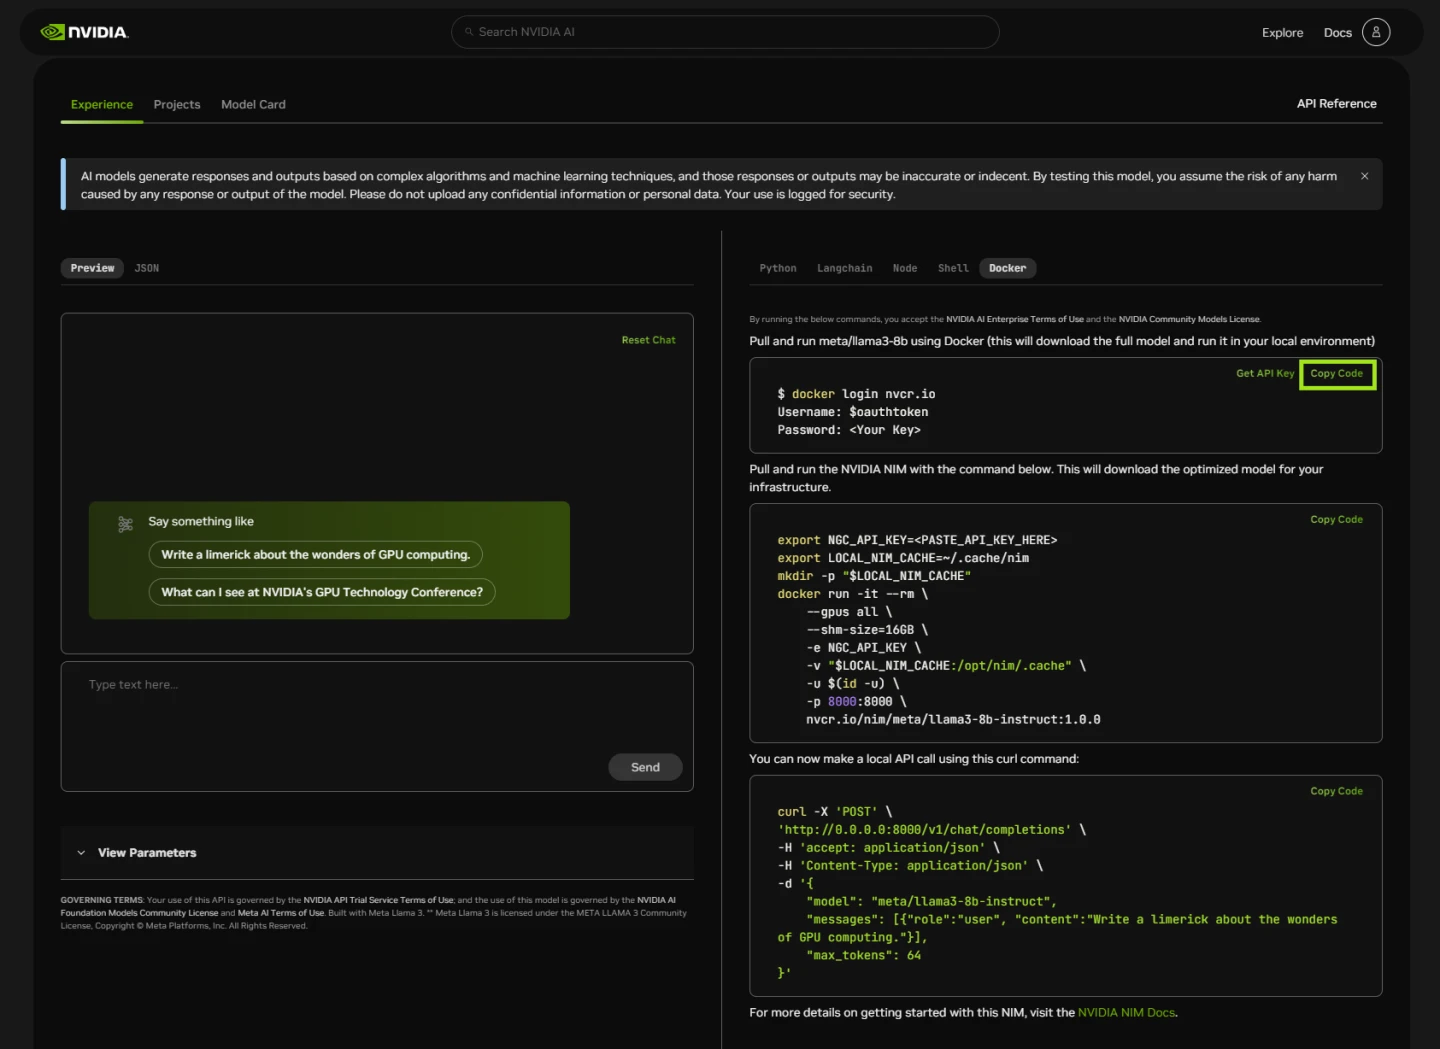
Download and Launch NVIDIA NIM for LLMs#
Use the following command to pull and run the NIM using Docker.
To modify the docker run parameters, see Docker Run Parameters.
You can now run inference.
Option 2: From NGC#
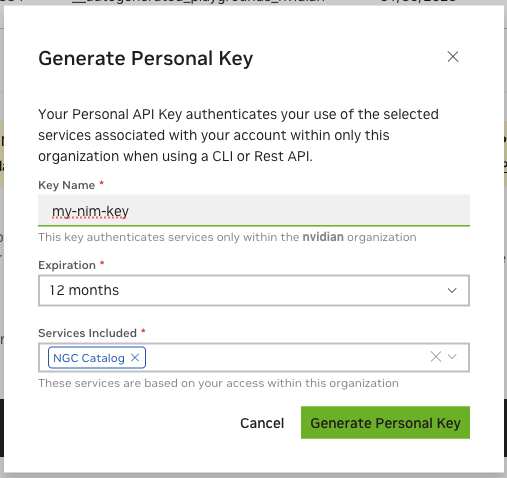
Generate an API key#
An NGC API key is required to access NGC resources. Navigate to https://org.ngc.nvidia.com/setup/api-keys to create a key.
When creating an NGC API key, ensure that at least “NGC Catalog” is selected from the “Services Included” dropdown. Include additional services if you want to use this key for other purposes.
Export the API key#
Pass the value of the API key to the docker run command in the next section as the NGC_API_KEY environment variable to download the appropriate models and resources when starting the NIM.
If you’re not familiar with how to create the NGC_API_KEY environment variable, the simplest way is to export it in your terminal:
export NGC_API_KEY=<value>
Run one of the following commands to make the key available at startup:
# If using bash
echo "export NGC_API_KEY=<value>" >> ~/.bashrc

# If using zsh
echo "export NGC_API_KEY=<value>" >> ~/.zshrc
Other, more secure options include saving the value in a file, so that you can retrieve with cat $NGC_API_KEY_FILE, or using a password manager.
Docker Login to NGC#
To pull the NIM container image from NGC, first authenticate with the NVIDIA Container Registry with the following command:
echo "$NGC_API_KEY" | docker login nvcr.io --username '$oauthtoken' --password-stdin
Use $oauthtoken as the username and NGC_API_KEY as the password. The $oauthtoken username is a special name that indicates that you will authenticate with an API key and not a user name and password.
List Available NIMs#
This documentation uses the ngc CLI tool in a number of examples. See the NGC CLI documentation for information on downloading and configure the tool.
Previously, the ngc tool used NGC_API_KEY environment variable, but has since deprecated that environment variable in favor of the NGC_CLI_API_KEY environment variable. In the previous section, you set NGC_API_KEY and the following sections use it in command examples. If this variable set and you run an ngc command, the command warns you by saying it is deprecated in favor of NGC_CLI_API_KEY. You can safely ignore this warning. Even if you set the NGC_CLI_API_KEY environment variable, as long as NGC_API_KEY is set, you get the warning.
Use the following command to list the available NIMs in CSV format.
ngc registry image list --format_type csv 'nvcr.io/nim/nvidia/nvclip*'
This command should produce output in the following format:
Name,Repository,Latest Tag,Image Size,Updated Date,Permission,Signed Tag?,Access Type,Associated Products
<name1>,<repository1>,<latest tag1>,<image size1>,<updated date1>,<permission1>,<signed tag?1>,<access type1>,<associated products1>
...
<nameN>,<repositoryN>,<latest tagN>,<image sizeN>,<updated dateN>,<permissionN>,<signed tag?N>,<access typeN>,<associated productsN>

Use the **Repository** and **Latest Tag** fields when you call the ``docker run`` command, as shown in the following section.
Launch NIM#
The following command launches a Docker container for the nvidia/nvclip-vit-h-14 model.
To launch a container for a different NIM, replace the values of Repository and Latest_Tag with values from the previous image list command and change the value of CONTAINER_NAME to something appropriate.
# Choose a container name for bookkeeping
export CONTAINER_NAME=nvclip

# The container name from the previous ngc registry image list command
Repository=nvclip
Latest_Tag=2.0.0

# Choose a NV-CLIP NIM Image from NGC
export IMG_NAME="nvcr.io/nim/nvidia/${Repository}:${Latest_Tag}"

# Choose a path on your system to cache the downloaded models
export LOCAL_NIM_CACHE=~/.cache/nim
mkdir -p "$LOCAL_NIM_CACHE"

# Start the NV-CLIP NIM
docker run -it --rm --name=$CONTAINER_NAME \
  --runtime=nvidia \
  --gpus all \
  -e NGC_API_KEY=$NGC_API_KEY \
  -v "$LOCAL_NIM_CACHE:/opt/nim/.cache" \
  -p 8000:8000 \
  $IMG_NAME
Docker Run Parameters#
Flags |
Description |
|---|---|
|
|
|
Delete the container after it stops (see Docker docs) |
|
Give a name to the NIM container
for bookkeeping (here
|
|
Ensure NVIDIA drivers are accessible in the container. |
|
Expose all NVIDIA GPUs inside the container. See the configuration page for mounting specific GPUs. |
|
Provide the container with the token necessary to download adequate models and resources from NGC. See Export the API key. |
|
Mount a cache directory from your
system ( |
|
Forward the port where the NIM
server is published inside the
container to access from the host
system. The left-hand side of
|
|
Name and version of the NV-CLIP NIM container from NGC. The NV-CLIP NIM server automatically starts if no argument is provided after this. |
|
Model profile id of the GPU you are running on. See the profiles page. |
Note
See the Configuring a NIM topic for information about additional configuration settings.
Note
If you have an issue with permission mismatches when downloading models in your local cache directory, add the `-u $(id -u)` option to the `docker run` call.
Run Inference#
During startup the NIM container downloads the required resources and begins serving the model behind an API endpoint. The following message indicates a successful startup.
INFO: Application startup complete.
INFO: Uvicorn running on http://0.0.0.0:8000 (Press CTRL+C to quit)
Once you see this message you can validate the deployment of NIM by executing an inference request. In a new terminal, run the following command to check whether the service is deployed successfully:
curl -X GET 'http://0.0.0.0:8000/v1/health/ready'
Tip
Pipe the results of curl commands into a tool like jq or python -m json.tool to make the output of the API easier to read.
For example: curl -s http://0.0.0.0:8000/v1/health/ready | jq.
This command should produce output similar to the following:
{
"status": "ready"
}
Note
If you are using a windows host, use localhost instead of 0.0.0.0 in the curl requests above to access the loopback interface.
OpenAI Embeddings Request#
OpenAI Embeddings API only supports text support. Embeddings API for NV-CLIP NIM has been extended to include image support as well. Image input can be provided as a base64 str in the format data:image/<image_format>;base64,<base64str>
Important
Update model name according to your requirements. For example, for a nvidia/nvclip-vit-h-14 model, you might use the following command:
curl -X 'POST' \
'http://0.0.0.0:8000/v1/embeddings' \
    -H 'accept: application/json' \
    -H 'Content-Type: application/json' \
    -d '{
        "input": [
            "The quick brown fox jumped over the lazy dog"
        ],
        "model": "nvidia/nvclip-vit-h-14",
        "encoding_format": "float"
    }' | jq .

# Sample Output:
# {
#    "object": "list",
#    "data": [
#        {
#            "index": 0,
#            "embedding": [
#                        < 1024 dimension vector of embedding values >
#                        ],
#            "object": "embedding"
#        }
#    ],
#    "usage": {
#        "num_images": 0,
#        "prompt_tokens": 77,
#        "total_tokens": 77
#    },
#    "model": "nvidia/nvclip-vit-h-14"
# }
You can also use the OpenAI Python API library,and provide image as the base64 string, as shown in the following example:
import base64
import requests
from io import BytesIO

from PIL import Image
from openai import OpenAI

client = OpenAI(base_url="http://0.0.0.0:8000/v1", api_key="not-used")

url = "https://raw.githubusercontent.com/vis-nlp/ChartQA/main/ChartQA%20Dataset/val/png/5090.png"
image = Image.open(requests.get(url, stream=True).raw)
buffer = BytesIO()
image.save(buffer, format="JPEG")
image_b64 = base64.b64encode(buffer.getvalue()).decode()

response = client.embeddings.create(
    input=["The quick brown fox jumped over the lazy dog",
            f"data:image/png;base64,{image_b64}"],
    model="nvidia/nvclip-vit-h-14",
    encoding_format="float"
)

print(response.data)

# Sample Output
# [Embedding(embedding=[<1024 dimension vector of embedding values>], index=0, object='embedding'),
#  Embedding(embedding=[<1024 dimension vector of embedding values>], index=1, object='embedding')]
Using Langchain:#
from langchain_openai import OpenAIEmbeddings

embeddings = OpenAIEmbeddings(base_url="http://0.0.0.0:8000/v1",
                            model="nvidia/nvclip-vit-h-14",
                            api_key="not-used",
                            check_embedding_ctx_length=False)


vector = embeddings.embed_query("What is langchain?")
print(vector)

# Sample Output
# [<1024 dimension vector of embedding values>]
Encoding format#
NV-CLIP NIM supports two encoding formats: base64 and float. The encoding_format can be specified in the API call. By default, encoding_format="float".
You can provide encoding_format="base64", as shown in the following example:
import base64
import requests
from io import BytesIO

from PIL import Image
from openai import OpenAI

client = OpenAI(base_url="http://0.0.0.0:8000/v1", api_key="not-used")

url = "https://raw.githubusercontent.com/vis-nlp/ChartQA/main/ChartQA%20Dataset/val/png/5090.png"
image = Image.open(requests.get(url, stream=True).raw)
buffer = BytesIO()
image.save(buffer, format="JPEG")
image_b64 = base64.b64encode(buffer.getvalue()).decode()

response = client.embeddings.create(
    input=["The quick brown fox jumped over the lazy dog",
          f"data:image/png;base64,{image_b64}"],
    model="nvidia/nvclip-vit-h-14",
    encoding_format="base64"
)

print(response.data)

# Sample Output
# [Embedding(embedding=[<1024 dimension vector of embedding values>], index=0, object='embedding'),
#  Embedding(embedding=[<1024 dimension vector of embedding values>], index=1, object='embedding')]
Batching Support#
NV-CLIP NIM supports a max_batch_size of 64 for both text and image input. Multiple images and texts can be provided in the input as list. Output embeddings will be indexed same as the input.
import base64
import requests
from io import BytesIO
from PIL import Image
from openai import OpenAI

client = OpenAI(base_url="http://0.0.0.0:8000/v1", api_key="not-used")
url = "https://raw.githubusercontent.com/vis-nlp/ChartQA/main/ChartQA%20Dataset/val/png/5090.png"
image = Image.open(requests.get(url, stream=True).raw)
buffer = BytesIO()
image.save(buffer, format="JPEG")
image_b64 = base64.b64encode(buffer.getvalue()).decode()


response = client.embeddings.create(
    input=["The quick brown fox jumped over the lazy dog",
            "Nvidia is a great company",
            "data:image/png;base64,iVBORw0KGgoAAAANSUhEUgAAAAEAAAABCAIAAACQd1PeAAAAEElEQVR4nGK6HcwNCAAA//8DTgE8HuxwEQAAAABJRU5ErkJggg==",
            f"data:image/png;base64,{image_b64}"],
    model="nvidia/nvclip-vit-h-14",
    encoding_format="float"
)

print(response.data)

# Sample Output
# [Embedding(embedding=[<1024 dimension vector of embedding values>], index=0, object='embedding'),
#  Embedding(embedding=[<1024 dimension vector of embedding values>], index=1, object='embedding')
#  Embedding(embedding=[<1024 dimension vector of embedding values>], index=2, object='embedding')
#  Embedding(embedding=[<1024 dimension vector of embedding values>], index=3, object='embedding')]
Cosine Similarity#
You can calculate cosine similarity between images and text, as shown in the example below:
import base64
import requests
from io import BytesIO
from PIL import Image
from openai import OpenAI
import torch

client = OpenAI(base_url="http://0.0.0.0:8000/v1", api_key="not-used")
url = "https://raw.githubusercontent.com/vis-nlp/ChartQA/main/ChartQA%20Dataset/val/png/5090.png"
image = Image.open(requests.get(url, stream=True).raw)
buffer = BytesIO()
image.save(buffer, format="JPEG")
image_b64 = base64.b64encode(buffer.getvalue()).decode()

embeddings_data = client.embeddings.create(
    input=["data:image/png;base64,iVBORw0KGgoAAAANSUhEUgAAAAEAAAABCAIAAACQd1PeAAAAEElEQVR4nGK6HcwNCAAA//8DTgE8HuxwEQAAAABJRU5ErkJggg==",
           f"data:image/png;base64,{image_b64}",
           "The quick brown fox jumped over the lazy dog"],
    model="nvidia/nvclip-vit-h-14",
    encoding_format="float"
).data

all_embeddings = [data.embedding for data in embeddings_data]
image_embeddings = [torch.tensor(embedding) for embedding in all_embeddings[:-1]]

image_embeddings = torch.stack(image_embeddings)
text_embeddings = torch.tensor(all_embeddings[-1])

image_embeddings /= image_embeddings.norm(dim=-1, keepdim=True)
text_embeddings /= text_embeddings.norm(dim=-1, keepdim=True)
probabilities = (100.0 * text_embeddings @ image_embeddings.T).softmax(dim=-1)

probabilities = {f"Image {i+1}": float(d) for i, d in enumerate(probabilities)}
print(probabilities)

# Sample Output
# {'Image 1': 1.0, 'Image 2': 3.4886383559751266e-08}
Stopping the container#
If a Docker container is launched with the --name command line option, you can use the following command to stop the running container.
# In the previous sections, the environment variable CONTAINER_NAME was
# defined using `export CONTAINER_NAME=nvclip`
docker stop $CONTAINER_NAME
Use docker kill if stop is not responsive. Follow either by docker rm $CONTAINER_NAME if you do not intend to restart this container as-is (with docker start $CONTAINER_NAME), in which case you will need to re-use the docker run ... instructions from the beginning of this section to start a new container for your NIM.
If you did not start a container with --name, use the output of the docker ps command to get a container ID for the image you used.