An NGC org (organization) is a dedicated virtual instance used to enable and manage NVIDIA cloud services. Upon your approval of the cuOpt Cloud Service EA program, an NVIDIA representative added you to the NGC org. You should have already received a welcome email that instructed you to continue the activation and sign-in process.
Please retrieve the Welcome to NGC email which you received from: noreply-ngc@nvidia.com
To get started with the cuOpt service, first, you will need to have an NGC account if you do not already have an account.
Sign up for a free NGC org through the NGC sign-in portal and create a new NVIDIA account.
Click on the link within the NGC Welcome email to accept the invitation to the org.
NotePlease refer to the NGC documentation for further details.
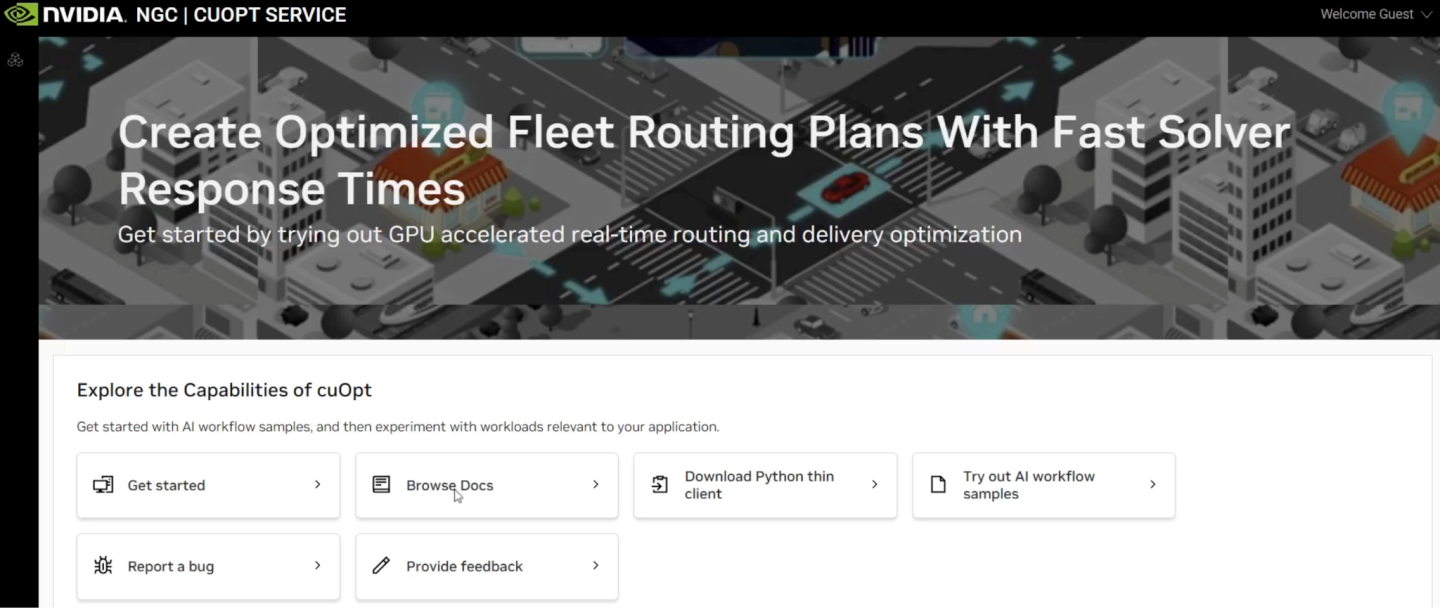
The following cuOpt Service landing page will be displayed.
Prior to setting up the Python thin client, we’ll create a Python virtual environment that we’ll use for the installation. This will allow us to install any Python scripts or libraries specifically for this service.
Supported OSes include Linux, WSL and macOS. We recommend you use bash shell on macOS.
First, ensure that Python 3.9+ is installed on the system. You can check the version of Python that’s installed using the command below.
python3 --version
Next, install the Python virtual environment package.
For installation on macOS, run:
pip3 install virtualenv
For installation on Ubuntu, run:
apt install python3.9-venv (or the specific package for your version of Python)
Next, make sure you’re in a proper working directory, such as your home directory, and create a virtual environment within that directory.
            cd ~
python3 -m venv cuopt-service-env
Activate the new environment by running.
source cuopt-service-env/bin/activate
Proceed to the next step to download and set up the Python thin client into this environment.
You must complete this download step. After completion of this step, NVIDIA will produce your credentials as soon as possible. Please wait for a welcome email from NVIDIA granting access to a service account and making you the administrator of an Oauth 2.0 client, then proceed with step 4 to obtain your credentials.
The cuOpt Service Python Thin Client is a Python interface to enable access to the NVIDIA-managed service. This lightweight client connects to the cuOpt server via a standard socket connection. It does not hold any data but simply establishes a socket connection to the server and performs all operations through it. It sends new and updated data to the cuOpt server and receives the server response (either the optimized routes or an error message) in return.
Login into NVIDIA NGC.
Click on the Download Python Thin Client link on the cuOpt landing page in NGC, as shown in the highlight below. This will download a zip file called
cuopt_managed_service.zip.
Unzip the downloaded file into the current working directory, using the command below.
unzip cuopt_managed_service.zip -d .
Navigate to the managed service directory that was just unzipped.
cd cuopt_managed_service
Make sure that your Python virtual environment that you created in the previous step is active, then execute the following command:
pip install .
This will install everything included in the managed service directory into your Python virtual environment. Now cuopt_cli can be run from that env, and the cuopt_thin_client package can now be imported in Python.
Wait to receive an email from NVIDIA granting access to a service account and making you the administrator of an Oauth 2.0 client
The cuOpt Managed Service Client handles requests to the cuOpt service through NVIDIA Cloud Functions (NVCF). Route Optimization problem data files are sent to the server using .json. Please refer to the upcoming API section for more details.
Please review the welcome email from NVIDIA granting access to a service account and Oauth 2.0 client
Click on the Admin Portal link in the above welcome email and enter your email address.
Proceed with the service account setup.
NoteIt is recommended to use the same login and password as in your NGC account setup.
Verify the account by email.
Once your email is verified, the NVIDIA Service Accounts portal will display a form containing your Client ID and secret.
Congratulations, these credentials will be used to connect to the cuOpt Managed Service.
Please copy over both the Client ID and secret to a safe, private, and protected location on your disk
The cuOpt managed service can be invoked from any machine with an appropriate Python environment containing the Python thin client.
Using the credentials (Client ID and Secret provided in Step 1: NGC Account Setup section), populate the credentials.json file located within the cuOpt_thin_client working directory.

Populate a Python dictionary with the appropriate cuOpt input data.
Pass the input data via a JSON file to the cuOpt service CLI.
Provided a feasible solution is obtained, the optimized routes will then be returned according to the input specified solve time plus any applicable network transfer time for cuOpt and solution data. If there is no feasible solution, cuOpt will return an error message.
The following is a sample run using the cuOpt CLI. Alternatively, you can call on the cuOpt API endpoint directly in your script. More information on this can be found in the API section.
            cuopt_cli cuopt_problem_data.json -c credentials.json -f
optimized_routes_sync_elite -t my_temp_dir

file: cuOpt problem data file, required if -g is not specified

-c: credentials file containing client_id and secret values in JSON. If
this file is not supplied,

the environment variables CUOPT_CLIENT_ID and CUOPT_CLIENT_SECRET will
be used

-f: cuOpt cloud function to call (defaults to
"optimized_routes_sync_elite")

-g: get available functions. Prints list of available cuOpt functions
and exits

-t: directory to write temporary files for handling large results
(defaults to "./")

-a: relevant only for internal NVIDIA developers to switch between
staging and production
The input file cuopt_problem_data.json is a JSON file containing all of the preprocessed problem data.
The following is a sample JSON file containing input data.
In this dictionary, the keys are input data parameters that cuOpt expects, and the values are lists of preprocessed input data.

Please refer to the cuOpt Server API reference guide for Task, Fleet, and Solver Configuration payload options.
Data can then be serialized and written to an output JSON file which can be sent to cuOpt through CLI.

For additional information, please refer to the upcoming API section.
The following is a sample run using the cuOpt API as well as test data for cuOpt.
We can import the CuOptServiceClient from the thin client and using our credentials, we create an instance of the service client.
            from cuopt_thin_client import CuOptServiceClient
import json

cuopt_service_client = CuOptServiceClient(
        client_id="CLIENT_ID",
        client_secret="CLIENT_SECRET",
)
Here we provide a problem that we know to work, with the solution provided below. If you are running into issues, you can test the cuOpt service with the following data and see if you get the expected output or some error message. This can help you understand if there is an issue with your cuOpt instance or your input data.
            cuopt_problem_data = {
    "cost_matrix_data": {
        "cost_matrix": {
                "0": [[0,1,1],[1,0,1],[1,1,0]]
        }
    },
    "task_data": {
        "task_locations": [0,1,2],
        "demand": [[0,1,1],[0,3,1]],
        "task_time_windows": [[0,10],[0,4],[2,4]],
        "service_times": [0,1,1],
        "priorities": [2,1,0]
    },
    "fleet_data": {
        "vehicle_locations": [[0,0],[0,0]],
        "priorities": [0,1],
        "capacities": [[2,2],[4,1]],
        "vehicle_time_windows": [[0,10],[0,10]],
        "skip_first_trips": [False,False],
        "drop_return_trips": [False,False],
        "vehicle_max_costs": [20,20]
    },
    "solver_config": {
        "time_limit": 5,
        "objectives": {
            "cost": 1
        }
    }
}
After we save the data to a dictionary, we send it to the service client.
            optimized_routes = cuopt_service_client.get_optimized_routes(
                    cuopt_problem_data
                    )
Once we get the cuOpt solver response, we print the routes.
print(optimized_routes)
Response:
{'response': {'solver_response': {'status': 0, 'num_vehicles': 1, 'solution_cost': 3.0, 'vehicle_data': {'0': {'task_id': ['Depot', '0', '1', '2', 'Depot'], 'arrival_stamp': [0.0, 0.0, 1.0, 3.0, 5.0], 'type': ['Depot', 'Delivery', 'Delivery', 'Delivery', 'Depot'], 'route': [0, 0, 1, 2, 0]}}}}, 'warnings': [], 'reqId': 'e9cb93c0-3eb2-44ba-bac6-ac2c3d7c69c0'}
The output is the same format for both CLI and API uses, including the number of vehicles as well as the route of each vehicle.