SBIOS Settings#
The NVIDIA DGX A100 system comes with a system BIOS with optimized settings for the DGX system. There might be situations where the settings need to be changed, such as changes in the boot order, changes to enable PXE booting, or changes in the BMC network settings.
Instructions for these use cases are provided in this section.
Important
Do not change settings in the SBIOS other than those described in this or other DGX A100 user documents. Contact NVIDIA Enterprise Services before making other changes.
Accessing the SBIOS Setup#
Here is information about how you can access the SBIOS setup.
Access the DGX A100 console, either from a locally connected keyboard and mouse or through the BMC remote console.
Reboot the DGX A100.
When presented with the SBIOS version screen, press [Del] or [F2] to enter the BIOS Setup Utility.
Here are some occasions where it might be necessary to reconfigure settings in the SBIOS:
Configuring a BMC Static IP Address Using the System BIOS
Enabling the TPM and Preventing the BIOS from Sending Block SID Requests
Clearing the TPM
Configuring the Boot Order#
The following instructions describe how to set the boot order at boot time. You can also set the boot order from the SBIOS setup > Boot screen.
Access the DGX A100 console, either from a locally connected keyboard and mouse or through the BMC remote console.
Reboot the DGX A100.
Press [F11] at the NVIDIA splash screen.

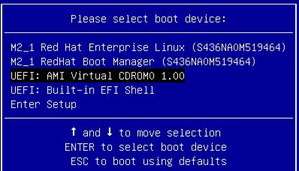
Select the boot device.
The following example shows virtual media selected.
Configuring the local terminal to access the SBIOS settings screen#
There are two ways to access the BIOS setup screen, one is through a direct-attached Keyboard and Monitor, and the other is through Serial-over-Lan (SOL) protocol using the IPMI tools.
Below are the instructions on how to configure a terminal with the correct settings to access the SBIOS configuration screens using SOL.
If using the IPMI SOL protocol#
When accessing the SBIOS configuration screen, be sure to use the ‘xterm’ terminal emulator and character encoding is set to
en_UTF-8Double-check the character encoding by running
echo $LANG.
For Linux desktop users, set the character encoding#
$ sudo localectl set-locale LANG=en_US.UTF-8Type
export LANG=en_UTF-8to set the locale for the current sessionType
xtermto launch the terminal with the set locale.From within the new xterm, use ipmitool to connect to the DGX A100 SOL console:
ipmitool -I lanplus -H {IP Address} -U admin -P dgxluna.admin sol activate
For Windows or Macintosh users#
Configure terminal application for
en_US.UTF-8support
Power on or Reboot the System#
Use the BMC User Interface to power on/reboot, OR
From the Operating System command line run
$ sudo rebootUsing the following IPMI command:
$ sudo ipmitool -I lanplus -H {IP Address} -U {userid} -P {password} sol activateto access the SOL interface using the terminal with the set locale.Press DEL or F2 when the following message comes up as the system is booting.
The system should confirm your choice and will bring up the BIOS configuration screen.