

Customization
This topic describes how to use the servers.json file to define the default connection behavior in Heavy Immerse. It describes how to enable default behavior using servers.json, provides basic syntax, and includes examples. You can define the HEAVY.AI database to connect to, as well as the username and password. You can also configure Immerse to use additional tile sources for geo charts.
Editing heavy.conf to Enable servers.json
To enable default behavior through a servers.json file, you must first edit heavy.conf to include servers.json information:
-
In your HEAVYAI_STORAGE directory, open
heavy.conf. For information aboutheavy.confand available options, see Configuration Parameters. -
In the
[web]section ofheavy.conf, referenceservers.jsonby adding the following line:Replace with the full path to
servers.json. -
Save
heavy.conf.
servers.json File Properties
Configuring Data Source and User Login Credentials
You can create a servers.json file to control the default configuration when you log in to Heavy Immerse. The information in servers.json can identify the database you connect to and credentials to use during automatic login.
-
If
servers.jsondoes not exist yet, create a file by that name in the HEAVYAI_STORAGE directory. -
In
servers.json, specify the database to connect to, as well as username and password information. You can use host, port, and protocol to specify the path to the data:Alternatively, you can define the data source using a URL:
-
Save
servers.json.
- If you leave the option values blank, the Immerse login form loads with blank fields.
- The contents of
servers.jsonmust be formatted as an array.
Feature Flags
The feature_flags section lets you set global default settings for the Immerse user interface.
Immerse User Interface Keys
The immerse_ui_keys section of servers.json enables you to configure which parts of the Immerse user interface are visible to the user.
For example, turn off all turn off all parts of the UI, and then explicitly turn back on tabs, the SQL editor, and the global side navigation.
The following table shows the names of the user interface keys that can be used to turn UI features on or off. Values are not case sensitive and can be prepended with IMMERSE_UI_.
Using Query Strings
You can use query strings in URLs to configure Immerse user interface keys, using the ui_on and ui_off parameters:
For example, to turn on the tabs and SQL Editor button:
All of the key values described in Immerse User Interface Keys apply to query strings. Values are not case sensitive and can be prepended with IMMERSE_UI_.
Custom Styles
To productize Immerse, you can add the customStyles JSON object to servers.json. Use the customStyles elements to:
- Customize colors
- Customize the text displayed in the browser tab
- Add your own logo
- Customize the login text
- Disable the Help menu dropdown on the navigation bar
JSON Branding Elements
Notes
- You can also set fonts and colors in the Immerse UI Settings panel. For more information, see Configuring the Dashboard User Interface.
- There are no visual design guarantees when using a large number of colors. For example, visual elements might bleed beyond borders or have an unexpected layout.
- Custom styles do not affect the settings for charts or dashboards saved before the custom styles are defined. However, you can edit existing charts and replace the colors in use to colors in your custom palette.
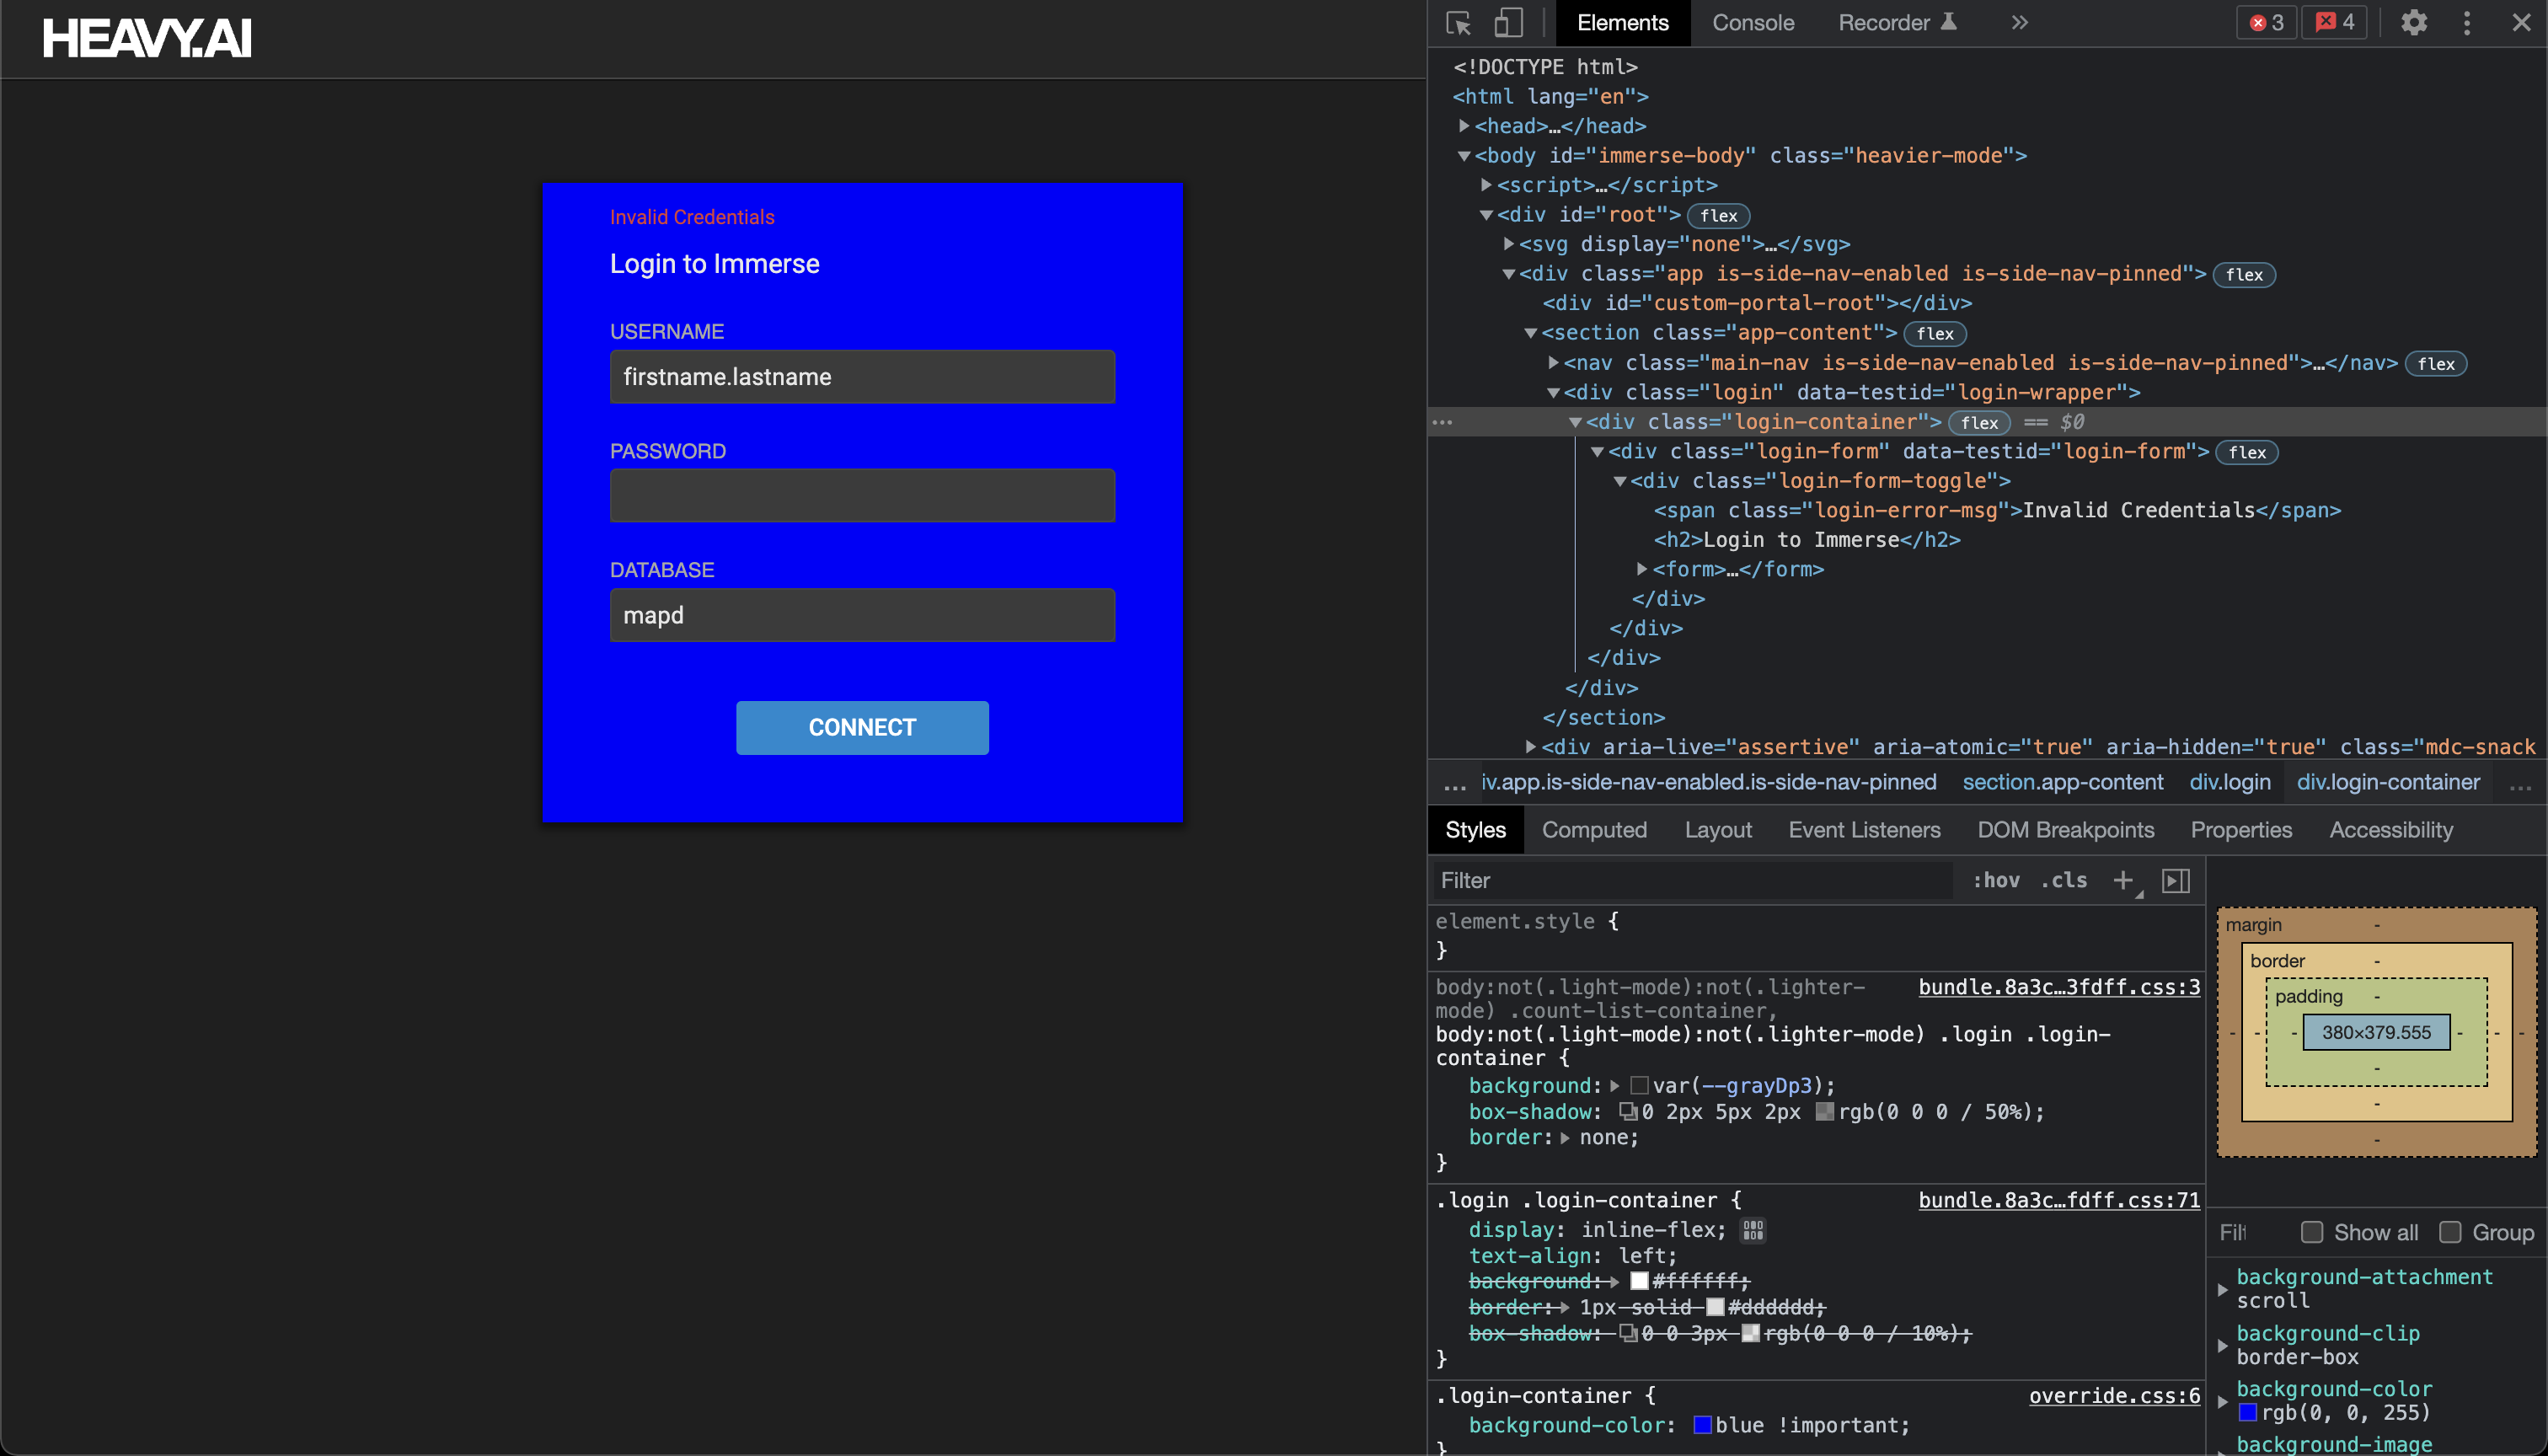
Loading Custom Stylesheets Using override.css
You can load custom stylesheets after the default Immerse styles by replacing override.css with with your own stylesheet.
The following example shows a login container style override. The code changes are reflected in the figures that follow.

Full servers.json Example
The following example shows a complete servers.json file that includes customization. When you want to change any of the settings in servers.json, you must replace all settings in servers.json, even if you duplicate the default values.
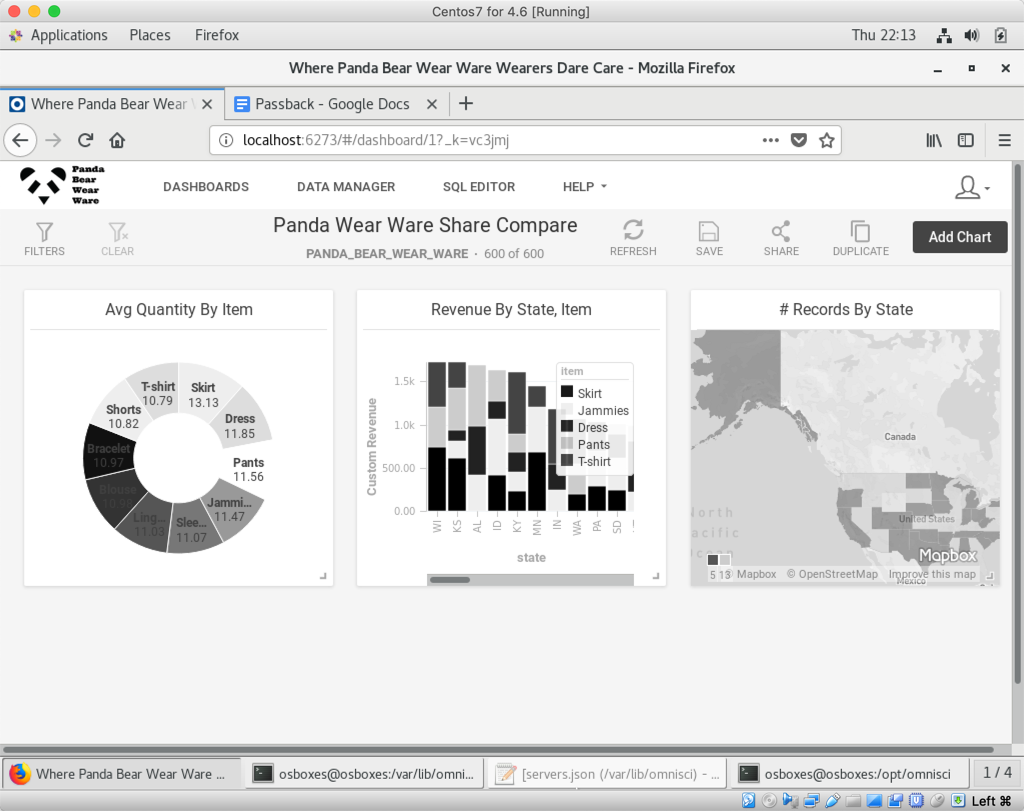
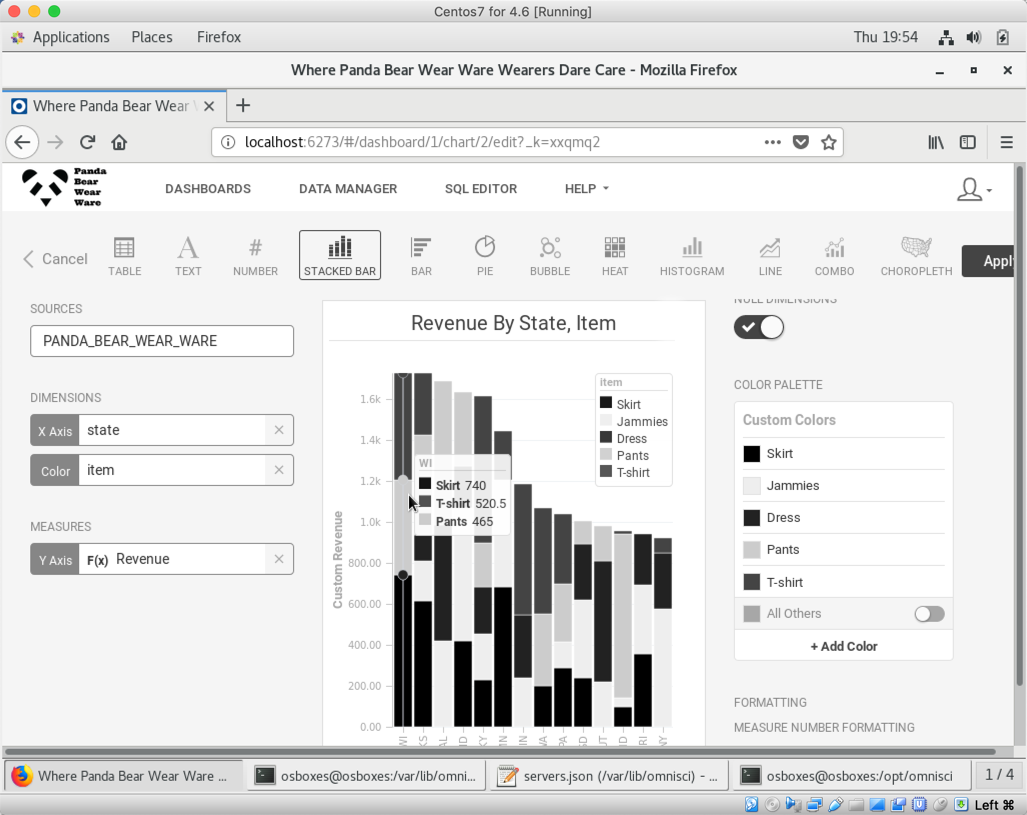
This example is for the totally-not-made-up company Panda Bear Wear Ware, where you can find all of your Panda Bear Wear Ware in one lair with time to spare. There is an understandable predilection toward black, white and everything in between on their color palette.
The first section contains branding information for their Heavy Immerse instance.
The logo, labeling, and button colors are visible at the dashboard level.
The Solid palette colors all items in Line, Pie, Bar, and other charts with one color. You can define the array of available colors.
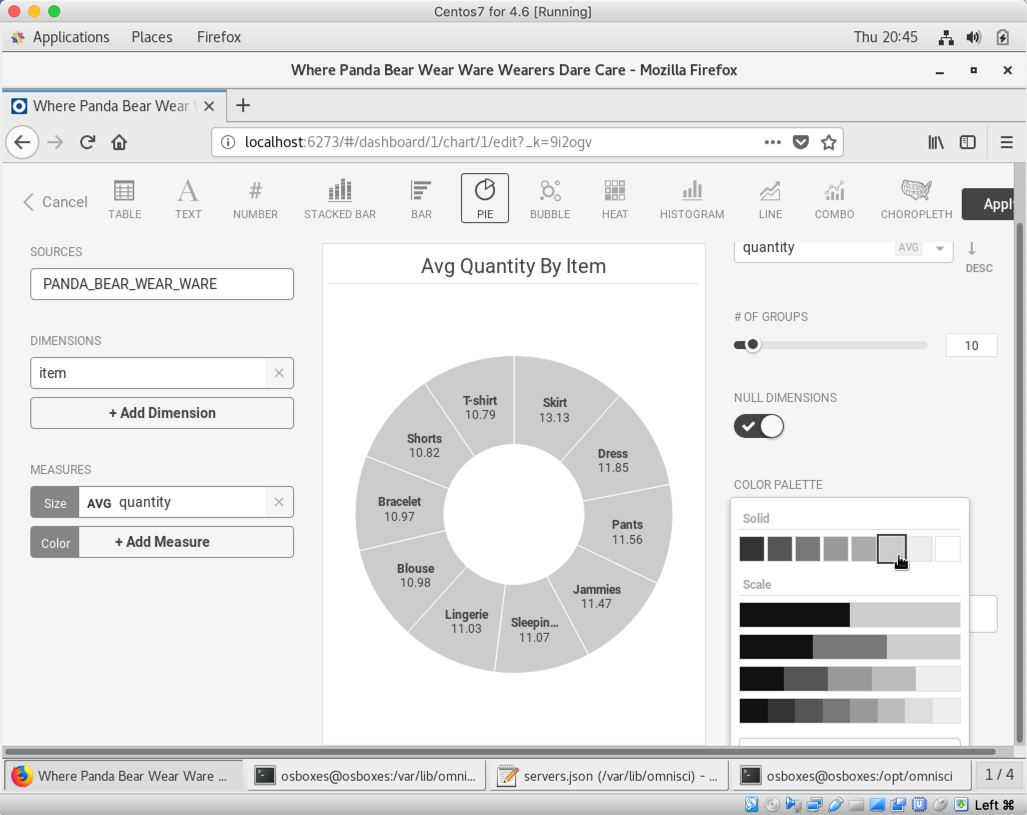
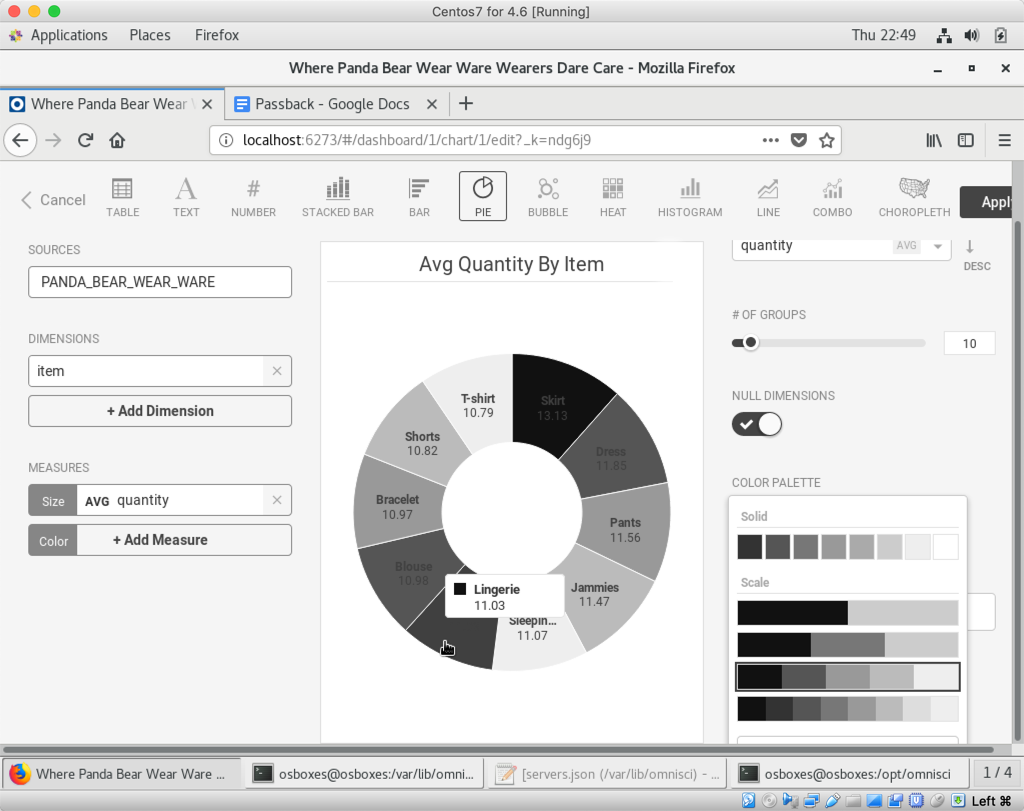
The Ordinal palette defines a range of colors that are iterated repeatedly in a chart with many values. You can define multiple ranges from which to select.
For example, a Pie chart can cycle through colors on the Ordinal palette to color each segment.
The Custom palette populates the Custom and Color By Dimension pop-ups, allowing you to assign specific colors to one or more values.
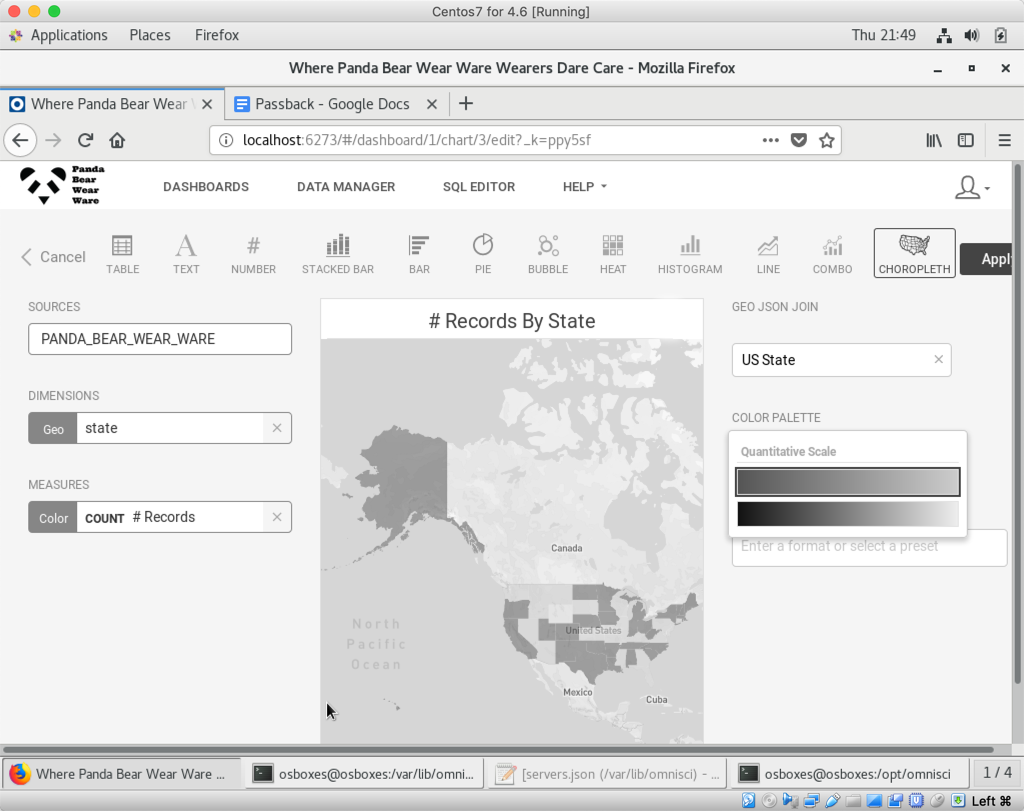
The Quantitative palette gives a range of two or more colors. Values are expressed as a gradient on a continuum between the colors you define. You can create multiple value sets.
Enable Custom Basemap Styles for Geo Charts
If you work extensively with geospatial data, you might need to use basemap styles that are different than those provided by Immerse. By modifying servers.json, you can use custom map styles created with Mapbox Studio, as well as third-party OGC-compliant raster tile sources.
To use different basemap styles, add the mapboxCustomStyles property, and then define the source.
Entering a source incorrectly can result in unexpected behavior in the geo charts, or cause Immerse to not load. Make sure that mapboxCustomStyles is an array, and that the objects in the array have label and value properties. To avoid errors, consider using a JSON validator like JSON Lint to make sure the code is correctly formatted before starting Immerse.
If you are an administrator, you can change the built-in styles to a new set of Mapbox tiles.
In releases before Release 6.1.0, custom styles with overlapping names would be appended to the list. This duplication of style names could cause unpredictable behavior. In Release 6.1.0 and higher, the style is defined by what is specified in servers.json.
To delete a theme, add a custom style without a value. For example, to delete the Satellite theme, add the theme and then define the value as follows:
A custom theme can be defined as the new default. Normally, the default theme is Current Immerse Theme, but by specifying "default" : true, the new theme becomes the default. For example:
The default theme appears first in the map theme selector.
If a theme’s value is changed (including changing the value of an Immerse-installed theme), a map using them will update to keep the same theme, but use the new Mapbox URL value.
If a theme is deleted, then any maps referencing that theme revert to the default.
The following example syntax shows how to add custom base maps using the mapboxCustomStyles property, in the following order:
- A custom map style created in Mapbox Studio and hosted on mapbox.com.
- A basemap style hosted on a Mapbox Atlas Server.
- A third-party OGC-compliant raster tiles source not affiliated with Mapbox. This source must adhere to the Mapbox Style Specification.