Installation#
Before proceeding with the installation, it is recommended to review the relevant details in the Power Reservation Steering Administration Guide.
The PRS Setup Wizard, available through both CLI and BaseView, streamlines the deployment and configuration of PRS and its integration with Slurm. This setup process requires BCM version 11 or later.
The wizard automates several critical tasks:
Installs the PRS package on the BCM head node. In High-Availability (HA) configurations, it ensures the package is installed on all head nodes to maintain redundancy and failover support.
Deploys a PRS-enabled Slurm version, replacing the default Slurm installation with a customized variant that supports PRS-specific functionality and scheduling extensions.
Configures BCM roles automatically:
prs-clientis applied to all compute nodes managed by PRS.prs-serveris applied to the designated head node(s) that host the PRS service.
Configures PRS with the cluster’s PDN (Power Domain Network) topology, including power budgets and grouping strategies.
Establishes secure communication by configuring mutual TLS (mTLS) channels between:
The PRS server and the BCM management interface.
The PRS Slurm plugin and the PRS job scheduler server.
This wizard significantly reduces manual configuration efforts and ensures consistency across all PRS-managed components in the cluster.
Key Concepts#
PD (Power Domain): A logical grouping of nodes that share a common power budget, typically aligned with physical electrical domains in the cluster’s PDN.
Node Static Power Usage: The theoretical maximum power of all devices and equipment in the node that PRS does not manage, such as fans, networking, and storage.
Node Static Power Usage down: Power consumed while the node is powered off. Consumed mainly by the BMC (Baseboard Management Controller).
Power Budget: The maximum allowable power consumption for a PD. It is typically determined by the capacity of the electrical infrastructure that supplies the domain — such as the utility feed, data hall PDU, or rack-level PDU. In some cases, the power budget may be deliberately set below the breaker’s limit to further restrict the power consumption. This can be useful for testing or validating PRS, or in situations where other constraints require lowering the budget below the physical capacity. Concrete examples demonstrating how to configure the power budget for various values and validate PRS on GB200 NVL72 racks are available in the FAQ section under Example 1 and Example 2.
Restrictions and Requirements#
To ensure the correct and safe operation of PRS, the following constraints must be observed:
BCM 11 or later is required. PRS is only supported in Bright Cluster Manager version
11and above.Only PRS sets power limits. Manual changes or the use of other tools to modify device power limits may interfere with PRS automation and lead to unpredictable behavior.
PRS operates only on nodes controlled by Slurm. Nodes that are not managed by Slurm cannot participate in PRS.
PDN configuration must be handled by experts. Only administrators with in-depth knowledge of the cluster’s PDN should define PDs and budgets. Typically, each electrical breaker maps to one PD.
The current PRS version supports only flat PD structures. PDs must be non-overlapping and non-hierarchical. Each node must belong to exactly one PD.
All jobs on PRS-controlled nodes must be submitted through Slurm. Other workload managers or direct job execution are not supported.
Modifications to PDN definitions must be done cautiously. Incorrect or inconsistent PDN changes can cause scheduling failures or incorrect power allocations.
CPU power management is conditional. PRS will manage CPUs only if they support power capping, such as GRACE processors or certain Intel CPUs with BIOS-enabled power cap features. If unsupported, CPU power is treated as static (unmanaged) and cannot be dynamically managed.
Option 1: Install using cm-prs-setup Wizard#
To install PRS using the CLI, follow these steps:
SSH into the BCM Head Node: Connect to the head node of your BCM-managed cluster using SSH.
Run the Setup Wizard: Execute the
cm-prs-setupcommand.Slurm WLM Verification: The wizard will first check for a Slurm Workload Manager (WLM) installed and managed by BCM.
If only one Slurm instance exists, it will be selected by default.
If multiple instances exist, you’ll be prompted to select the one to configure PRS for.
Slurm Cluster Selection: If prompted, select the desired Slurm cluster where you want to deploy PRS.

Category Selection (Optional): Choose the categories of nodes that should be managed by PRS.
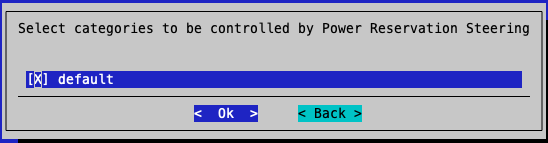
Note
A category is a way to group multiple nodes that share a common configuration. It allows administrators to apply the same roles, software images, and configurations to all nodes within that group at once.
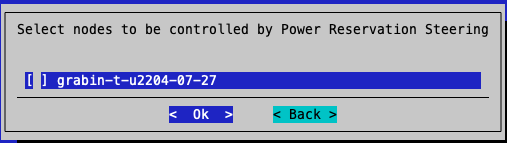
Node Selection: Select specific nodes within the chosen categories to be managed by PRS.
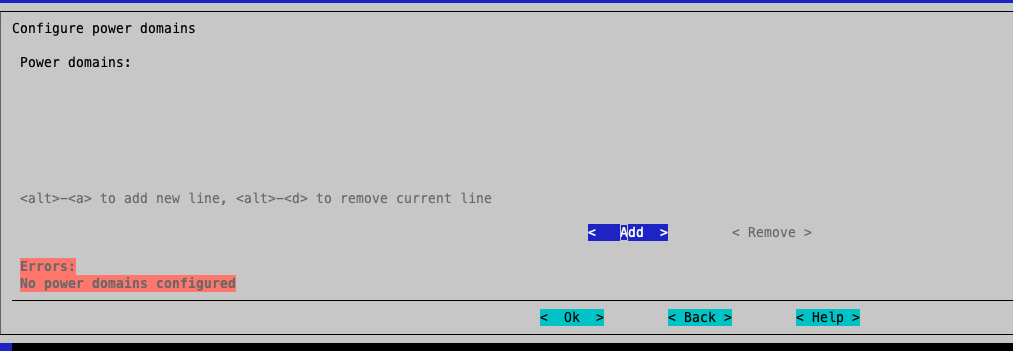
Add PDs: This crucial step should be performed by a PD Expert. Click “Add New Power Domain” to define the PDs. For each PD, fill in the following:
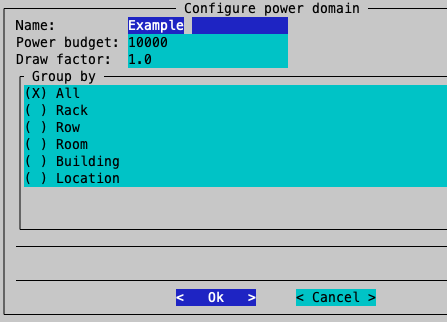
Domain Name: A descriptive name for the PD.
Power Budget (in Watts): The maximum power allocation for this PD.
Draw Factor: A factor used in power calculations. Note: In the current version of PRS, this parameter is not used, so users should leave it at the default value
1.Group By (e.g., Rack, Enclosure, etc.): How nodes within this PD are physically grouped. If “Rack” is selected, multiple PDs will be created automatically per rack, each using the configured budget.
Finalize PDs: After all PDs are added, click OK to continue.
Define Node Power Consumption Parameters: For each PD, provide the following information for a single representative node (ideally provided by a PDN expert):
Static Power Usage (in Watts): Power consumed by node components not managed by PRS, such as fans, networking, and storage. To ensure power compliance, this value should be set to the highest static usage among all nodes in the PD when hardware differs between nodes. Note that PRS-controlled devices, such as GPUs and CPUs, may vary.
Static Power Usage down (in Watts): Power consumed while the node is powered off. Consumed mainly by the BMC (Baseboard Management Controller), which is roughly 50W.

Save Configuration and Deploy: Choose to save and deploy the configuration.
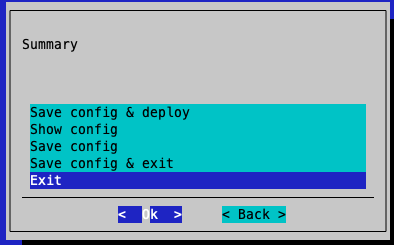
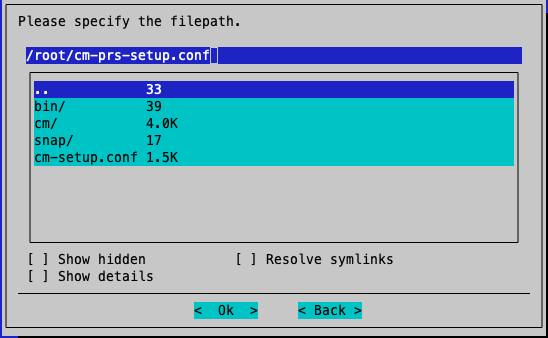
Specify PRS Artifacts Path: You can leave the default path for saving PRS artifacts.
Monitor Installation: Wait for the installation to complete.
Example installation output:
Connecting to CMDaemon

## Progress: 16
#### stage: prs: Question: PickClientCategories

## Progress: 33
#### stage: prs: Question: PickClientNodes

## Progress: 50
#### stage: prs: Question: ConfigurePowerDomainsQuestion

## Progress: 66
#### stage: prs: Question: ConfigurePowerConsumptionQuestion

## Progress: 83
#### stage: prs: Overview

## Progress: 100
Took: 00:49 min.
Progress: 100/100

################### Finished execution for 'Power Reservation Steering setup', status: completed
Power Reservation Steering setup finished!

Executing 10 stages
################### Starting execution for 'Power Reservation Steering setup'
- prs

## Progress: 0
#### stage: prs: Check Slurm Versions

## Progress: 10
#### stage: prs: Populate Packages

## Progress: 30
#### stage: prs: Collection Update Provisioners

## Progress: 40
#### stage: prs: Collection Images Updater

## Progress: 50
#### stage: prs: Create PRS Server Overlay

## Progress: 60
#### stage: prs: Create Client Overlay
Creating configuration overlay prs-client
Adding nodes
Adding categories

## Progress: 70
#### stage: prs: Merge Assign Role

## Progress: 80
#### stage: prs: Configure Slurm clusters

## Progress: 90
#### stage: prs: Install cmsh alias

## Progress: 100
Took: 00:50 min.
Progress: 100/100

################### Finished execution for 'Power Reservation Steering setup', status: completed
Power Reservation Steering setup finished!
Option 2: Install using BaseView (Web UI)#
To install PRS using the BaseView web interface, follow these steps:
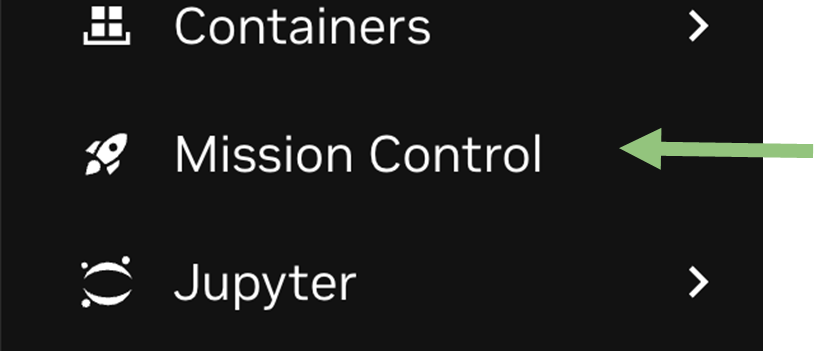
Access Mission Control: From the side menu bar in BaseView, open Mission Control.
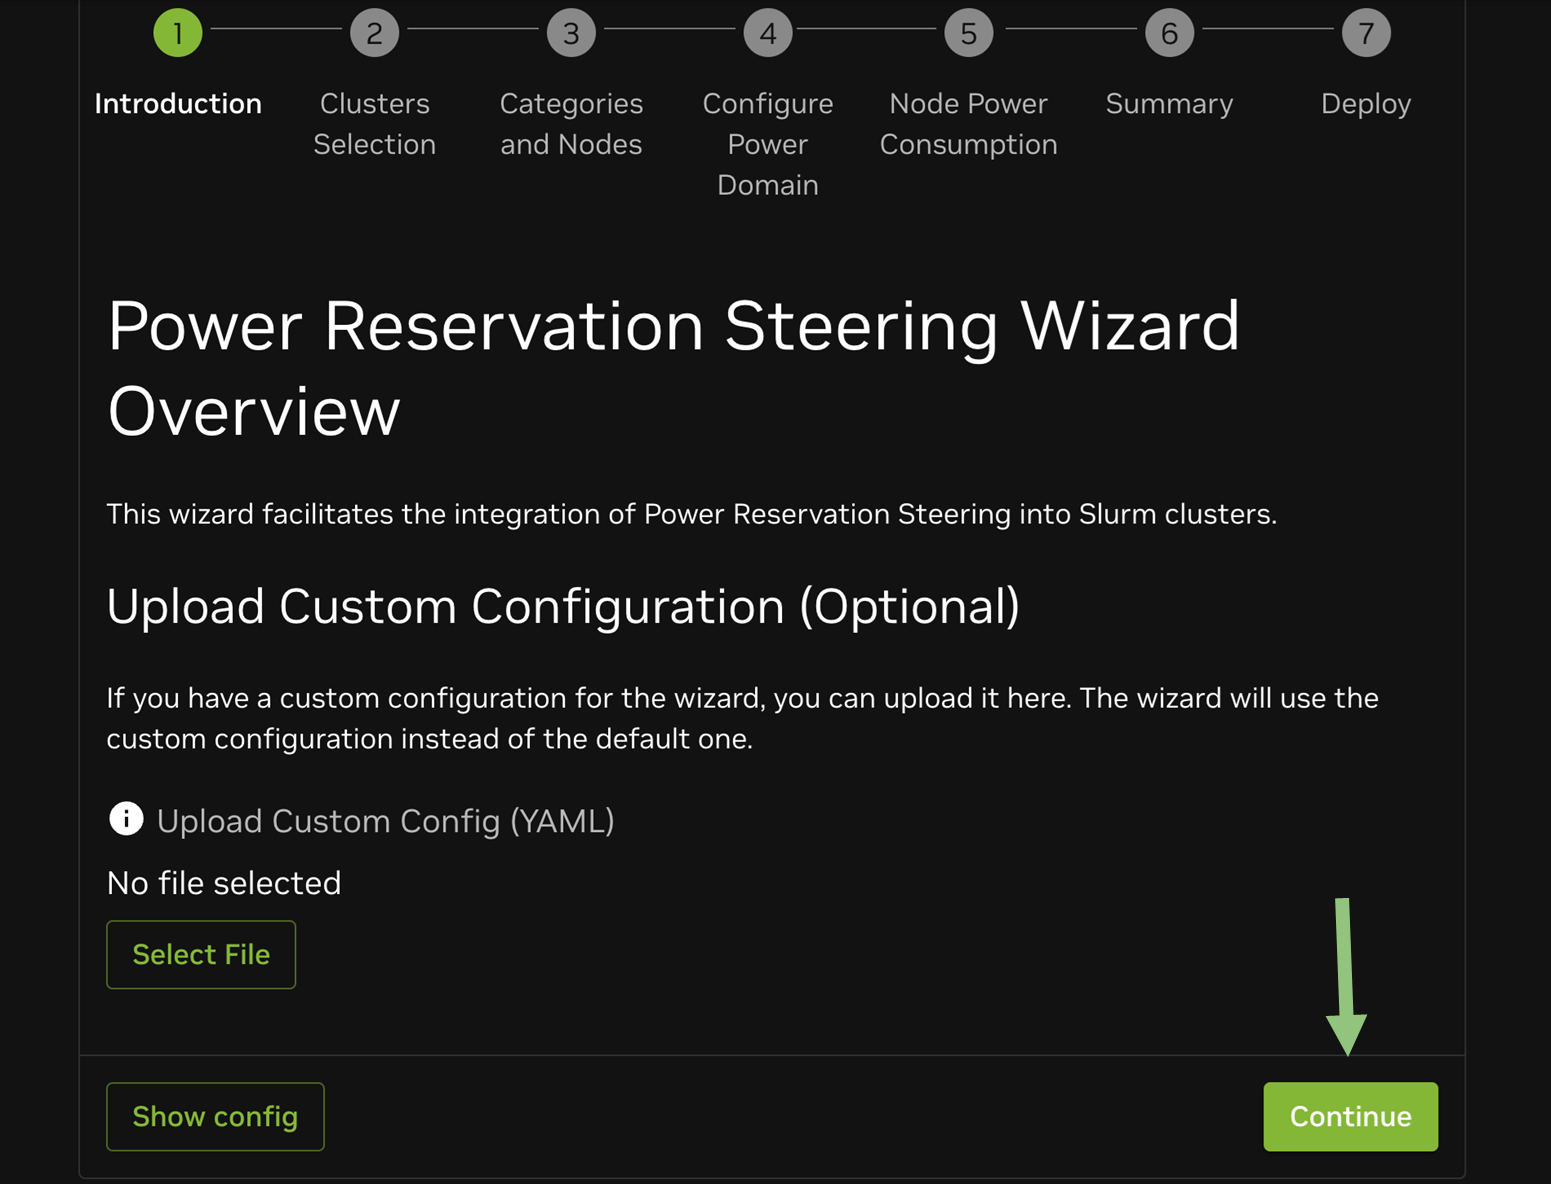
Start PRS Setup Wizard: Initiate the Power Reservation Steering wizard.

Upload Existing Configuration (Optional): If you have a pre-existing PRS configuration, you can upload it here. Otherwise, click Continue to proceed with a new setup.
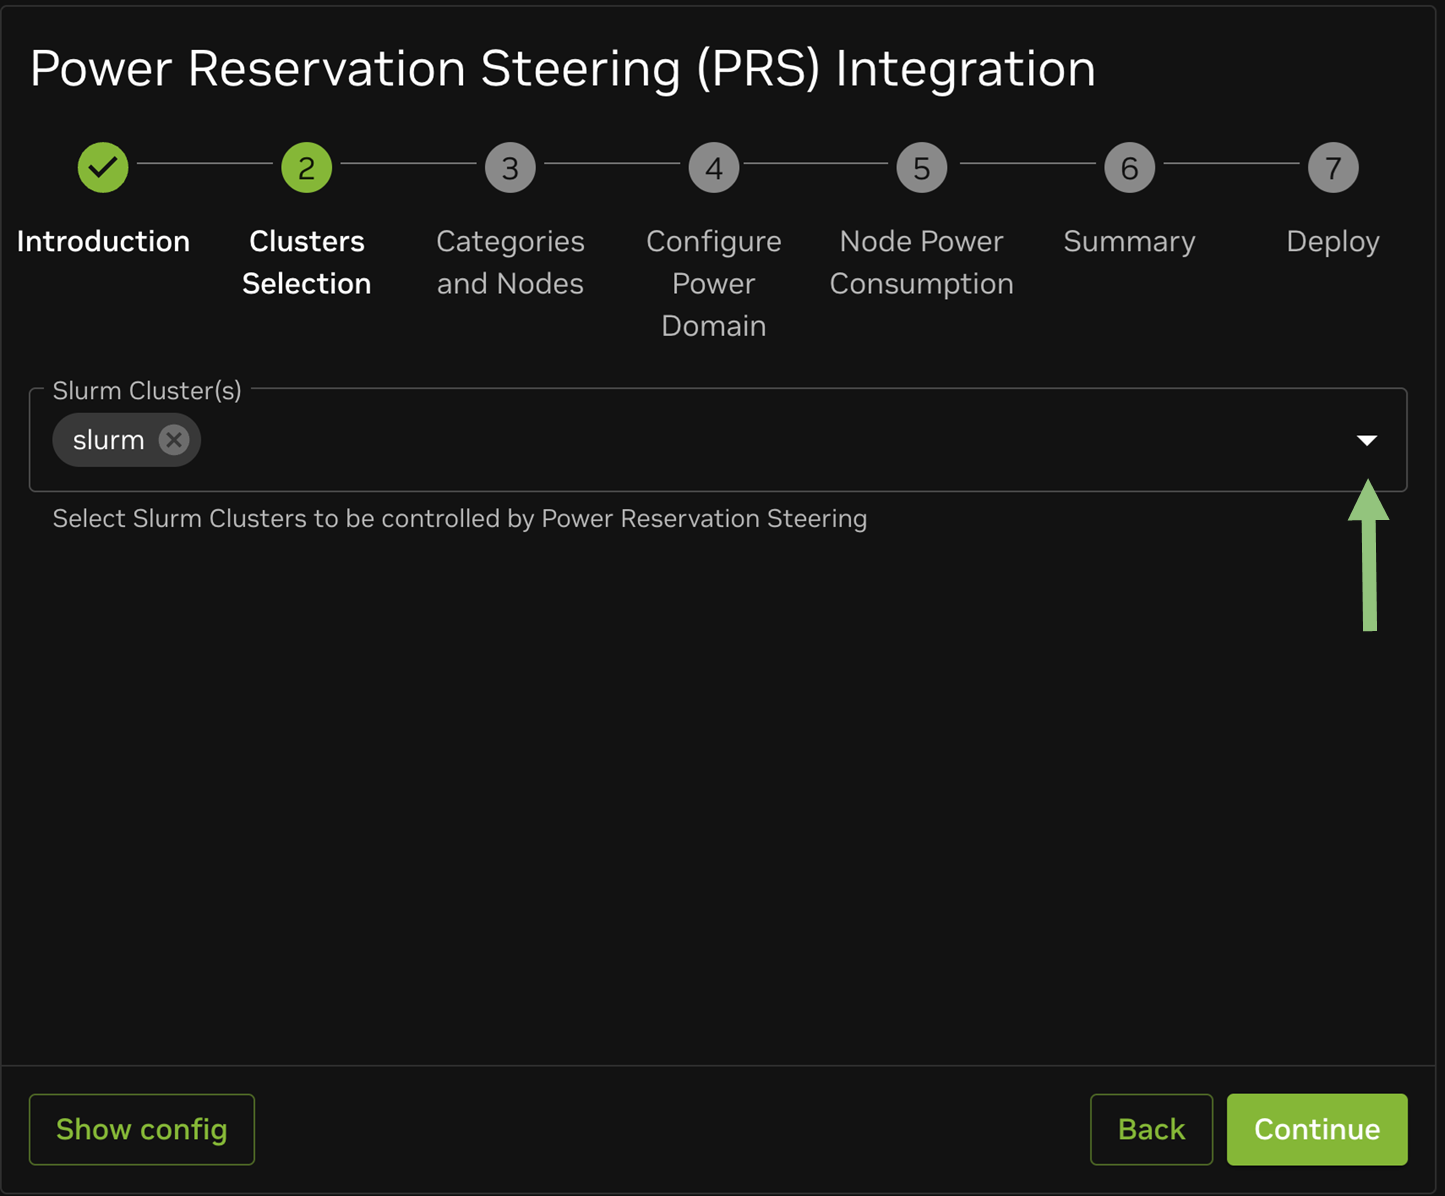
Select Slurm Cluster: Choose the specific Slurm cluster that PRS will monitor for job execution, then click Continue.
Choose Nodes and Categories: Select the nodes and categories that PRS should manage and monitor, then click Continue.
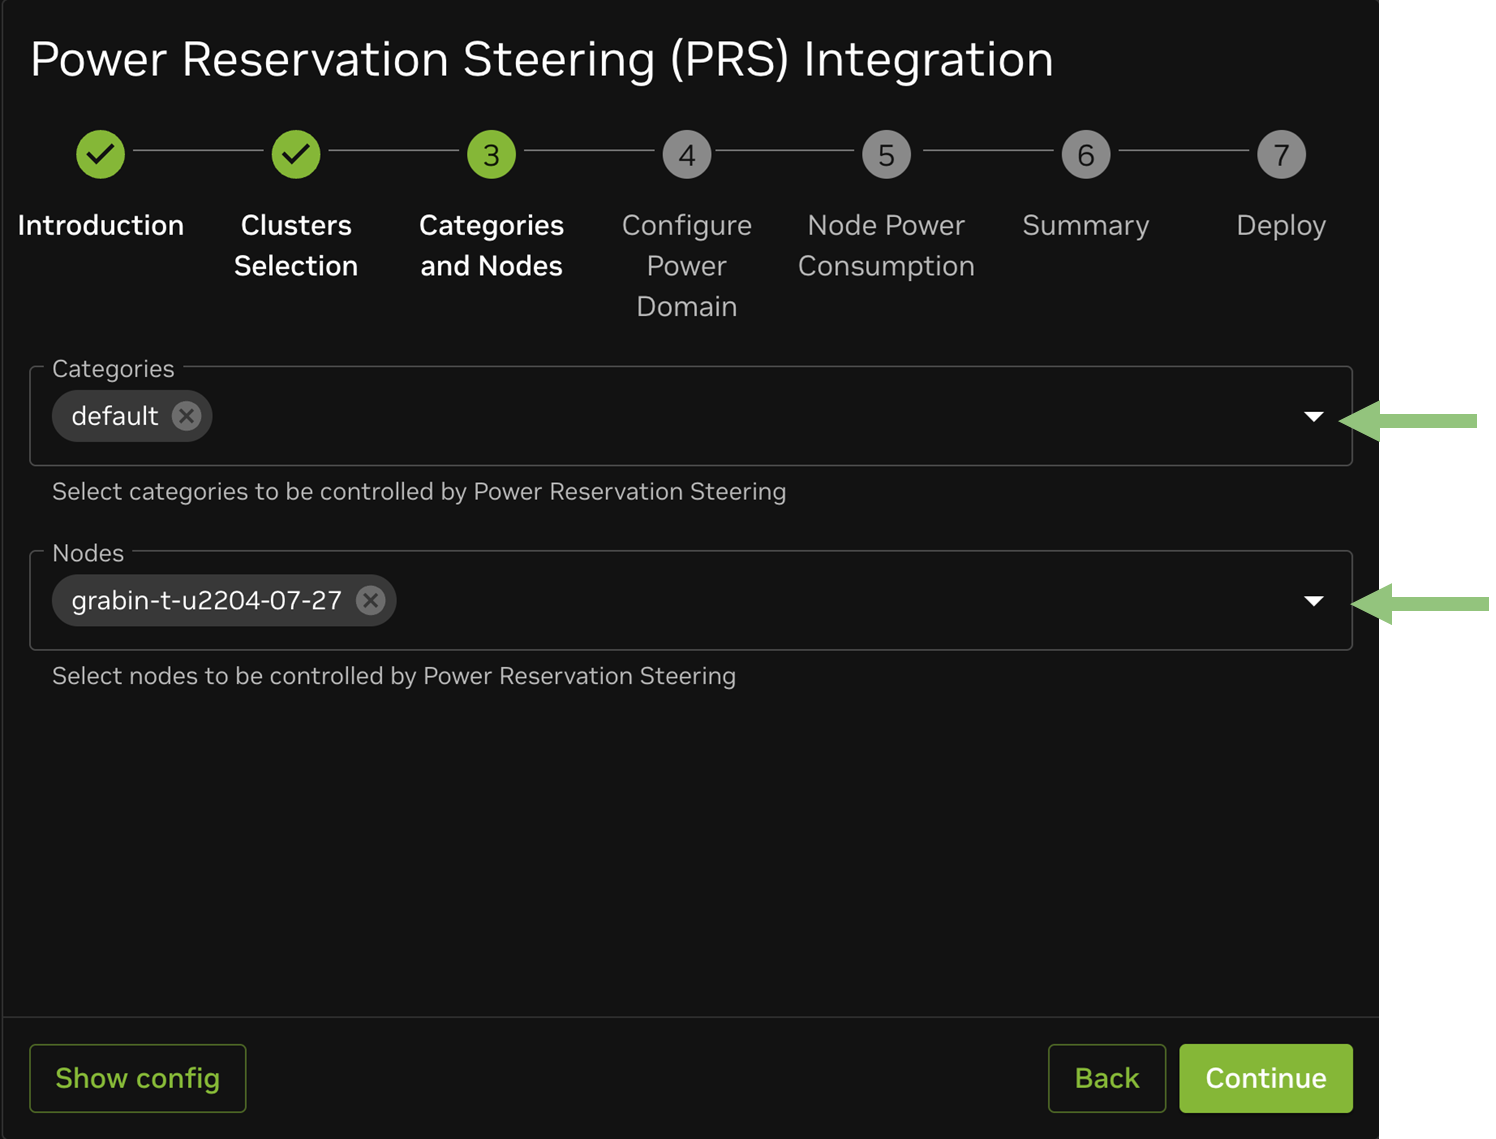
Note
A category is a way to group multiple nodes that share a common configuration. It allows administrators to apply the same roles, software images, and configurations to all nodes within that group at once.
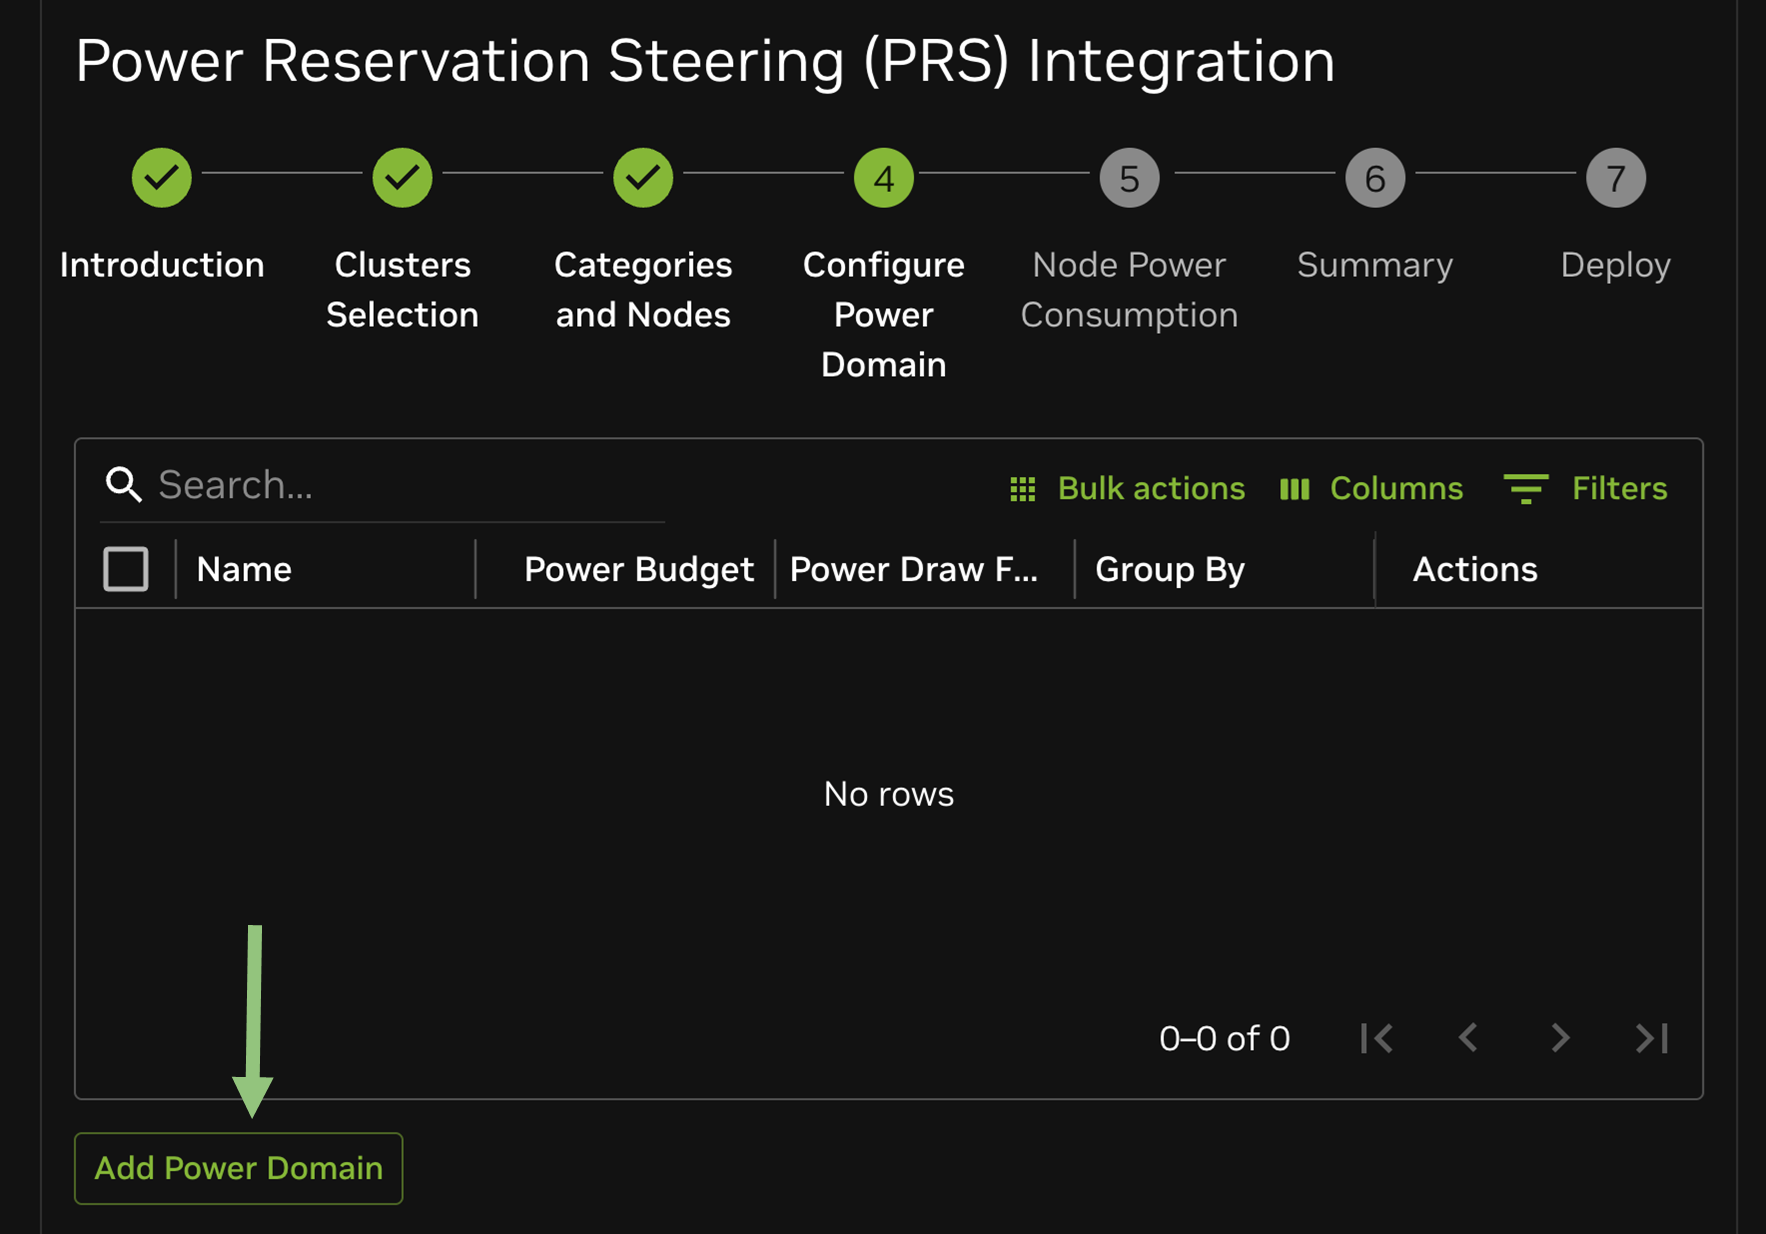
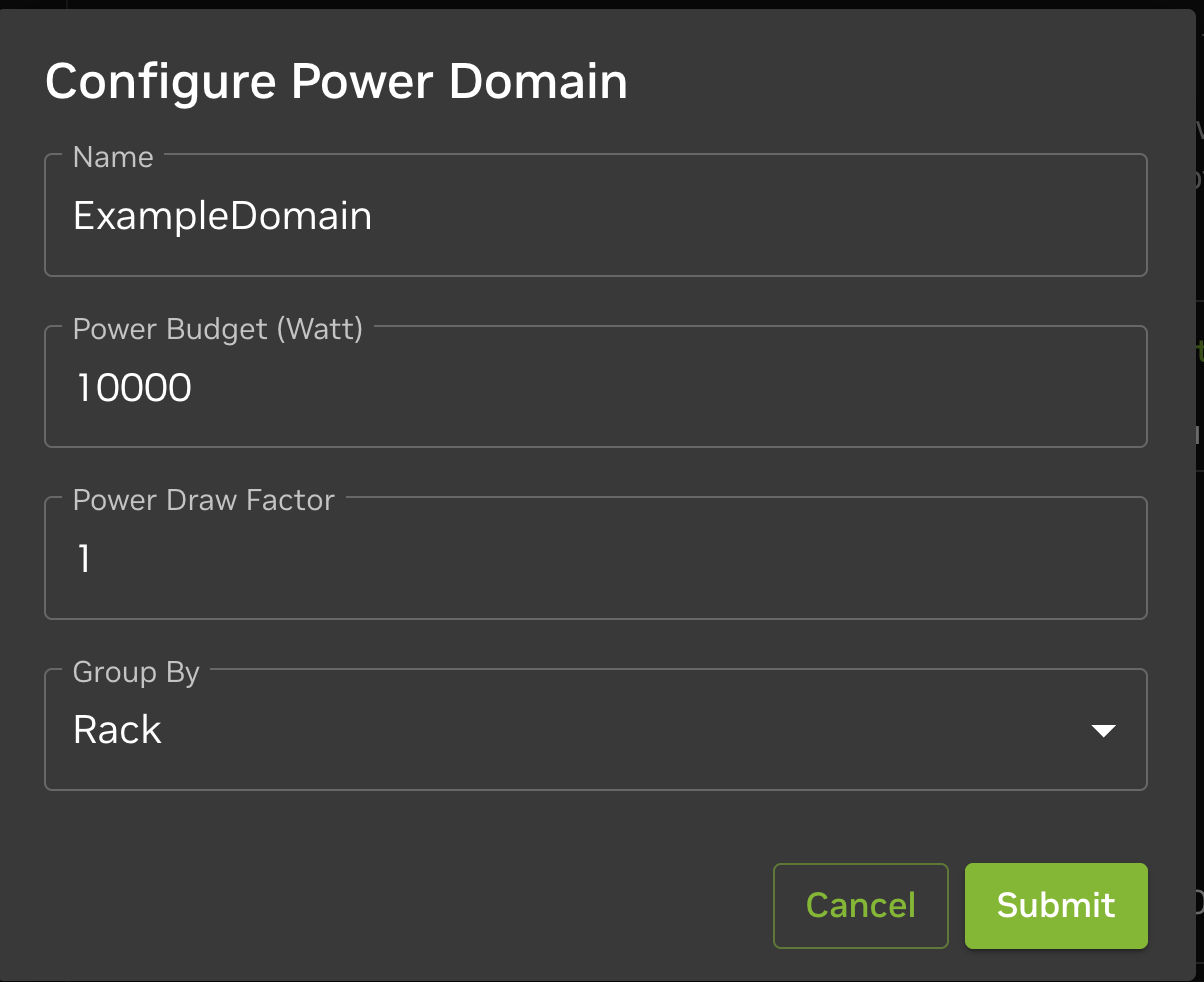
Add PDs: This crucial step should be performed by a PD Expert. Click “Add New Power Domain” to define your PDs. For each PD, provide the following details:
Domain Name: A descriptive name for the PD.
Power Budget (in Watts): The maximum power allocation for this PD.
Draw Factor: A factor used in power calculations. Note: In the current version of PRS, this parameter is not used, so users should leave it at the default value 1.
Group By (e.g., Rack, Enclosure, etc.): How nodes within this PD are physically grouped. If “Rack” is selected, multiple PDs will be automatically created per rack, each adhering to the configured budget.
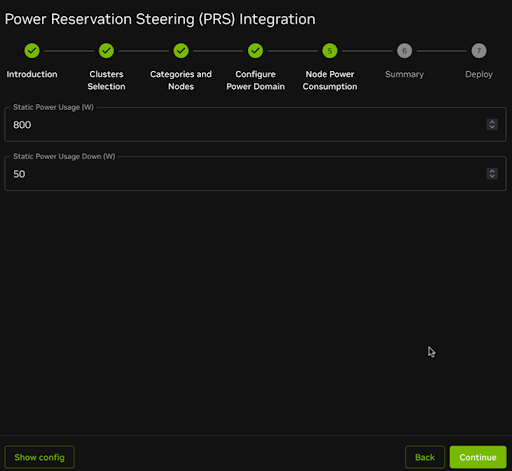
Configure Node Power Consumption: For each PD, provide the following information for a single representative node (ideally provided by a PDN expert):
Static Power Usage (in Watts): Power consumed by node components not managed by PRS, such as fans, networking, and storage. To ensure power compliance, this value should be set to the highest static usage among all nodes in the PD when hardware differs between nodes. Note that PRS-controlled devices, such as GPUs and CPUs, may vary.
Static Power Usage Down (in Watts): Power consumed while the node is powered off. Consumed mainly by the BMC (Baseboard Management Controller), which is roughly 50W.
Click Continue after setting these values.
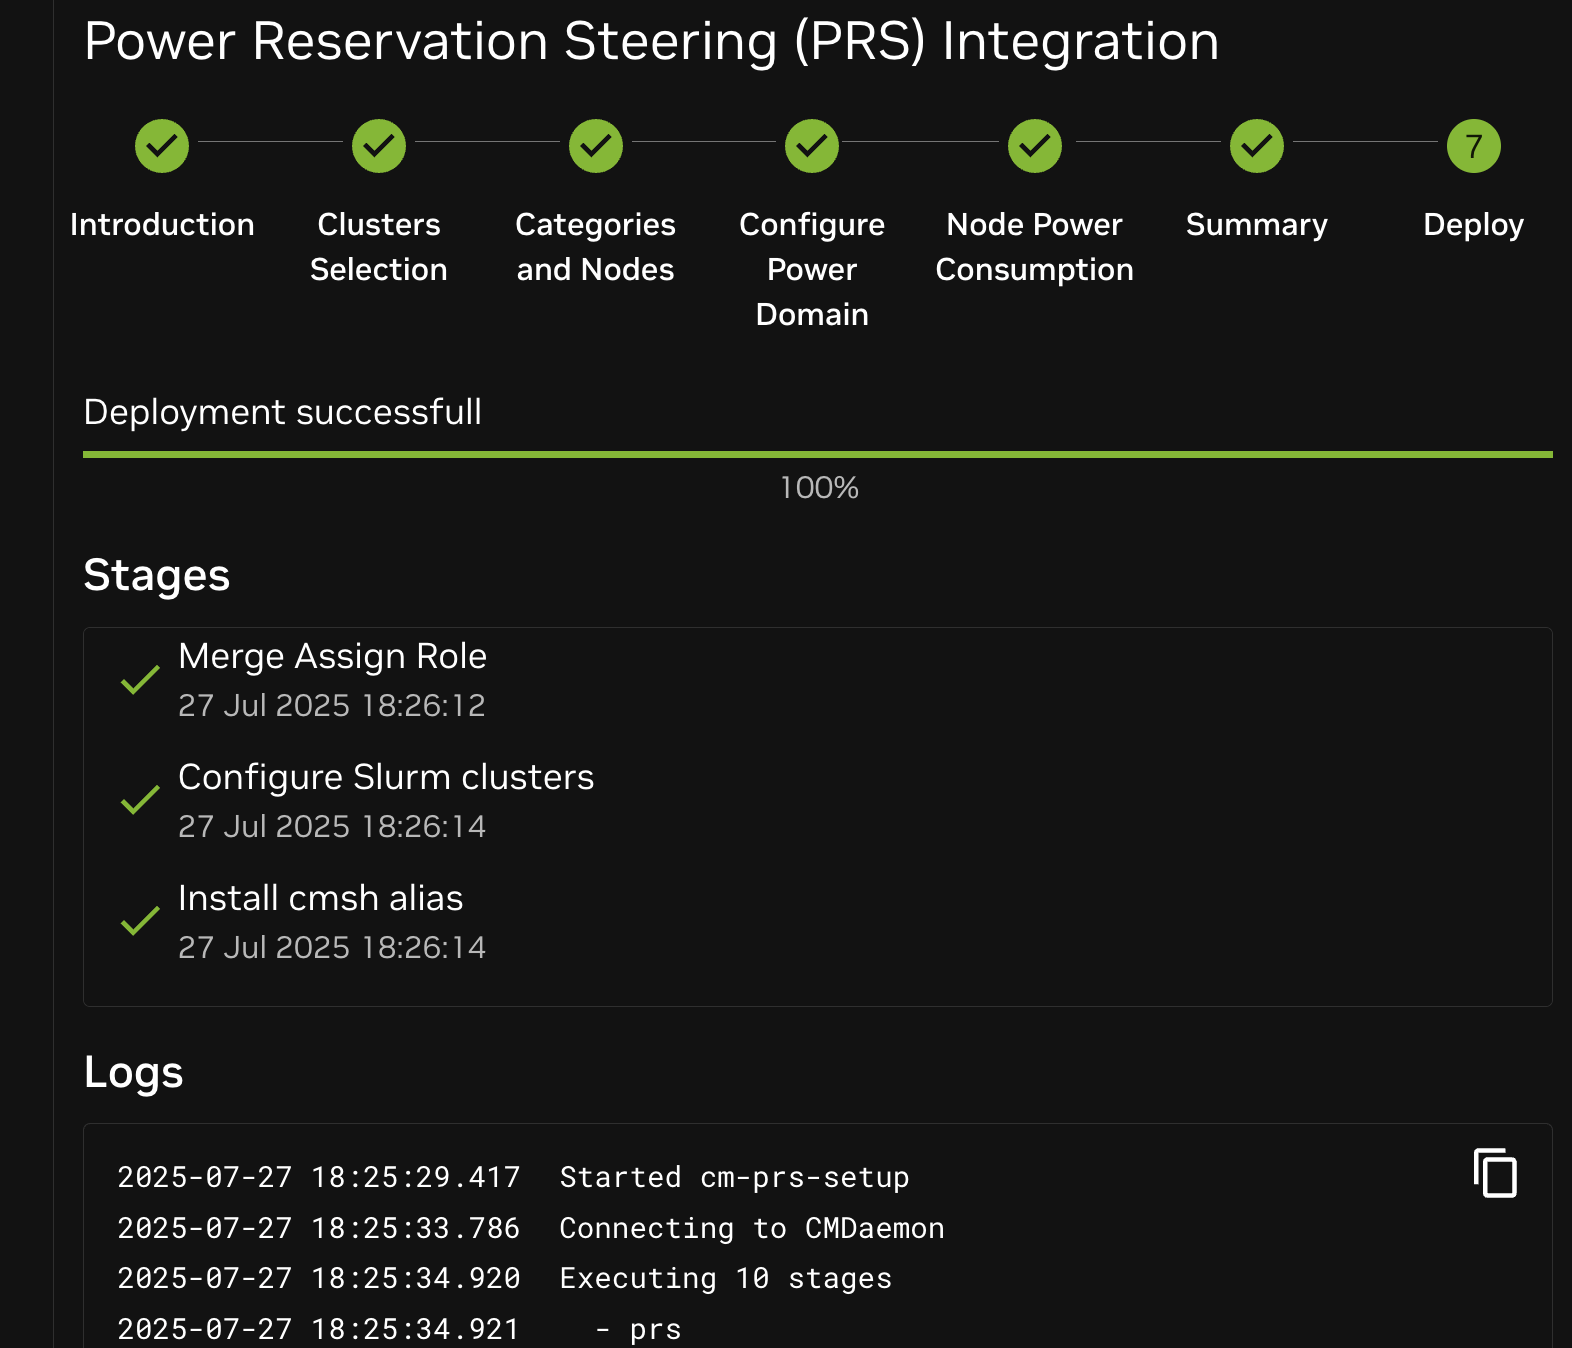
Review and Deploy: Carefully review the final configuration. Once satisfied, mark it as reviewed and click Deploy.
Monitor Installation: Wait for the installation process to complete.
Check PRS Service Status on BCM Head Node#
To check the status of the PRS service on the BCM head node, follow these steps:
Check the status of the PRS service:
systemctl status nvidia-prs
Output example:
root@grabin-t-u2204-07-27:~# systemctl status nvidia-prs

● nvidia-prs.service - PRS Service
Loaded: loaded (/etc/systemd/system/nvidia-prs.service; disabled; vendor preset: enabled)
Active: active (running) since Sun 2025-07-27 17:26:20 CEST; 16h ago
Process: 214854 ExecStartPre=/usr/bin/rm -f /cm/local/apps/prs/etc/config_server-config.json (code=exited, status=0/SUCCESS)
Process: 214855 ExecStartPre=/usr/bin/rm -f /cm/local/apps/prs/etc/config_server-config.json.lock (code=exited, status=0/SUCCESS)
Process: 214856 ExecStartPre=/usr/bin/rm -f /cm/local/apps/prs/etc/config_server-state.json (code=exited, status=0/SUCCESS)
Process: 214857 ExecStartPre=/usr/bin/rm -f /cm/local/apps/prs/etc/config_server-state.json.lock (code=exited, status=0/SUCCESS)
Process: 214858 ExecStartPre=/usr/bin/rm -f /cm/local/apps/prs/etc/controller-state.json (code=exited, status=0/SUCCESS)
Process: 214859 ExecStartPre=/usr/bin/rm -f /cm/local/apps/prs/etc/controller-state.json.lock (code=exited, status=0/SUCCESS)
Process: 214860 ExecStartPre=/usr/bin/rm -f /cm/local/apps/prs/etc/job_sched_server-state.json (code=exited, status=0/SUCCESS)
Process: 214861 ExecStartPre=/usr/bin/rm -f /cm/local/apps/prs/etc/job_sched_server-state.json.lock (code=exited, status=0/SUCCESS)
Main PID: 214862 (prs)
Tasks: 4 (limit: 4557)
Memory: 202.2M
CPU: 12min 12.540s
CGroup: /system.slice/nvidia-prs.service
├─214862 /cm/local/apps/python3/bin/python /cm/local/apps/prs/bin/prs
├─215086 /cm/local/apps/python3/bin/python /cm/local/apps/prs/bin/prs
└─215087 /cm/local/apps/python3/bin/python /cm/local/apps/prs/bin/prs
Check for any errors in the PRS service logs from the last hour:
journalctl -u nvidia-prs --since "1 hour ago"
Output example:
root@grabin-t-u2204-07-27:~# journalctl -u nvidia-prs --since "1 hour ago"

Jul 28 08:51:58 grabin-t-u2204-07-27 prs[214862]: [2025-07-28 08:51:58,139][DEBUG ][ prs.controller.cluster_connection_bcm ] Writing 2 prs_power_draw entries to DB is in progress (1)
Jul 28 08:51:58 grabin-t-u2204-07-27 prs[214862]: [2025-07-28 08:51:58,142][DEBUG ][ prs.controller.prs_controller ] Devices power draw:
Jul 28 08:51:58 grabin-t-u2204-07-27 prs[214862]: node_name device_type device_index domain_name min max value
Jul 28 08:51:58 grabin-t-u2204-07-27 prs[214862]: 0 node001 gpu 0 ExampleDomain 150 300 46.894
Slurm Configuration for PRS#
The PRS installer will automatically configure the core resource plugin for you. You only need to verify it. To verify the core resource plugin, follow these steps:
Already applied by the PRS installer – just confirm that SelectType is set to select/gnl_cons_tres:
scontrol show config | grep SelectType
Enable GPU Isolation (ConstrainDevices=yes):
This step is required. Without it, PRS cannot accurately isolate and manage GPU power draw.
To enable GPU isolation:
cmsh -c "wlm ; use <slurm-name> ; cgroups ; set constraindevices Yes ; commit"
Note
Why does this matter?
Enabling
ConstrainDevices=yesensures that each job can only access the specific/dev/nvidia*devices assigned to it. This allows PRS to determine whether a job was allocated GPUs and enforce power limits accordingly.
PRS with Vanilla Slurm#
Using the modified Slurm select plugin is not mandatory for PRS to function. PRS can operate with an unmodified (vanilla) version of Slurm, which may be necessary in environments that prohibit changes to the scheduler.
However, not using the modified plugin has the following implications:
No guaranteed maximum power for hero jobs: Hero jobs are not assured the theoretical maximum power of their allocated devices. Nonetheless, administrators should still define the
globres_heroQOS (as described in Submit a Hero Job). PRS will make a best-effort attempt to allocate the highest possible power to hero jobs.Increased risk of job performance variability: Since power is not treated as a resource during job scheduling, job runtimes may be affected due to suboptimal power allocation.
To switch to the vanilla version of Slurm (instead of the modified one), run the following command:
cmsh -c "wlm ; use <slurm-name> ; set SelectType select/cons_tres ; commit"
Uninstall PRS#
Currently, the only way to remove PRS is through the cm-prs-setup wizard.
To remove all PRS-related entities:
Run:
cm-prs-setupWhen prompted with the option to remove PRS, select Yes.