13.3. Clara Management Console
The Clara Management Console allows you to view Clara Platform features from web browser. Currently, it supports views for pipelines, jobs and the Render Server: The Pipelines view shows all created Clara pipelines with their current statuses, the Jobs view displays details of all created Clara jobs and the Render Server view is for visualization of payloads.
You must use Chrome web browser to access the web interface using IP where Clara Management Console is deployed on port 32002 (e.g., http://<HOST IP or DNS>:32002).
13.3.1.1. Minimum Requirement
Google Chrome - Version 80.0.3987.149 (Official Build) (64-bit)
13.3.1.2. Starting the Service
Clara Management Console is comprised of two different containers that work together to provide the web application:
Clara Management Console Backend: web application backend that communicates with clara platform API server using clara platform API and provides this information to new clara management console frontend over RESTful API whenever requested.
Clara Management Console Frontend: web application which contains all the frontend logic to display clara management console. All the views are updated periodically to reflect the current status.
You can get Clara Management Console by using command below:
clara pull console
You can start these two containers by using the command below:
clara console start
To stop the service:
clara console stop
To restart the service:
clara console restart
13.3.2.1. User Basic Authentication
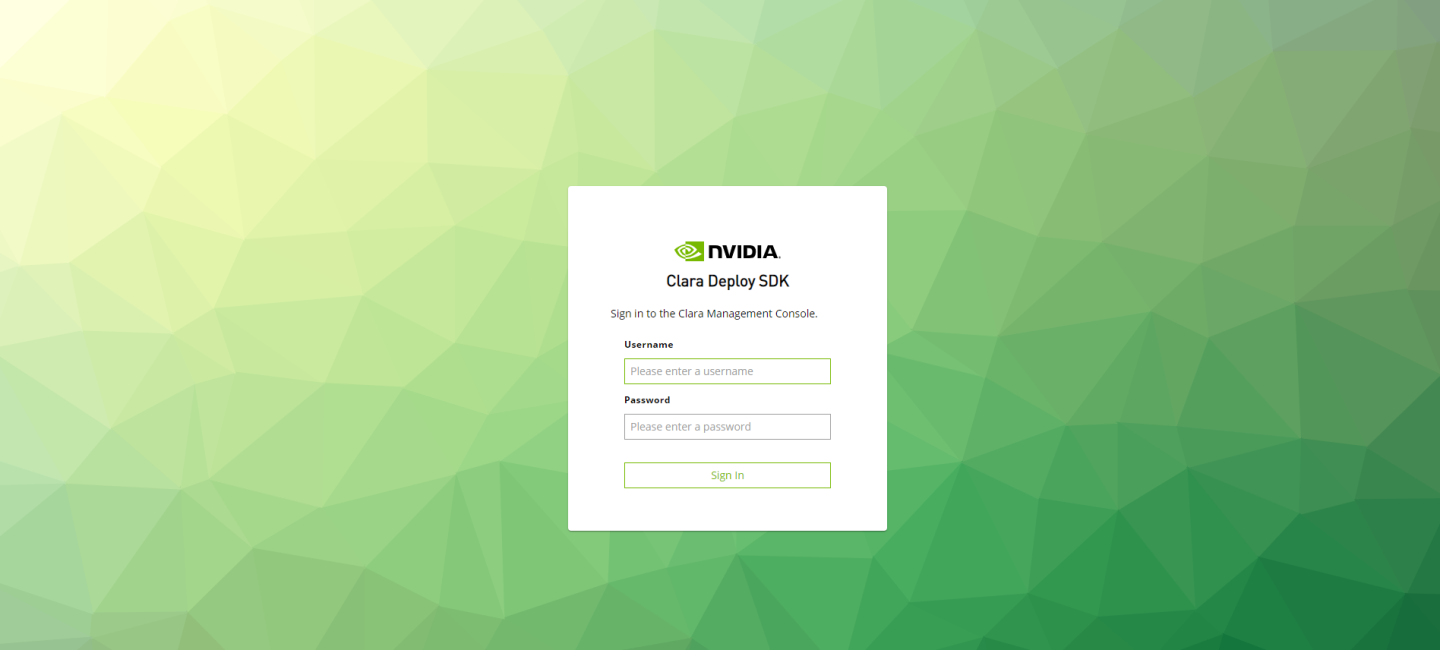
When the main URL is loaded, browser shows the landing page with sign in form. The user can sign in with the valid credentials provided for Clara Management Console. Once the user is authenticated, user is redirected to the pipelines view page.
13.3.2.2. Navigation Menu
When the main URL is loaded, and the user signs in, browser shows the page with navigation bar at the top. There are currently three views supported, pipelines view which can be loaded by clicking on <b><i>PIPELINES</i></b> icons, jobs view which can be loaded by clicking on <b><i>JOBS</i></b> icon and the Render Server application which can be opened by clicking on <b><i>RENDERSERVER</i></b> icon.
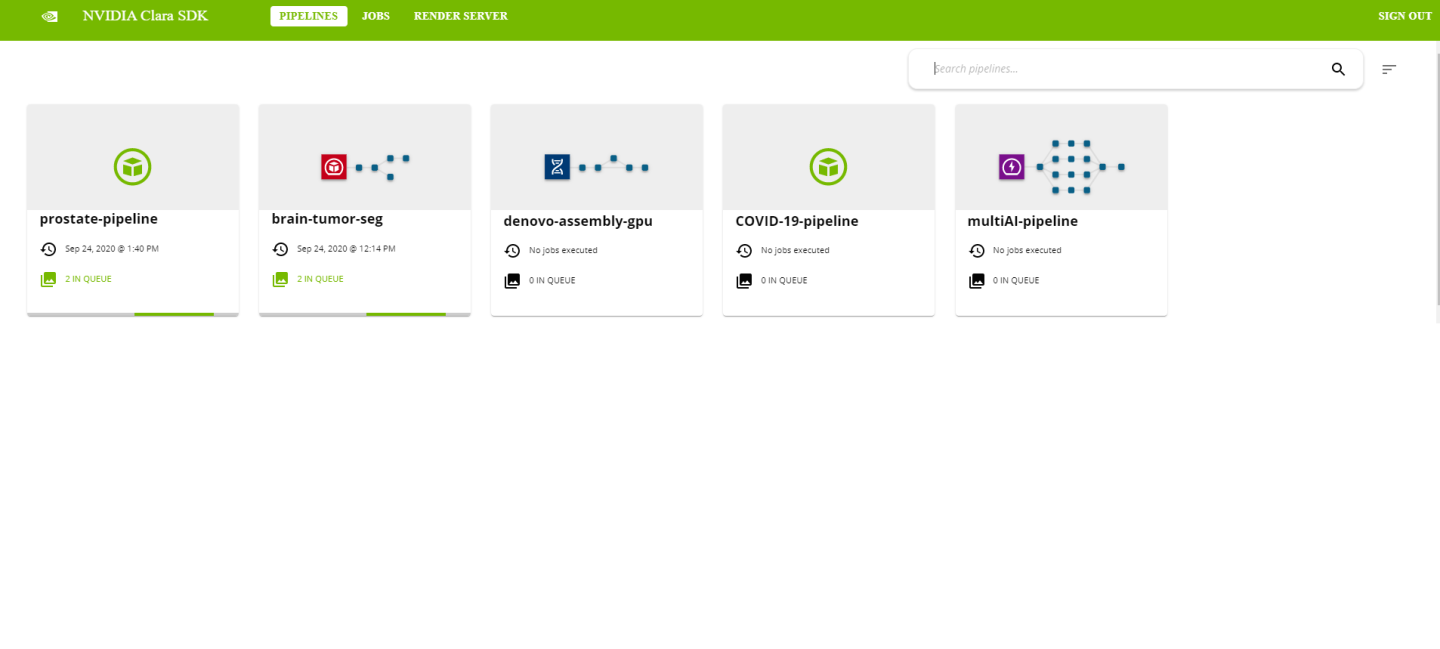
13.3.2.3. Pipelines View
Pipelines view lists all the created clara pipelines. This view can be accessed by clicking <b><i>PIPELINES</i></b> icon on navigation bar. Each pipeline is shown on separate cards. Each pipelines card also shows the number of jobs currently in queue and the timestamp for last executed job for that pipeline. This tab is updated periodically to update the pipelines list and all associated information whenever there is an update. By clicking on any pipeline card, navigation is made to jobs tab with filter applied on clicked pipeline card so that only jobs of that pipeline are shown.
Pipelines can also be searched by entering pipeline name in the search box displayed on the right top of the pipelines view.
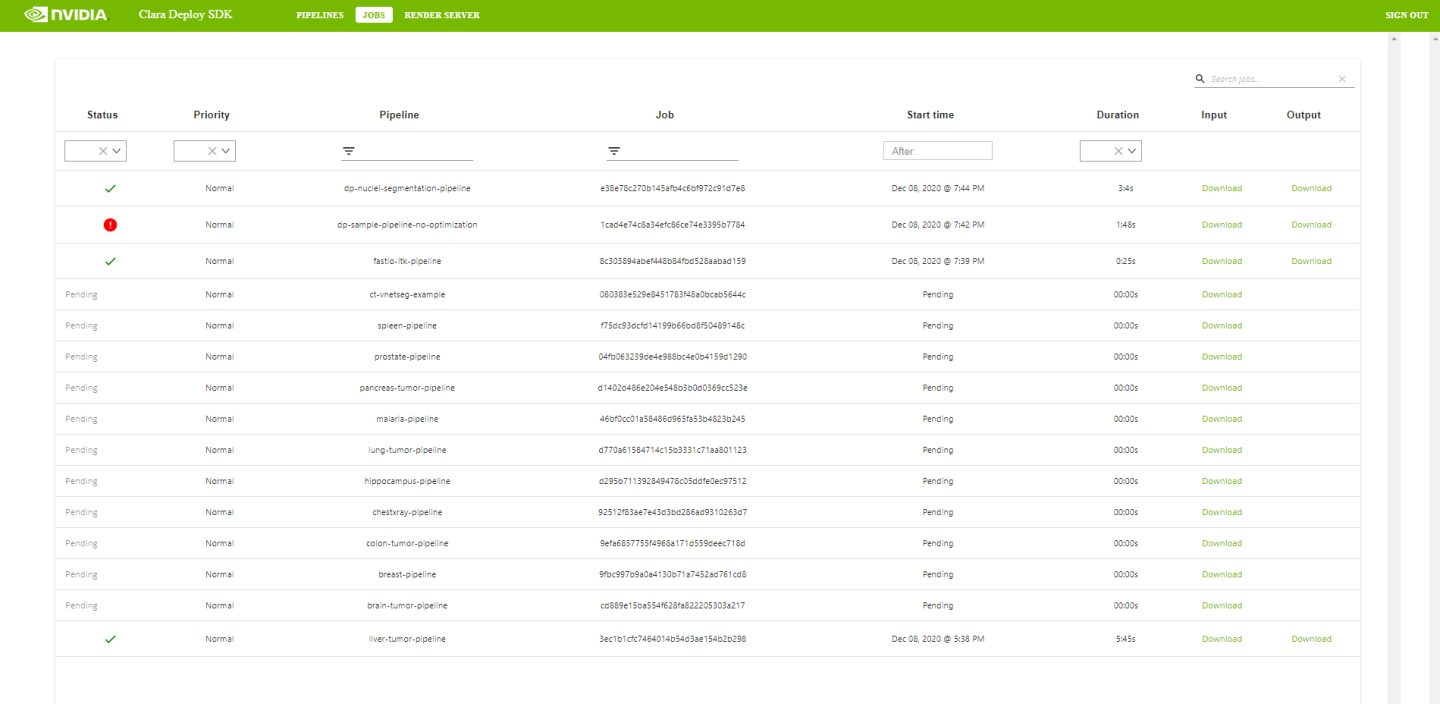
Jobs view lists all created clara jobs. This view can be accessed by clicking on ‘JOBS’ button on navigation bar. For every job, it lists the current status, priority, job id, pipeline name, start time and duration. This view is also dynamically updated to reflect the current status of all jobs. Jobs can also be sorted on priority and filtering is supported for all columns.
For each job, input and output payload can be downloaded by clicking on ‘Download’ link in ‘Input’ and ‘Output’ column for a job respectively. Clicking on ‘Download’ link will get the payload files, archive them in a ZIP file and download it in browser’s download folder. Ouput palyload link for a job will be shown once a job is finished. Input payload represents initial input for a job and output payload represents output payload of all the operators for a job. After clicking on ‘Download’ link, a progress bar indicating current download progress is shown at the bottom of the page.
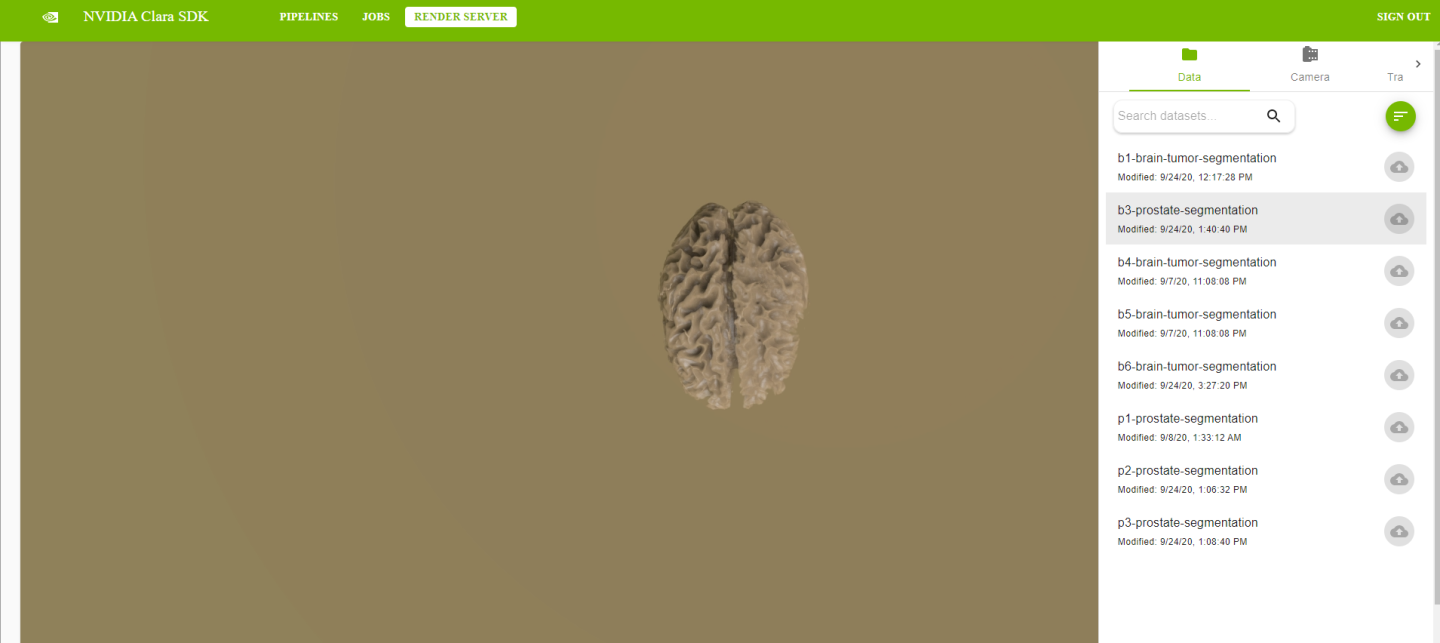
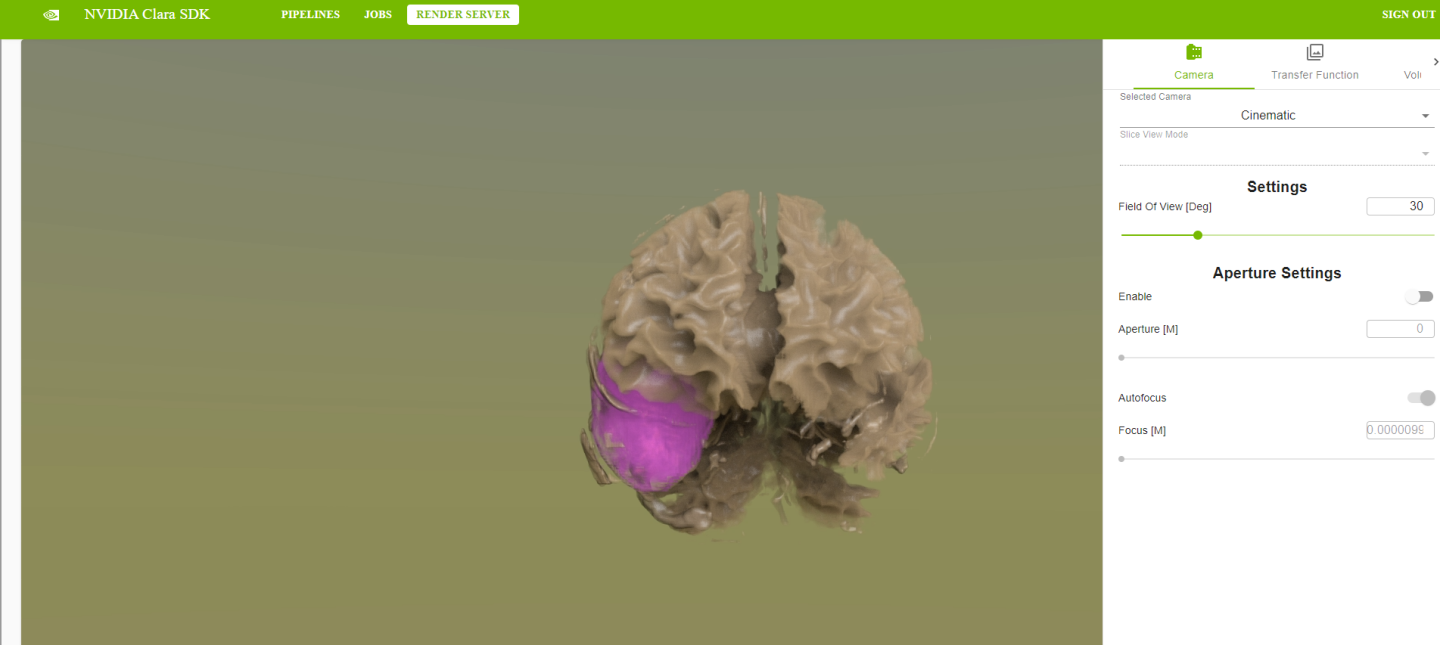
The Clara Render Server application can be opened by clicking on ‘RENDERSERVER’ icon in navigation menu.
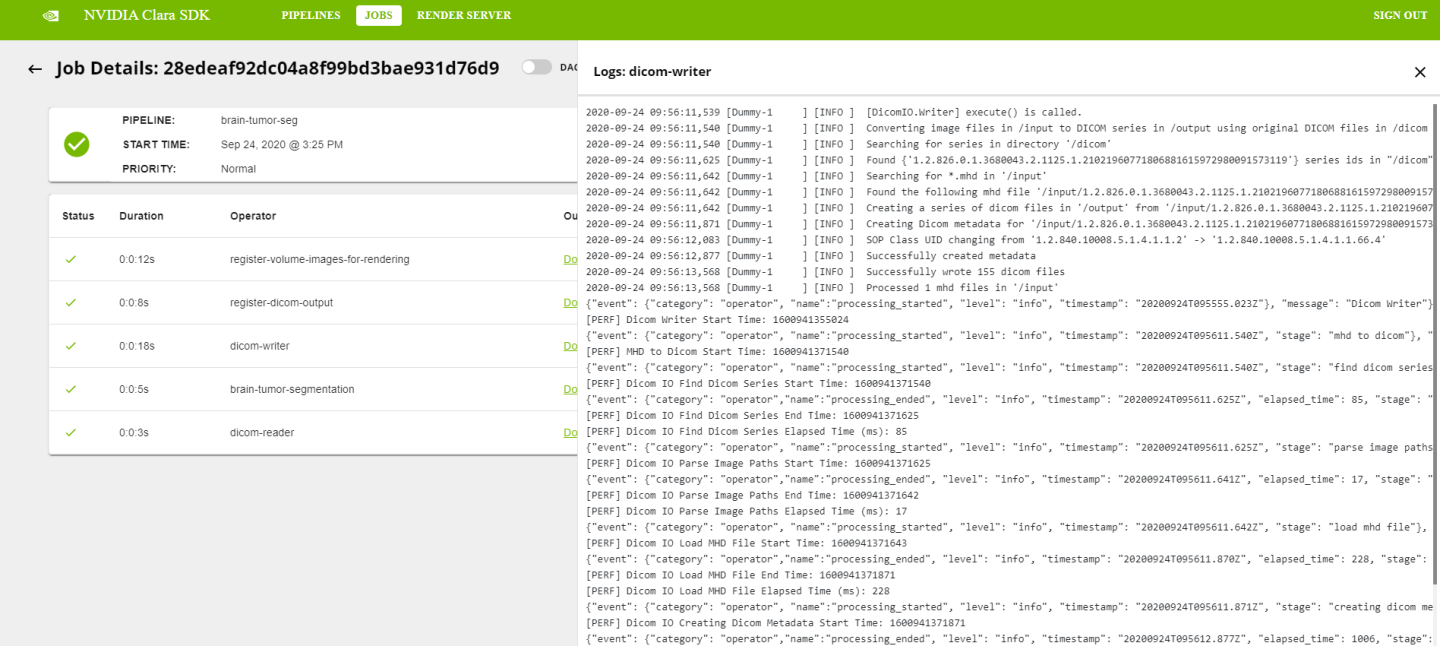
Job Details View for a job can be opened by clicking on a row for that job in Jobs View. It shows additional information about each job such as the list of all the operators with their current status and duration. The output payload for an operator can be downloaded by clicking on a ‘Download’ link in output column. The output payload ‘Download’ link for an operator is shown when the operator is executed. If the operator results are registered with the Clara Render Server for rendering, the ‘Output Payload’ column for an operator also shows ‘Render’ option when the operator is executed. If the operator results are not registered with the Clara Render Server for rendering, the ‘Output Payload’ column for an operator instead shows ‘Import’ option when the operator is executed.
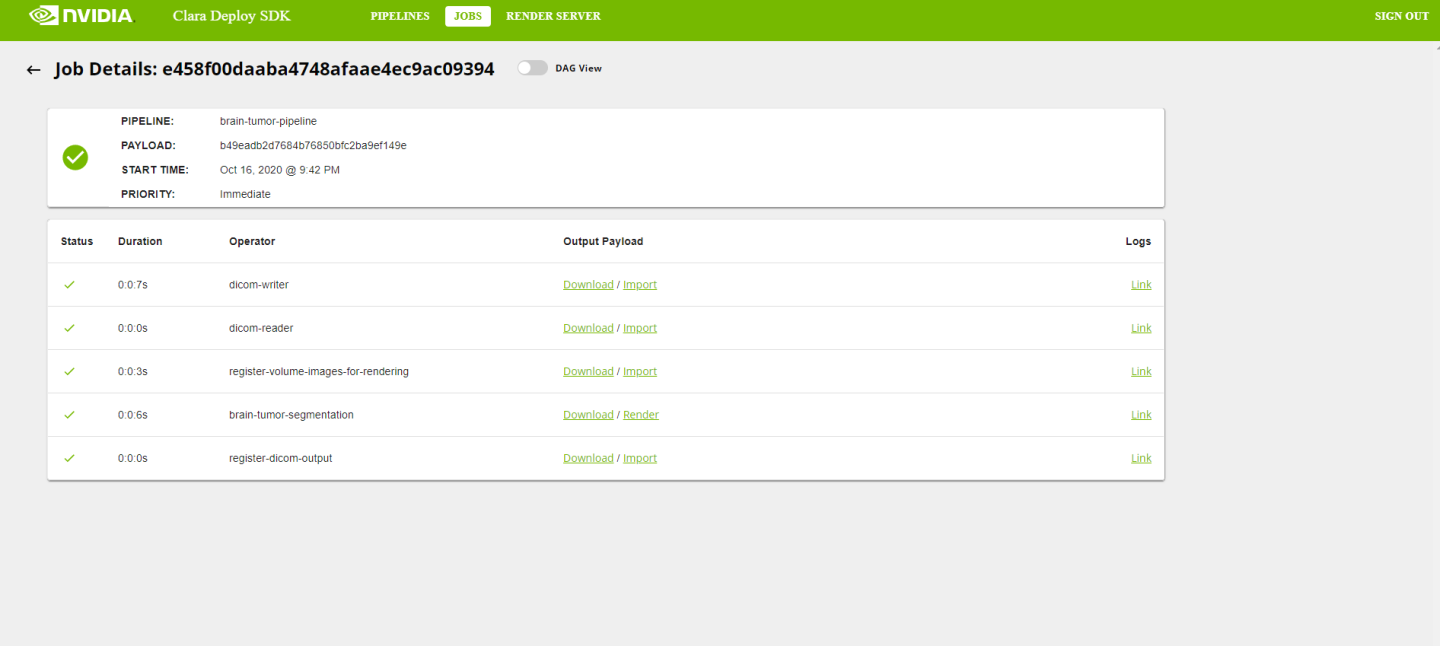
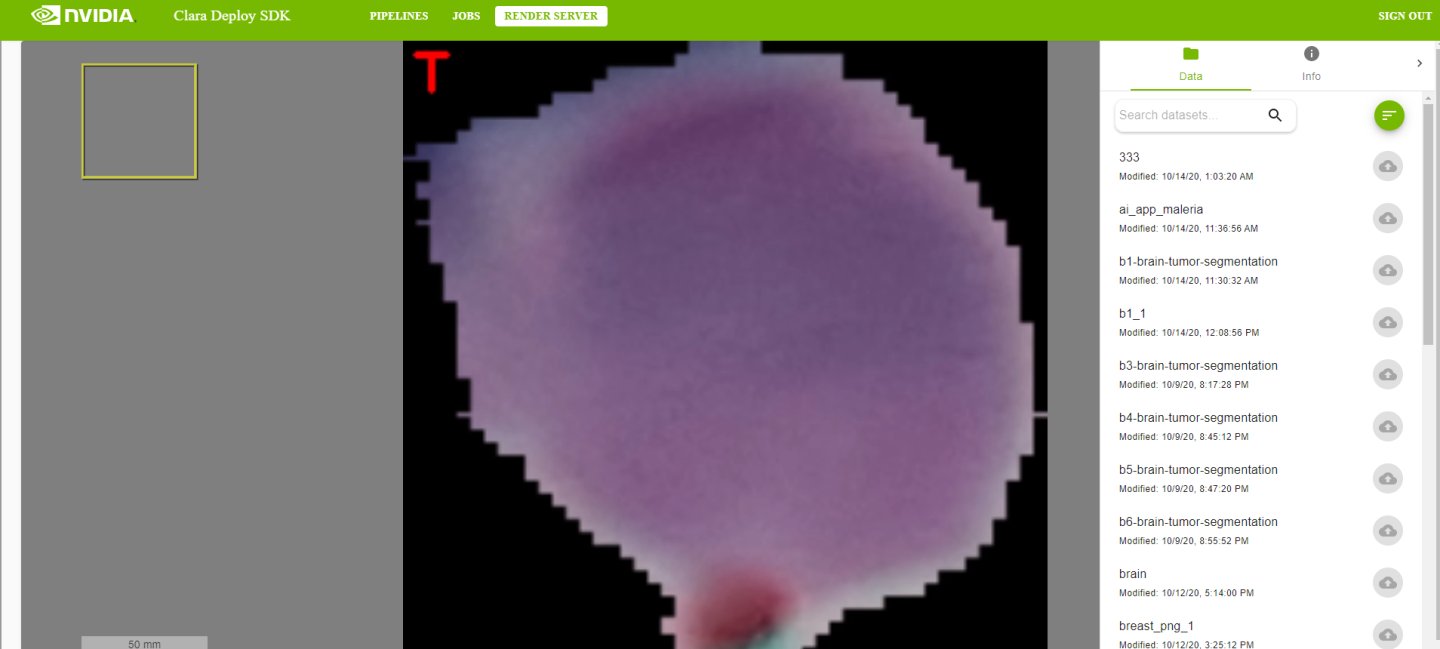
Clicking on ‘Render’ option in ‘Output Payload’ column of an operator will open Render Server in separate Console tab and it will render the output of an operator.
Clicking on ‘Import’ option in ‘Output Payload’ column of an operator will open Render Server in separate Console tab and it will open payload import dialog inside Render Server.
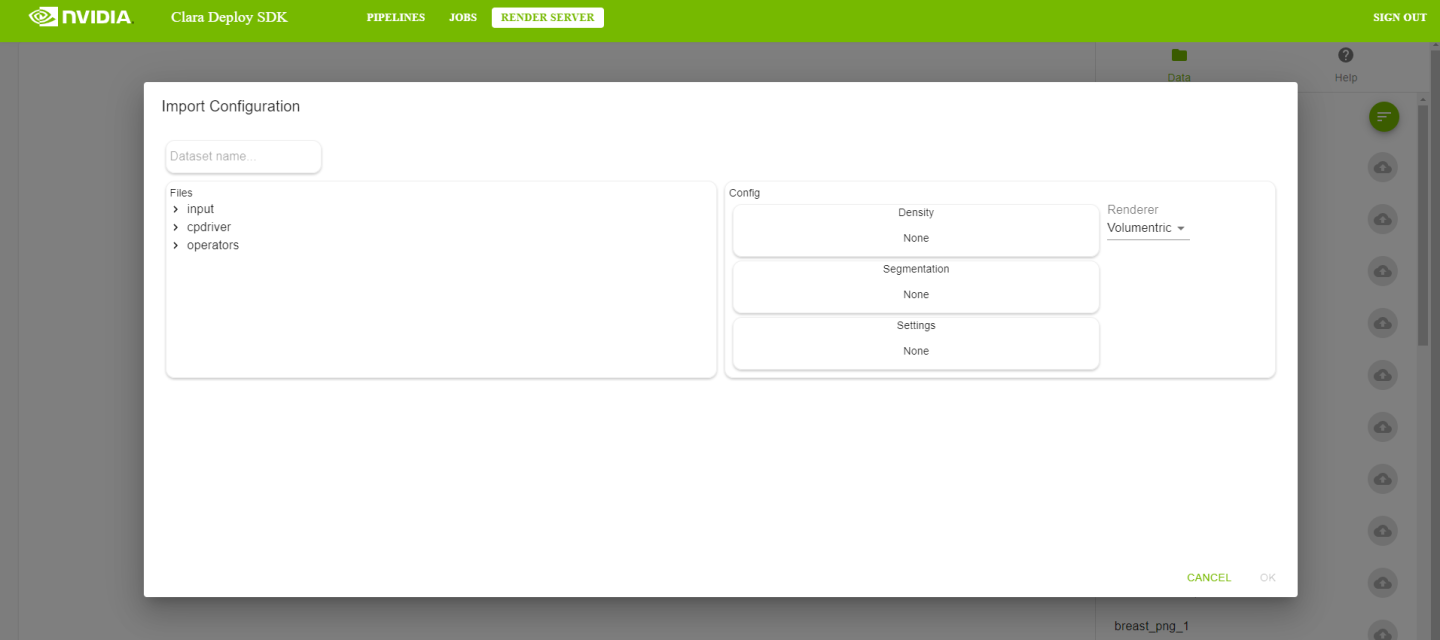
Select the appropriate renderer type (volume or 2d), drag & drop volume files (mhd, nifti, nrrd) or images (png, jpg, tif) on right side of the dialog, give the dataset a name.
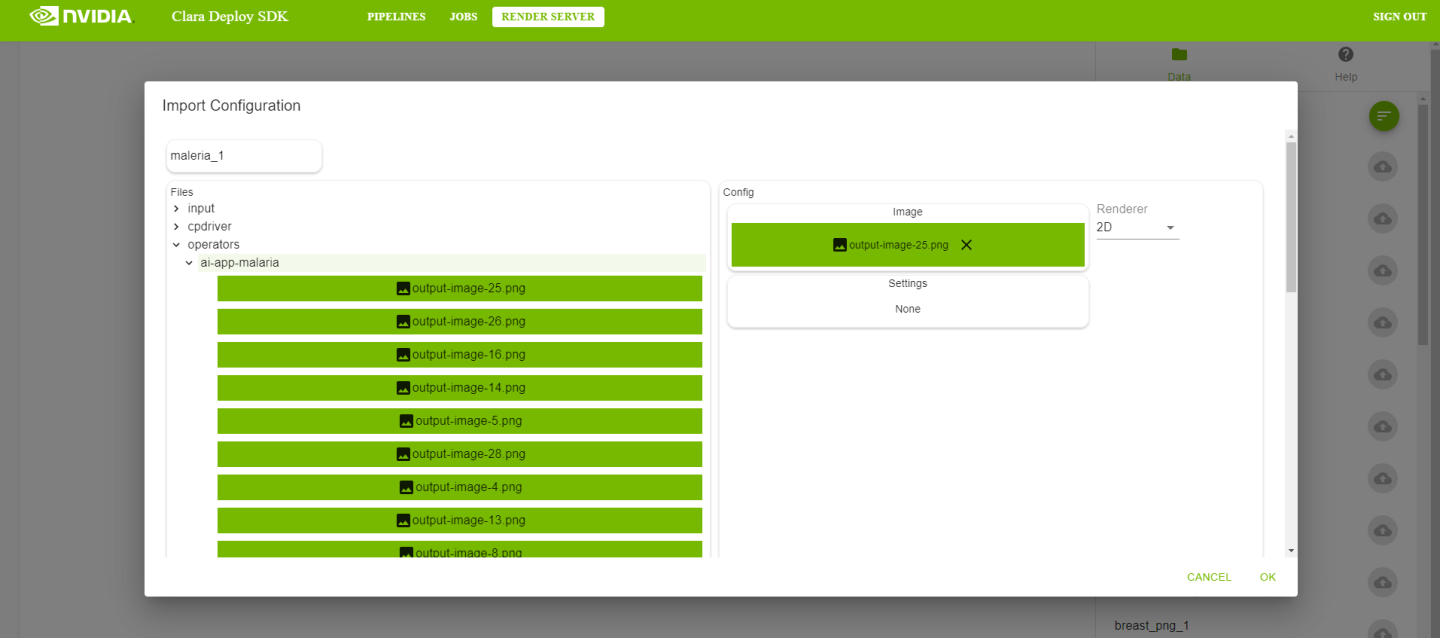
Click ‘OK’ on import dialog to visualize selected file.
Job Details view also shows operator logs whenever available. The logs for an operator can be accessed by clicking ‘link’ in ‘Logs’ column of an operator.
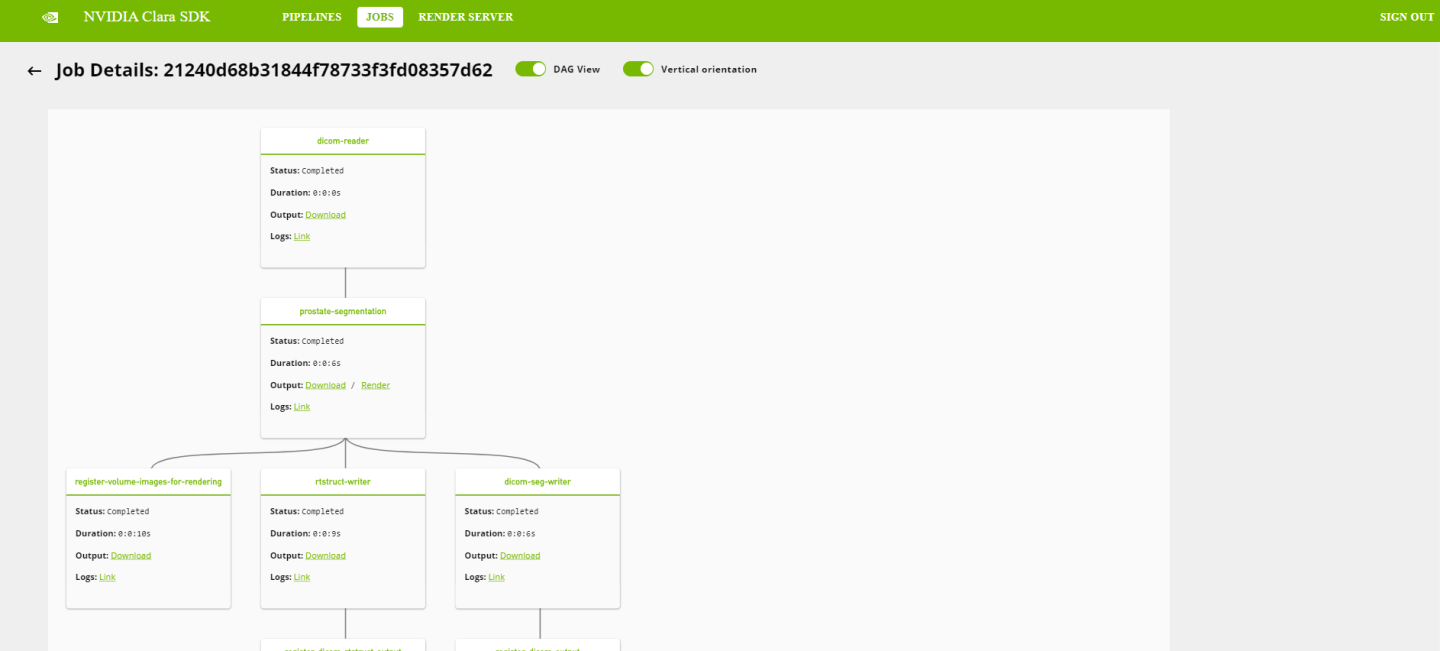
Job Details view also has an option to render visual representation of a job DAG. It can be toggled ON/OFF by clicking on ‘DAG View’ option in the Job Details view.
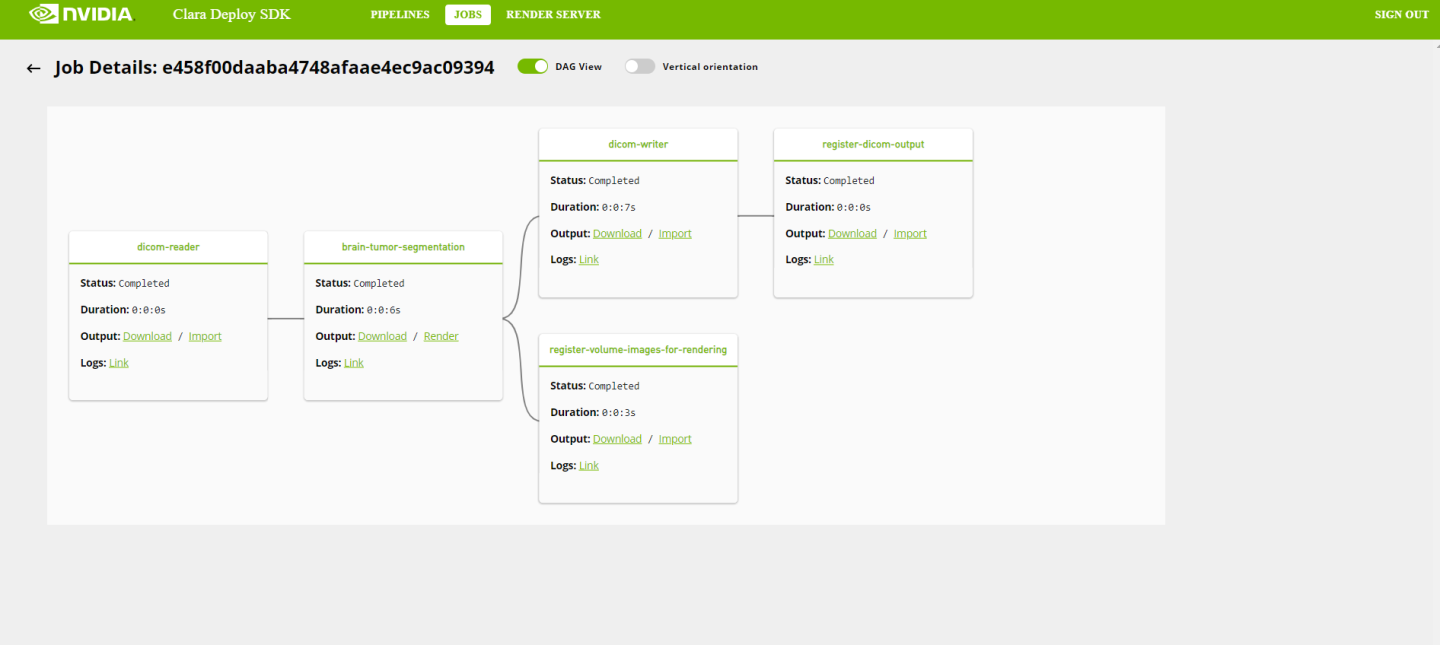
A job DAG is rendered in horizontal orientation from left to right by default. The vertical orientation of a job DAG can be toggled ON/OFF by clicking on ‘Vertical orientation’ option in the Job DAG view.
Clara Management Console provides default credentials which should be changed after installation. Default credentials are
Username: admin Password: console
Follow below steps to change default credentials:
Open .htaccess file on the node where Clara Management Console is installed. File is located at path /clara/console/data/.htaccess
vim /clara/console/data/.htaccess
Edit default credentials, more than one username:password entry can be added to the .htaccess file, each entry on a separate line and in format username:password.
Restart Clara Management Console
clara console restart
The user can then open Clara Management Console in web browser and sign in with one of the provided credentials from .htaccess file.
It is recommended to sign out of Clara Management Console once done using it, close the tab and sign in again next time.