Upgrading from Omnisci to HEAVY.AI 6.0
This section is giving a recipe to upgrade from Omnisci platform 5.5+ to HEAVY.AI 6.0.
If the version of Omnisci is older than 5.5 an intermediate upgrade step to the 5.5 version is needed.
Check the docs on how to do the upgrade.
Considerations when Upgrading from Omnisci to HEAVY.AI Platform
If you are upgrading from Omnisci to HEAVY.AI, there are a lot of additional steps compared to a simple sub-version upgrade.
Before Upgrading to Release 6.0
IMPORTANT - Before you begin, stop all the running services / docker images of your Omnisci installation and create a backup $OMNISCI_STORAGE folder (typically /var/lib/omnisci).
A backup is essential for recoverability; do not proceed with the upgrade without confirming that a full and consistent backup is available and ready to be restored.
The omnisci the database will not be automatically renamed to the new default name heavyai.This will be done manually and it’s documented in the upgrade steps.
All the dumps created with the dump command on Omnisci cannot be restored after the database is upgraded to this version.
Essential Changes for release 6.0 of HEAVY.AI compared to Omnisci
The following table describes the changes to environment variables, storage locations, and filenames in Release 6.0 compared to Release 5.x. Except where noted, revised storage subfolders, symlinks for old folder names, and filenames are created automatically on server start.
Change descriptions in bold require user intervention.
Upgrade Instructions
The order of these instructions is significant. To avoid problems, follow the order of the instruction provided and don’t skip any step.
Assumptions
This upgrade procedure is assuming that you are using the default storage location for both Omnisci and HEAVY.AI.
Upgrading Using Docker
Stop all containers running Omnisci services.
In a terminal window, get the Docker container IDs:
You should see an output similar to the following. The first entry is the container ID. In this example, it is 9e01e520c30c:
Stop the HEAVY.AI Docker container. For example:
Backup the Omnisci data directory (typically /var/lib/omnisci).
Rename the Omnisci data directory to reflect the HEAVY.AI naming scheme.
Create a new configuration file for heavydb changing the data parameter to point to the renamed data directory.
Rename the Omnisci license file (EE and FREE only).
Download and run the 6.0 version of the HEAVY.AI Docker image.
Select the tab depending on the Edition (Enterprise, Free, or Open Source) and execution Device (GPU or CPU) you are upgrading.
EE GPU
EE CPU
OS GPU
OS CPU
Check that Docker is up and running using a docker ps command:
You should see output similar to the following:
Using the new container ID rename the default omnisci database to heavyai:
Check that everything is running as expected.
Upgrading to HEAVY.AI Using Package Managers or Tarball
To upgrade an existing system installed with package managers or tarball.
The commands upgrade HEAVY.AI in place without disturbing your configuration or stored data.
Back up the Omnisci Database
Stop the Omnisci services.
Backup the Omnisci data directory (typically /var/lib/omnisci).
Create a user named heavyai who will be the owner of the HEAVY.AI software and data on the filesystem.
Centos/RHEL
Ubuntu
Set a password for the user. It’ll need when sudo-ing.
Login with the newly created user
Rename the Omnisci data directory to reflect the HEAVY.AI naming scheme and change the ownership to heavyai user.
Create the “semaphore” catalog directory; we’ll have to remove it later ”
Check that everything is in order and that the “semaphore” directory is created,
All the directories must belong to the heavyai user, and the directory catalogs would be present
Rename the license file. (EE and FREE only)
Install the HEAVY.AI Software
Install the HEAVY.AI software following all the instructions for your Operative System.
CentOS/RHEL and Ubuntu.
Please follow all the installation and configuration steps until the Initialization step.
Update the configuration file and rename the default database
Log in with the heavyai user and ensure the heavyai services are stopped.
Create a new configuration file for heavydb, changing the data parameter to point to the /var/lib/heavyai/storage directory and the frontend to the new install directory.
All the settings of the upgraded database will be moved to the new configuration file.
Now we have to complete the database migration.
Remove the “semaphore” directory we previously created. (this is a fundamental step needed for the omnsci to heavydb upgrade)
To complete the upgrade, start the HEAVY.AI servers.
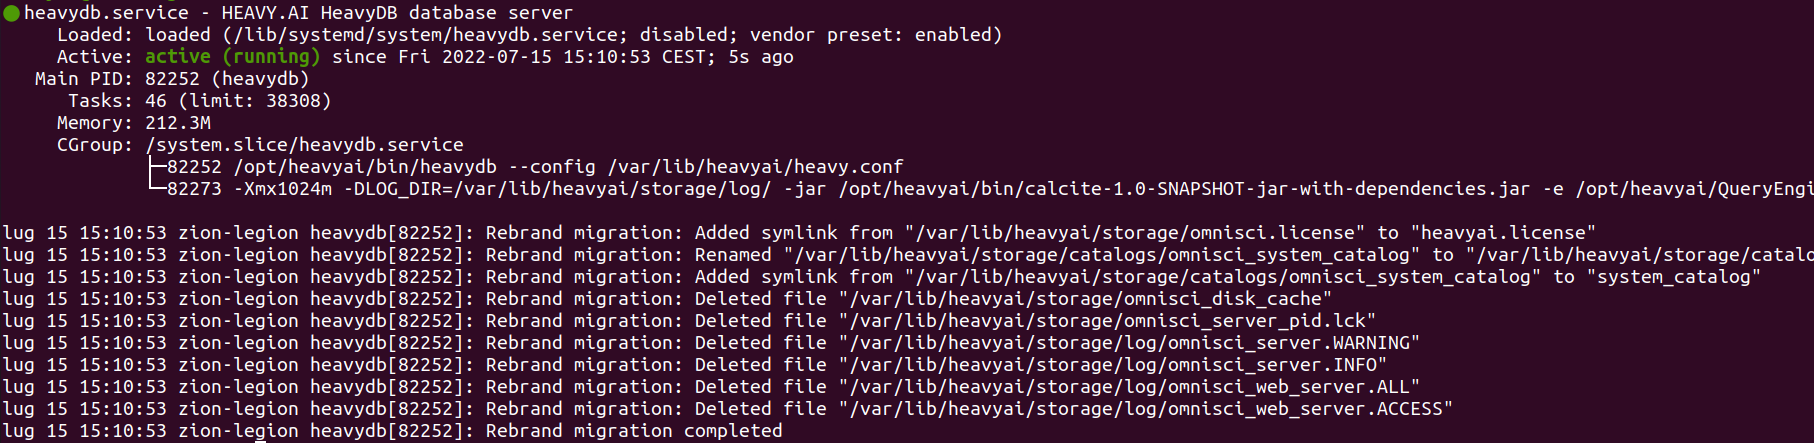
Check if the database migrated, running this command and checking for the Rebrand migration complete message.
Rename the default omnisci database to heavyai.
Run the command using an administrative user (typically admin) with his password (default HyperInteractive)
Restart the database service and check that everything is running as expected.
Remove Omnisci Software from the System
After all the checks confirmed that the upgraded system is stable, clean up the system to remove the Omnisci install and relative system configuration.
Remove permanently the configuration of the services.
Remove the installed software.
Delete the YUM or APT repositories.

