Assembling a Robot Training Scene#
Now that we’ve converted URDF files and shown how to optimize an asset, let’s bring the UR10e robot we started with into a useful training scene. This scene will include the UR10e, an accompanying housing called Sortbot.
Create the new stage#
Create an empty stage by going to File > New.
Open the Content Browser and locate this file in the course assets at:
starting_point/small_warehouse_digital_twin.usdDrag and drop the asset onto the Stage panel to load it as a reference
Tip
To control the scene camera:
Alt + Left Click: Rotate about object
Right Mouse Button: Rotate about camera
Scroll wheel: Zoom
Middle Mouse Button: Pan
Add the Sortbot to the stage#
Open the Content Browser and locate the sortbot housing USD file in the course assets under
/starting_point/sortbot_housing/sortbot_housing.usdDrag and drop the USD onto the Stage panel, and make sure it’s under the World (defaultPrim).
Select
sortbot_housingin the Stage panel.In the Property panel under Transform, click Add Transforms if a Transform does not exist already.
Set the Translate property to
(-4.0, -5.0, 0.0)Select
sortbot_housingin the Stage panel.Press F to frame it in the Viewport.
Confirm the Sortbot looks like this in the Viewport:
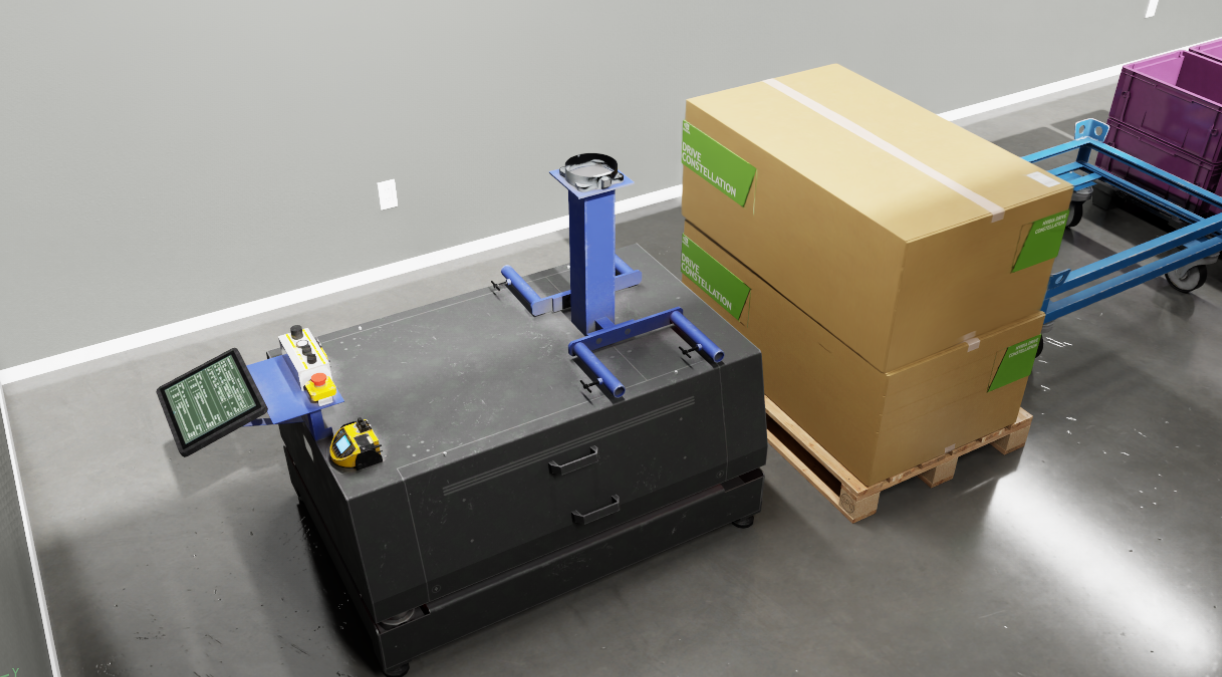
Save your work by going to File > Save or pressing Ctrl+S.
Add the UR10e to the stage#
In the Content Browser, locate the UR10e robot USD file we made earlier, or the completed robot in the course assets folder under
imported_manipulator/urSelect it and drag it onto the Stage panel onto
/Worldto load it as a payload.Rename the
urprim torobot.Select
robotand set these values in the Property panel.Translate:
(0.02, 0.285, 1.175)It should now be resting on the stand like this:
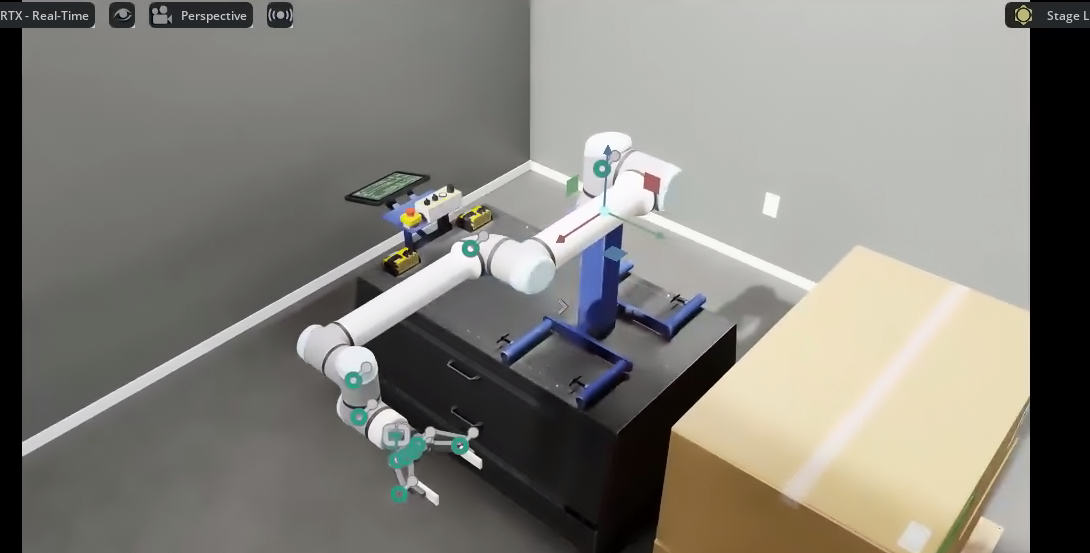
Save your work.
Checkpoint
If you had any troubles with these steps, a USD file of the completed warehouse is located in the course assets undercompleted_warehouse/warehouse_complete.usd
Inspect physics and control the robot#
Go to Tools > Physics > Physics Inspector.
Click on Physics Inspector.
Select
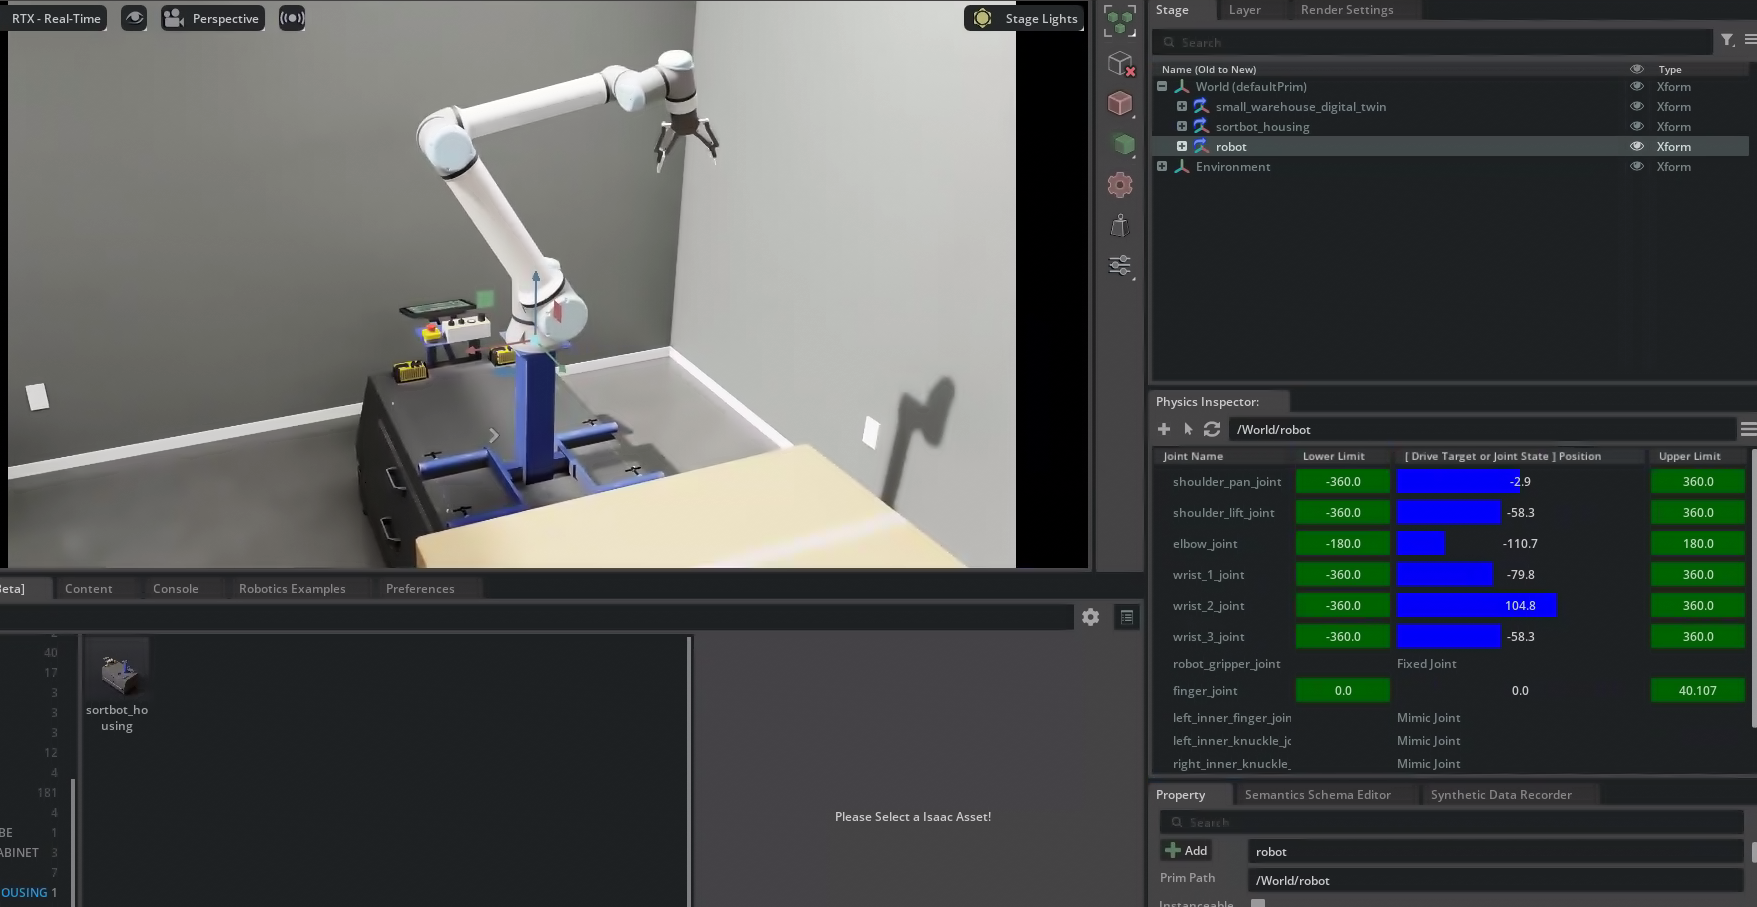
robotin the Stage panel.Click on the refresh button on the top left of the Physics Inspector UI.
Now you can adjust the drive target by moving the Drive Target or Joint State position.
Either enter a number into the target area, or click and drag on the blue sliders to move the robot!

Close the Physics Inspector.
Now that you have verified the physics simulation works, you can import this environment in Isaac Sim or Isaac Lab for training or testing.
If you’d like to learn more about the Physics Inspector, see the documentation.
Add the Toolbox to the stage#
Using the Content panel, locate the toolbox USD asset at
starting_point/Collected_toolbox.usdDrag and drop the USD onto the Stage panel.
In the Stage panel, select the toolbox prim.
In the Property panel under Transform, click Add Transforms if a Transform does not exist already.
Set the Translate property of toolbox to
(-4.0, -5.2, 0.66)Confirm the Sortbot looks like this in the Viewport:
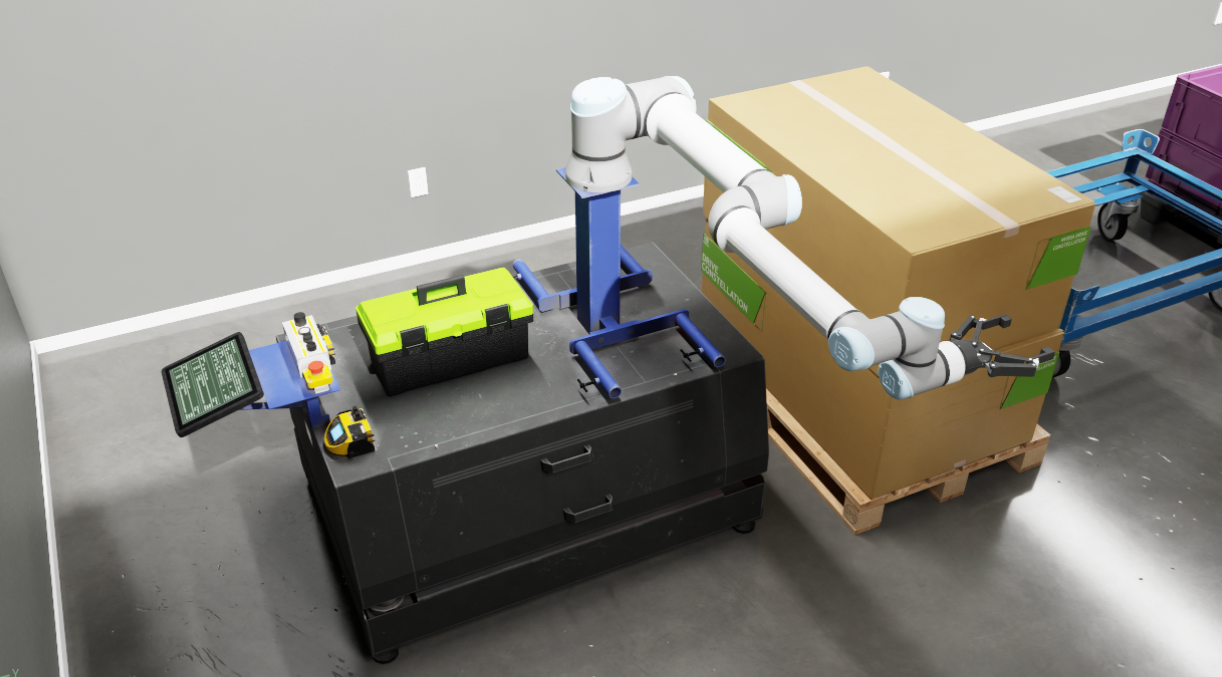
Save your work.