Set Up Additional ROS Features#
Robot Automatic Namespacing#
Overview#
We will first add a namespace to the robot file.
We will then open an environment and add our nova carter robots to complete the scene.
Add lidar namespace to Nova Carter#
Note: If you are using the backup robot asset, this section is already completed.
Now we can add an automatic namespace attribute to the 3d lidar inside the nova carter robot. This will namespace the /point_cloud topic with the lidar name.
Open nova_carter_ROS.usd if you don’t already have it open (this is the file we’ve been working in).
Select the XT_32 prim located at /nova_carter/chassis_link/sensors/XT_32.
Right click on the prim, then select Add > Isaac > Namespace
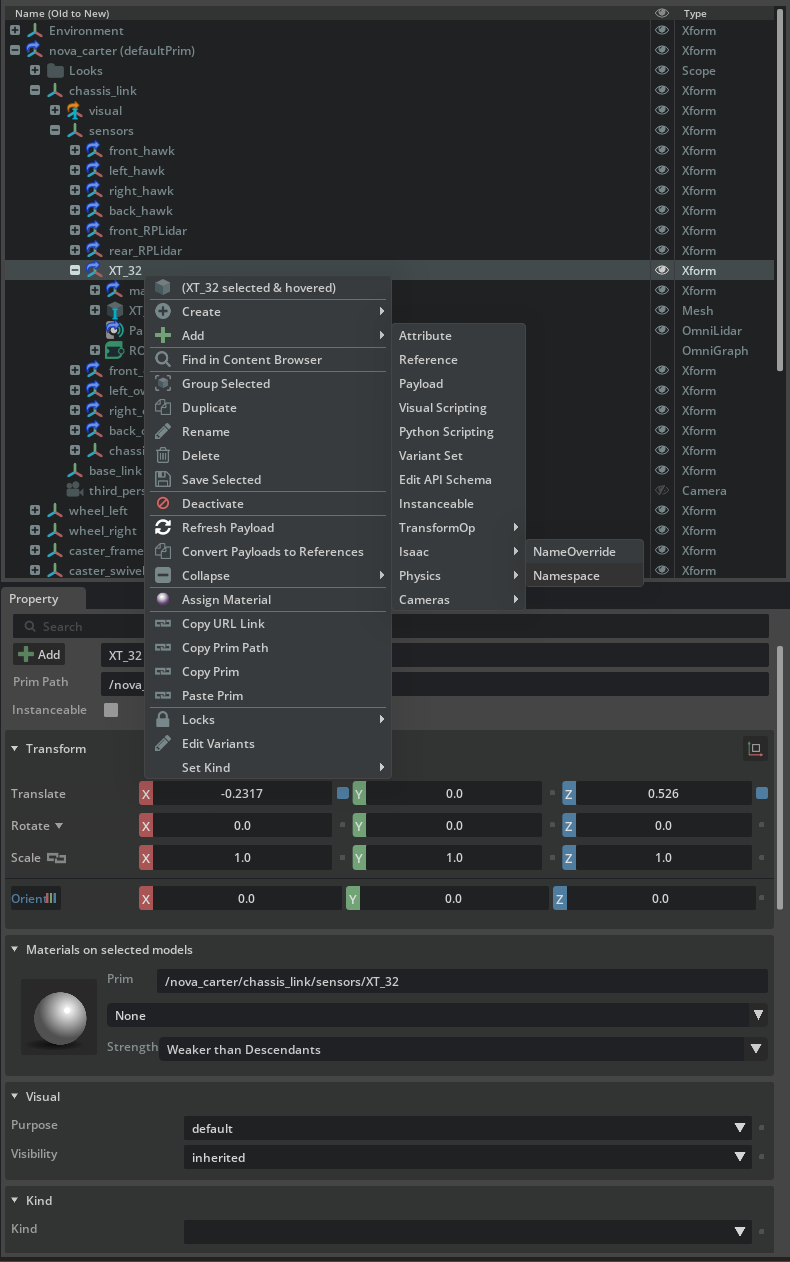
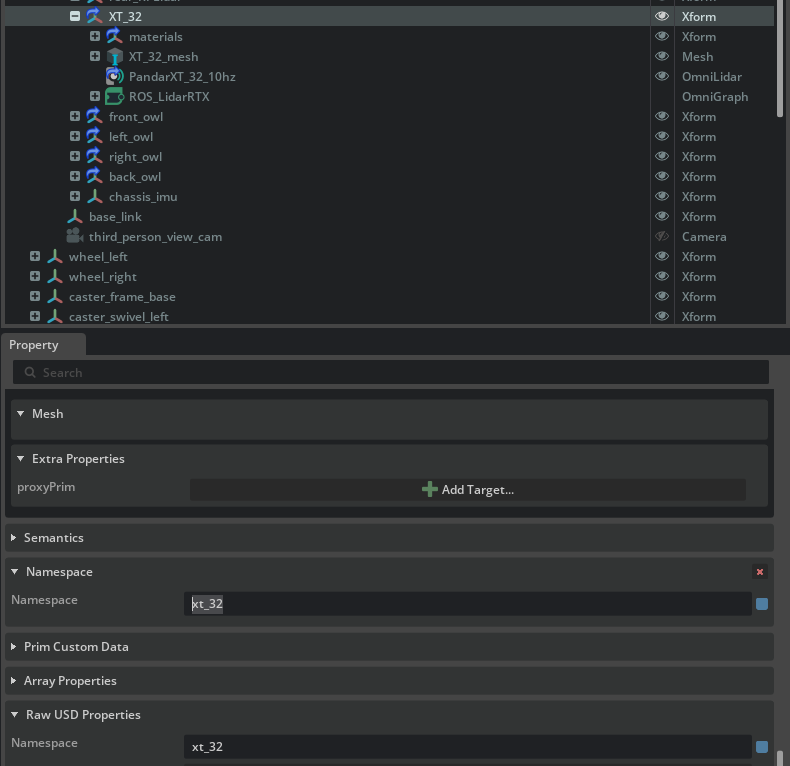
In the property panel, find the Namespace field and update the namespace to xt_32. (Note the lower case of “xt” to match conventions for ROS topics)
Save the robot file.
Verify Functionality#
Press the Play button in Isaac Sim to activate the publisher.
Open a ROS-sourced terminal and run the following command:
ros2 topic list
If you do not see an output, ensure that the ROS_DOMAIN_ID environment variable is set and try again.
export ROS_DOMAIN_ID=42 # Replace number with your own station number
Confirm that /xt_32/point_cloud has replaced the older /point_cloud topic is listed among the available topics.
Automatic Namespacing#
Overview#
Here we will manually set up the scene to perform multi robot navigation. In later modules of the workshop we will use Simulation Interfaces to load the scene, spawn robots and other props and run through a fun scenario!
Add a Nova Carter #1 Into Warehouse Test Scene#
From the course assets, open
Starting_Point/warehouse_test_scene.usdDrag and drop your nova carter asset to the warehouse env.
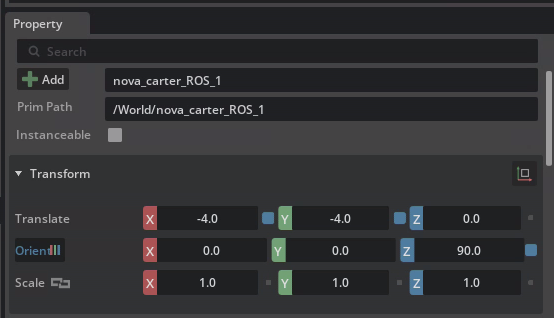
Starting_Point/nova_carter_ROS.usdRename the robot prim name to nova_carter_ROS_1.
Select the prim and set the value of the transform to:
Create Auto Name Space attribute#
Now we can add the overall namespace attribute to the nova carter robot. This ensures that all ROS topics and services associated with the robot are properly namespaced, preventing conflicts when working with multiple robots or systems.
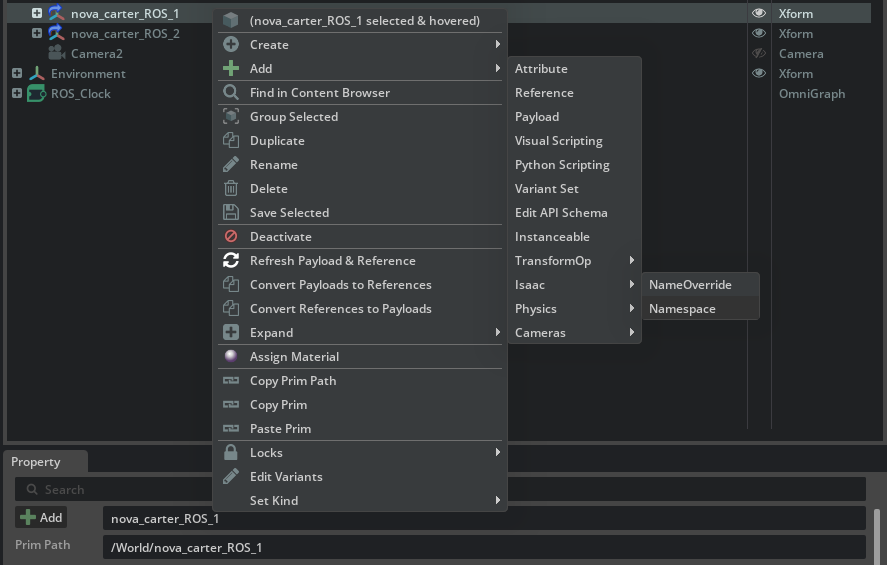
Select the /World/nova_carter_ROS_1 prim.
Right click on the prim, then select Add > Isaac > Namespace
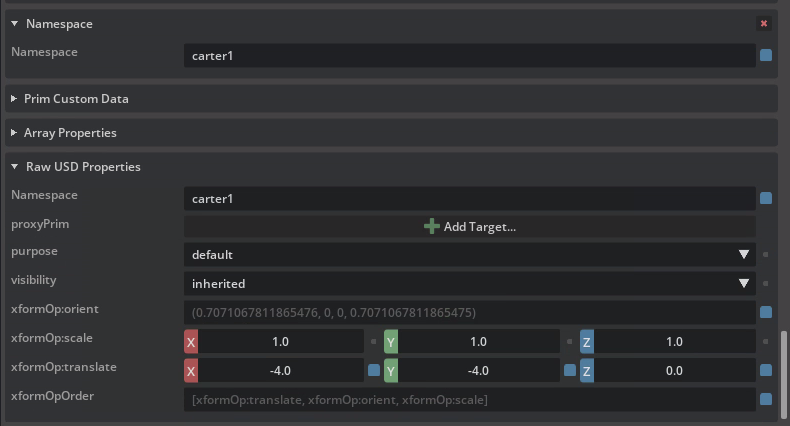
In Raw USD Properties within the Property panel, locate the newly added isaac:namespace attribute.
Set its value to carter1.
Save your changes.
Press the Play button in Isaac Sim to activate the simulation.
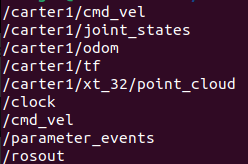
Verify Namespaced Topics#
Open a ROS-sourced terminal and run:
ros2 topic list
Verify that all Nova Carter-related topics are now prefixed with /carter1. You should see output similar to:
Setting up automatic namespacing for Carter 2#
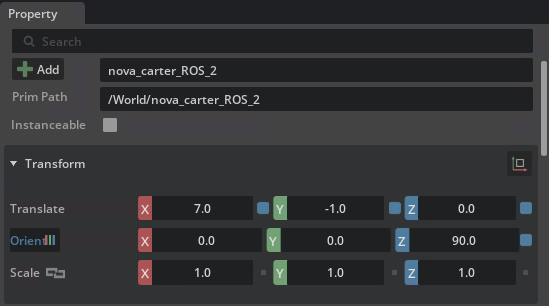
Duplicate nova_carter_ROS_1 and rename robot prim to nova_carter_ROS_2.
Set the value of the transform to:
In Raw USD Properties within the Property panel, locate the newly added isaac:namespace attribute.
Set its value to carter2.
Save your changes.
Press the Play button in Isaac Sim to activate the simulation.
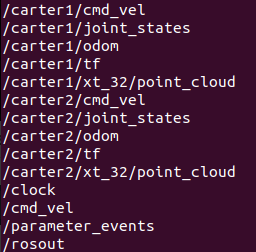
Verify Namespaced Topics#
Open a ROS-sourced terminal and run:
ros2 topic list
Verify that all Nova Carter-related topics are now prefixed with /carter2. You should see output similar to:
Setup Environment - Analyze the Environment#
Overview#
In this module we will analyze the props and other ROS graphs in the environment scene.
Clock Publisher#
Right-click on the ROS_Clock graph in the Stage Tree and select Open Graph.
The graph should resemble the following:
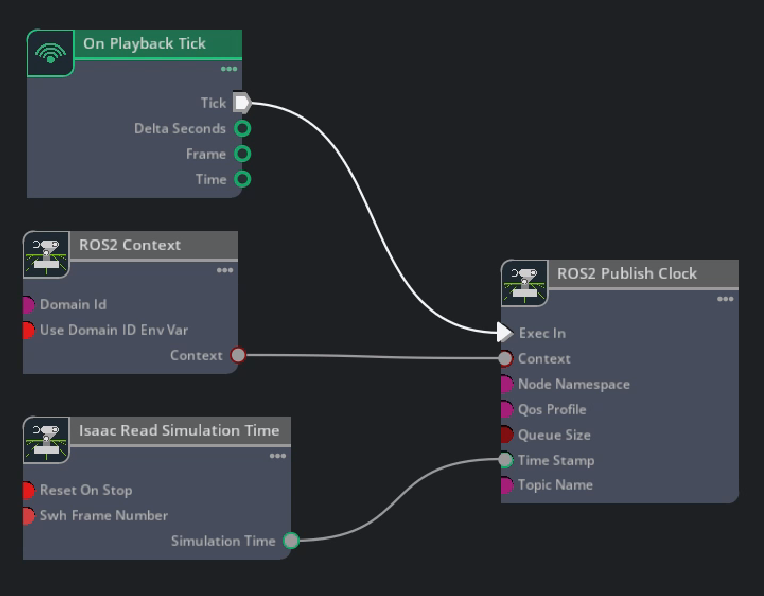
The ROS 2 Publish Clock OmniGraph node publishes simulation time that is fed in from the Isaac Read Simulation Time OmniGraph node. The ROS 2 Context OmniGraph node passes in the context while the On Playback Tick OmniGraph node executes the publisher every frame.
Demo Tables#
Let’s take a look at where the tables are located. In later modules, we’ll spawn these demo tables and cubes as well as other helper robots that will be used to push the cube into the nova carter’s front bin, all using Simulation Interfaces.
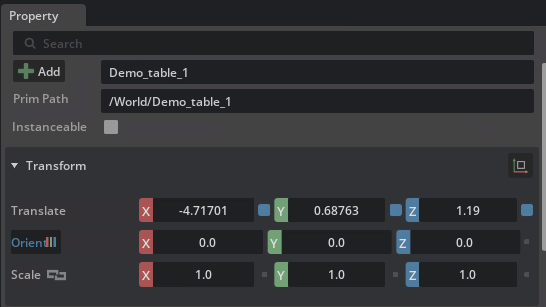
Notice the following transform for /World/Demo_table_1:
Notice the following transform for /World/Demo_table_2:

Review#
We looked at the clock ROS graph and noticed where the cubes are located.
Checkpoint 2
At this checkpoint, the full Environment is ready to be used.
The backup scene USD file is located in the course assets folder at /Backup/warerhouse_test_scene.usd.
If you need to use the backup robot USD file, copy and replace it into the Starting Point folder at: Starting_Point/warerhouse_test_scene.usd.