Adding Custom Multimodal Content#
Overview#
This section will show you how to add custom multimodal content to the Tokkio UI. This is useful if you want to show custom content in the UI such as a custom image, video, or text based on the response from a RAG, Agent, or other AI service used in the Tokkio application.
Prerequisites#
This will require a custom implementation of the ACE Controller. If you haven’t already done so, see the Local Developer Workflow Method section for information on how to set up a local ACE Controller for development. This section will also require a basic understanding of Pipecat, which is the framework used to construct the ACE Controller pipeline.
What is Available#
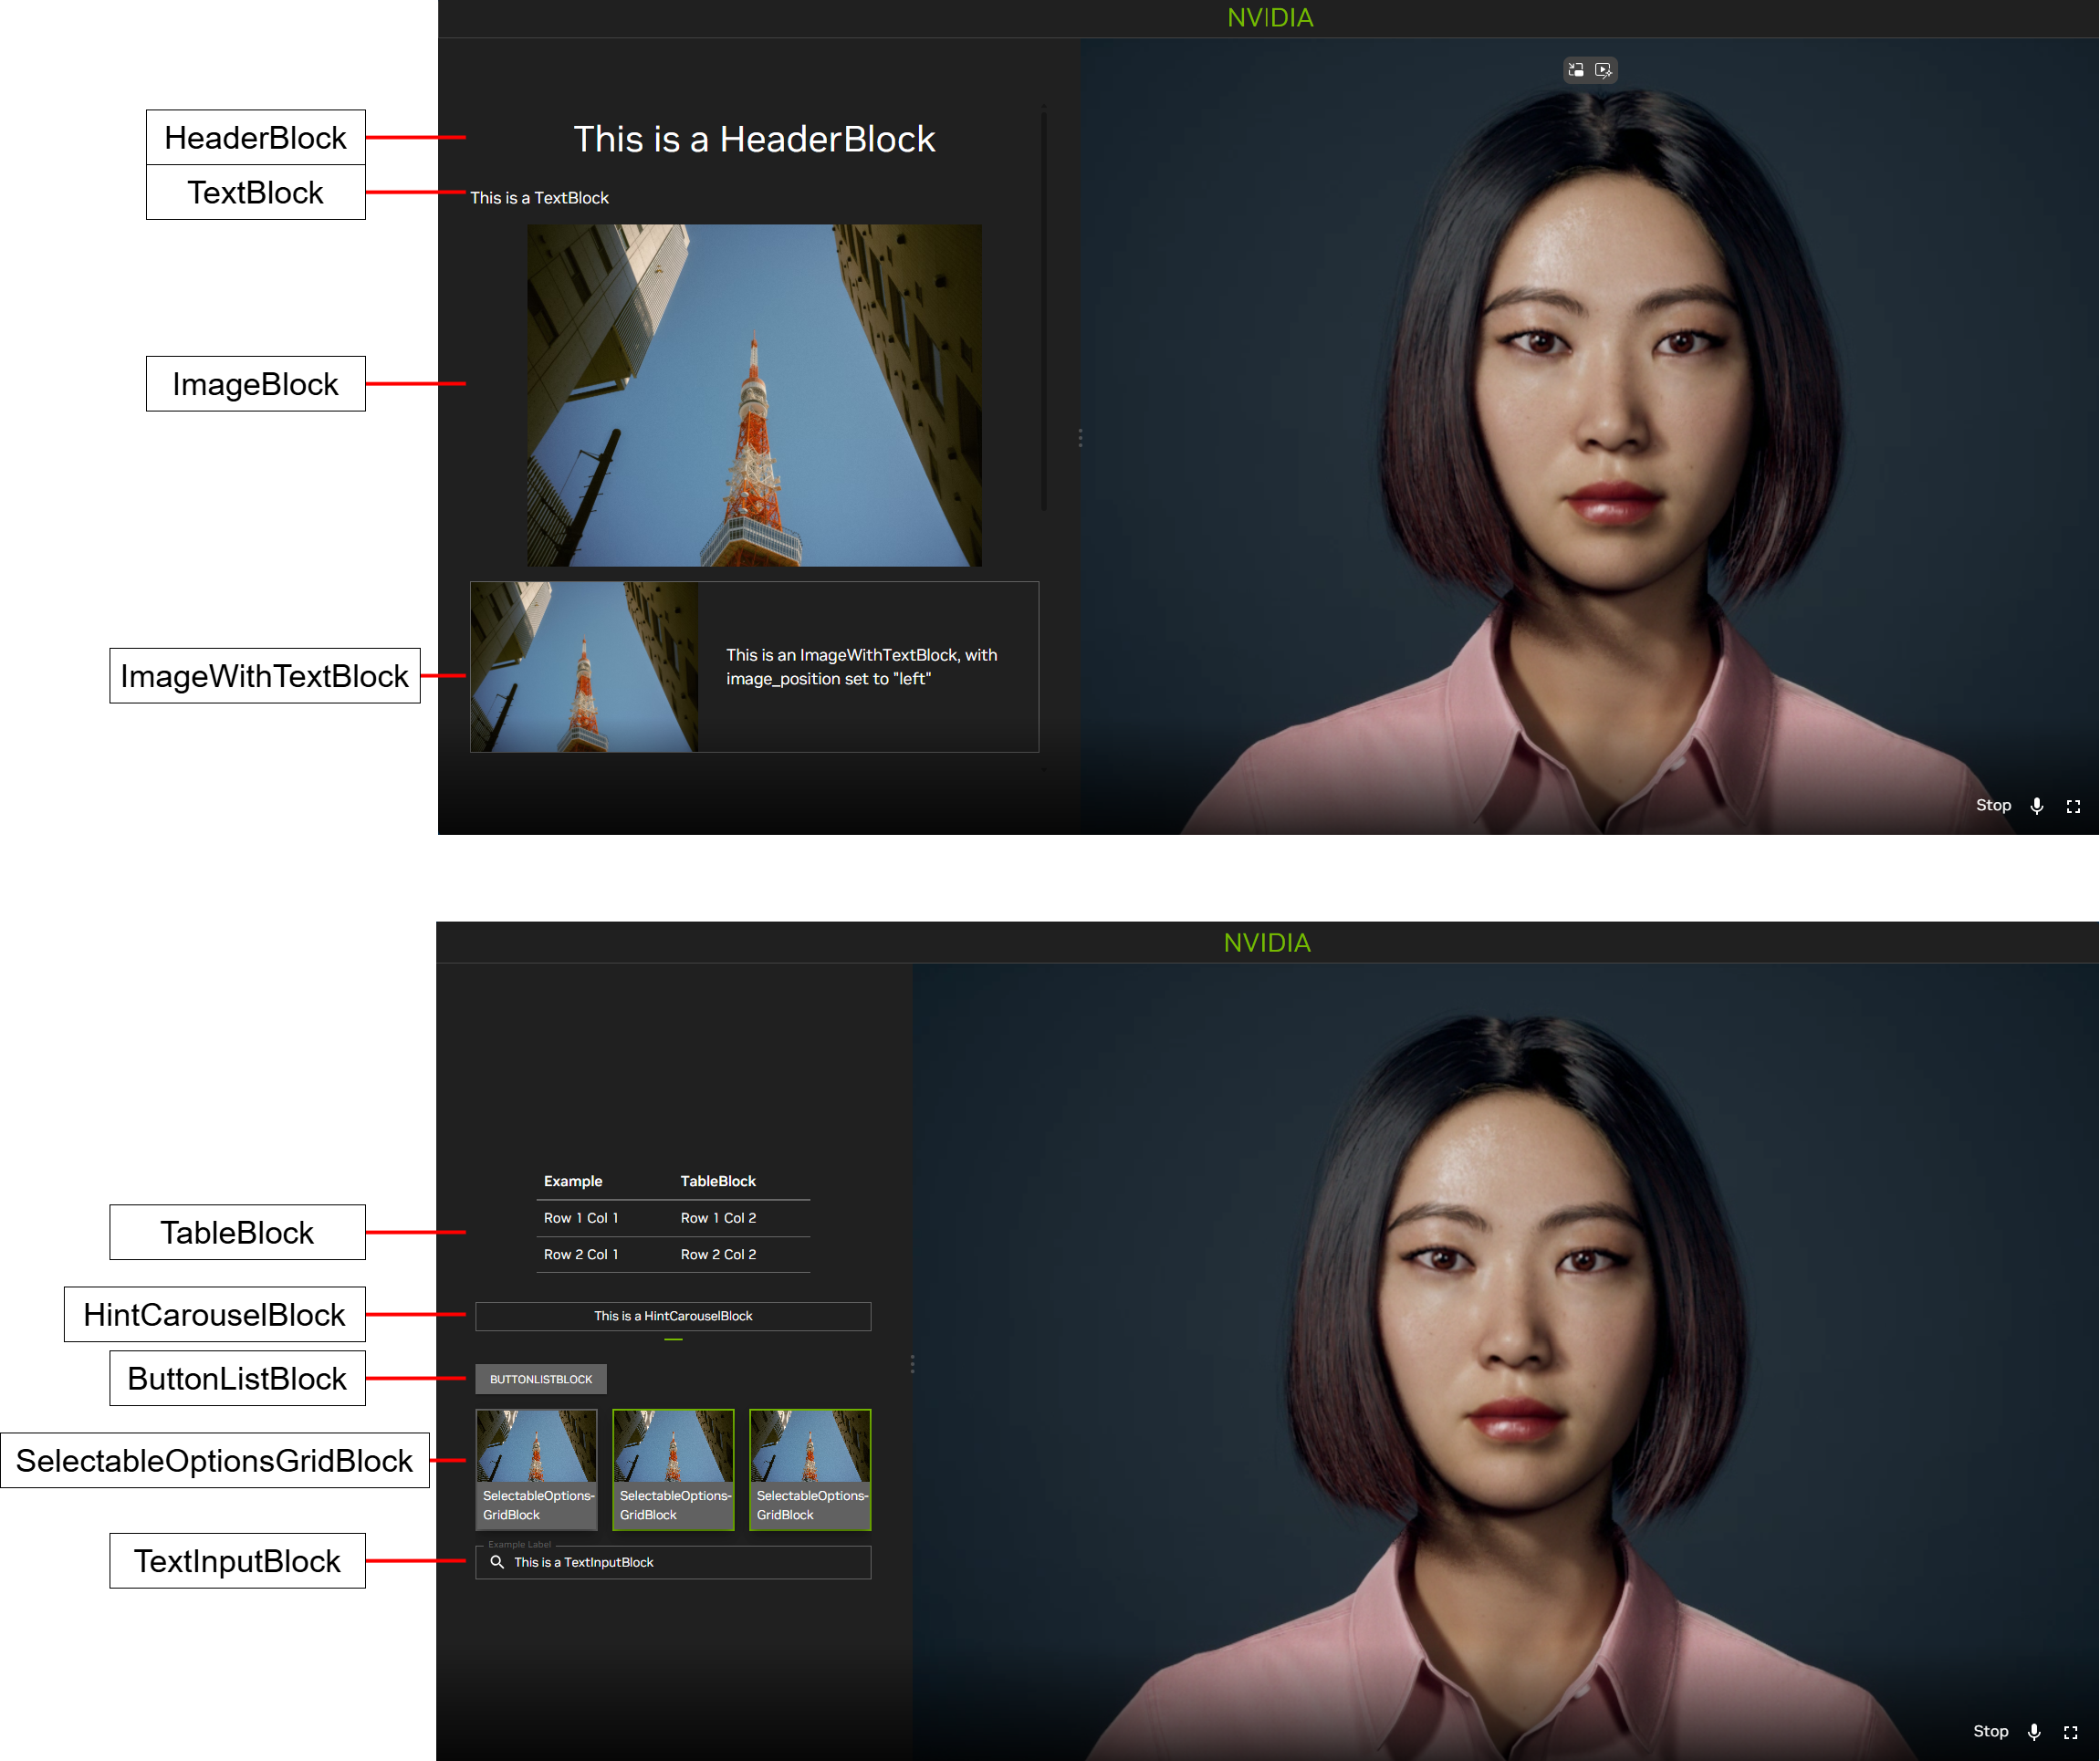
The Tokkio UI can show custom multimodal content sent by the ACE Controller without changing the UI code. The UI is capable of showing the following types of multimodal content in any order as modular components stacked on top of one another:
Header
Image
Image With Text
Hint Carousel
Paragraph
Table
Text Input
List of Selectable Options
Buttons
These components are referred to as Blocks in the documentation and code.
Tokkio UI Custom View#
Setting Up the Multimodal Content#
Note
Check out the documentation embedded in the ACE Controller code for detailed information on what multimodal content can be sent by the ACE Controller and how to set up the Custom View blocks. The Tokkio implementation of the ACE Controller contains a RAGMultimodalResponseProcessor in the pipeline which gives a reference example of how the multimodal view can be set up. This is used for the NVIDIA RAG service.
The setup for this is as follows:
Create a new frame processor in the ACE Controller, and add it to the pipeline in
bot.py.In the frame processor, import the custom view frames and blocks from the
frames/custom_view.pyfile in the ACE Pipecat library. Take the time to read and understand the documentation for the Custom View frames and blocks embedded in the code from the imported file.Create a
StartCustomViewFrame, and add the multimodal content you want to show in the UI by adding the modularBlockobjects to theblocksarray in the frame. Here is an example code snippet for a Frame that will show an image based on a URL in the UI:# Import the relevant custom view frames and blocks. from nvidia_pipecat.frames.custom_view import ( StartCustomViewFrame, HeaderBlock, ImageBlock, Image, ) # Inside your frame processor, create a StartCustomViewFrame # and add a title and an image to the blocks array. frame = StartCustomViewFrame( action_id="test-action-id", blocks=[ HeaderBlock(id="test-header", header="Example Title", level=1), ImageBlock(id="test-image", image=Image(url="https://example.com/image.jpg")), ], ) # Send the StartCustomViewFrame down the pipeline. await self.push_frame(frame, direction)
Send the
StartCustomViewFramedown the pipeline.When it is time to hide the multimodal content, send a
StopCustomViewFrame. Here is an example code snippet for a Frame that will hide the multimodal content:# Import the relevant custom view frames and blocks. from nvidia_pipecat.frames.custom_view import StopCustomViewFrame # Inside your frame processor, create a ``StopCustomViewFrame``. frame = StopCustomViewFrame(action_id="test-action-id") # Send the ``StopCustomViewFrame`` down the pipeline. await self.push_frame(frame, direction)
If your example is based on the Tokkio implementation of the ACE Controller, then you are all set! Here is what will happen next:
The frames will be received by the
TokkioUIWebSocketSerializer, which will convert the frames into WebSocket messages to be sent to the UI.The UI will receive the messages and display the multimodal content.
If you are creating a custom implementation of the ACE Controller or UI, you must ensure that the above steps are present in your implementation.
Receiving User Input#
The Tokkio UI can also receive user input from the UI multimodal content and send it back to the ACE Controller. This is useful if you want to allow the user to select an option from a list of selectable options, enter text into a text input field, or press a button.
The interactive components are:
Text Input (
TextInputBlock)List of Selectable Options (
SelectableOptionsGridBlock)Buttons (
ButtonListBlock)
To receive user input, you must do the following:
For any of the interactive components, the Block must have an
idattribute. This ID will be used to identify the component which the user interacted with.Listen for the following frames, depending on the type of input you want to receive. These frames will arrive whenever the user interacts with the corresponding component:
UIInterimTextInputFrameUITextInputFrameUIButtonPressFrameUISelectableOptionPressFrame
Each of these frames has an
component_idattribute. This ID will match theidattribute of the corresponding Block in theStartCustomViewFrame, and can be used to identify which component the user interacted with.From here, you can retrieve the user interaction data from the component attributes.