Installation
The Aerial Omniverse Digital Twin (AODT) Installer is a way to get up and running quickly with fresh installations on qualified systems, both in the cloud and on-prem. There are several components that must be installed and configured in order for a deployed system to run AODT. This section will detail how to use the AODT Installer for each of the qualified system configurations.
AODT can be installed in the cloud or on-prem. The installation involves deploying a set of frontend components and a set of backend components. The frontend components require one NVIDIA GPU, and the backend components require another NVIDIA GPU. The frontend components and backend components can be deployed to either the same node (i.e., colocated) or to separate nodes (i.e. multi-node). The following table details the GPU requirements for each case:
System Type | GPU Qnty | GPU vRAM | GPU Requirement | GPU Notes |
|---|---|---|---|---|
| Frontend alone | 1 | 12GB+ | GTX/RTX | e.g. RTX 6000 Ada, A10, L40 |
| Backend alone | 1 | 48GB+ | e.g. RTX 6000 Ada, A100, H100, L40 | |
| Frontend and backend colocated | 2 | see note | see note | 1x frontend-capable GPU, 1x backend GPU |
The following tables describes the GPU driver versions used by the installation scripts
System Type | Operating System | deployed driver version |
|---|---|---|
| Frontend azure | Linux | 535.154.05 |
| Frontend azure | Windows | 537.13 |
| Backend azure | Linux | 535.154.05 |
| Frontend and backend colocated | Linux | 550.107.02 |
and the OS support for each type.
System Type | OS |
|---|---|
| Frontend alone | Windows 11, Windows Server 2022, Ubuntu 22.04 |
| Backend alone | Ubuntu 22.04 |
| Frontend and backend colocated | Ubuntu 22.04 |
For memory and CPU requirements, we recommend looking at the qualified systems in the next section.
Additional information
The AODT backend supports the following streaming multiprocessor (SM) architectures: 80, 86, 89 and 90. The runtime logic checks:
Startup verification: Upon startup, the backend confirms that it is running on a system with a supported SM architecture. If an unsupported architecture is detected, it emits an error to the standard error console and the application terminates.
Compile-time vs. run-time check: The backend also compares the compile-time SM architecture against the run-time one. If the compile-time architecture is different than the run-time one, the backend prints an error and exits. In case the compile-time process specifies multiple values, the runtime logic picks the highest value to compare with the runtime values.
Compilation Option: For users wishing to run the backend on the same system used for its compilation, or a different system with the same SM Architecture, the CMake build system allows for specifying -DCMAKE_CUDA_ARCHITECTURES="native" during the CMake generation phase. This ensures that the compiled version aligns with the device architecture, preventing the aforementioned errors; "native" is also the default value in case the user does not specify any value of -DCMAKE_CUDA_ARCHITECTURES during CMake generation time.
The following qualified systems have been tested and are directly supported with the AODT Installer:
Qualified system | Node 1 | Node 2 |
|---|---|---|
| Azure VM (Multi-Node) |
|
|
| Dell R750 (Colocated) |
|
N/A |
Note: installations on Microsoft Azure A10 VMs require NVIDIA GRID drivers.
Azure
The Aerial Omniverse Digital Twin can be installed on Microsoft Azure using the Azure Installer. The Azure Installer in turn can be downloaded from NGC - Aerial Omniverse DT Installer using version tag 1.1.0.
Specifically, the user can first download the files from the Azure folder into a local directory, create a file called .secrets in such directory, and define the following environment variables:
            RESOURCEGROUP=
WINDOWS_PASSWORD=
SSH_KEY_NAME=
LOCAL_IP=
GUI_OS=
NGC_CLI_API_KEY=
where
Variable | Description |
|---|---|
| RESOURCEGROUP | Microsoft Azure Resource Group |
| SSH_KEY_NAME | Name of SSH key stored in Microsoft Azure |
| WINDOWS_PASSWORD | Password length must be between 12 and 72 characters and satisfy 3 of the following conditions: 1 lower case character, 1 upper case character, 1 number and 1 special character |
| LOCAL_IP | IP address (as seen by Azure) of the host that will run the provisioning scripts |
| GUI_OS | Windows |
| NGC_CLI_API_KEY | NGC API KEY |
More information on NGC_CLI_API_KEY can be found here: NGC - User’s Guide.
Also, if necessary, the following command can be used to find LOCAL_IP, the external IP address of the local machine that will be used to connect to the VMs.
curl ifconfig.me
The private ssh key must be stored in a location accessible by the installation bundle, e.g. ~/.ssh/azure.pem
Once the variables above are configured, we can use the mcr.microsoft.com/azure-cli docker image to run the provisioning scripts.
docker run -it --env-file .secrets -v .:/aodt -v ~/.ssh/azure.pem:/root/.ssh/id_rsa mcr.microsoft.com/azure-cli
The docker container will mount the downloaded scripts and it will access the private SSH key.
When using Windows for GUI_OS, the AODT Azure frontend installation uses the nvidia-omniverse-workstation image. We can find details of this image here. Before using this image, users must review and accept the Azure Marketplace image terms for the image. One way to do that is by running the following commands inside the azure-cli docker container:
            $ az login
$ az vm image terms show --publisher nvidia --offer nvidia-omniverse-workstation --plan ove
$ # Review the terms as needed, and then accept the terms
$ az vm image terms accept --publisher nvidia --offer nvidia-omniverse-workstation --plan ove
Inside the docker container, we can run the following commands:
            $ az login
$ cd aodt
$ bash azure_install.sh
and the script will create the VMs, configure the network inbound ports, and download the scripts needed in the next step. The script is expected to take several minutes to complete. At the end, azure_install.sh will show:
            Use Microsoft Remote Desktop Connection to connect to <ip-address>
Username: aerial
Password: <configured password>

BACKEND_IP=<ip-address>
Logging into the Azure VM
We can use Microsoft Remote Desktop Client to connect to the IP address shown at the end of azure_install.sh using the configured username and password in the .secrets file.
Once successfully logged in to the remote desktop session, wait for the installation scripts to complete, while ignoring any pop up windows prompting for an NVIDIA Omniverse email address.
At the end of the installation, enter the username and password of the omniverse-server in the browser.
Once the installation is complete, the script will launch the AODT application and open a Jupyter notebook in the browser.
Dell R750
For a full deployment on prem, we can select the pre-qualified Dell PowerEdge R750 server. Install Ubuntu-22.04.3 Server using the default options in the Ubuntu installer. When loading the Ubuntu 22.04 Server ISO, we may use a bootable USB, or the server’s virtual media function. For instructions on installing Ubuntu 22.04 Server and creating the bootable USB, we can follow the official Ubuntu documentation here. For instructions on using the R750’s virtual media function, we can follow Dell’s official documentation here. After installing Ubuntu-22.04.3 Server, we can log in using SSH and run the following commands
            sudo apt-get install -y jq unzip

export NGC_CLI_API_KEY=<NGC_CLI_API_KEY>
AUTH_URL="https://authn.nvidia.com/token?service=ngc&scope=group/ngc:esee5uzbruax&group/ngc:esee5uzbruax/"

TOKEN=$(curl -s -u "\$oauthtoken":"$NGC_CLI_API_KEY" -H "Accept:application/json" "$AUTH_URL" | jq -r '.token')

versionTag="1.1.0"
downloadedZip="$HOME/aodt_bundle.zip"

curl -L "https://api.ngc.nvidia.com/v2/org/esee5uzbruax/resources/aodt-installer/versions/$versionTag/files/aodt_bundle.zip" -H "Authorization: Bearer$TOKEN" -H "Content-Type: application/json" -o $downloadedZip

# Unzip the downloaded file
unzip -o $downloadedZip
Again, more information on NGC_CLI_API_KEY can be found here: NGC - User’s Guide.
Once the aodt_bundle.zip has been downloaded and extracted, we can continue by running the following command
./aodt_bundle/install.sh localhost $NGC_CLI_API_KEY
When the installation is complete, we can use a VNC client to connect to the VNC server on port 5901. The VNC password is nvidia.
We will finally sign into NVIDIA Omniverse and complete the installation in the Omniverse Launcher as for Azure. As before, a Jupyter notebook will also be opened in the browser.
Once the Aerial Omniverse Digital Twin graphical interface is running, we can click on the toolbar icon showing the gears and connect to the RAN digital twin.
If asked for credentials, we can use the following:
username:
omniversepassword:
aerial_123456
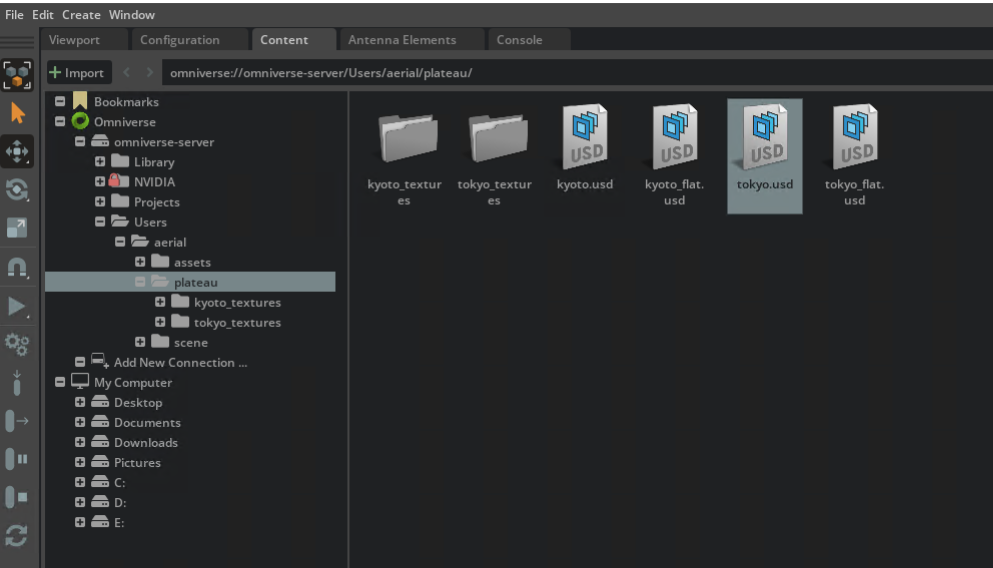
Once successfully logged in, we can then select the Content tab (refer to the Graphical User Interface section for further details) and click Add New Connection. In the dialog window, we can then
type
omniverse-serverclick
OKexpand the
omniverse-servertree viewright click on
omniverse://omniverse-server/Users/aerial/plateau/tokyo.usdand open the map.
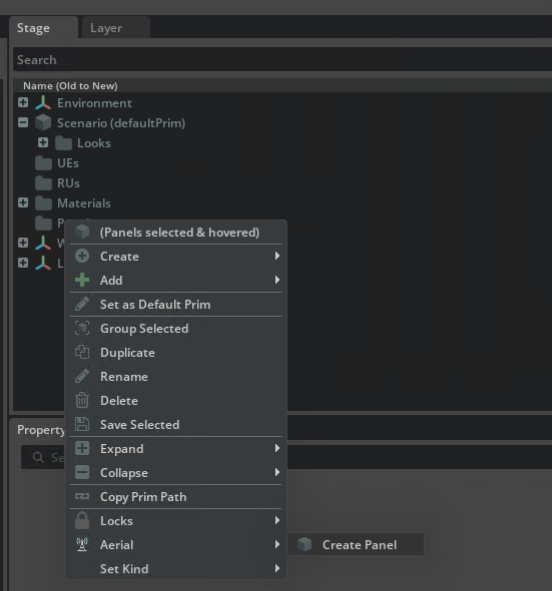
Once the map is loaded, we will continue by
selecting the Viewport tab
right clicking on the Stage widget
and selecting Aerial > Create Panel twice from the context menu.
The first panel will be used - by default (refer to the /Scenario scope in the Stage widget) - for the user equipment UE and the second for the radio unit (RU).
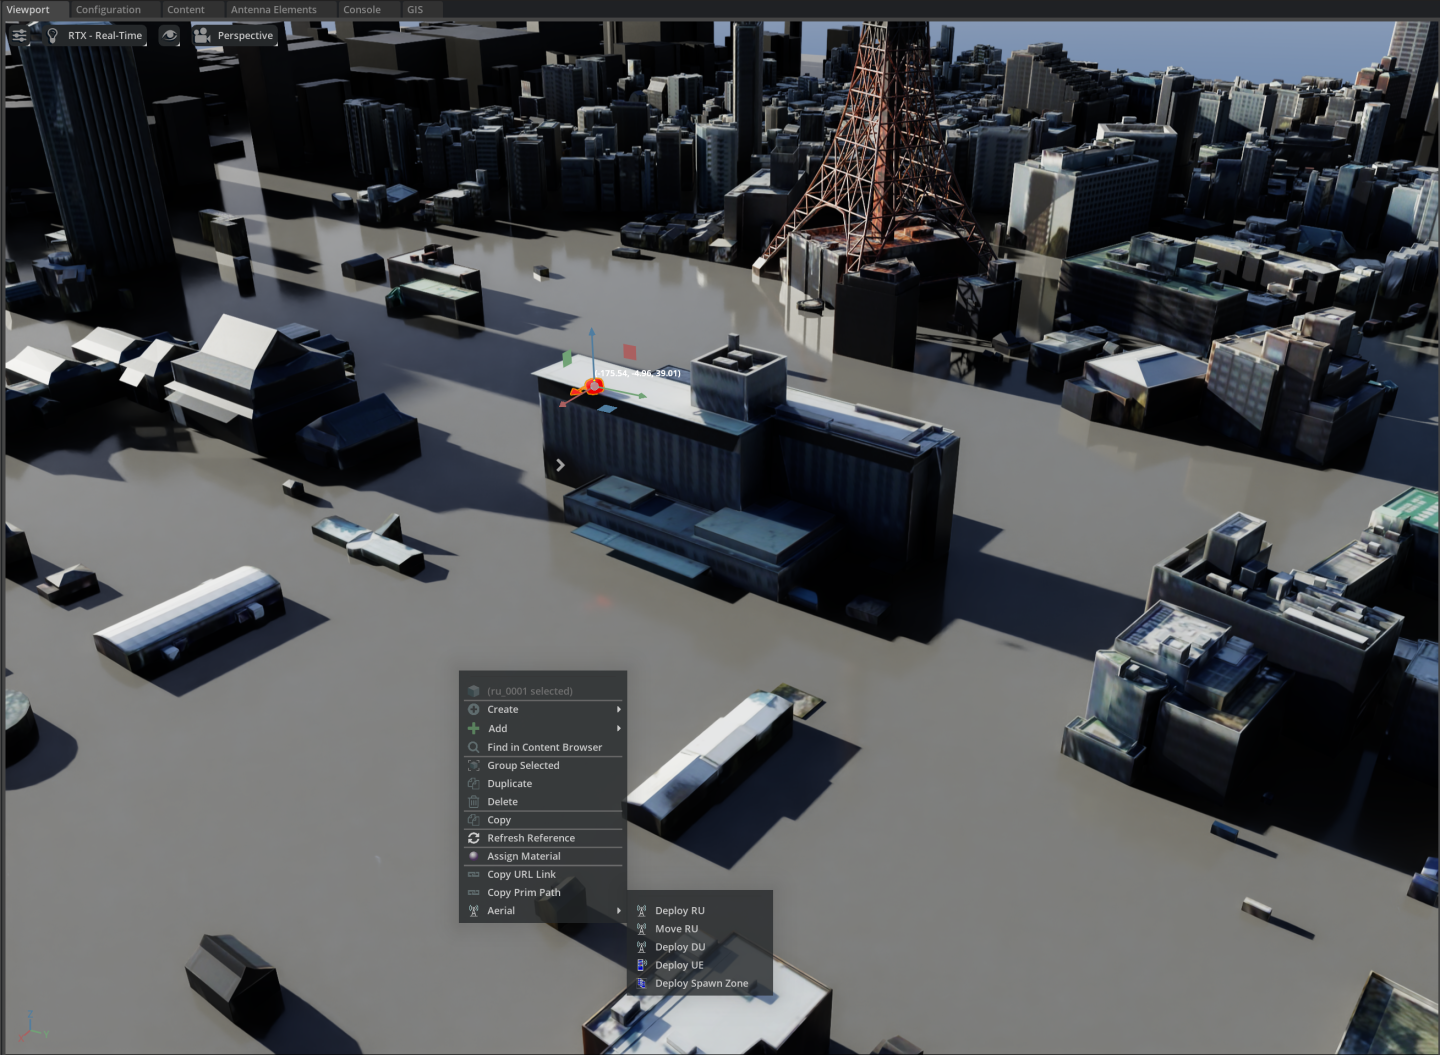
With the panels defined, we then can then
right click in the Viewport
select Aerial > Deploy RU from the context menu
and click on the final location where we would like to place the RU

With the RU deployed, we will then select it from the Stage widget and enable the Show Raypaths checkbox from the Property widget.
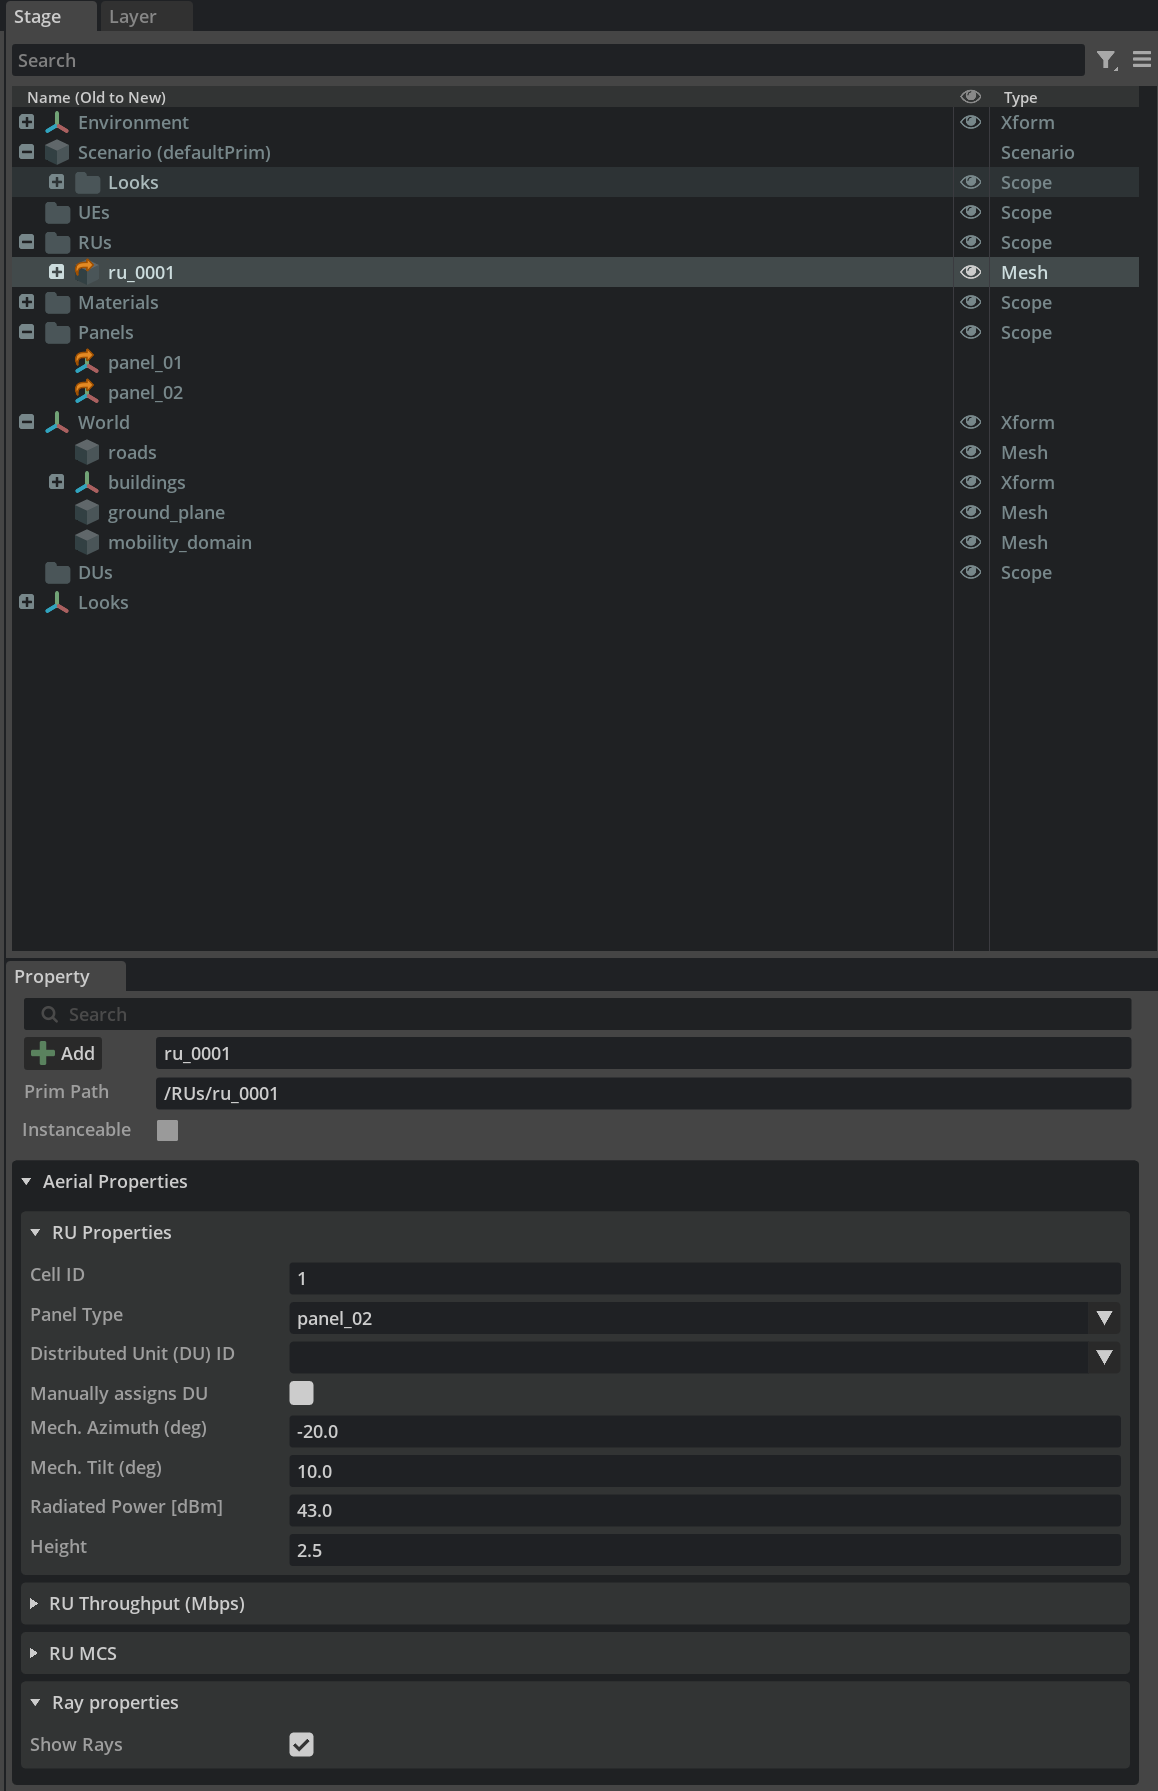
Similarly, we will
right click on the Viewport
and select Aerial > Deploy UE from the context menu.
Differently from the procedure for the RU, however, this will drop the UE in the location where the right click took place.
Finally, we can
select the Scenario entry in the Stage widget
set
Duration equal to 10.0
Interval to 0.1

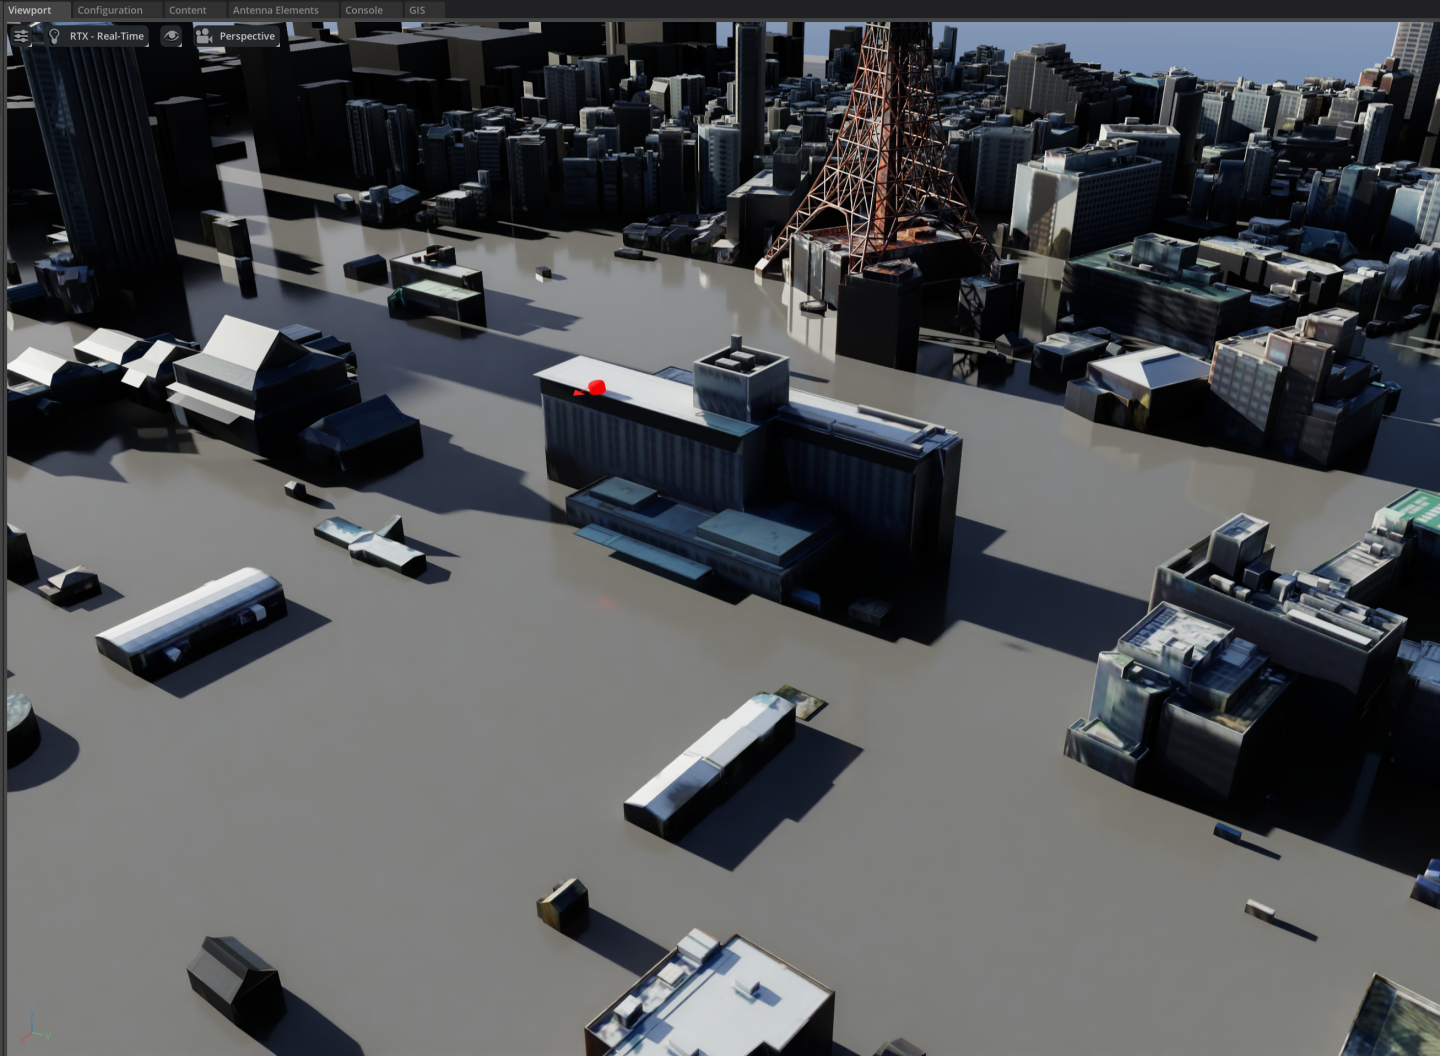
click the Generate UEs icon in the toolbar

click the Start UE Mobility icon
This will start a simulation and update the graphical interface as in the figure below.
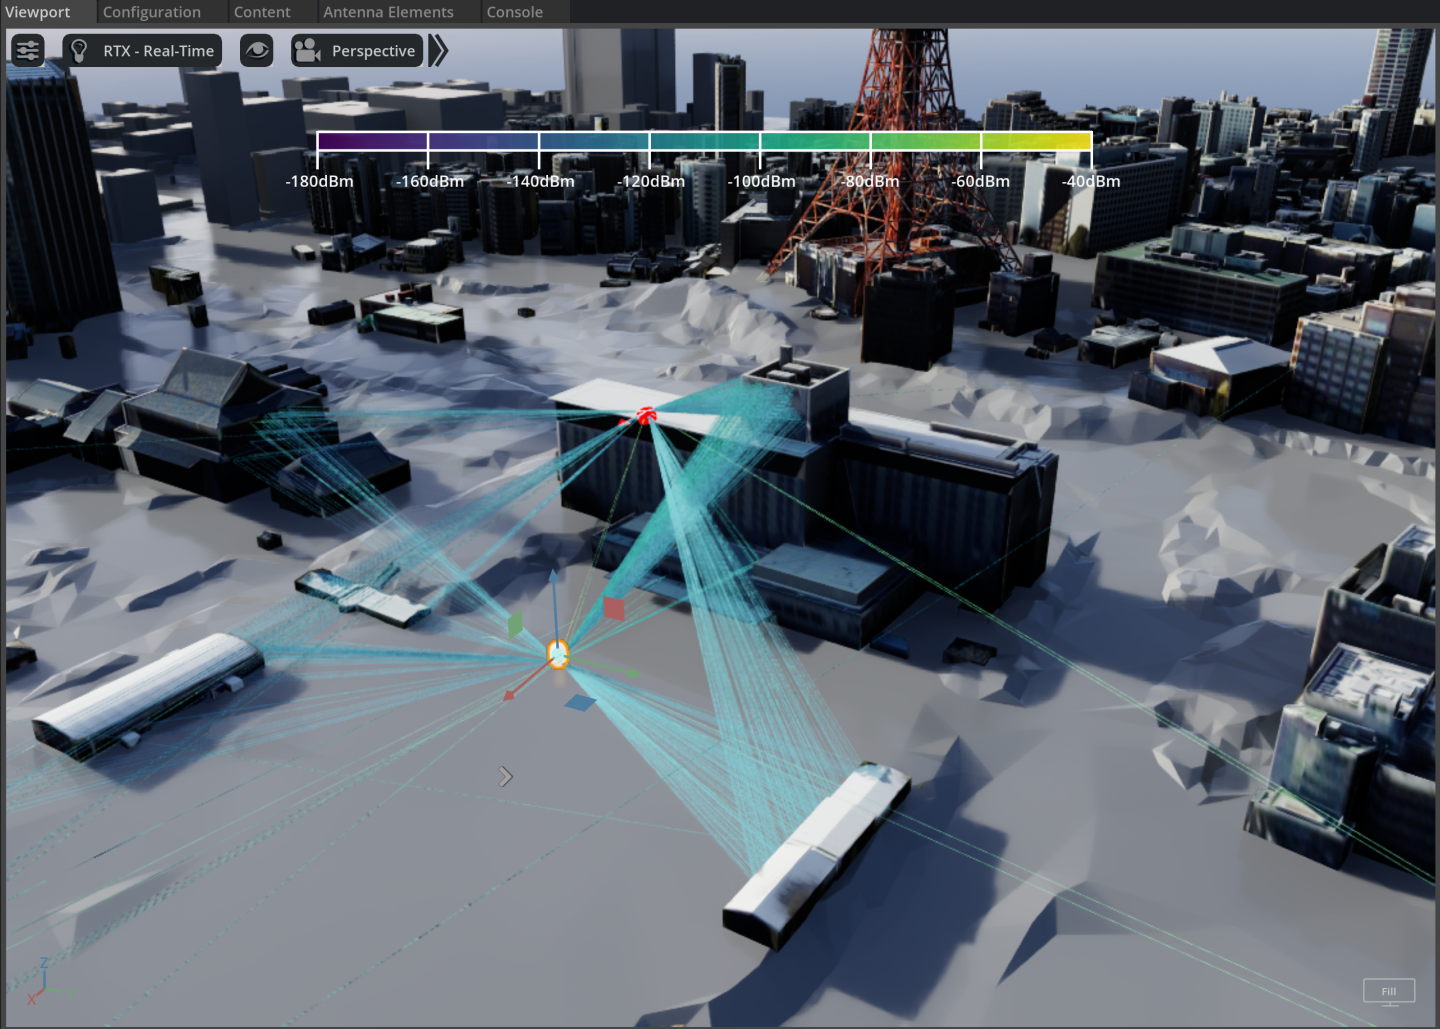
By clicking on the Play button in the toolbar, we can then inspect the evolution of the mobility of the UE and the corresponding rays that illustrate how the radiation emitted by the RU reaches the UE.