14.2. Clara Dashboard Render Service
The Render Service web application enables viewing of datasets from your pipeline and a viewer component that allows live interaction against the content of a dataset; rotation, orbit and pan.
You must use Chrome web browser to access the web interface on your local machine via its local IP address or localhost on port 8080; http://localhost:8080.
14.2.1.1. Minimum Requirement
- Google Chrome - Version 74.0.3729.169 (Official Build) (64-bit)
14.2.1.2. Starting the Service
The Render Service is comprised of three different containers that work together to provide the web application:
- Dashboard: web application and API server.
- Render Server: handles live stream and rendering of the datasets.
- Dataset Service: currently only support mhd, raw, json and meta files.
You can start all three containers by using the command below:
clara render start
To stop the service:
clara render stop
14.2.2.1. Notifications
A visual component located at the bottom left to inform the user of the response status of an action that was taken against the interface.
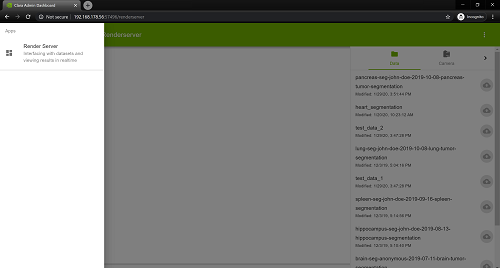
14.2.2.2. Navigation Menu
The navigation drawer menu can be toggled from the top left menu icon and allows you to switch between available applications.
14.2.2.3. Application Menu
Functionalities unique to an application can be toggled from the top right more icon.
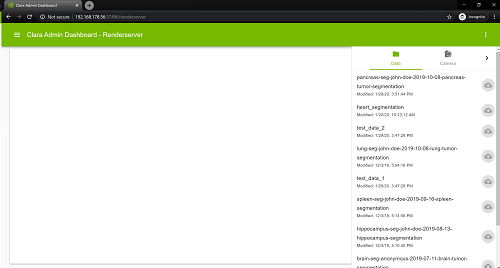
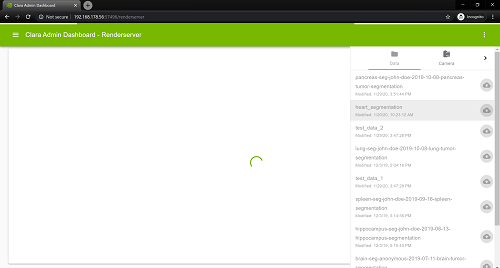
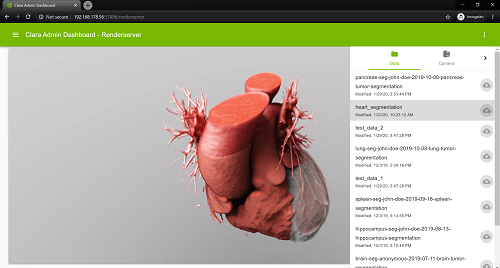
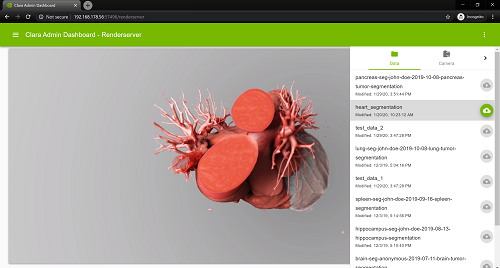
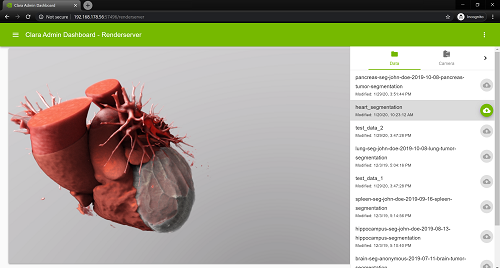
You can start a live interaction stream by selecting an item from the dataset list from the Render Service application menu on the right.
At the right side of the dataset name there is a button to upload changes of the dataset render settings to the dataset service. When newly loading the dataset the button is inactive. Any changes to the dataset render settings (e.g. view position, camera settings, transfer function settings) activate the button. When the button is pressed the dataset render settings are uploaded to the dataset service database.
14.2.3.1. Live Stream Interactions
The mouse or touch input can be used to provide direction against the content of a live stream (when using the mouse the mouse wheel is required for panning). The mouse cursor or touch input must remain within the bound of the live stream.
14.2.3.1.1. Orbit
You can rotate the camera view by using the left mouse click against the live stream and dragging the mouse cursor, or by using a single finger on a touch display and moving it. This allows for rotations against the x and y axis.
14.2.3.1.2. Zoom
You can zoom in or out by using the mouse scroll. On a touch capable device you can zoom by using a pinch gesture; use two fingers, increase the distance between the fingers to zoom in, decrease the distance to zoom out.

14.2.3.1.3. Pan
You can pan by clicking the mouse wheel (middle) and dragging the mouse cursor against the live stream. On a touch capable device zou can pan by using the pan gesture; use two fingers and move both in the same direction. This allows the content to be moved up, down, left and right.
14.2.3.1.4. Slice Selection
In slice render mode you can select the slice to be displayed by using the left mouse click against the live stream and dragging the mouse cursor, or by using a single finger on a touch display and moving it.
14.2.3.1.5. Oblique Slice Rendering
When in oblique slice rendering press and hold the shift key to orbit.
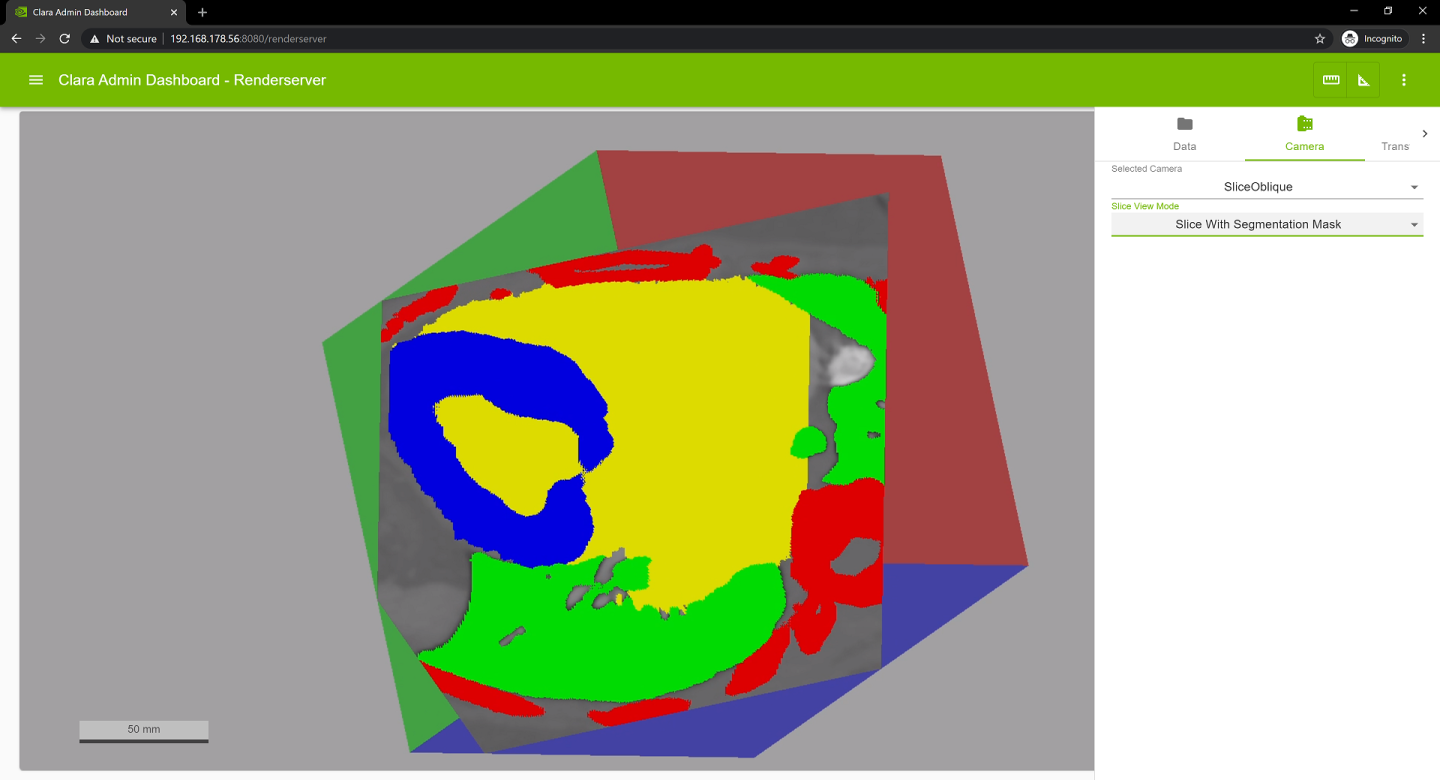
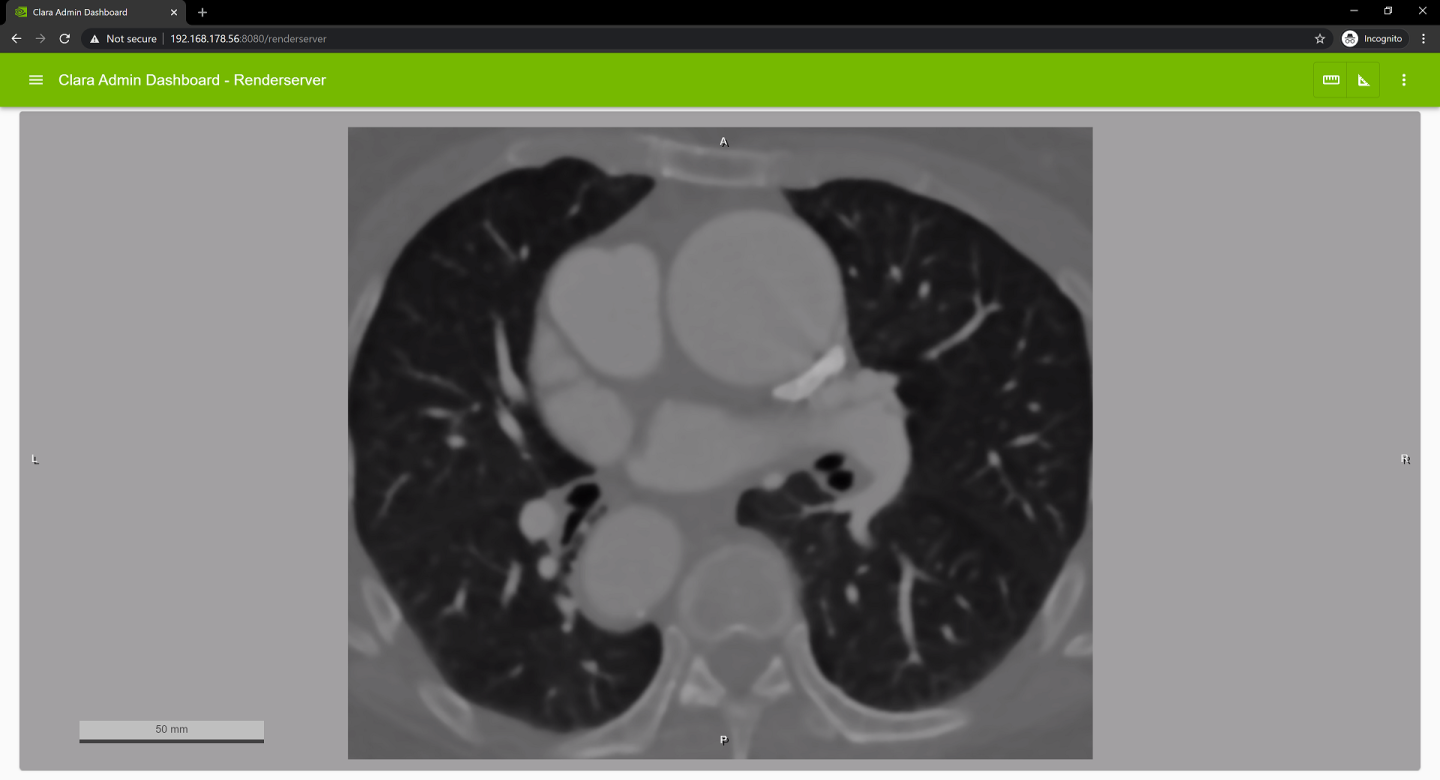
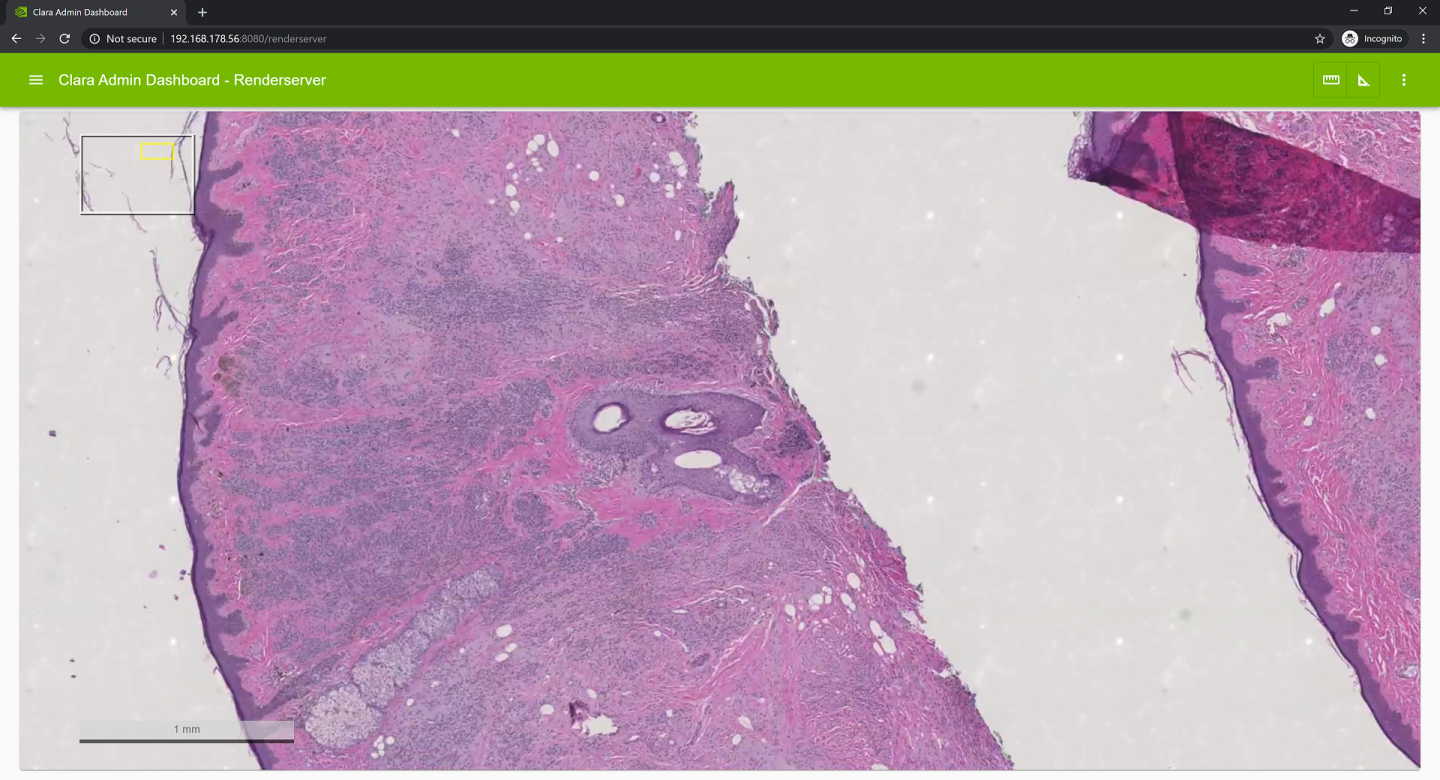
14.2.3.1.6. Rendering of 2D image data
When rendering 2D image data and multi-resolution digital pathology data a region view is displayed in the top left and scale bar in the bottom left corner.
For large multi-resolution digital pathology images data is loaded asynchronously on demand. When data is fetched a spinner is displayed in the lower left corner.
Panning and zooming is supported in that mode.
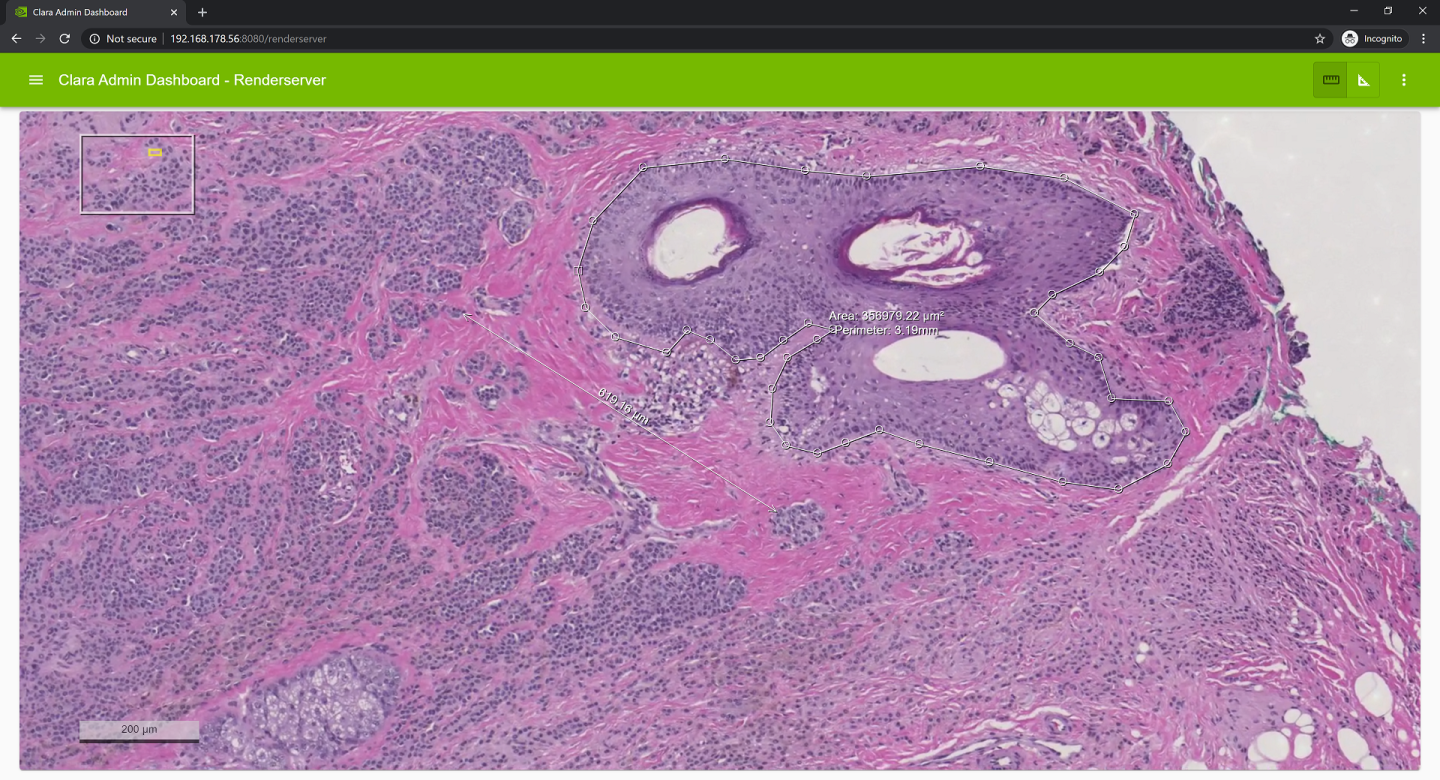
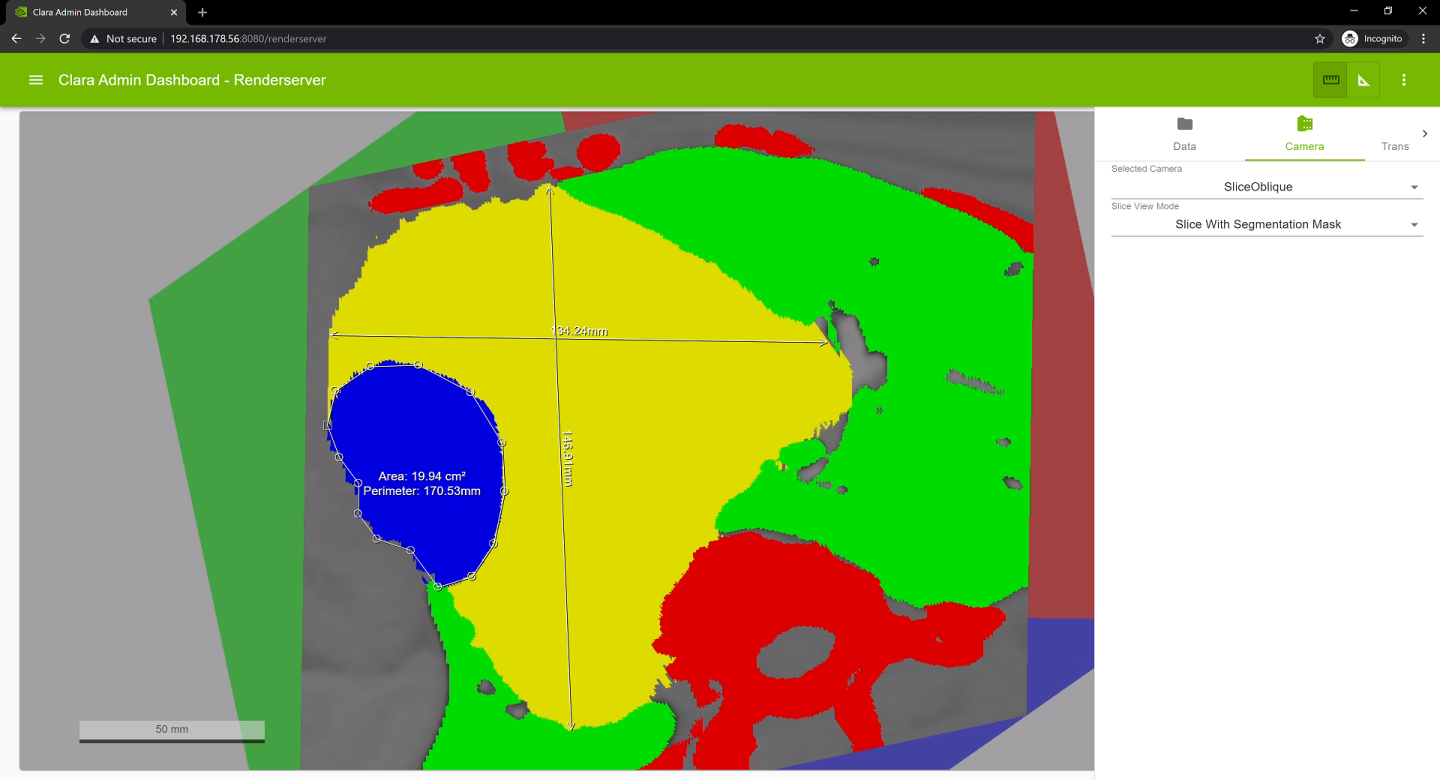
14.2.3.1.7. Measuring in 2D image data views
2D image views such as slice, oblique slice, 2D image and multi-resolution digital pathology data support measuring of distances and areas in physical units. To toggle the measurement mode click on one of the measure buttons on the right of the toolbar.
When in measurement mode the view can’t be changed, e.g. panning, zooming and rotating is diabled.
Start a distance measurement by selecting the ‘Measure Length’ button and then pressing and holding the left mouse button at the position where the measurement should be started, move to the end point and release the mouse button. The measured distance is continuously updated while doing the measurement.
Start an area measurement by selecting the ‘Measure Area’ button and then clicking with the left mouse button at the position where the measurement should be started. Move to the next point and press the left mouse button again to add another point. At least three points are needed for an area measurement. To close the area either press the middle mouse button or left click on the starting point (marked with a rectangle). The area and perimeter is updated while doing the measurement.
Measuring is also supported using a touch display.
The files required by each dataset is located at /clara-io/datasets/ as seen in the directory tree below. You must name your configuration json and meta file as config.json and config.meta.
            sdk/DatasetService
├── datasets
│   ├── ct-wb-viz
│   │   ├── config.json
│   │   ├── config.meta
│   │   ├── highResCT.mhd
│   │   ├── highResCT.raw
│   │   ├── smoothmasks.seg.mhd
│   │   └── smoothmasks.seg.raw
14.2.4.1. Meta File
The configuration meta file is used to define basic information and configuration that a dataset should use:
- name
The name that will be used by the Render Service Interface - data
A list of data file names and data order of that files- name
File name - order
A string defining the data organization and format. Each character defines a dimension starting with the fastest varying axis and ending with the slowest varying axis. For example a 2D color image is defined as ‘CXY’, a time sequence of density volumes is defined as ‘DXYZT’.
Each character can occur only once. Either one of the data element definition characters ‘C’, ‘D’ or ‘M’ and the ‘X’ axis definition has to be present.- X: width
- Y: height
- Z: depth
- T: time
- I: sequence
- C: RGB(A) color
- D: densisty
- M: mask
- name
- settings
JSON configuration file that defines rendering settings to be used with dataset.
The density and seg_masks properties are deprecated and should no longer be used.
            {
    "name": "liver segmentation",
    "data": [
      {
        "file": "niiToMhd.mhd",
        "order": "DXYZ"
      },
      {
        "file": "niiToMhd.mask.mhd",
        "order": "MXYZ"
      }
    ],
    "settings": "config.json"
}
14.2.4.2. JSON File
The JSON file defines the default rendering settings (Lights, Camera, Transfer Function, etc) that a dataset will use by the Render Server when loaded.
            {
    "BackgroundLight": { ... },
    "Camera": {
        "eye": {
         "x": 85.31266780987673,
         "y": 936.6606803456496,
         "z": -93.52363814878406
        },
        "fieldOfView": 30,
        "lookAt": {
         "x": -10.693446599964338,
         "y": 25.72413336774661,
         "z": 20.531344844723407
        },
        "pixelAspectRatio": 1,
        "up": {
         "x": -0.019490319079825145,
         "y": -0.12218998118626274,
         "z": -0.9923153409878966
        }
    },
    ...,
}
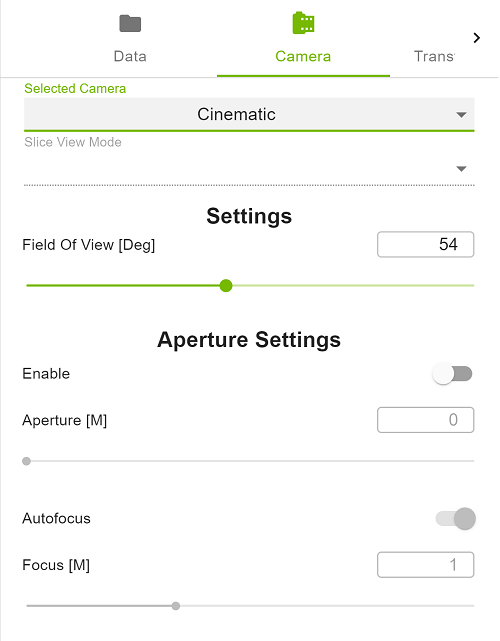
The Camera tab allows for interactions with the viewport’s Camera Setting that cannot be achieved by the mouse.
- Selected Camera
Changes the currently selected camera - Slice View Mode
Changes the view mode when rendering slices - Settings
- Field of View [Deg]
Controls how zoomed in or out the viewport should be
- Field of View [Deg]
- Aperture Settings
- Enable
Enable the use of an aperture value, if disabled use a pin-hole camera model - Aperture [M]
Increase or decrease the aperture value - Autofocus
Enables Autofocus, the focus distance is set to the distance between the camera and the object - Focus[M]
Increase of decrease the focus distance
- Enable
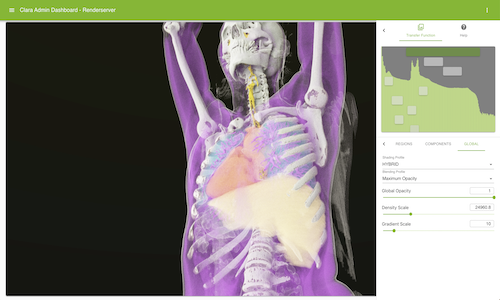
A collection of sub-menus and input forms to help the user interact with Transfer Functions.
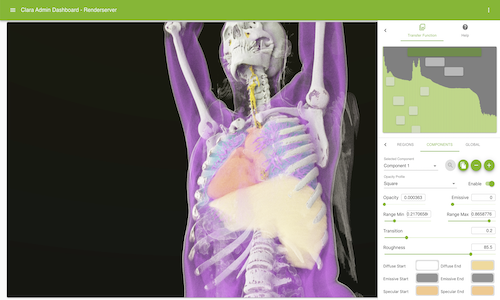
14.2.6.1. Histogram
This section is a static visual component to help better understanding of the current viewport’s lighting. Overlay buttons will dynamically render based on the dataset select and correspond to the number of components is available. You can drag an overlay button to increase or decrease its range min and max value.
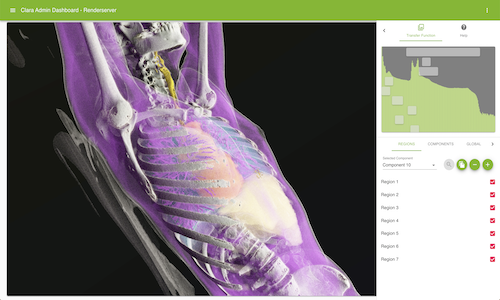
14.2.6.2. Regions
Allows users to view the number of regions for a given component. Users may duplicate, add or remove a component from either the Regions or Component sub-tabs. However, at least 1 component must be retained.
Duplicate Component

Remove Component

Add Component

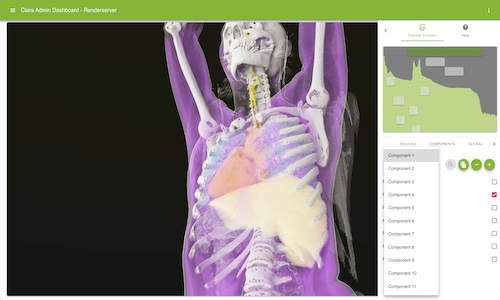
14.2.6.3. Components
14.2.6.4. Globals
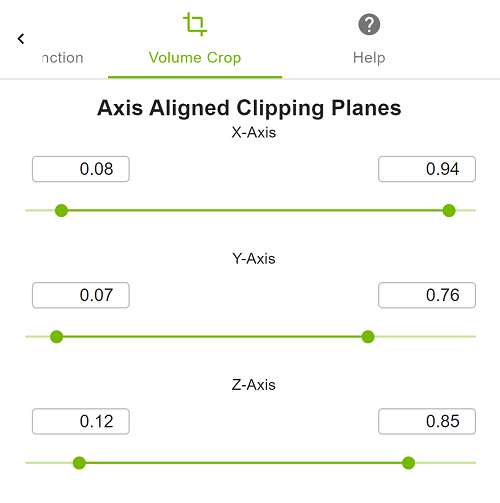
This tab allows the modification of volume crop settings.
- Axis Aligned Clipping planes
Allows changes to the minimum and maximum values of the axis aligned volume clipping planes.
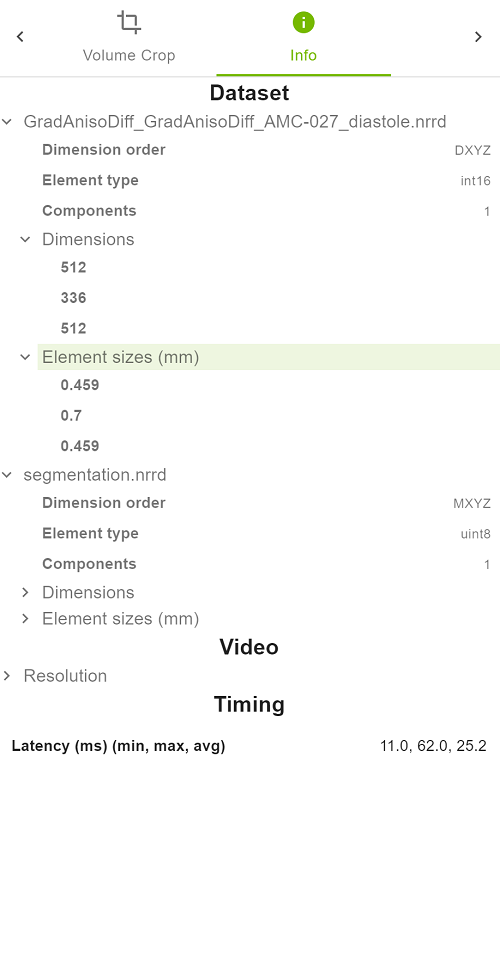
The Info tab provides information on the selected dataset, the video stream and timing information. The timing information is updated when the camera view is changed and shows the delay between sending a camera request and the respective updated video frame delivered.
The Help tab provides a brief description of valid user inputs against the viewport.
