Motherboard Tray - Removal and Installation#
You will need to completely remove the motherboard tray from the server to service the following components.
DIMMs (either adding or replacing)
Trusted Platform Module (TPM)
Preparing the Motherboard for Service#
Before pulling the motherboard out of the system, the system must be shut down and cables must be removed from the system.
Caution
Wear an ESD strap during any procedure that involves touching electronic components.
Shut down the system.
To avoid misconfigurations, label all the cables before unplugging them.
Label all network, monitor, and USB cables.
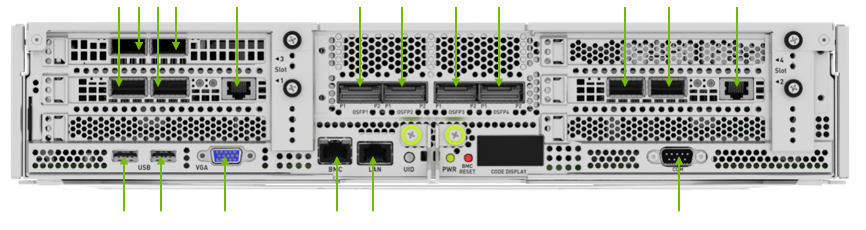
Unplug all power cords.
Unplug all network, monitor, and USB cables.
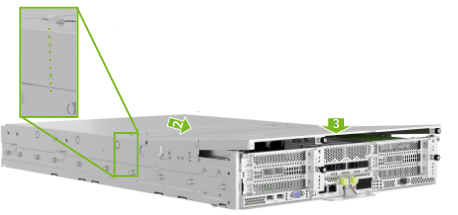
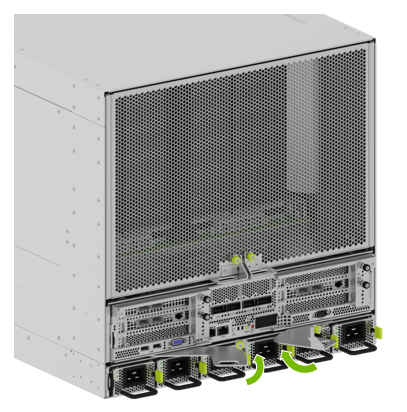
Release the Motherboard#
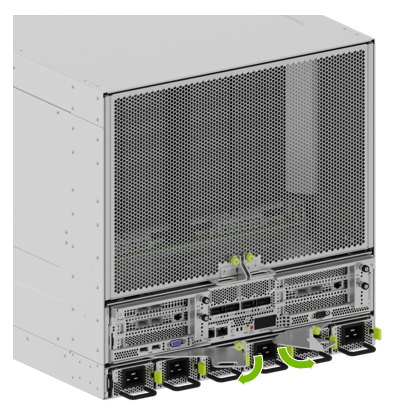
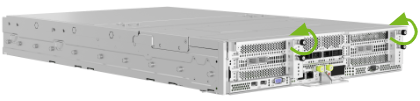
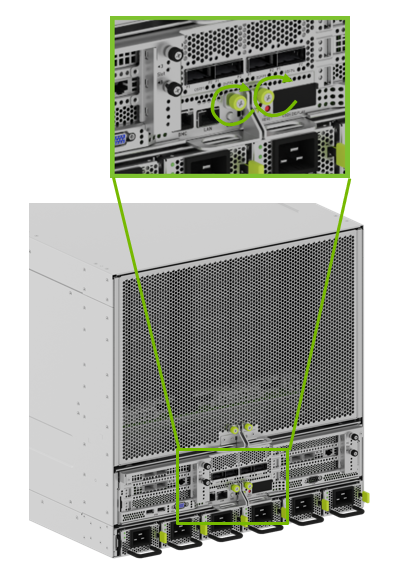
Unlock the motherboard by loosening the captive screws that hold the ejection levers in place:

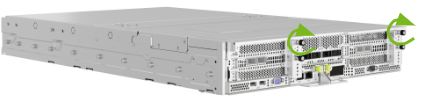
Pull the ejection levers to disengage the midplane connectors:
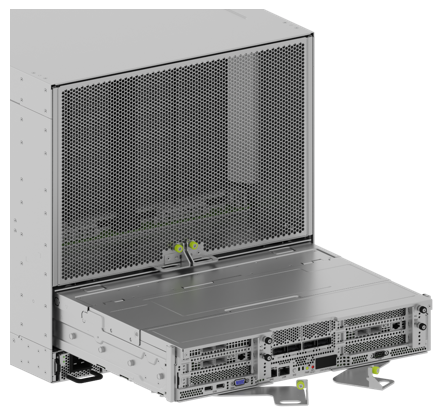
Pull the Motherboard from the Chassis#
Ensure that you have a solid, flat surface to rest the motherboard tray.
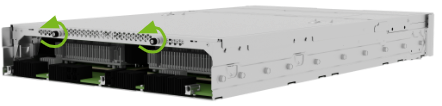
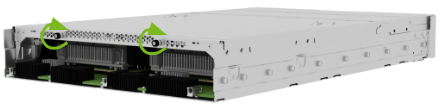
Pull the motherboard tray out until the locking mechanism in the lid engages and prevents further movement.
Push down on the buttons identified in the following figure to release the motherboard tray:
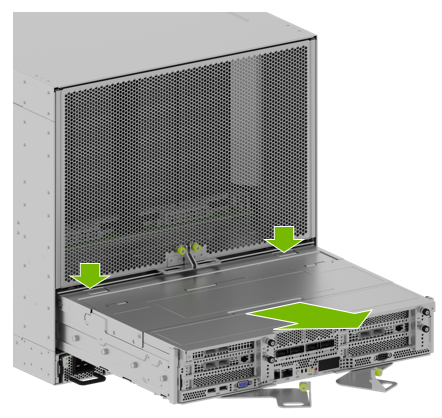
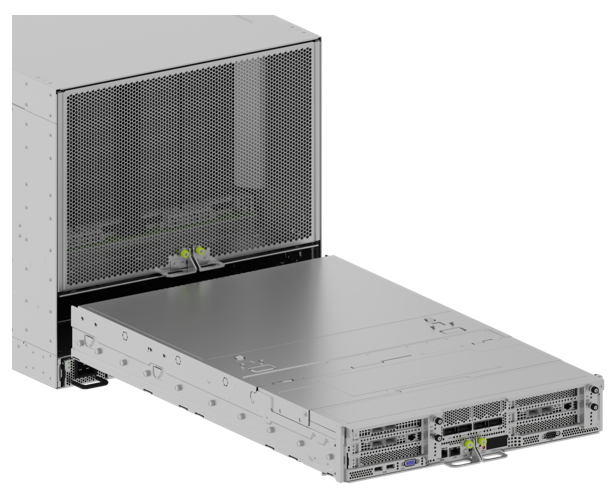
Pull the motherboard tray out of the chassis completely:
Do not hold the motherboard tray by the ejection handles. The handles can bend or break.
Be careful with the connectors at the back of the module to prevent damage.
Place the motherboard tray on a solid, flat surface.
Remove the Motherboard Tray Lid#
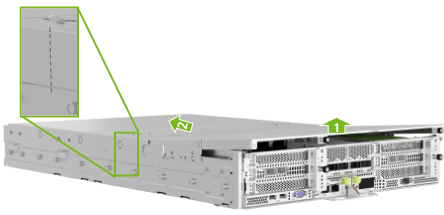
Loosen the two screws on the port side of the motherboard tray, as shown in the following figure:
Loosen the two screws on the connector side of the motherboard tray, as shown in the following figure:
To remove the tray lid, perform the following steps:
Lift on the connector side of the tray lid so that you can push it forward to release it from the tray.
After the triangular markers align, lift the tray lid to remove it.
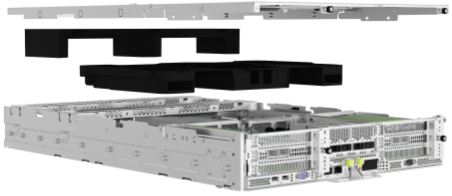
(Optional) Depending on the procedure being performed, remove the air baffles from the motherboard.
Close the Motherboard Tray Lid#
Before you perform the following steps, ensure that all components are installed correctly so that they do not interfere with the air baffles or tray lid.
Insert the motherboard tray baffles and then place the tray lid over the motherboard tray.
To close the tray lid, perform the following steps:
Position the tray lid correctly by aligning the markers, as shown in the following figure.
Push the tray lid toward the I/O section of the tray until the folding section is flush.
Press the folding section down so that the thumbscrews align with the screw holes.
Tighten the two lid screws on the port side of the motherboard tray, as shown in the following figure:
Tighten the two lid screws on the connector side of the motherboard tray, as shown in the following figure:
Insert the Motherboard Tray into the Chassis#
Insert the motherboard tray into the chassis partially. Open the ejection levers before you insert the motherboard tray into the chassis:
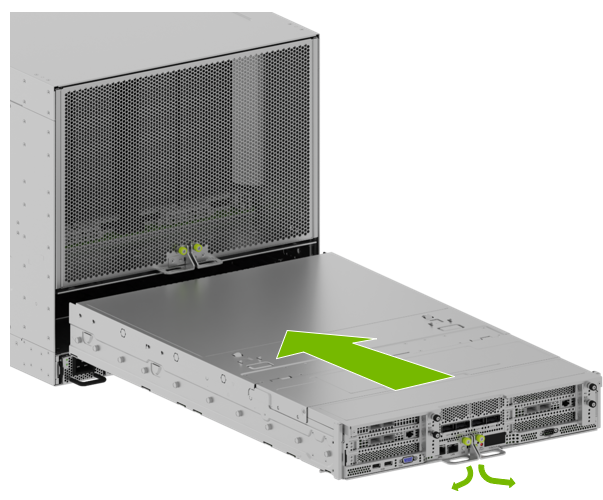
Push the motherboard tray into the chassis until the levers on both sides engage with the sides:
Insert the Motherboard#
Use the levers to engage the midplane connectors:
After the levers are fully closed, tighten the green thumbscrews to hold the ejection levers in place:
Finalize Motherboard Closing#
Use the labels on the cables to reconnect them to the correct ports.
Install all power cords.
Power on the system.