Power Supply Replacement#
Power Supply Replacement Overview#
This is a high-level overview of the procedure to replace a power supply on the NVIDIA DGX™ B200 system.
Identify the broken power supply by the amber color LED or the power supply number.
Request a replacement from NVIDIA Enterprise Support.
Remove the locking power cord from the power supply.
Replace the power supply.
Install the locking power cord.
Confirm that both LEDs light up green on the power supply.
Ensure the BMC reports no power supply failures.
If requested, send the failed unit to NVIDIA Enterprise Support using the packaging provided.
Identifying the Failed Power Supply#
You can identify a failed power supply using any of the following methods:
Run the
sudo nvsm show healthcommand to identify the failed power supply.Access the BMC Web User Interface and select Sensors from the left-side navigation menu bar.
From the console, run the
ipmitool sdr | grep -i psucommand.Note which power supply has no temperature reading or an irregular output reading (close to or equal to zero).
Contact NVIDIA Enterprise Support to request a replacement. The team might ask for this or similar information to confirm that the power supply needs to be replaced.
The nvsm command output and the BMC web user interface identify each power supply as PSUx,
where x is 0 to 5.
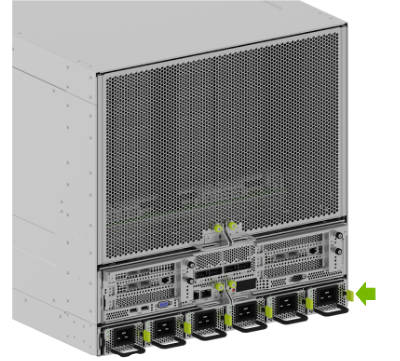
The following diagram shows the physical location of each PSU.

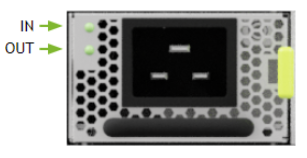
Viewing the Power Supply LEDs
Access the rear of the system and view the status LEDs while the system is powered on.
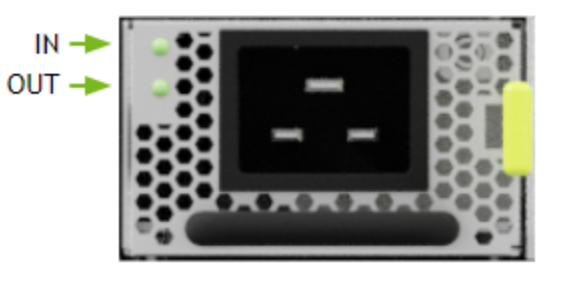
If the PSU is good, both LEDs should be solid green. If either of the LEDs is not green or blinks, contact NVIDIA Enterprise Support to troubleshoot the issue.
Running the show psus Command
Run the following command to display information about the PSUs:
sudo nvsm show psus
The output shows information for each PSU. Look for any that do not report
Status_Health=OK.
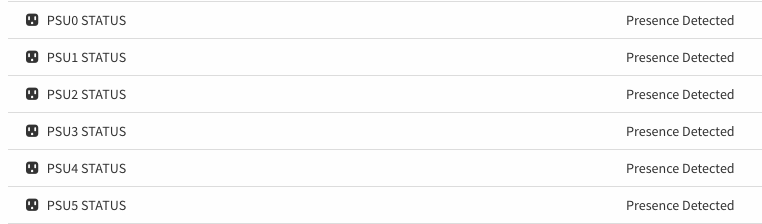
Viewing PSUs from the BMC Web User Interface
Access the BMC web user interface and select Sensors from the left-side navigation menu bar.
Confirm PSU presence:
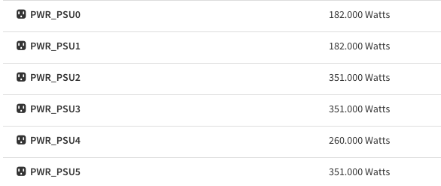
Confirm power output:
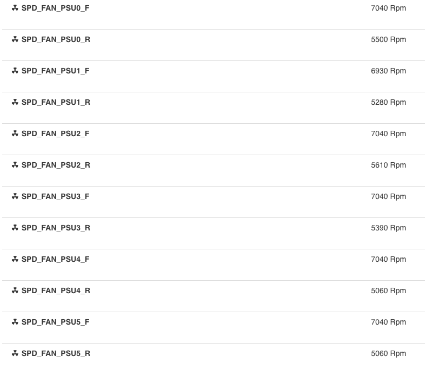
Confirm fan speeds:
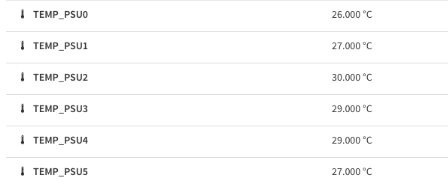
Confirm the PSU temperature readings:
Run the
ipmitoolcommand to view information about the PSUs:sudo ipmitool sdr | grep -i psu
Look for power supplies with no temperature or output reading close to or equal to zero.
Determining the Manufacturer
Important
All PSUs in the system must be from the same manufacturer.
Run the following
nvsmcommand to determine the PSU manufacturer:sudo nvsm show /chassis/localhost/power/PSUx
Replace x in the preceding command with the PSU identifier.
Example output:
The following output is for PSU0 and shows that the manufacturer is Delta.
/chassis/localhost/power/PSU0
Properties:
    FirmwareVersion = 02.02.02.01.02.02
    LastPowerOutputWatts = 0
    Manufacturer = Delta
    MemberId = PSU0
    Model = ECD16020137
    Name = PSU0
    Oem_PSU_Error = Presence detected| Power Supply AC Lost| AC Lost or out-of-range
    PowerSupplyType = AC
    SerialNumber = DTHTCT2233078
    Status_Health = Critical
    Status_State = Present
Targets:
Verbs:
    cd
    show
Obtain the replacement PSU (of the same manufacturer) from NVIDIA Enterprise Support.
Preparing the Power Supply for Replacement#
After the new power supply arrives, look at the system and identify which needs to be replaced.
If the system is on, ensure at least five power supplies are fully functional by confirming the IN and OUT LEDs are lit green.
The system can operate at full capacity with five fully functional power supplies.
Note
If insufficient PSUs are present and working, power off the system.
Unplug the power cord from the failed power supply, following the instructions described in Locking Power Cords.
Before replacing the power supply, remove the locking power cable.
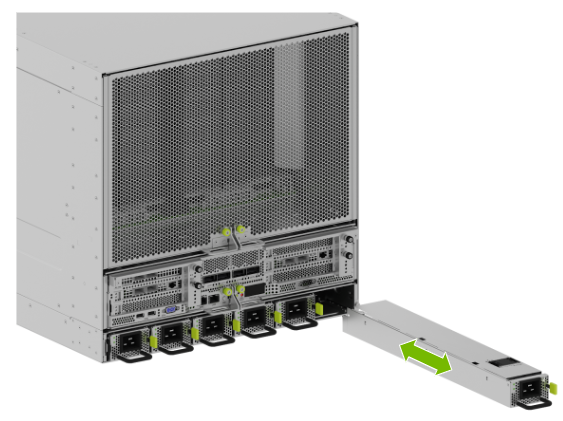
Replacing the Power Supply#
Remove the power supply by pressing the green tab to unlock the unit, and then pull on the black handle.
Caution
Once the power supply is out of the chassis, replace it with the new power supply in less than 30 seconds to avoid airflow disruptions in the system - especially if it is up and running.
Replace the power supply with the new unit making sure the green tab locks into place.
Install the locking power cord.
Confirm that both the IN and OUT LEDs light up green on the new power supply.
Ensure that the BMC Web UI reports no power supply failures.
Run the
sudo nvsm show healthcommand and confirm that the output does not report any errors.After the replacement is complete, return the failed power supply to NVIDIA Enterprise Support using the provided packaging.
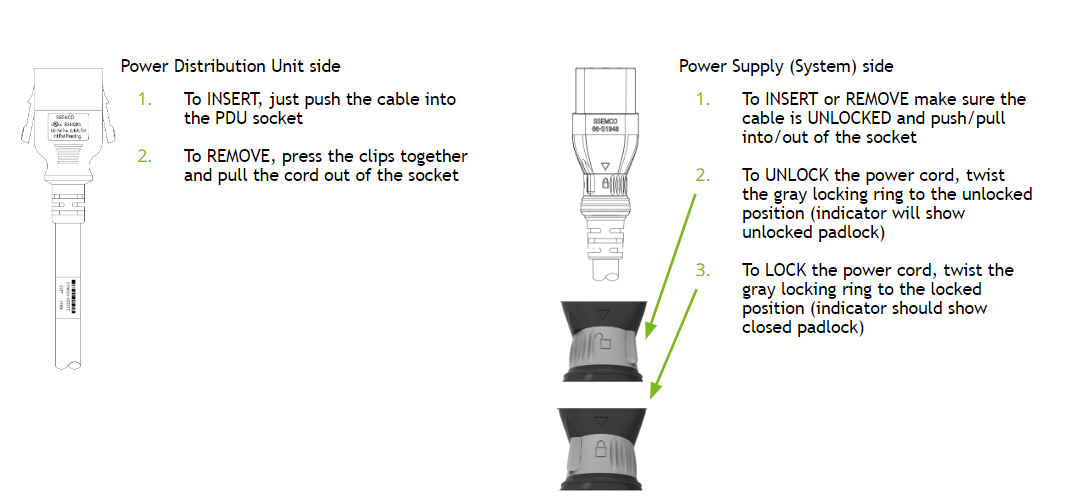
Locking Power Cords#
To use the twisting locking power cords that ship with the system:
On the power distribution unit (PDU) side
To insert, push the cable into the PDU socket.
To remove, press the clips on both sides simultaneously to pull the cord out of the socket.
On the power supply side
Ensure the cable is unlocked:
To insert, push the cable into the socket.
To remove, pull the cable out of the socket.
To unlock the power cord, twist the gray locking ring to the unlocked position.
The indicator will show an unlocked padlock.
To lock the power cord, twist the gray locking ring to the locked position.
The indicator will show a closed padlock.