Installing Software on IGX Thor Developer Kit Mini#
Applies to NVIDIA IGX Thor Developer Kit Mini and IGX Thor T5000 module.
This guide provides installation instructions for the IGX Thor Developer Kit Mini and IGX Thor T5000 module.
Note
IGX-SW 2.0 or later is required for the IGX Thor.
Installation Setup#
To install the IGX-OS, you will need:
A laptop or PC (Windows, Mac, or Linux) to create the USB flash drive.
A USB flash drive (16GB or larger)
A monitor connected to the DisplayPort (3) or HDMI port (4) of the Dev Kit.
Keyboard and mouse connected to the USB ports (1) of the Dev Kit.
Refer to the System Overview page for more details on the HW interfaces.
Download ISO Image#
IGX Software is also hosted for development and evaluation in the IGX Download Center.
Download IGX OS ISO: IGX Download Center → Downloads → IGX OS ISO.
Update Firmware#
Firmware Versions: IGX-SW 2.0 Release#
Firmware |
Version |
|---|---|
SMCU |
NFW 2.00.02 |
Boot Firmware (QSPI) |
38.5.0-gcid-44447062 (on UEFI screen) |
SMCU Firmware#
Note
The SMCU firmware on IGX Thor Developer Kit Mini comes pre-installed for the IGX-SW 2.0 and does not need to be updated. For future IGX-SW releases, refer to the Flashing SMCU FW over UART from host PC section for update instructions.
Boot Firmware (QSPI)#
Important
As part of the IGX OS installation, the Boot Firmware (QSPI) will also be updated automatically. Hence, there is no need to update it using the Jetson Linux BSP scripts.
For development using the Jetson Linux BSP, refer to the JetPack on IGX page.
IGX OS Installation#
Create a Bootable USB Flash Drive#
BalenaEtcher is a cross-platform tool to create bootable USB flash drives with an ISO. We recommend you use it to create an ISO installer of the IGX BaseOS.
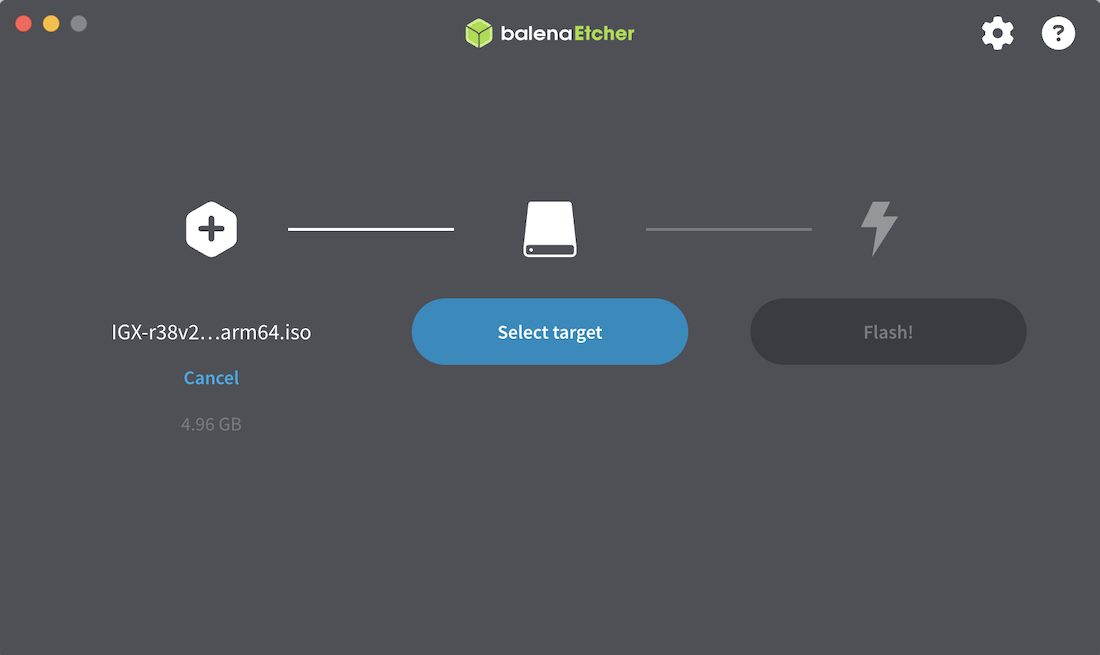
Figure 1. Use BalenaEtcher to create a BaseOS installer#
Complete the Installation#
Insert the USB flash drive to a USB A port on the IGX T5000 Developer Kit Mini.
Power on the unit, and boot the system. Press Esc when the NVIDIA logo appears to access the UEFI menu.
Enter the UEFI Boot Manager.
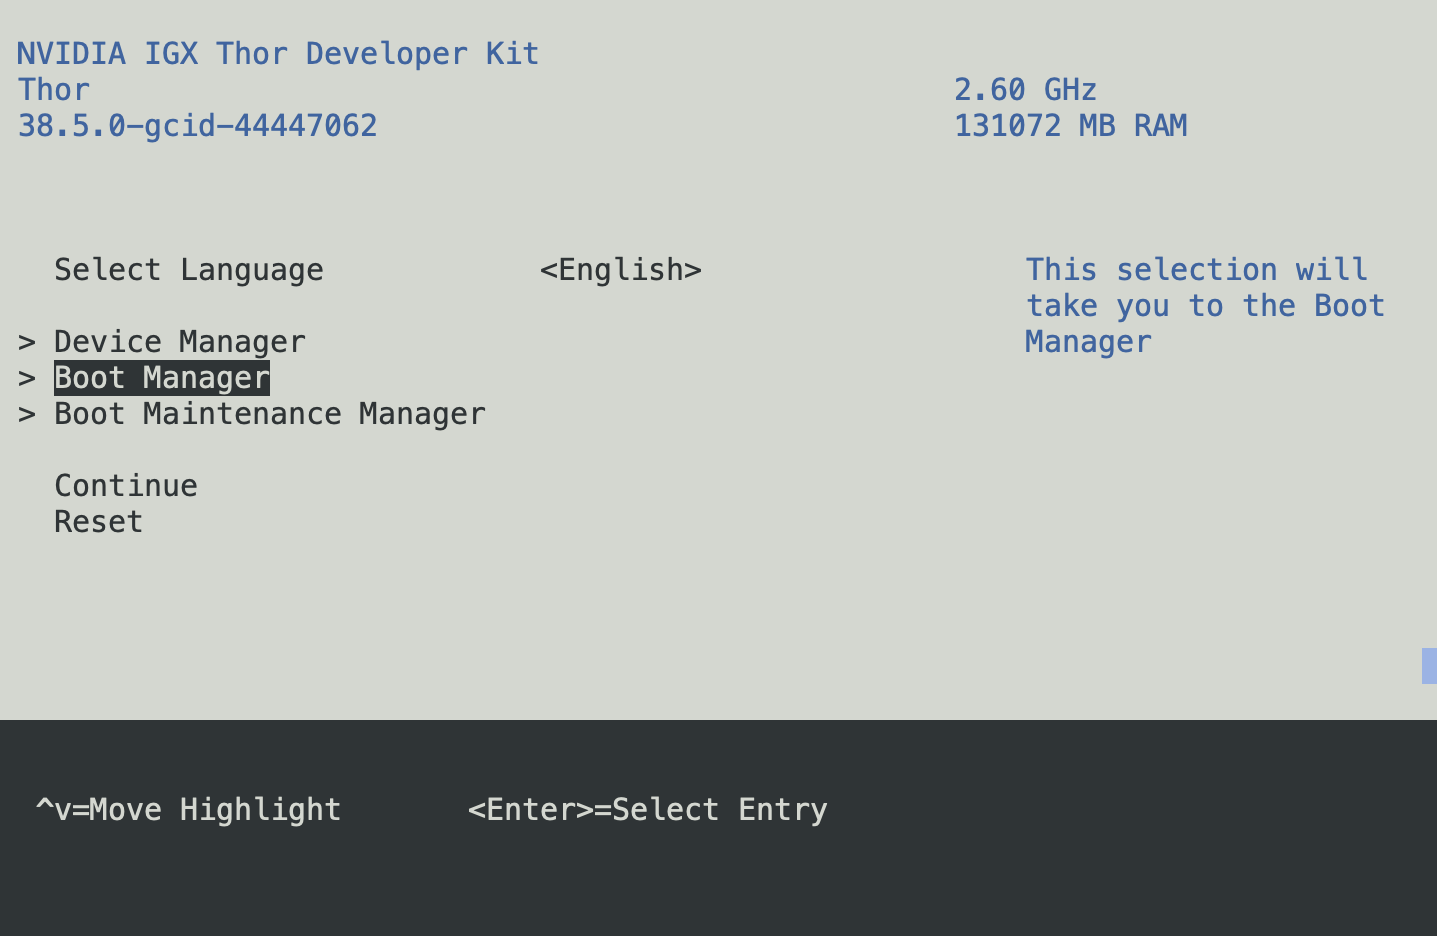
Figure 2. UEFI Boot Manager#
Select the USB volume name that corresponds to the inserted USB flash drive and boot the system from that drive.
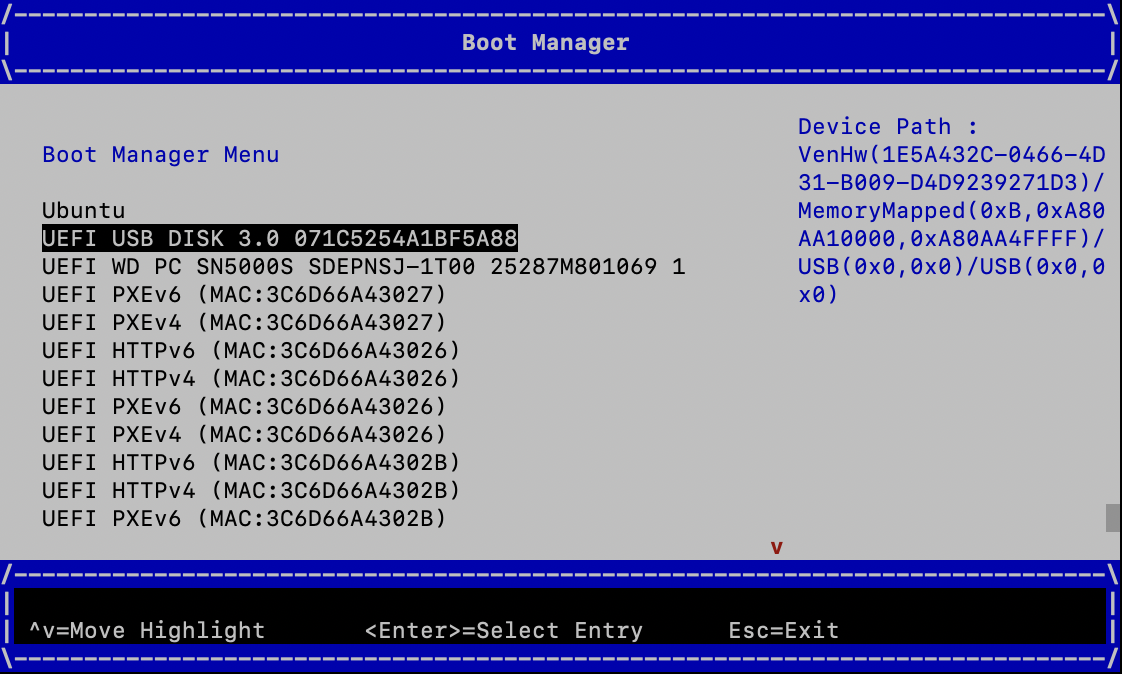
Figure 3. Boot from the USB flash drive#
Continue to the IGX Thor options in the GRUB menu.
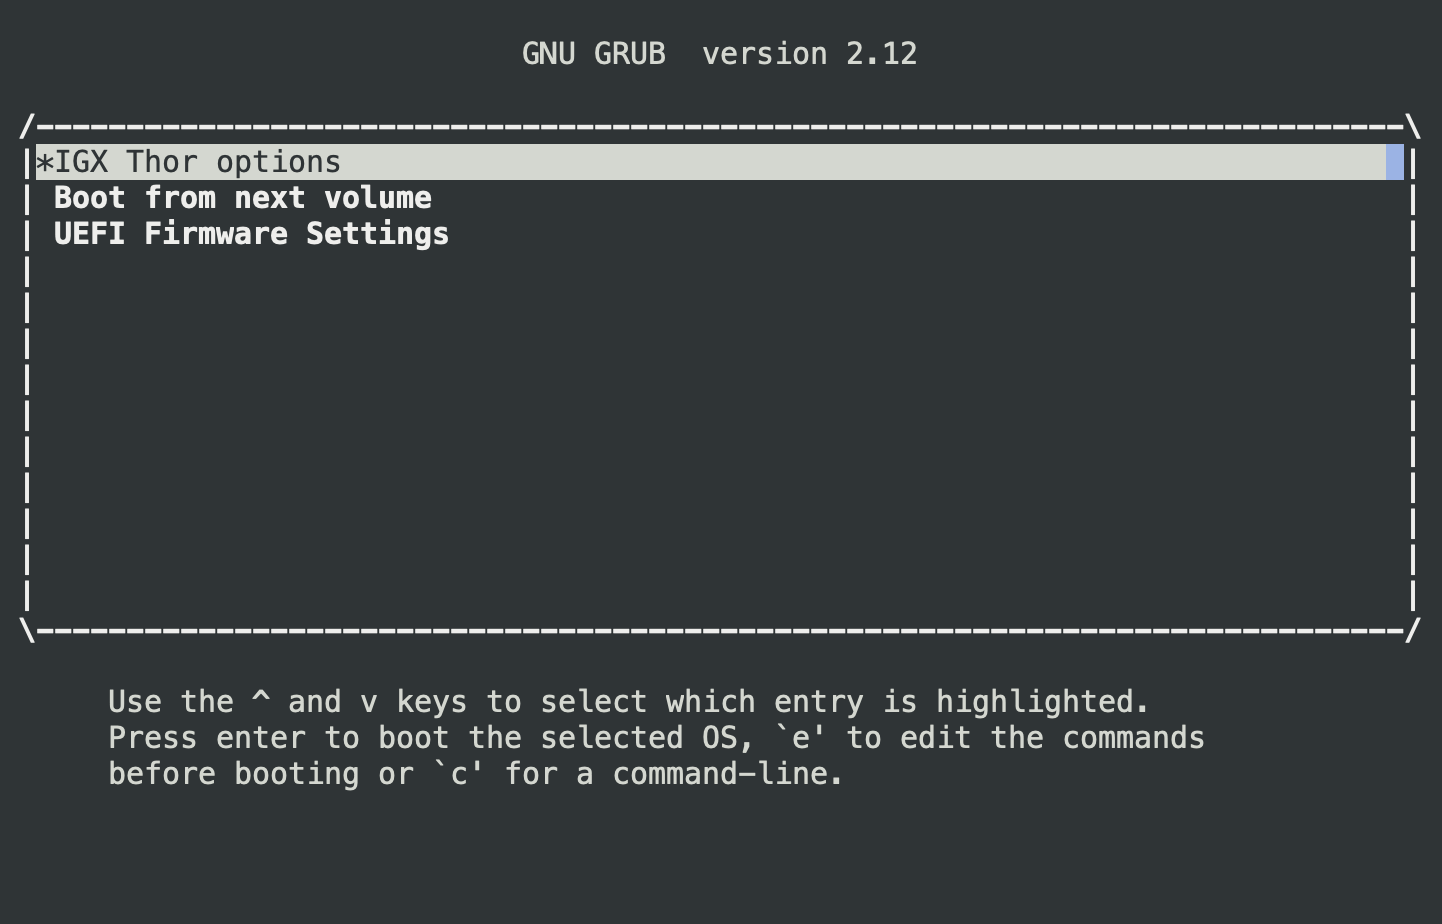
Figure 4. GRUB - IGX Thor options#
Choose Install IGX OS <version> with Real-Time Kernel to start the ISO installation. Depending on the speed of the USB flash drive, the installation will take about 20 minutes.
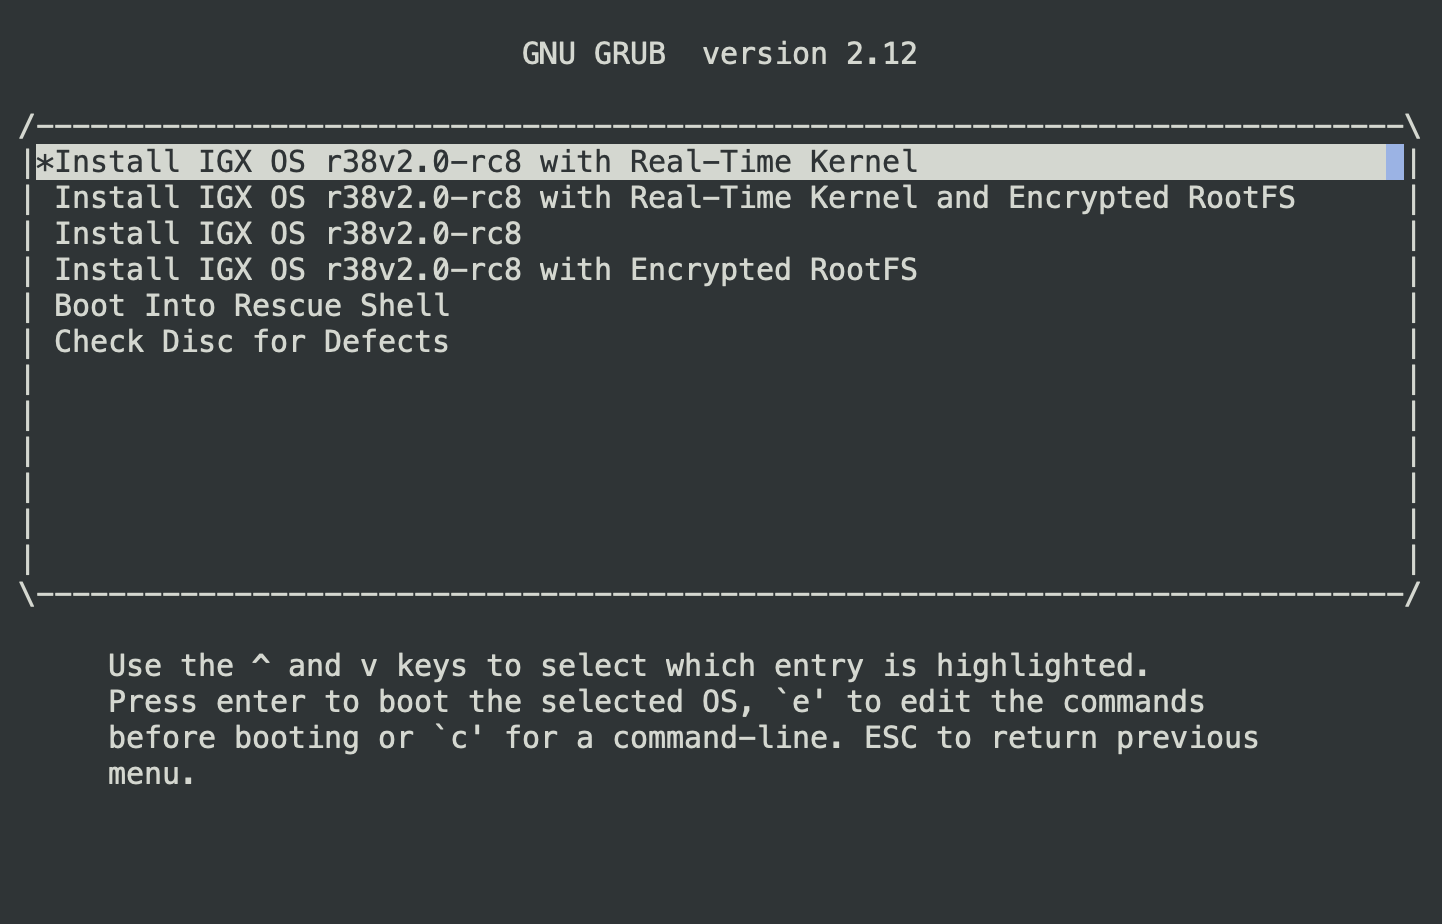
Figure 5. GRUB - Install IGX OS#
After installing the IGX ISO, the Dev Kit will reboot and it will update the Boot Firmware (QSPI) using the UEFI capsule update mechanism. The capsule update will happen twice (for A and B partitions respectively).
After the ISO installation completes, the OS will reboot automatically.
Complete the NVIDIA OOBE on the monitor to configure the system and create an account/password.
Install the NVIDIA AI Stack#
This section provides information on how to install the NVIDIA AI Stack.
Run APT update and install the compute components using the following commands:
sudo apt update
sudo apt install nvidia-igx-ai
Enable nvidia-cdi-refresh.service to refresh the CDI spec:
sudo systemctl enable --now nvidia-cdi-refresh.service
Refer to the CDI documentation for more details on the CDI spec and refresh service.
To specify the iGPU inside a container, pass the parameter
--device=nvidia.com/gpu=0while launching the container withdocker runcommand.