Installing Software on IGX Thor Developer Kit#
Applies to NVIDIA IGX Thor Developer Kit and IGX Thor T7000 board kit.
This guide provides installation instructions for the IGX Thor Developer Kit and IGX Thor T7000 board kit.
Note
IGX-SW 2.0 or later is required for the IGX Thor.
Installation Setup#
To install the IGX software, you will need:
A laptop or PC (Windows, Mac, or Linux) to create the USB flash boot drive and access the BMC WebUI.
A monitor connected to the iGPU DisplayPort of the Dev Kit. The iGPU DisplayPort is labeled as 4 in the External Interfaces diagram.
Keyboard and mouse connected to the USB ports of the Dev Kit.
Refer to the System Overview page for more details on the HW interfaces.
Download IGX OS ISO and Firmware Images#
IGX software images are hosted for development and evaluation in the IGX Download Center.
Download the IGX OS ISO: IGX Download Center → Downloads → IGX OS ISO.
Download the Firmware tarball: IGX Download Center → Downloads → Firmware (BMC, MCU, Bootloader….
Extract the tarball igx_fw_for_webui_update_<version>.tbz2 to get the following firmware images:
igx-bmc-apfw-non_erot.fwpkg
igx-bmc-apfw-erot.fwpkg
igx-thor-qspi-flash.fwpkg
smcu-flash.fwpkg
Set up your host to access the BMC#
To set up your host to access the BMC, follow these steps:
Connect your host machine and the Dev Kit with an Ethernet cable. Make sure to connect to the BMC port (5), the right side one of the two Ethernet ports.
On the host machine, assign static IP
192.168.1.1to the Ethernet interface connected to the Dev Kit.Test connection to the BMC default IP address
192.168.1.110with either SSH or ping.Open a web browser and navigate to
https://192.168.1.110to access the BMC WebUI.Login to the BMC WebUI.
Note
The default BMC username is “root” and password is “0penBmc”. The first character “0” is zero.
Refer to the Log in to the BMC section to access the BMC over SSH.
Update Firmware#
Login to the BMC WebUI.
Navigate to Operations → Firmware page.
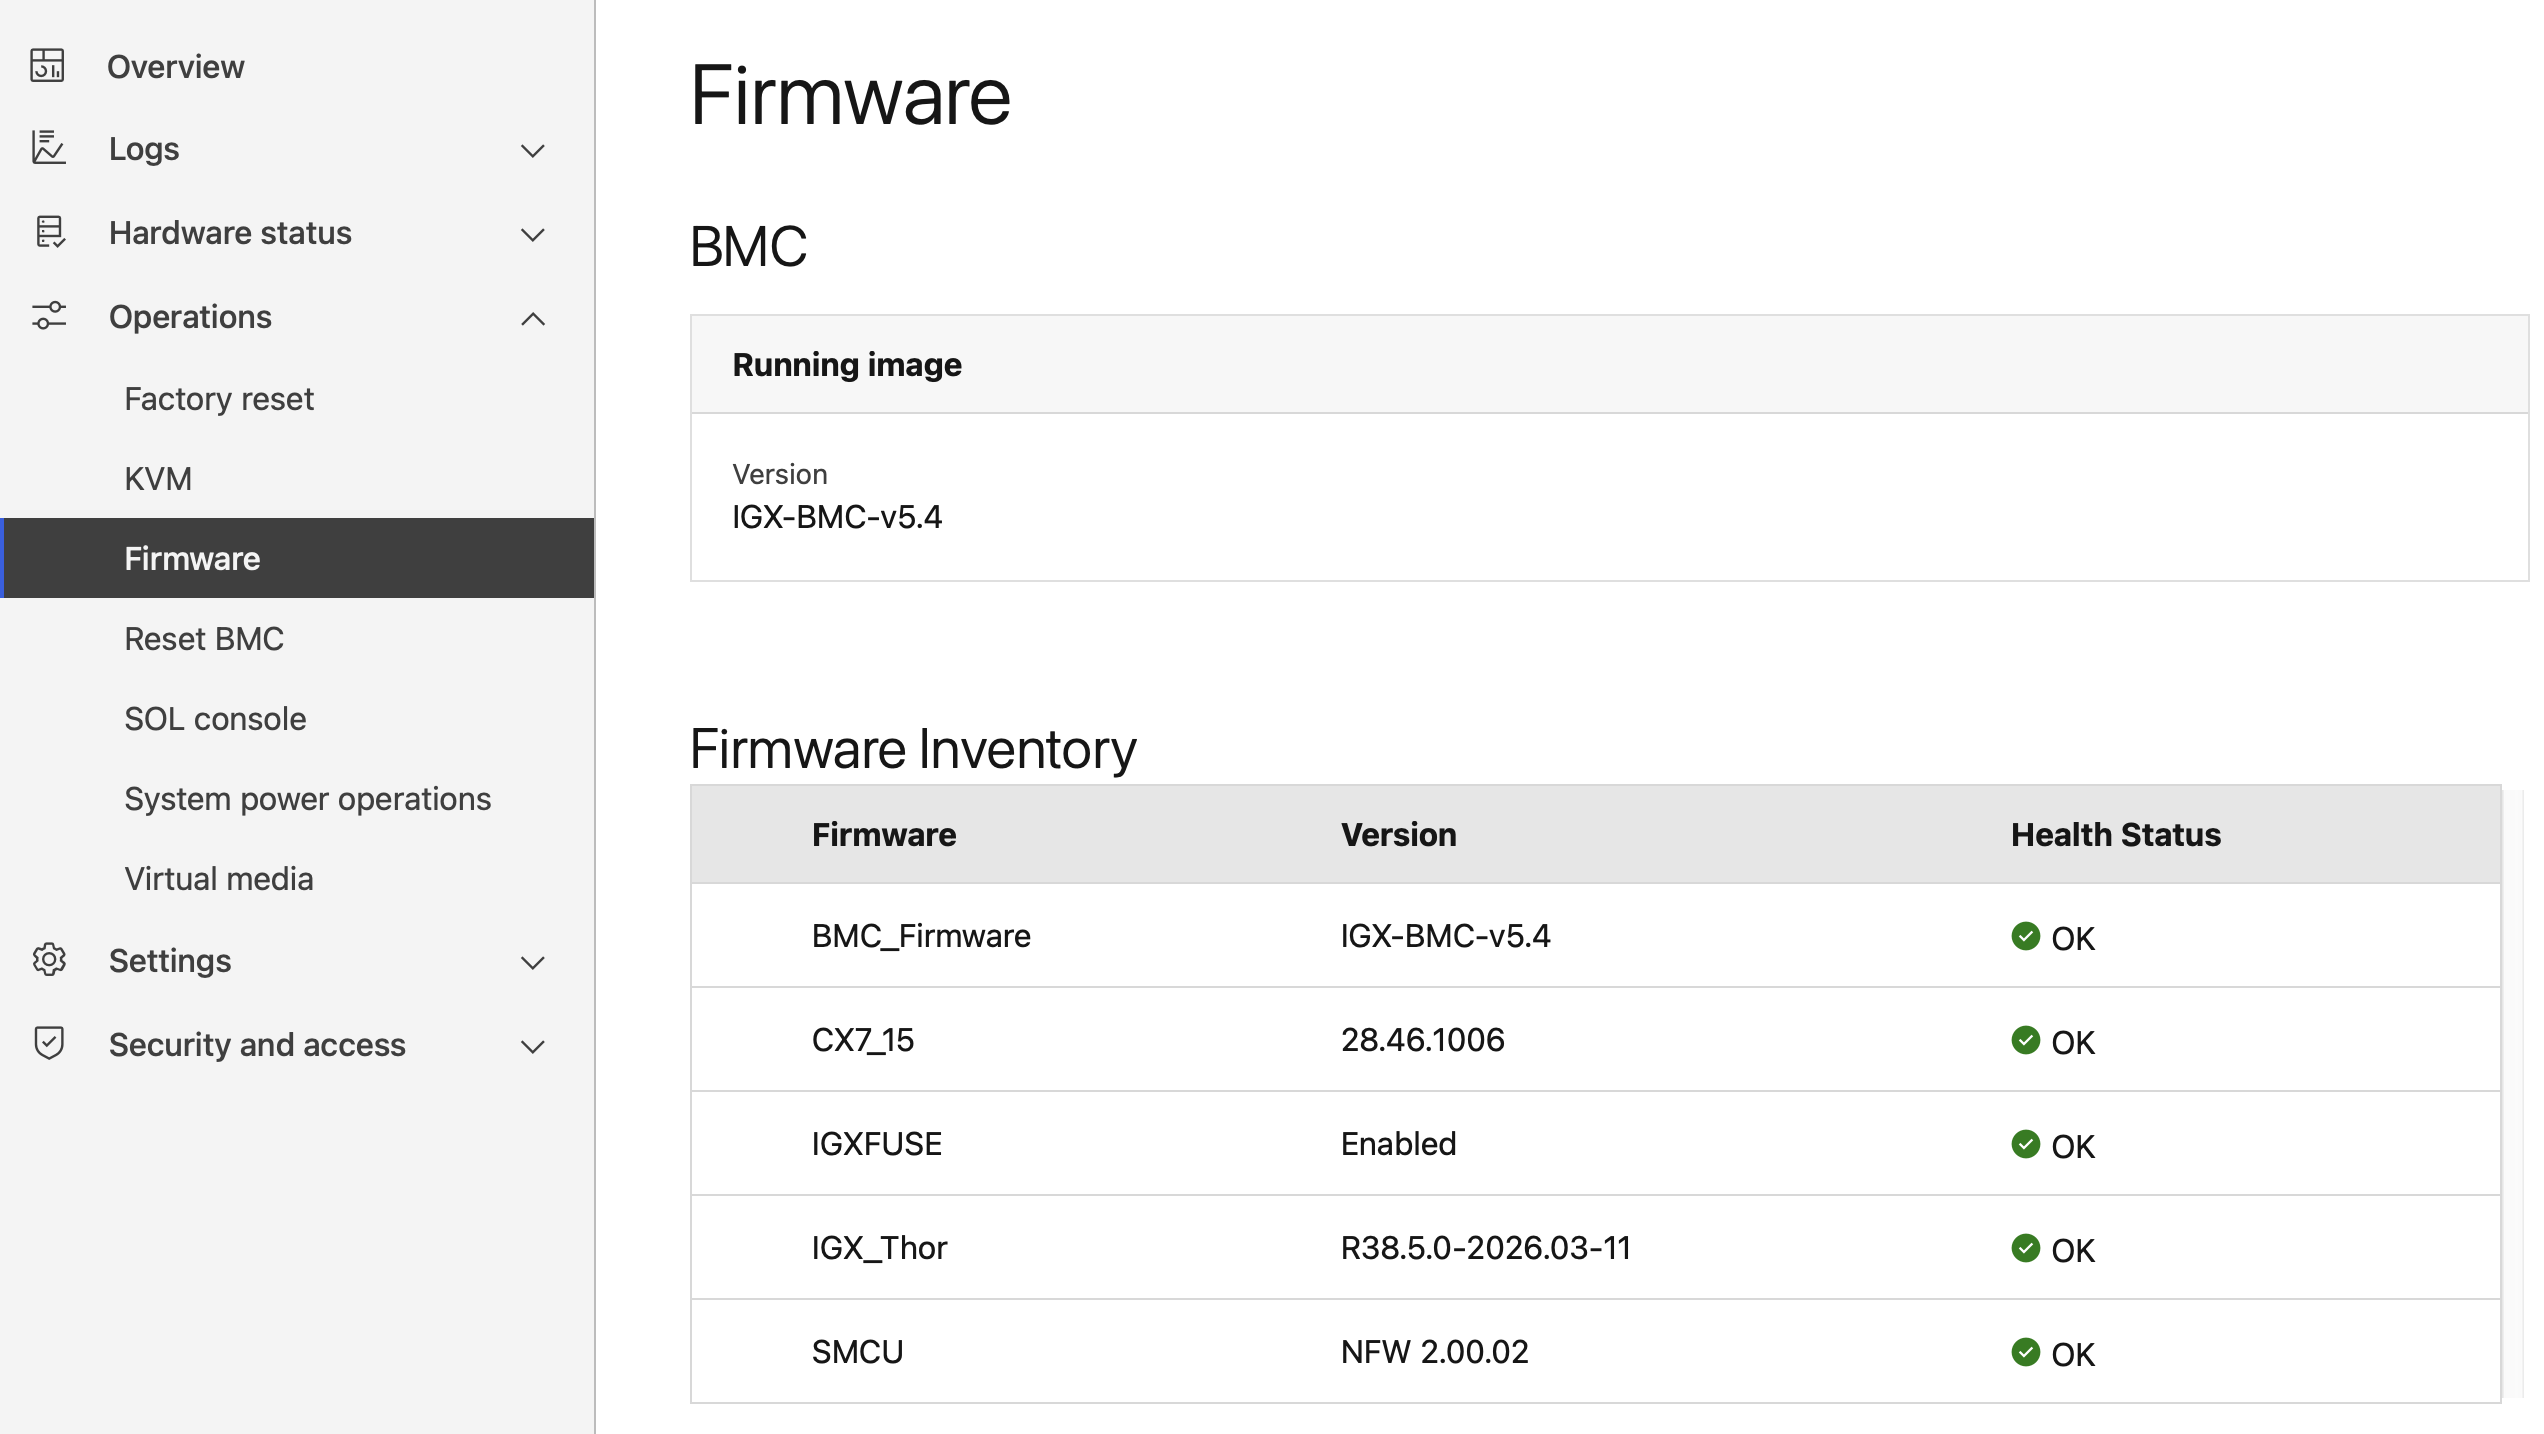
Figure 1. BMC WebUI Firmware page#
Check the firmware inventory for the installed firmware versions.
Compare the installed versions with the current release versions in the following table. If any firmware is older, then continue to update it.
Firmware Versions: IGX-SW 2.0 Release#
Firmware |
Version |
|---|---|
BMC_Firmware |
IGX-BMC-v5.4 |
SMCU |
NFW 2.00.02 |
Boot Firmware (QSPI) |
38.5.0-gcid-44447062 (on UEFI screen) |
CX7_15 |
28.46.1006 |
Note
Use the UEFI screen to check the Boot Firmware (QSPI) version.
Update BMC Firmware#
Identify whether the BMC is ERot or Non-ERot version.
Go to Hardware status → Inventory, then toggle down to System, and check the Secure boot option.
If Secure boot value is:
Yes → ERot → BMC Firmware image name: igx-bmc-apfw-erot.fwpkg
No → Non-ERot → BMC Firmware image name: igx-bmc-apfw-non_erot.fwpkg
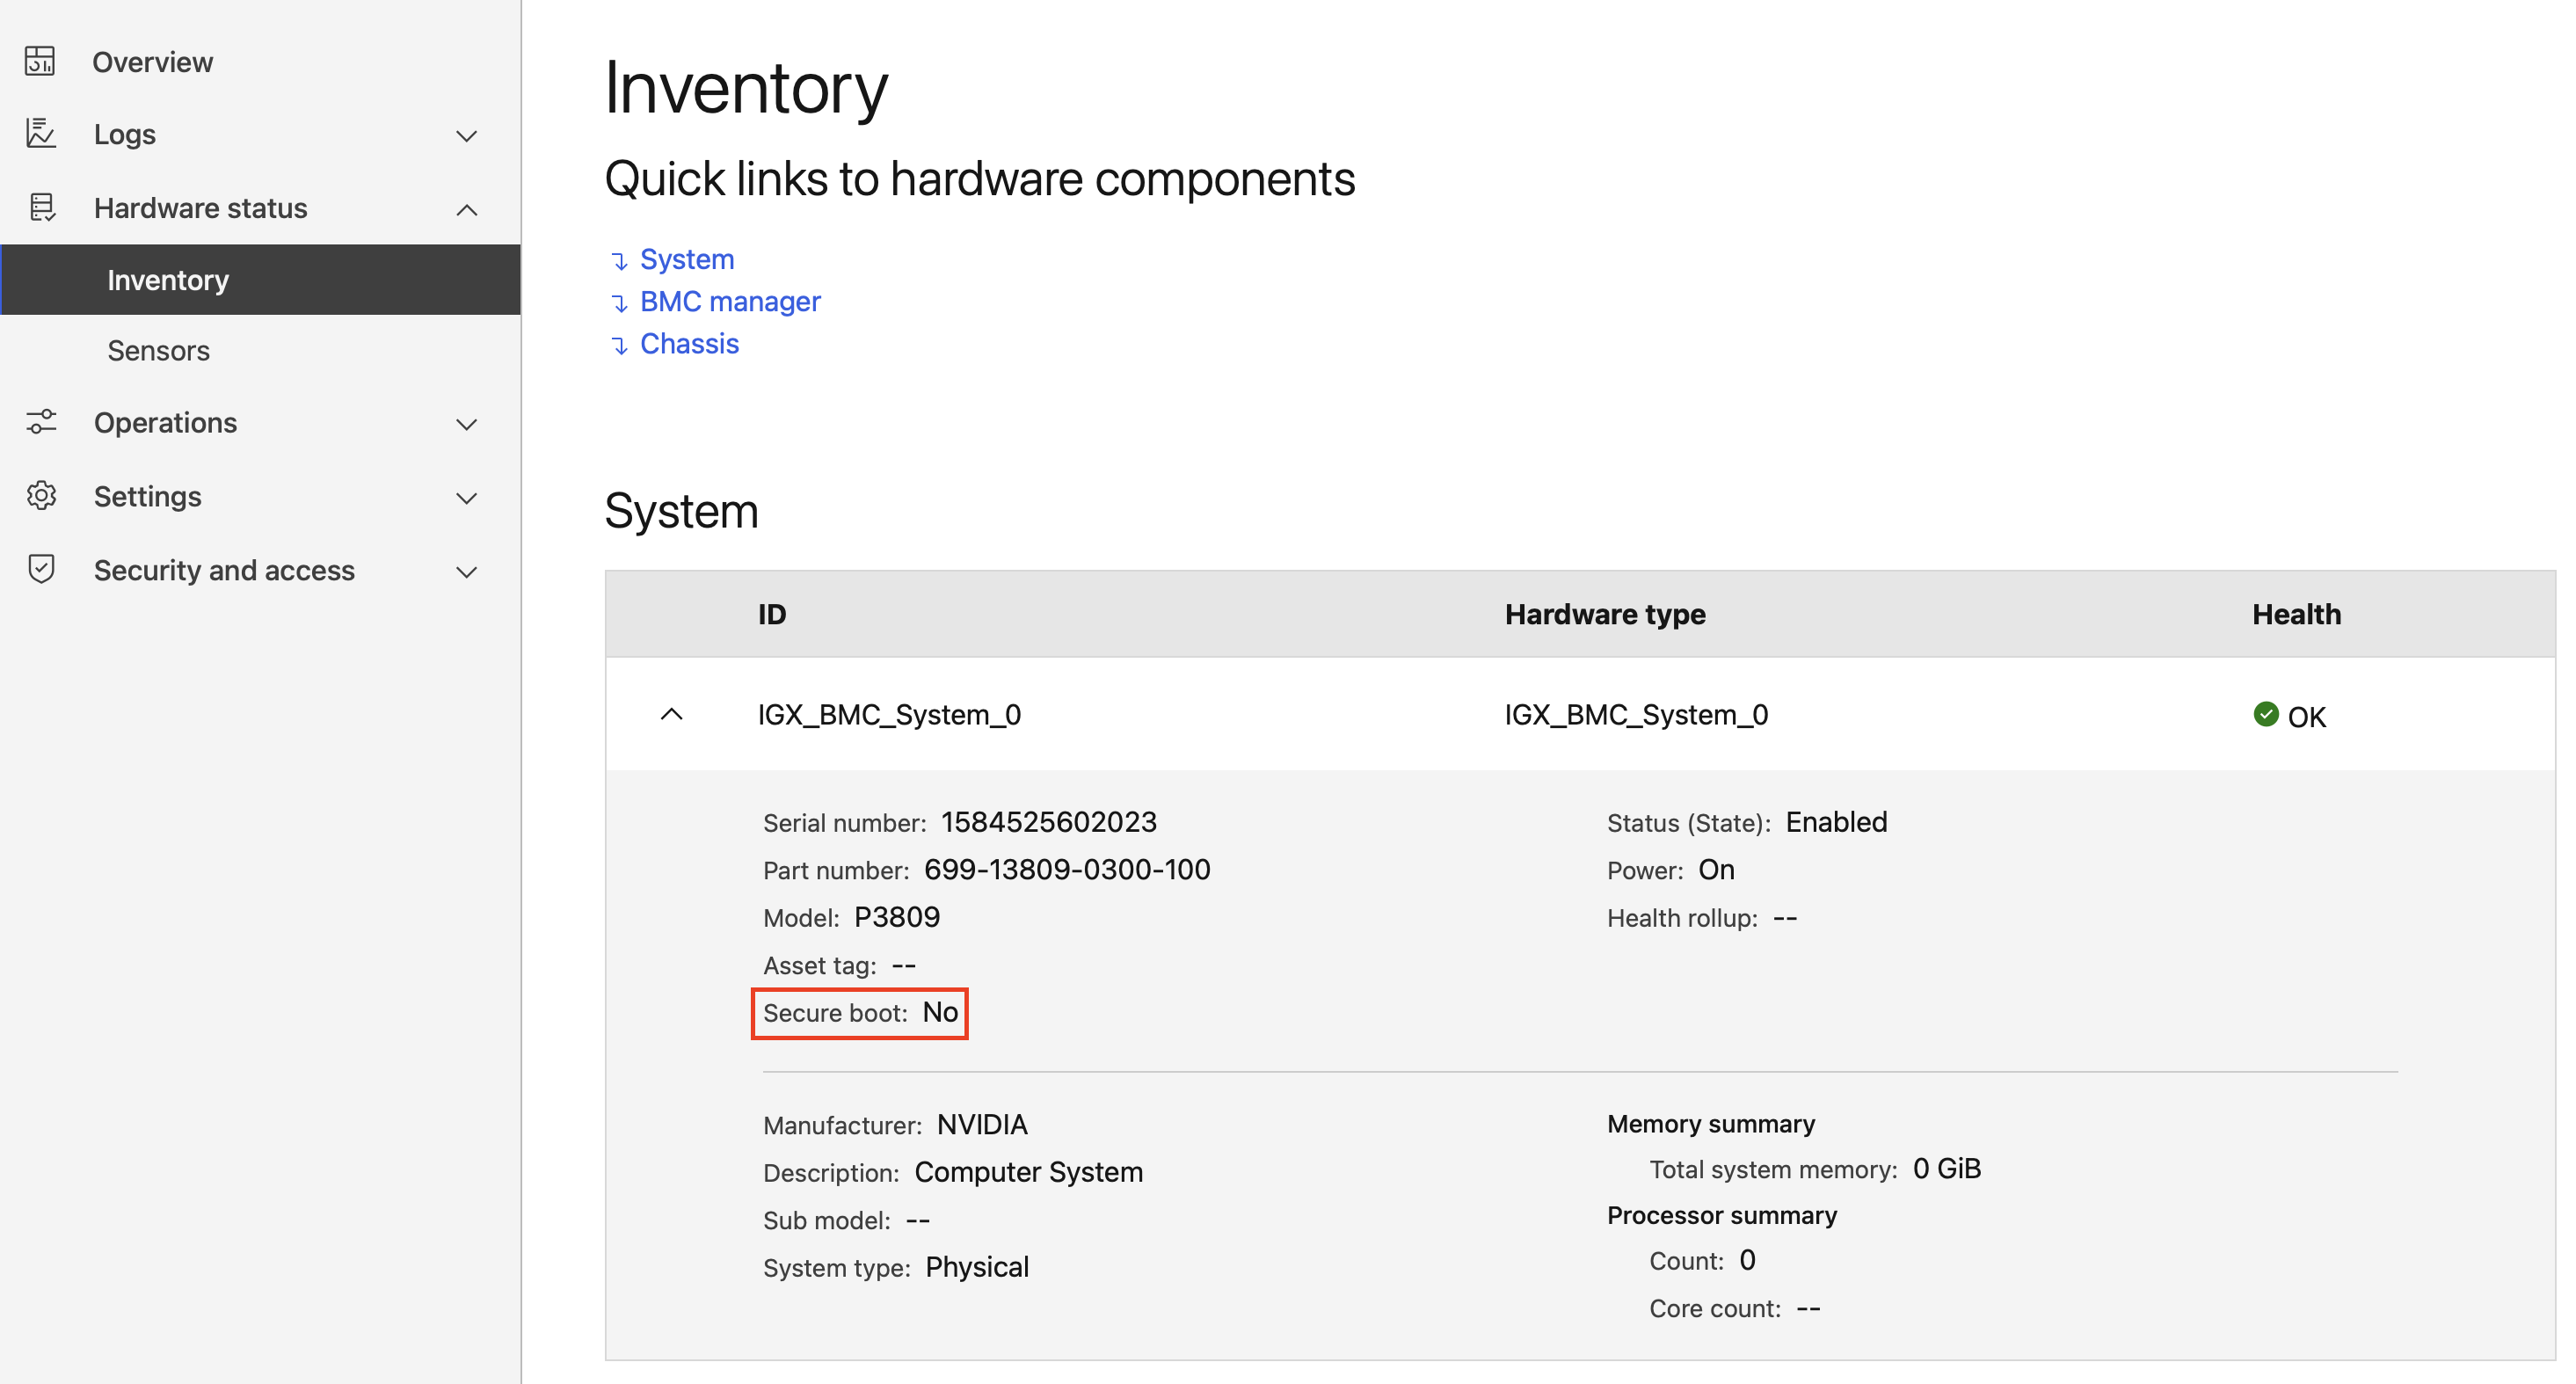
Figure 2. BMC ERot/Non-ERot identification#
To update the BMC firmware, navigate to Operations → Firmware.
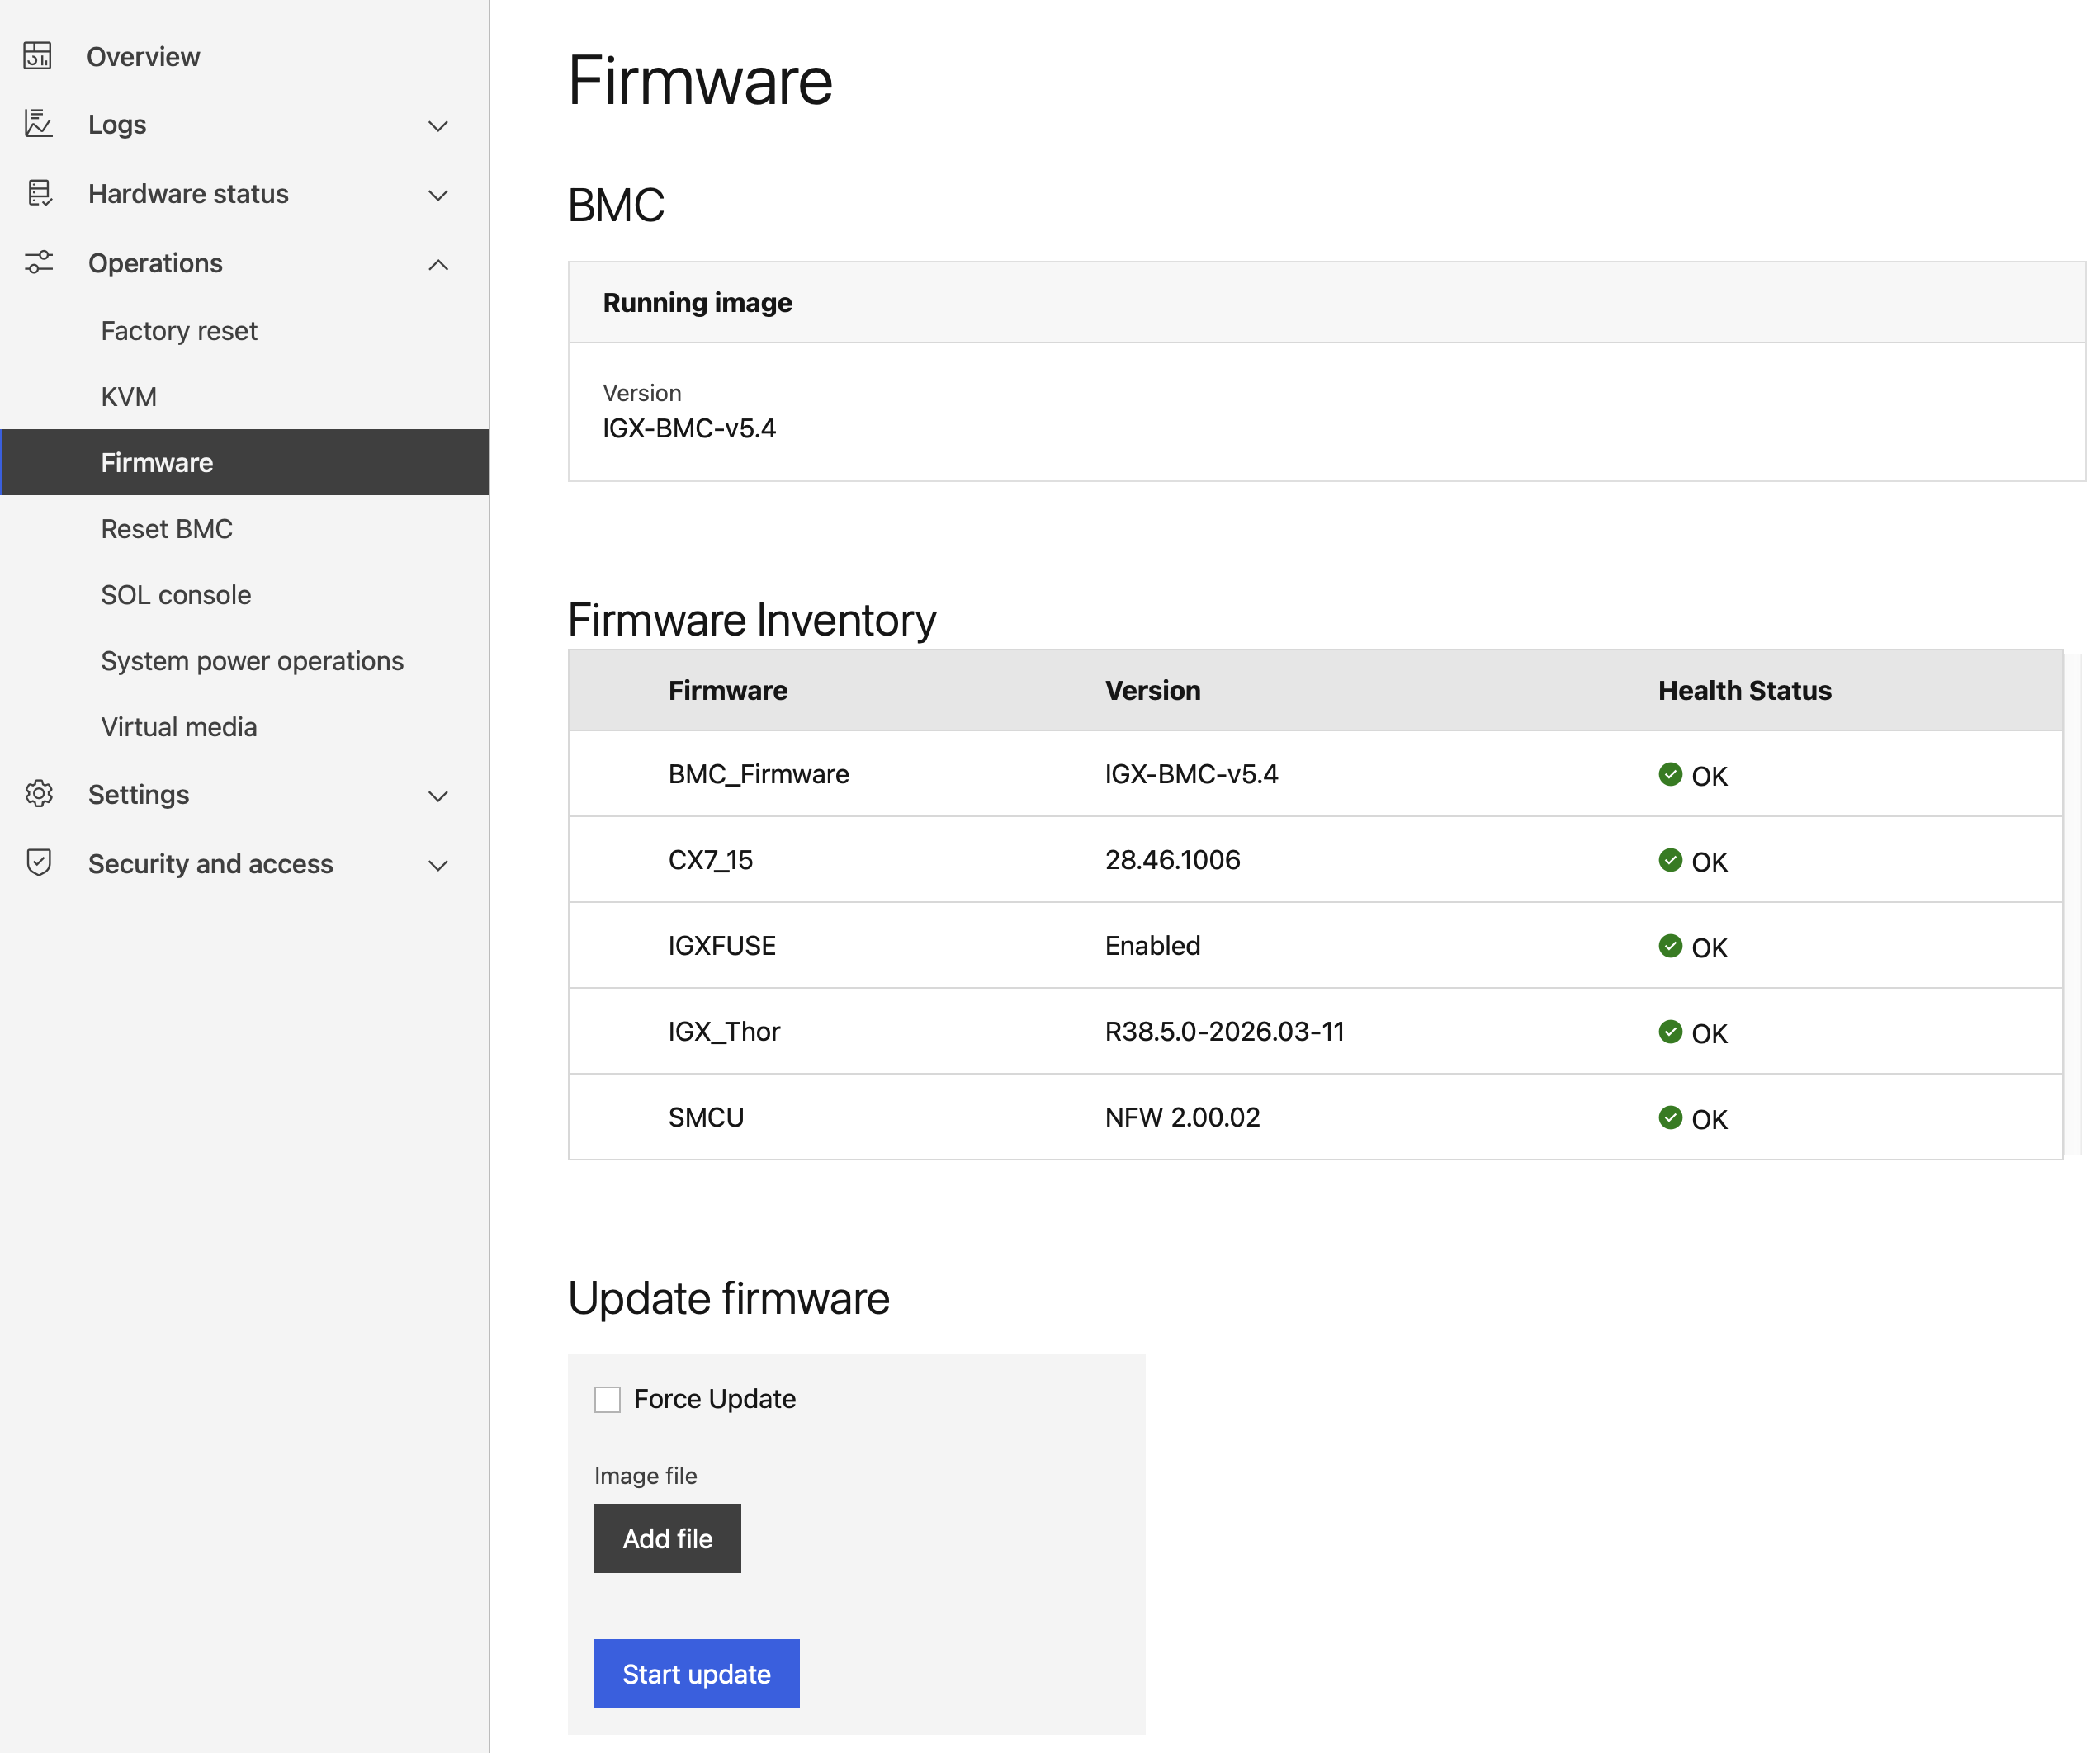
Figure 3. BMC Firmware update interface#
Click on Add file and select the correct BMC firmware image.
Click on Start Update to start the firmware update process.
Wait for the verify update notification at the top-right corner of the BMC WebUI. This may take up to 5 minutes.
Once the BMC firmware update is complete, reset the BMC: navigate to Operations → Reset BMC, select reset type GracefulRestart, then click Reset IGX_BMC_0.
Update SMCU Firmware#
Use the BMC WebUI → Update firmware interface with the SMCU firmware image smcu-flash.fwpkg.
Update Boot Firmware (QSPI)#
Important
As part of the IGX OS installation, the Boot Firmware (QSPI) will also be updated automatically. Hence, there is no need to update it from the BMC WebUI.
If required, you can use the BMC WebUI → Update firmware interface to update the Boot Firmware (QSPI), using the QSPI firmware image igx-thor-qspi-flash.fwpkg.
Update CX7 Firmware#
Use the BMC WebUI → Update firmware interface with the CX7 firmware image.
IGX OS Installation#
You can either use a USB flash drive or the BMC Virtual Media interface for the installation.
Option 1: Use USB Flash Drive#
Create a bootable USB flash drive: BalenaEtcher is a cross-platform tool to create bootable USB flash drives with an ISO. We recommend you use it to create an ISO installer of the IGX BaseOS.
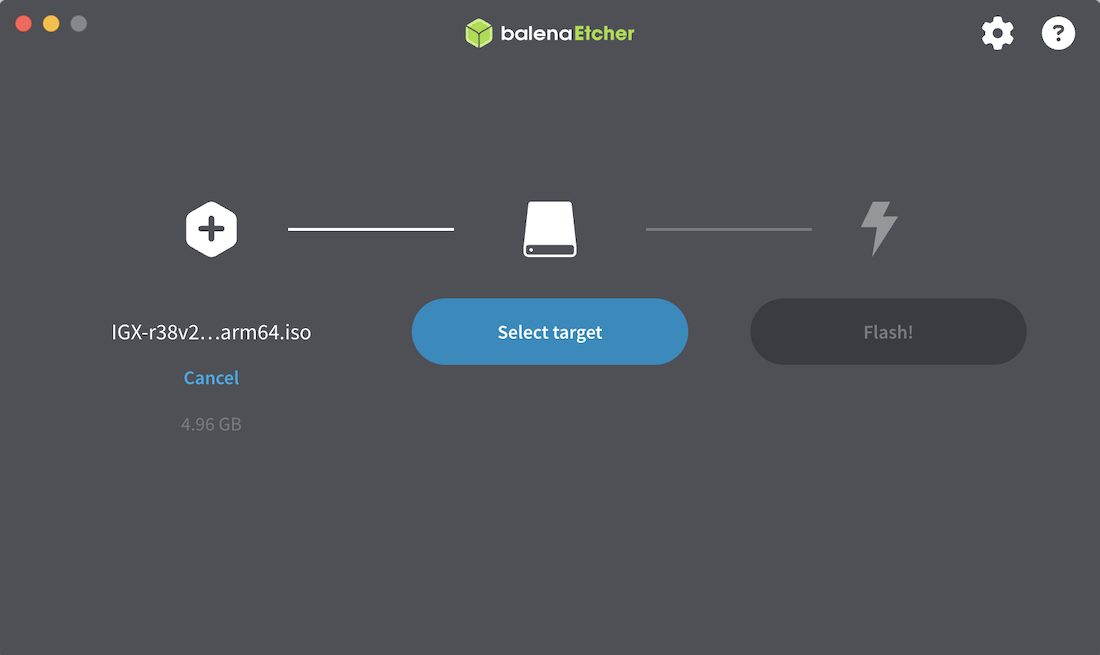
Figure 4. Use BalenaEtcher to create a BaseOS installer#
Insert the USB flash drive to the Dev Kit.
Continue to the Complete the Installation section below.
Option 2: Use BMC Virtual Media#
Login to the BMC WebUI.
Navigate to Operations → Virtual Media.
Click on Add file and select the downloaded IGX OS ISO.
Click on Start to mount the ISO as virtual media on the Dev Kit.
Continue to the Complete the Installation section below.
Complete the Installation#
On the BMC WebUI, navigate to Operations → System power operations. Select Force Restart → Reboot → Confirm to reboot the Tegra.
Continue the remaining installation steps on the Dev Kit’s video console (monitor).
Press Esc when the NVIDIA logo appears to access the UEFI menu.
Enter the UEFI Boot Manager.
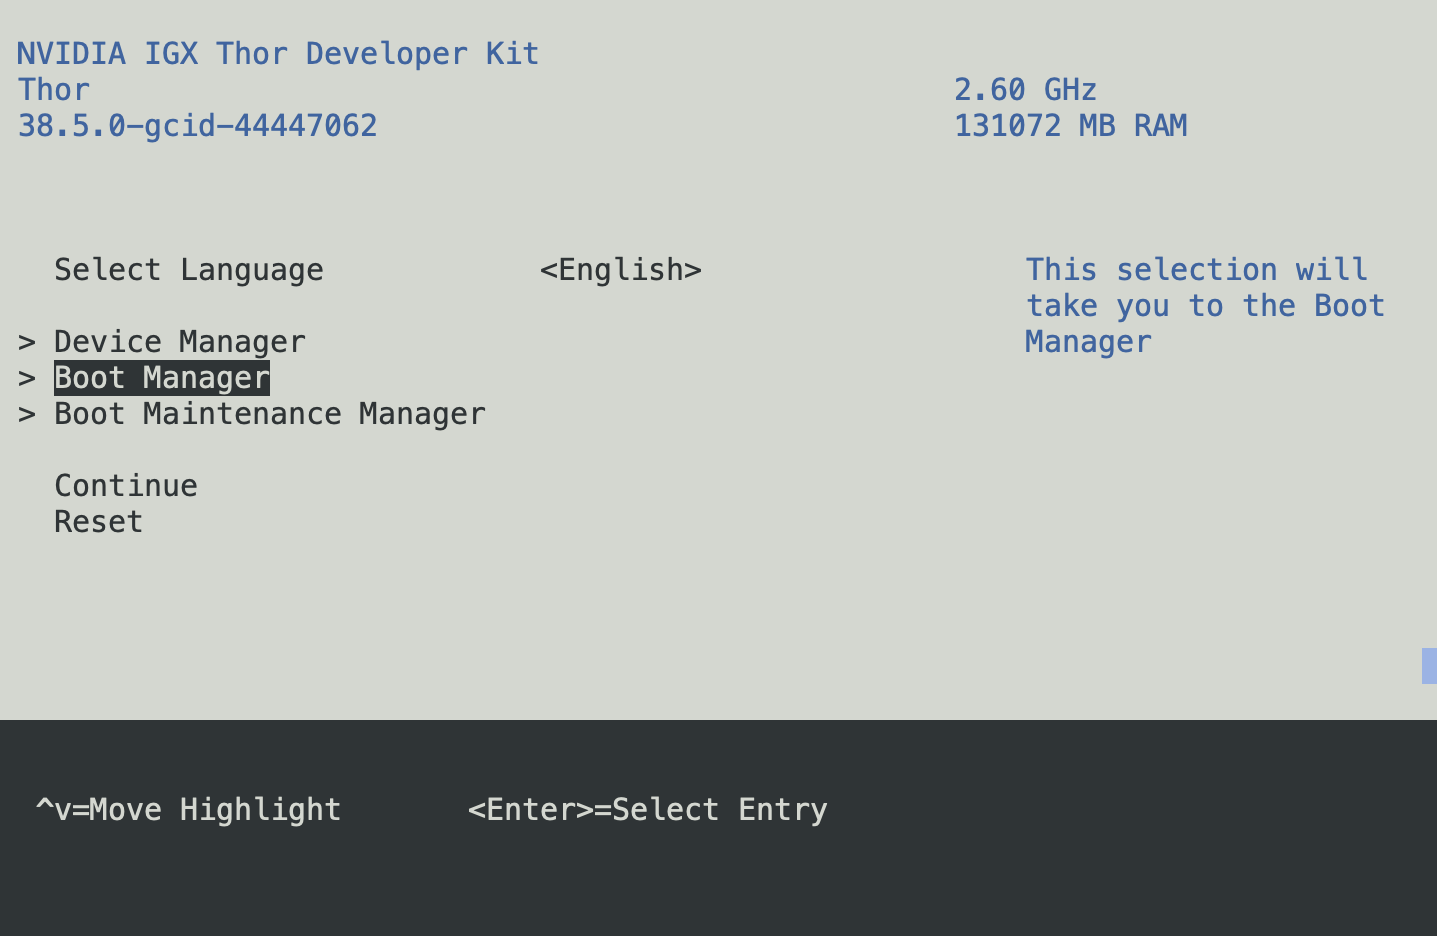
Figure 5. UEFI Boot Manager#
For Virtual Media installation: Select the UEFI OpenBMC Virtual Media to boot the system from that drive.
For USB flash drive installation: Select the USB volume name of the USB flash drive to boot the system from that drive.
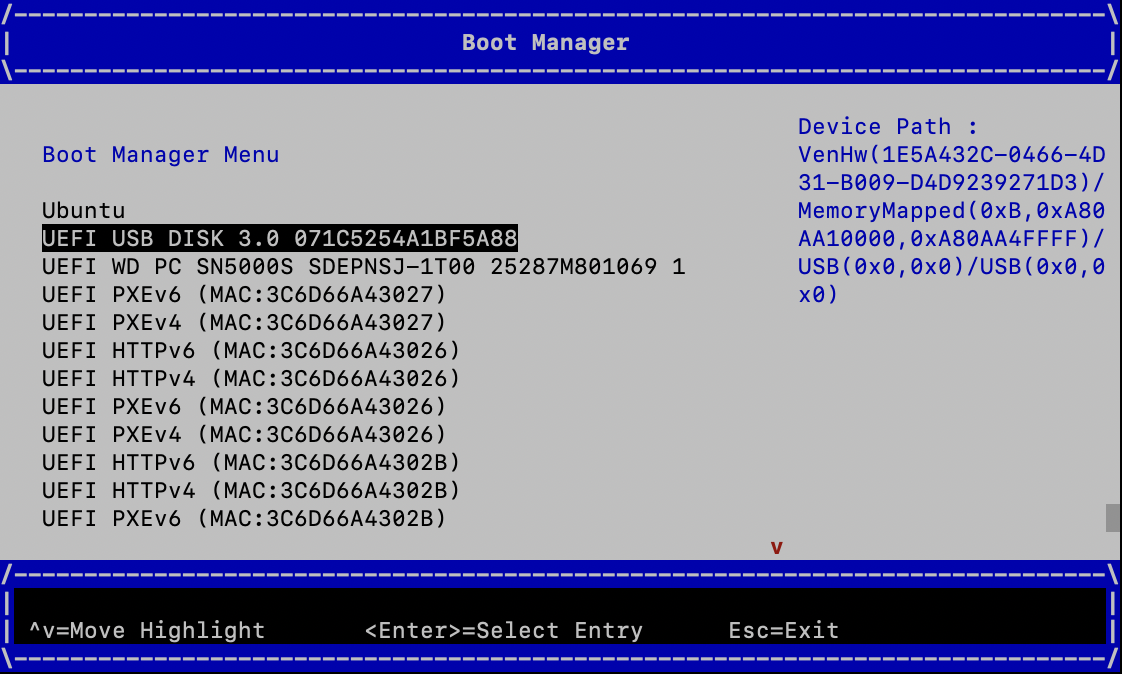
Figure 6. Boot from the USB flash drive or Virtual Media#
Continue to the IGX Thor options in the GRUB menu.
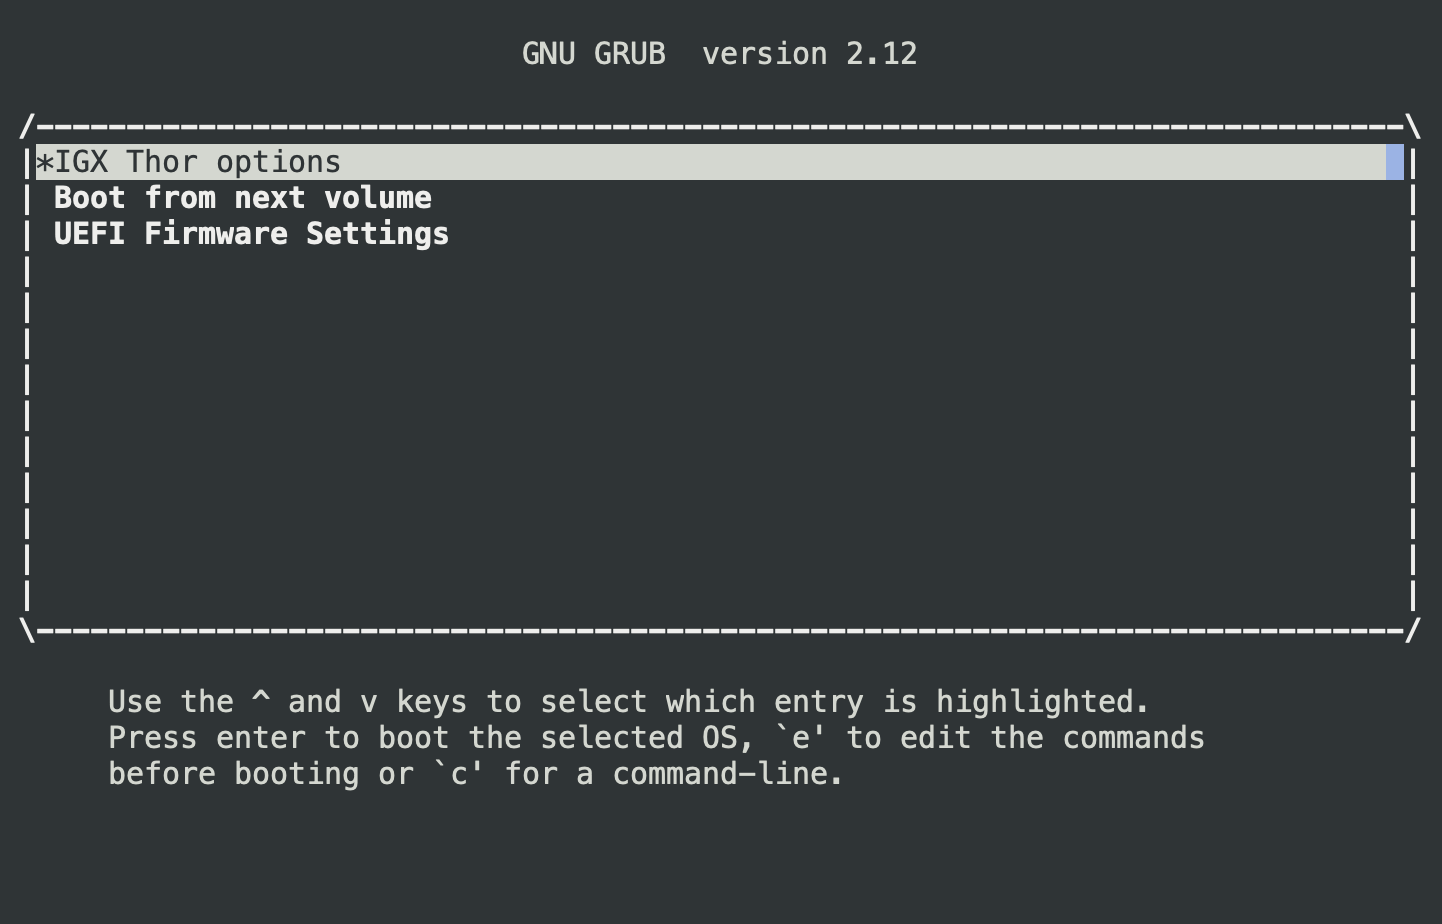
Figure 7. GRUB - IGX Thor options#
Choose Install IGX OS <version> with Real-Time Kernel to start the ISO installation. Depending on the speed of the USB flash drive, the installation will take about 20 minutes.
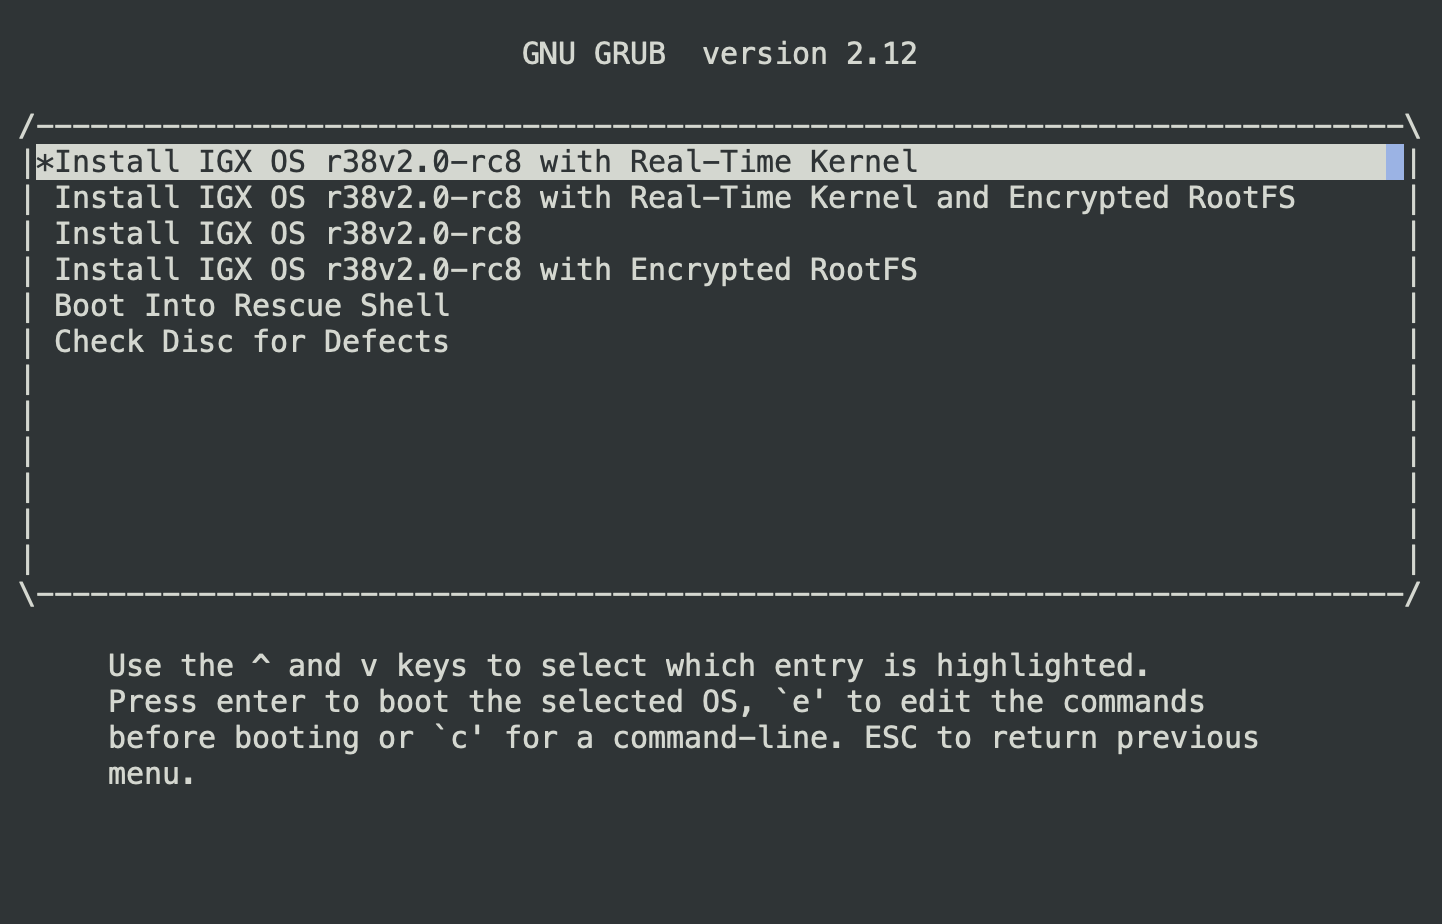
Figure 8. GRUB - Install IGX OS#
After installing the IGX ISO, the Dev Kit will reboot and it will start updating the Boot Firmware (QSPI) using the UEFI capsule update mechanism. The capsule update will happen twice (for A and B partitions respectively).
After the ISO installation completes, the OS will reboot automatically.
Complete the NVIDIA OOBE on the monitor to configure the system and create an account/password.
Install the NVIDIA AI Stack#
This section provides information on how to install the NVIDIA AI Stack.
Run APT update and install the compute components using the following commands:
sudo apt update
sudo apt install nvidia-igx-ai
Enable nvidia-cdi-refresh.service to refresh the CDI spec:
sudo systemctl enable --now nvidia-cdi-refresh.service
Refer to the CDI documentation for more details on the CDI spec and refresh service.
To specify a dedicated GPU to use (iGPU or dGPU on the IGX Thor developer kit) inside a container, pass one of the parameters
--device=nvidia.com/gpu=0or--device=nvidia.com/gpu=1while launching the container withdocker runcommand.