Calibrating the SO-101#
What Do I Need for This Module?
Hands-on. You’ll need the physical SO-101 robot, teleop arm, USB cables, and the assembled workspace from Building the Workspace.
In this session, you’ll power up the SO-101 robot, run through the calibration process, and verify the calibration is correct.
While calibration can be a bit tedious, it is essential for accurate robot control and for our AI model to perform well.
Tip
If you encounter hardware issues during this session, see the Troubleshooting Guide for solutions to common problems.
Learning Objectives#
By the end of this session, you’ll be able to:
Power on and safely operate the SO-101 robot arm
Calibrate the teleop and robot arms for accurate positioning
Safety Guidelines#
Review the Safety protocol before powering on the robot.
Workspace Setup#
You should already have assembled and staged the physical task environment in Building the Workspace. Keep that lightbox layout, lighting, mat, vials, and rack consistent while you power on, calibrate, and teleoperate here—and again whenever you run real-robot evaluation later.
Powering On the Robot#
Physical Inspection#
Before powering on:
Inspect the robot for any visible damage
Verify all cables are securely connected
Warning
The teleop arm uses a lower voltage power supply (5V) compared to the follower (12V).
It is very important to not mix these up.
We recommend labeling or color coding them, so it’s easy to tell them apart.
Connect the power cables.
Verify the power LED illuminates on the control board at the back of the robot.
Connect USB cables from the robot to the host computer you’re working from.
Run the Docker Container for This Course#
When USB devices are plugged and re-plugged, the port assignments from your operating system may change.
Use the LeRobot port finder to find the address assigned to the robot, and to the teleop arm. After you’ve found the ports, we’ll assign them to environment variables in your terminal. This way when we run commands, we don’t have to keep typing the ports manually.
Open a new terminal window (CTRL+ALT+T).
Run the
teleop-dockercontainer:
xhost +
docker run --name teleop -it --privileged --gpus all -e "ACCEPT_EULA=Y" --rm --network=host \
   -e "PRIVACY_CONSENT=Y" \
   -e DISPLAY \
   -v /dev:/dev \
   -v /run/udev:/run/udev:ro \
   -v $HOME/.Xauthority:/root/.Xauthority \
   -v ~/docker/isaac-sim/cache/kit:/isaac-sim/kit/cache:rw \
   -v ~/docker/isaac-sim/cache/ov:/root/.cache/ov:rw \
   -v ~/docker/isaac-sim/cache/pip:/root/.cache/pip:rw \
   -v ~/docker/isaac-sim/cache/glcache:/root/.cache/nvidia/GLCache:rw \
   -v ~/docker/isaac-sim/cache/computecache:/root/.nv/ComputeCache:rw \
   -v ~/docker/isaac-sim/logs:/root/.nvidia-omniverse/logs:rw \
   -v ~/docker/isaac-sim/data:/root/.local/share/ov/data:rw \
   -v ~/docker/isaac-sim/documents:/root/Documents:rw \
   -v ~/.cache/huggingface/lerobot/calibration:/root/.cache/huggingface/lerobot/calibration \
   -v ~/Sim-to-Real-SO-101-Workshop/docker/env:/root/env \
   -v ~/Sim-to-Real-SO-101-Workshop:/workspace/Sim-to-Real-SO-101-Workshop \
   teleop-docker:latest
Identify the Teleop Arm Port#
Run this command to start port identification:
lerobot-find-port
The tool will prompt you to remove the USB cable from the robot and press Enter when done. Let’s start with the teleop arm.
Finding all available ports for the MotorBus.
['/dev/ttyACM0', '/dev/ttyACM1']
Remove the usb cable from your MotorsBus and press Enter when done.
After removing the cable, press Enter.
The port of this MotorsBus is '/dev/ttyACM2'
Reconnect the USB cable.
In this example, /dev/ttyACM2 is the port assigned by the host computer.
Using this info, set environment variables for the teleop arm - make sure to make the port match the output of the last command.
setenv TELEOP_PORT=/dev/ttyACM # !! make sure to update
setenv TELEOP_ID=orange_teleop # use this line as-is
Note
We are using a special method called setenv to export the environment variables, this will help us keep them persistent across sessions and across containers.
The variables will be saved into the ~/Sim-to-Real-SO-101-Workshop/docker/env file
Identify the Robot Arm Port#
Repeat again for the robot arm, and note the port.
lerobot-find-port
Using this info, set environment variables for the robot arm - make sure to make the port match the output of the last command.
setenv ROBOT_PORT=/dev/ttyACM # !! make sure to update
setenv ROBOT_ID=orange_robot # use this as-is
Note
The ID determines where calibration data is stored (~/.cache/huggingface/lerobot/calibration). Use consistent IDs across sessions so calibration persists.
(Optional) to double check the values, run this command and confirm the values are what you expect.
echo "Teleop port is ${TELEOP_PORT} with id ${TELEOP_ID}"
echo "Robot port is ${ROBOT_PORT} with id ${ROBOT_ID}"
Keep this terminal open.
If you close it, restart the docker container and reset these environment variables. It’s a good idea to write down these ports in a notebook, if you have it.
Important
If you re-connect multiple USB cables at once, the ports may change. These common tasks can be easily re-found on the Quick Reference page. You can identify which port corresponds to which arm by disconnecting one and pressing Enter.
Calibration Process#
Calibration ensures that the leader and follower arms have the same position values when they are in the same physical position.
The process is the same for both arms, just a slightly different command.
Don’t worry, calibrating the SO-101 is a simple process once you’ve done it a few times.
Why Calibration Matters (expand to read)
Good calibration is essential for sim-to-real transfer. Without it, the policy will not be able to control the robot accurately.
Without calibration, we introduce a major source of error that could cause damage or just unpredictable behavior.
Let’s start by calibrating the teleop arm.
Calibrate the Teleop Arm (Leader)#
Run the calibration command for the leader arm (the robot that teleoperates). Make sure you have already assigned $TELEOP_PORT in the earlier step.
lerobot-calibrate \
    --teleop.type=so101_leader \
    --teleop.port=$TELEOP_PORT \
    --teleop.id=$TELEOP_ID
The calibration script output will guide you through the process:
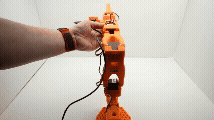
Move to the middle of the range: When instructed, manually move each joint to the middle of its range of motion. This is what that looks like:
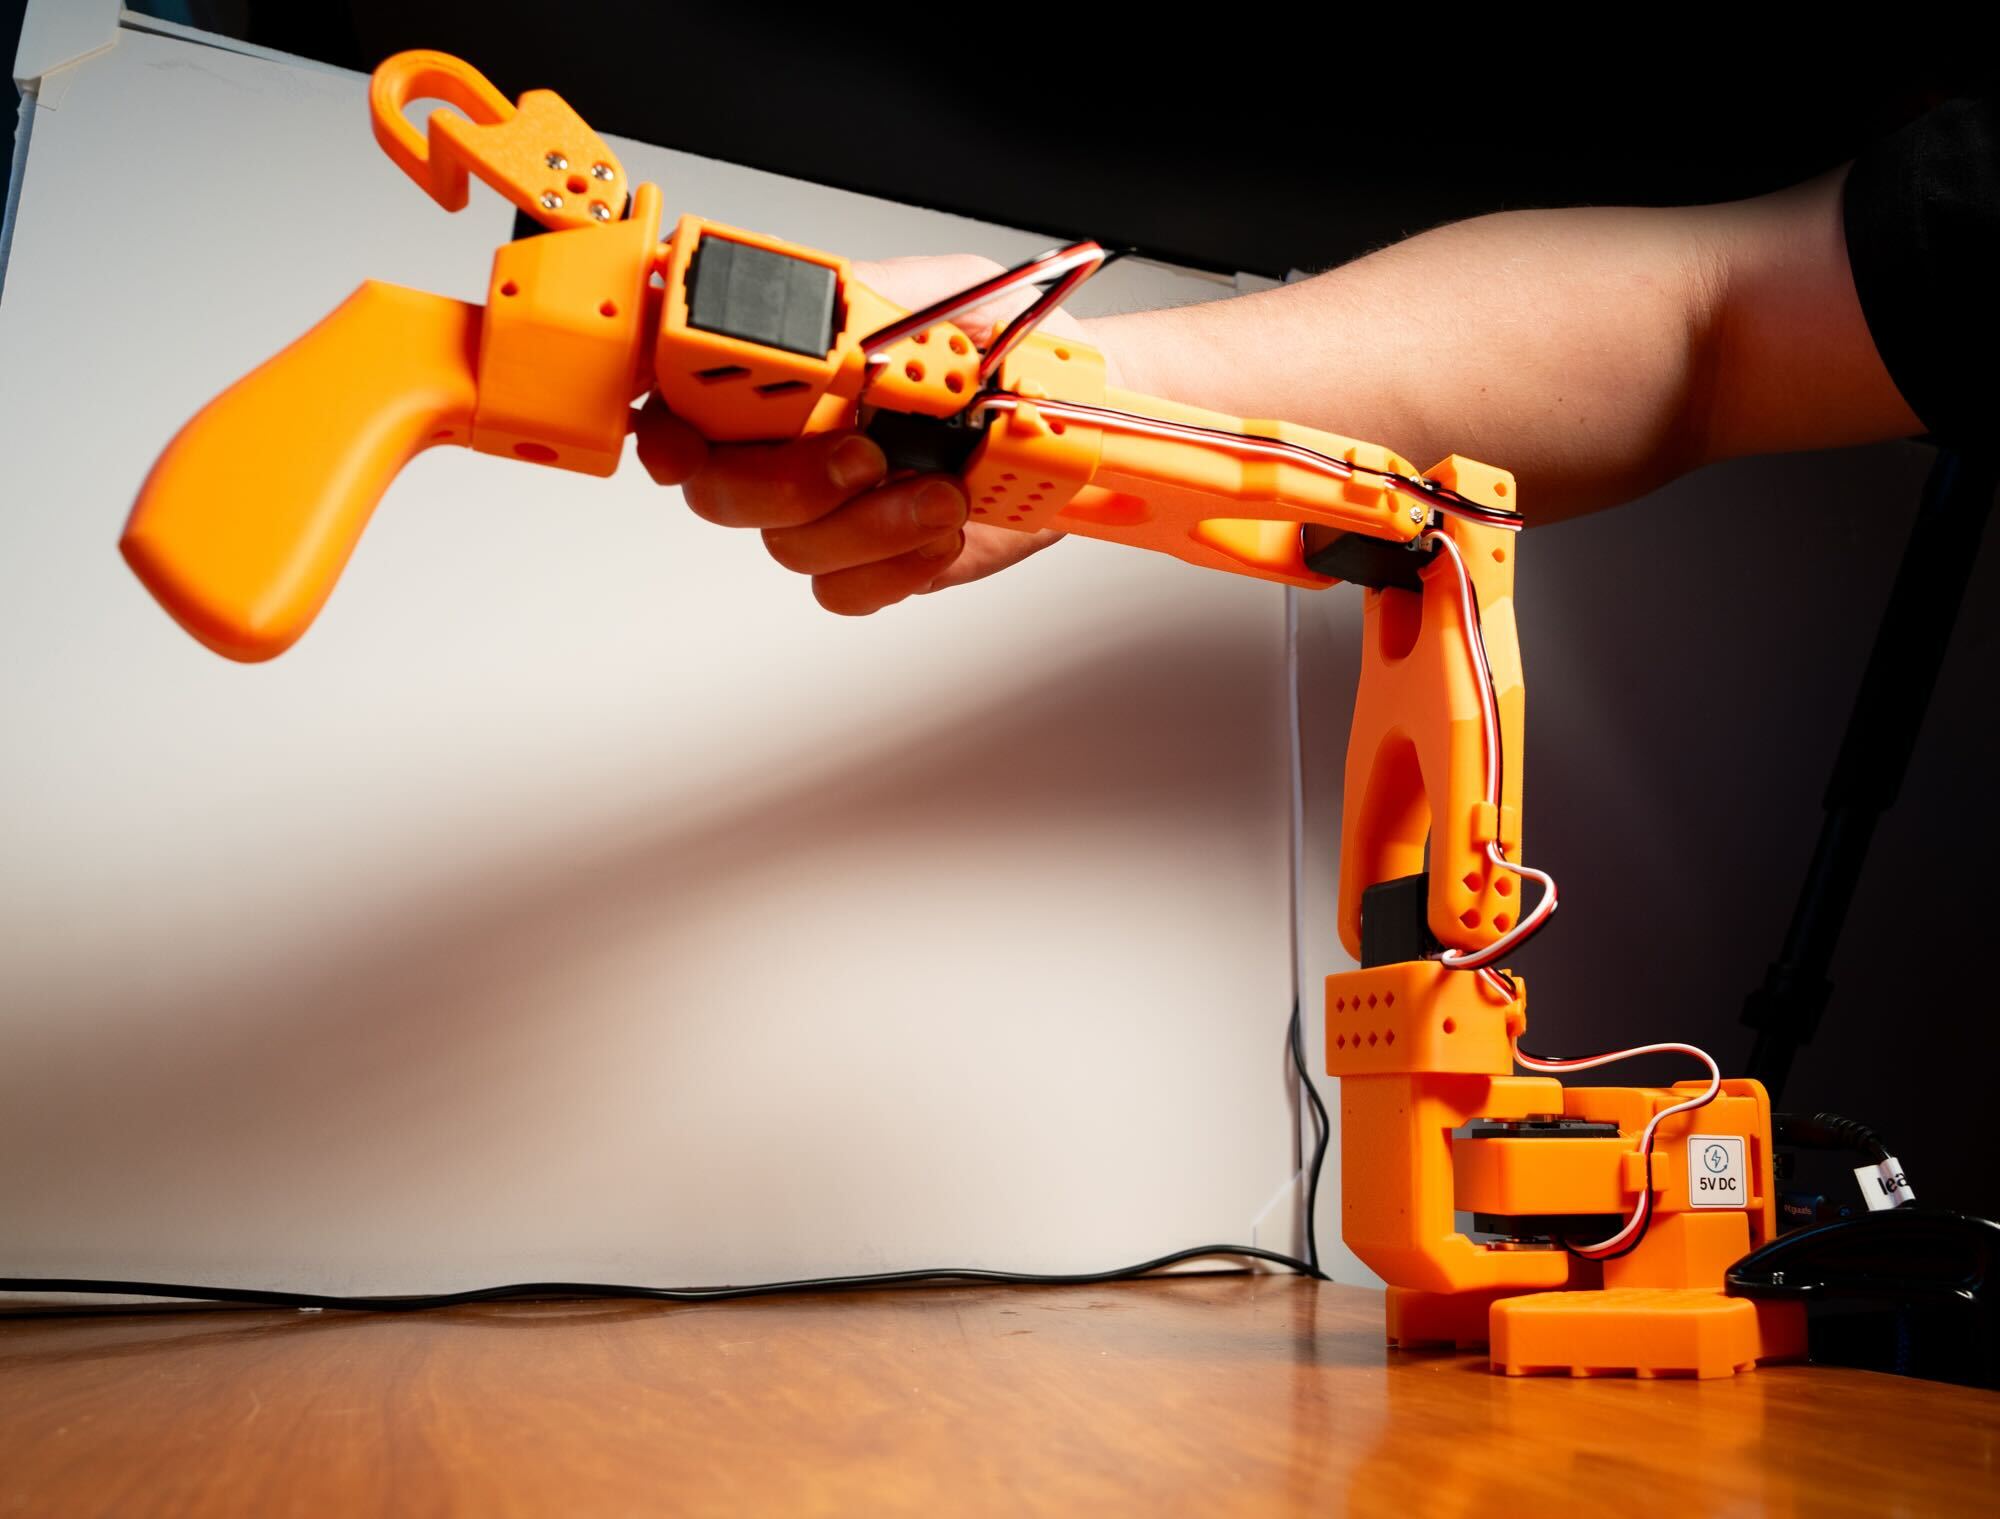
Teleop Arm: Calibration Pose Example#
Important
Pay particular attention to the wrist axis here. This axis uses almost the entire motor rotation, so if it’s not properly centered, you may encounter encoder overflow / underflow. Note how the gripper handle is oriented.
We added two black dots to the gripper to help you find this position. Otherwise, just make your robot match the image.
Once you’ve confirmed the neutral pose, press Enter to begin calibration process.
Move each joint through its entire range of motion, moving until the joint stops or hits its end point. You can repeat to make sure you found it.
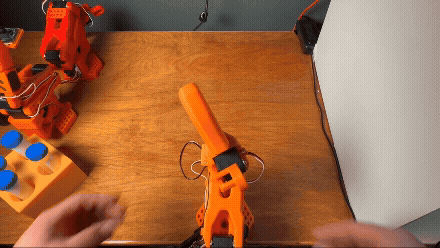
Animated example: Teleop Arm Calibration process. Move each joint to the center, confirm, then sweep to end stops one by one to complete calibration.#
Hit Enter when done.
Tip
We recommend moving each joint through its entire range, one by one, to ensure you’ve met its full range of motion and didn’t miss one.
It’s okay to move an axis more than once. The script records min and max positions for each joint.
And if you make a mistake or aren’t sure, you can always run the calibration again.
Calibrate the Follower Arm (Robot)#
This is the same process, the command flags just change to reflect the follower arm.
Run the same command, but note the change in arguments:
lerobot-calibrate \
    --robot.type=so101_follower \
    --robot.port=$ROBOT_PORT \
    --robot.id=$ROBOT_ID
Move the robot to the calibration pose. This is what that pose looks like. Each joint is in the middle of its range of motion.
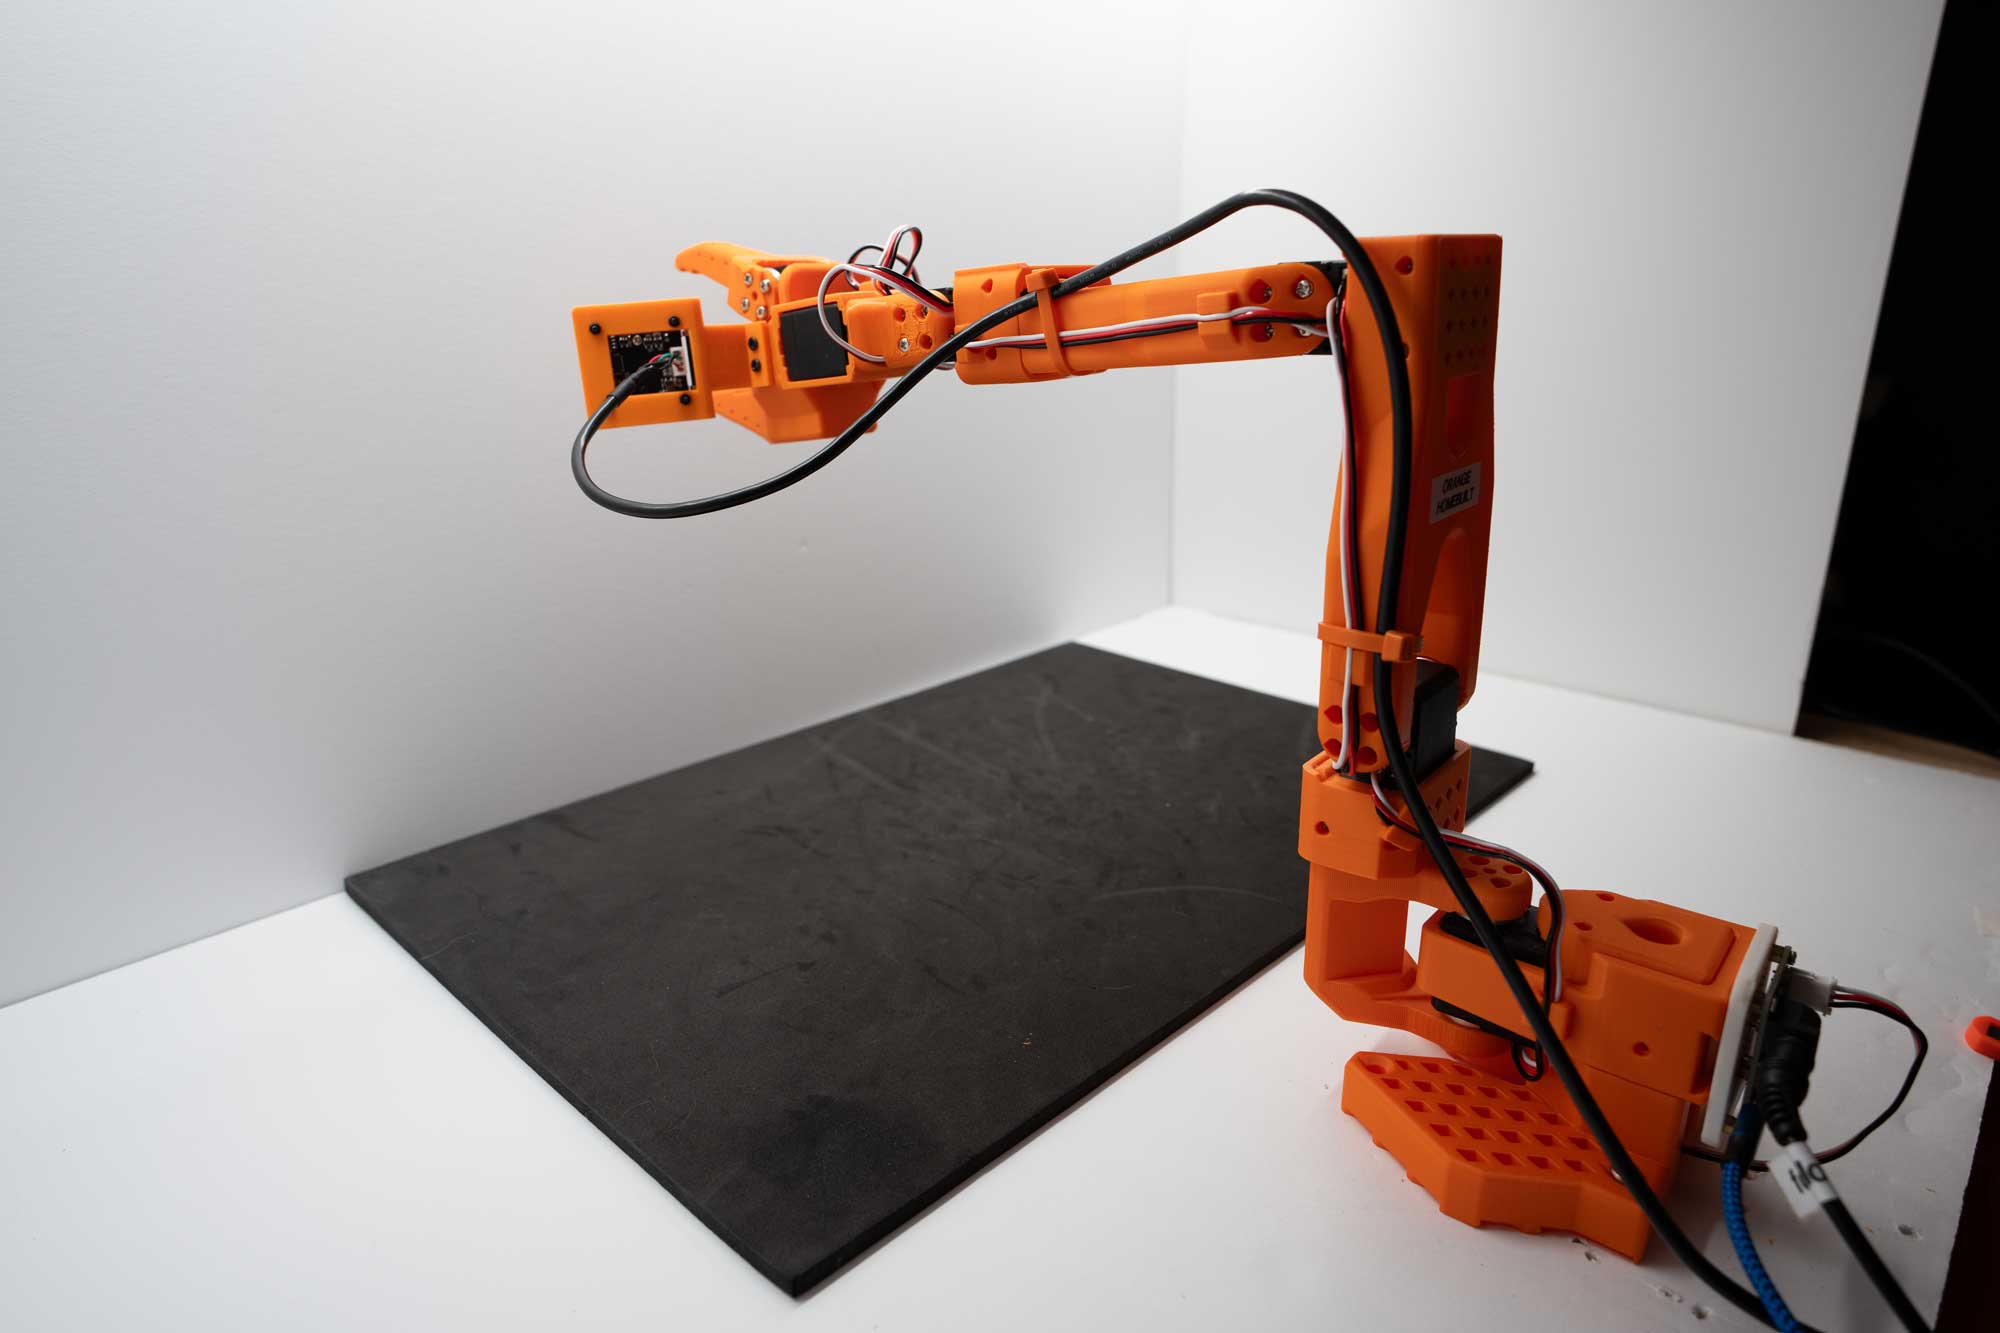
Calibration Pose Example
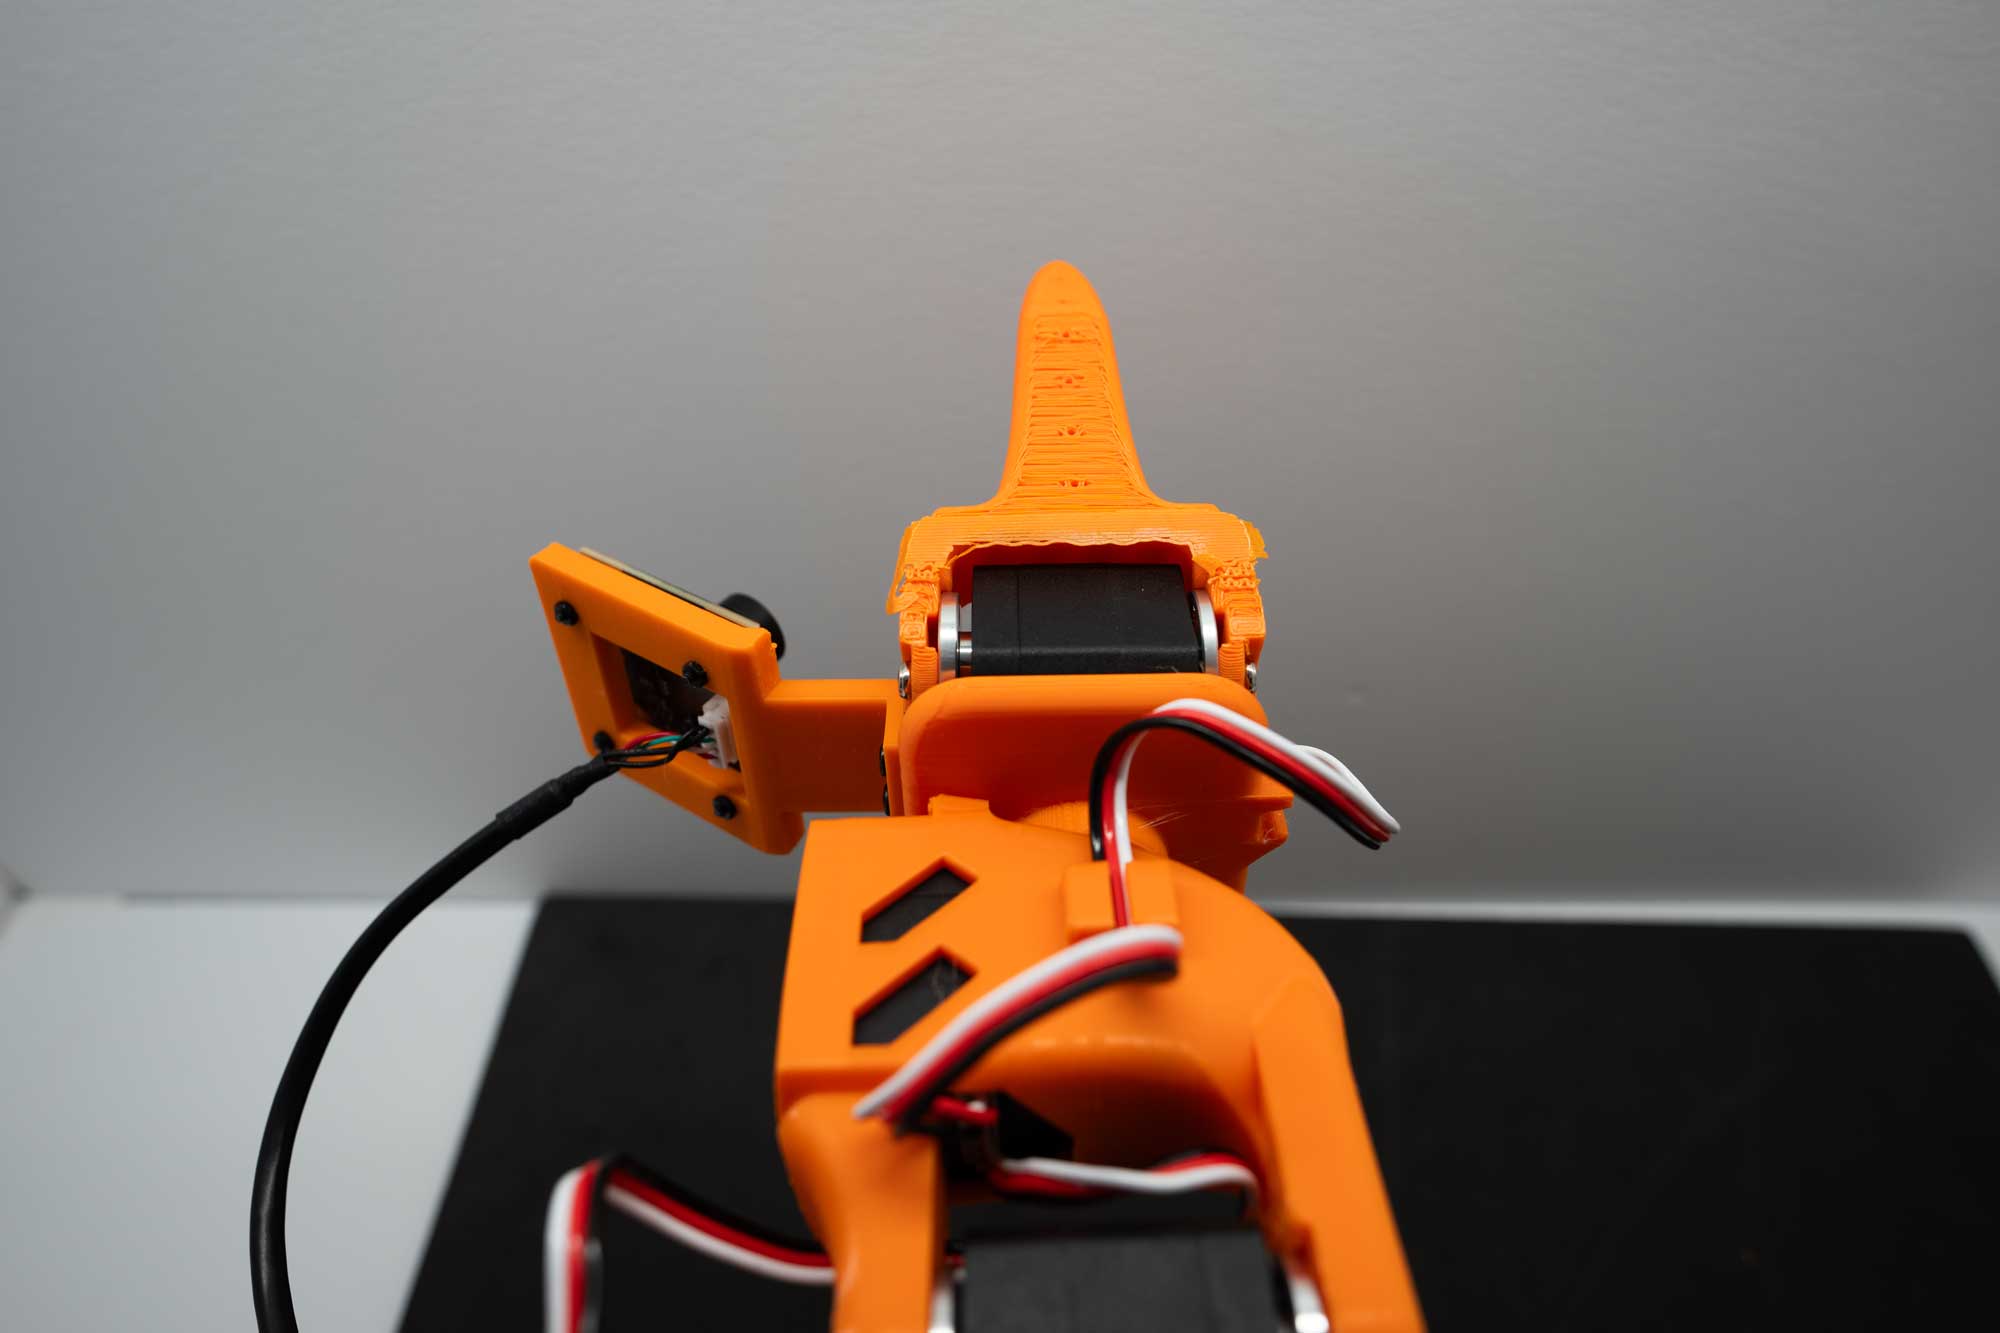
Pay particular attention to the wrist axis here. This is what the centered position looks like. This axis uses almost the entire motor rotation, so if it’s not properly centered, you may encounter encoder overflow / underflow.
Press Enter to begin calibration.
Move the robot through its entire range of motion, moving until the joint stops or hits its end point. You can repeat to make sure you found it.
Tip
True end stops only. Move each joint until it reaches its mechanical end stop, not a cable or obstacle. If a cable is pinched between links or the robot hits a cable, you will record a false min/max limit and calibration will be wrong. Check cable routing so the arm can reach its real limits.
Hit Enter when done.
Full calibration workflow example: moving all joints through their ranges on the SO-101.#
The calibration file will then be saved in the ~/.cache/huggingface/lerobot/calibration directory, using the type for the folder name, and the id parameter as the filename.
Warning
Calibration File Warning
When running the robot after calibration, you may see this message if the calibration file is not correct for your robot. If you are recalibrating, this message is expected and you can proceed.
Press ENTER to use provided calibration file associated with the id leader_arm_1, or type 'c' and press ENTER to run calibration
Take caution when you see this message. It may indicate:
The calibration file is not correct for your robot
The robot and teleop arm are mixed up (wrong ID assignment)
A previous calibration that doesn’t match the current hardware state
When in doubt, press CTRL+C to cancel the command, and double check the robot assignments. If they are correct, you can run the calibration again.
Check Your Work#
How do you know if your calibration is correct?
We have a small script that will compare your calibration to a small dataset of calibrations we collected.
Run this command:
python docker/real/scripts/so101_check_calibration.py
Example output:
============================================================================
  SO101 CALIBRATION CHECK REPORT
  File:  /root/.cache/huggingface/lerobot/calibration/robots/so101_follower/orange_robot.json
  Stats: /workspace/Sim-to-Real-SO-101-Workshop/real_robot/calibration_stats.json
============================================================================

[1] Motion Range vs Stats (threshold ±2.0σ)

  Joint               Range     Mean    Std  Deviation    Offset  Status
  --------------------------------------------------------------------------
  shoulder_pan         2718     2725     32     -0.23σ      -174  ✓ PASS
  shoulder_lift        2353     2350     77     +0.04σ       710  ✓ PASS
  elbow_flex           2230     2222      9     +0.90σ     -1659  ✓ PASS
  wrist_flex           2331     2329     17     +0.11σ      -330  ✓ PASS
  wrist_roll           3857     4026    114     -1.48σ      -555  ✓ PASS
  gripper              1483     1475     33     +0.23σ      -845  ✓ PASS

[2] Live Encoder Positions

  Joint               Position    Calibrated Range     In Range
  --------------------------------------------------------------------------
  shoulder_pan            2174       857 – 3575       ✓ OK
  shoulder_lift            888       872 – 3225       ✓ OK
  elbow_flex              3059       861 – 3091       ✓ OK
  wrist_flex              1871       838 – 3169       ✓ OK
  wrist_roll               100       77 – 3934        ✓ OK
  gripper                 1763      1727 – 3210       ✓ OK

============================================================================
  Overall: ✓ PASS — calibration looks good.
============================================================================
Make sure you see
Overall: ✓ PASS — calibration looks good.in the output. If not, try re-calibrating.
Tip
If you need help, see the Troubleshooting Guide for common issues and diagnostic steps.
Key Takeaways#
Proper calibration is essential for sim-to-real correspondence
LeRobot provides unified commands for robot control
Always verify hardware before data collection or deployment
What’s Next?#
With both arms calibrated, continue to Operating the SO-101 to teleoperate the robot and configure cameras.