DIMM Replacement#
Caution
Static Sensitive Devices: Be sure to observe best practices for electrostatic discharge (ESD) protection. This includes making sure personnel and equipment are connected to a common ground, such as by wearing a wrist strap connected to the chassis ground, and placing components on static-free work surfaces.
DIMM Replacement Overview#
This is a high-level overview of the procedure to replace a dual inline memory module (DIMM) on the NVIDIA DGX™ H100/H200 system.
Use the
nvsm healthcommand to identify the failed DIMMGet a replacement DIMM from NVIDIA Enterprise Support
Shut down the system
Label all motherboard tray cables and unplug them
Remove the motherboard tray and place on a solid flat surface
Remove the motherboard tray lid
Use the reference diagram on the lid of the motherboard tray to identify the failed DIMM
Replace the bad DIMM with the new one
Close the lid on the motherboard tray
Insert the motherboard tray into the system
Plug in all cables using the labels as a reference
Power on the system
Verify that all DIMMs are now healthy with nvsm health
Ship back the failed unit to NVIDIA Enterprise Support using the packaging provided
Note
You should observe the following DIMM population guidelines:
Each memory channel (A, B, C, D, E, F, G, H) should be populated with identical DIMMs for optimal performance in a dual-memory configuration. For example, DIMMs in slots CPU1_B0 and CPU1_B1 within channel B should have the same part number.
Different memory channels can be populated with DIMMs of different part numbers. For example, DIMMs in slots CPU1_A0 and CPU1_A1 should have the same part number, while DIMMs in slots CPU1_B0 and CPU1_B1 should have the same part number. However, the DIMM manufacturer in channel A can differ from the DIMM manufacturer in channel B.
Identifying the Failed DIMM#
From the console, run the following
nvsmcommand to identify memory alerts:sudo nvsm show health
Determine the DIMM manufacturer.
sudo nvsm show memory
Request the replacement DIMM from NVIDIA Enterprise Support, specifying the manufacturer.
Replacing the DIMM#
Power off the system.
Remove the motherboard tray. Refer to Motherboard Tray - Removal and Installation for more information.
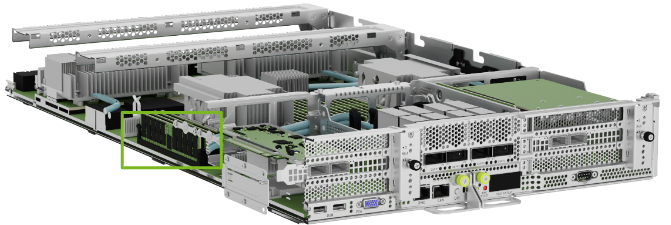
Pull the motherboard out of the system and place it on a solid, flat surface and remove the lid and air baffles to expose the DIMMs.
Identify the failed DIMM on the motherboard. Use the label on the lid to identify the position of the DIMM to be replaced. The names of the DIMMs also include the CPU numbering for easier identification.

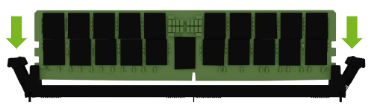
Remove the DIMM. Press down on the side latches at both ends of the DIMM socket to push them away from the DIMM. This should unseat the DIMM from the socket.
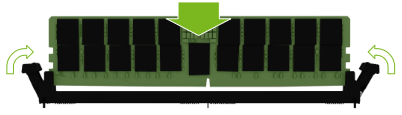
To install the DIMM, make sure both levers are in the open position. Make sure the DIMM is correctly aligned with the key in the right position and press down on the DIMM until it clicks in the socket and the levers close.
Finalize DIMM Replacement#
Install the air baffles, close the motherboard, and install the tray in the chassis. Refer to Motherboard Tray - Removal and Installation for more information.
Plug in all cables.
Install all power cords.
Power on system.
Login and use the
nvsmcommand to confirm the system is healthy:sudo nvsm show health
Ship the bad DIMM back to NVIDIA Enterprise Support.