Network Interface Card Replacement#
Network Card Replacement Overview#
This is a high-level overview of the procedure to replace one or more network cards on the NVIDIA DGX™ H100/H200 system.
Identify the failed card
Get a replacement Ethernet card from NVIDIA Enterprise Support
Make sure the system is shut down
If cables don’t reach, label all cables and unplug them from the motherboard tray
Slide motherboard out until it locks in place
Open rear compartment
Pull out the bad Ethernet card
Install the new Ethernet card
Close the rear motherboard compartment
Slide the motherboard back into the system
Plug in all cables using the labels as a reference
Power on the system
Test the Ethernet card
Ship back the failed unit to NVIDIA Enterprise Support using the packaging provided
Prepare the System for Replacement#
Usually, the issue with a network interface card for the following reasons:
The operating system does not detect the device.
The device does not transmit or receive data.
After you rule out external connectivity issues, contact NVIDIA Enterprise Support to receive a replacement card.
When you receive the card, begin the replacement by performing the following actions:
Power off the system.
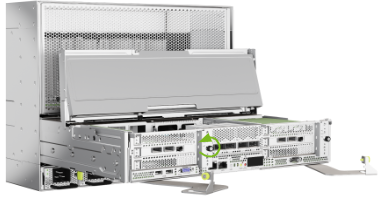
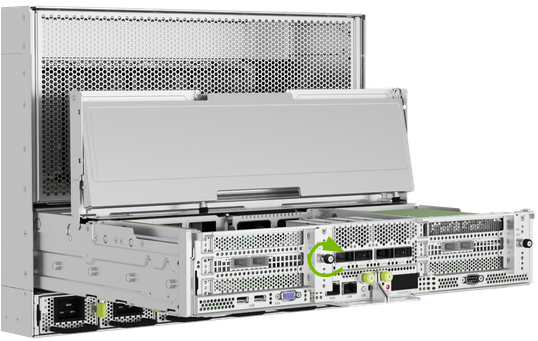
Open the motherboard tray IO door to access the rear section of the motherboard. Refer to Motherboard Tray - Opening and Closing the IO door for more information.
Remove the Non-Functional Card#
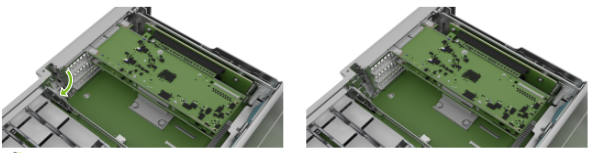
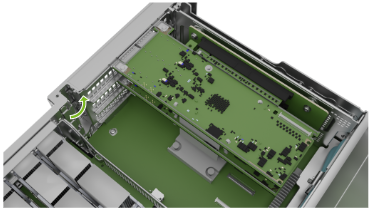
First, turn the locking mechanism 90 degrees so the card can be extracted from the PCI slot:
Confirm the motherboard tray service lid is open and loosen the thumb screw for the PCI card locking mechanism next to slots 1 and 3:
Rotate the locking mechanism to release the PCI cards, as shown in the following figure:
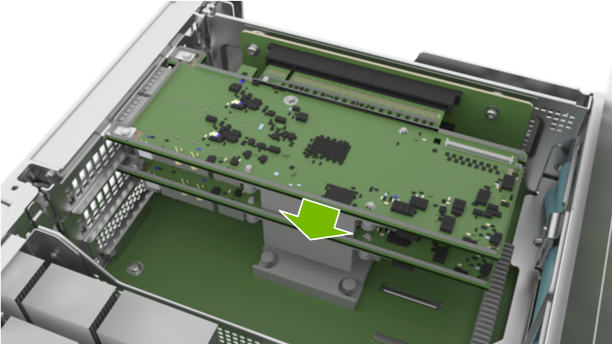
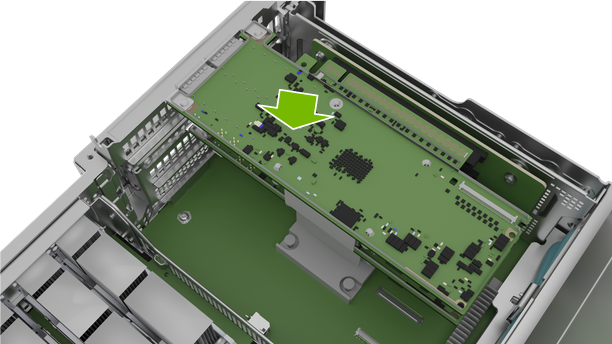
Pull the PCI Ethernet card from the slot in the riser:
Remove the card from the system:
Install the New Card and Close the Lock#
Position the PCI card in the system:
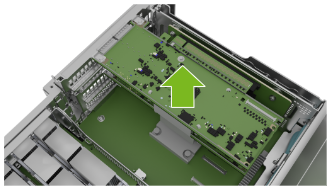
Push the card into the PCI slot:

Close the latch to lock the PCI cards in place:
Secure the locking mechanism by tightening the black thumb screw:
Finalize the Network Interface Card Replacement#
Refer to Motherboard Tray - Opening and Closing the IO door for information about performing the following actions:
Close the motherboard tray IO door.
Lock the motherboard lid.
Insert the motherboard.
Reconnect cables to their ports.