Rack Mount Kit Replacement#
Remove the two front screws and washers
Remove the two rear screws
Use the clips to release the front and rear from each side of the kit
Remove the cage nuts from the rack posts
Install on the new rack by using the clips to position the kit at the right height
Use the template to install the cage nuts in the right
Use the four screws and two washers to secure the rack mount kit in place
Rack Mount Kit Description#
The rack mount kit acts as a shelf in the rack, it does not allow the system to be moved once installed. All components are serviceable from the front or rear.
This rack mount kit can extend lengthwise, and the distance between the posts can range from 29-35 in (.74m - 0.9m)
Note
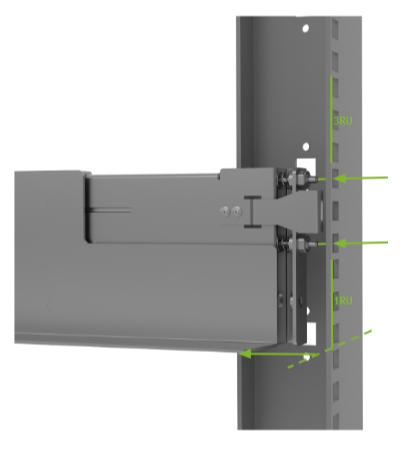
the lip at the bottom will hold the bottom of the system
These prongs enter the holes of the rack (square or round)
Metal plates keep the rack kit in place
Secure the rack mount kit to the rack with the provided screws
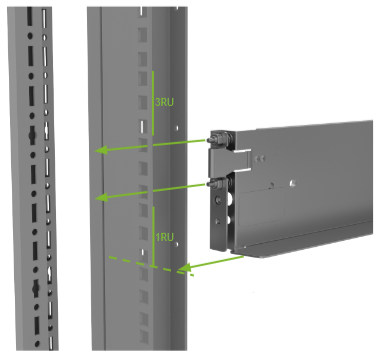
Identify the front of the rackmount with the embossed labels

On the lower part, there is a lip, labeled ‘1’, that when installed in a rack, will hold the system in place as if it was a shelf.
On either end, and labeled ‘2’ on the diagram, there are spring loaded prongs that fit into the rack’s holes (either square or round.)
Together with the metal clips labeled ‘3’, they hold the rack mount kit in place for ease of installation.
Labeled with a number 4 are the holes where the screws that secure the rack kit in place must be installed.
The number ‘5’ identifies the location where that part of the rack mount kit should be installed in the rack
Remove Rack Mount Kit - Front Rack#
To remove the rack mount kit, first remove the flat head screw and the countersunk washer, and keep in a safe place.
Push on the clip to release the rack mount kit rail from the post, and push it towards the back while holding the rail
Next pull on the clip to release the rack mount kit from the post so it can slide back and so that the prongs can be released from the post.
Remove the rail from the front post and hold in place while the rear is released;
Remove all cage nuts from the rack posts so they can be used during installation
Remove Rack Mount Kit - Rear#
To release the rear of the rack mount kit, remove the round head screw and keep next to the other screws and washers.
Pull on the metal clip and slide the rail away from the post so the progs are free from the rack.
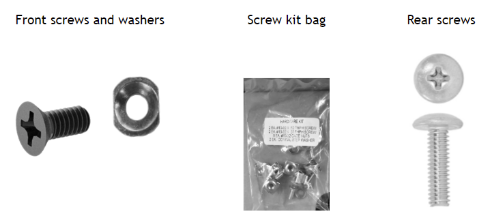
Confirm Necessary Screws and Washers#
These items are in the rack mount kit box with the rack mount kit All these components should have been removed from the previous installation
Note
front screws are different from the screws used for the back of the rack mount kit. If the correct screws are not used in the front, the server will not be flush when pushed against the rack and it will be difficult to secure the other eight captive screws.
Make sure all cage nuts are removed from the rack, as they will be needed to install the rack mount kit at its new location.
Install Cage Nuts Using Template#
A printed copy of this template is included as part of the rack kit, and it should be used to align the desired location of the system to where the included cage nuts should be installed The template is double sided so it can be used as a reference on the left and right posts of the rack.
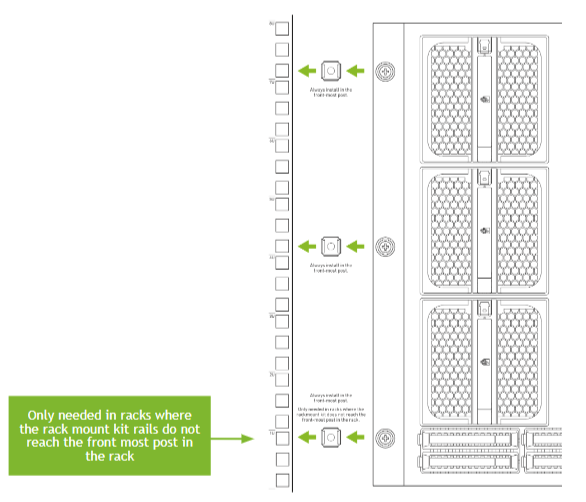
Note
RACKS WITH C-CHANNEL POSTS: They have an obstruction that prevents the rack mount kit from being installed in the front-most post - use a third pair of cage nuts so the bottom system screws have something to engage with.
Install Rack Mount Kit - Front#
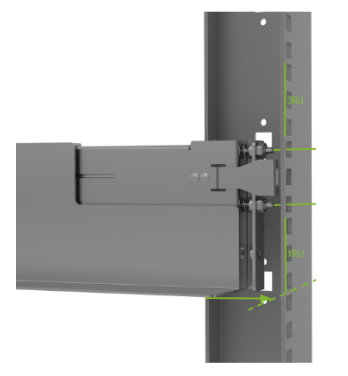
To install the rack mount kit on the rack, start with either side. We will describe the installation of the left side.
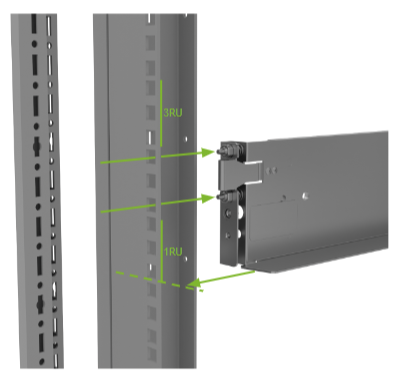
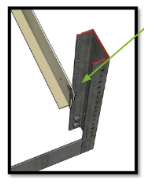
The first step is to align the lip to the bottom of the rack unit where the system needs to be installed as shown in the diagram.
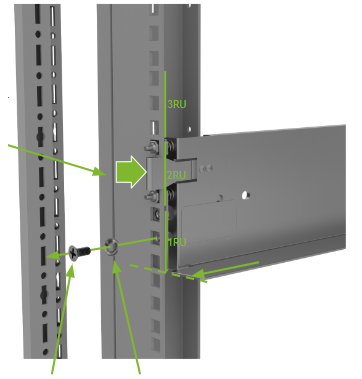
Insert the spring loaded prongs into the rack post’s holes and open the clips to make sure the prongs are inserted as far as they will go.
Close the clip and make sure the rack kit is securely attached to the rack.
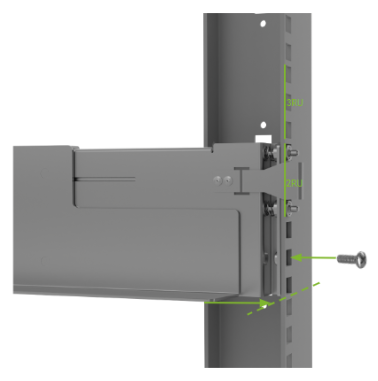
Install the flat head screw and the countersunk washer in the bottom hole as pictured to secure the rack mount kit to the post.

Install Rack Mount Kit - Rear#
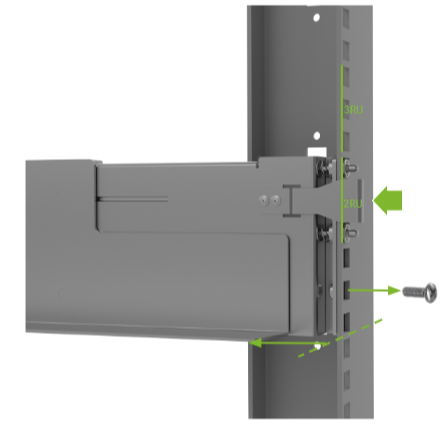
To install the rear section of the rack mount kit, follow the same steps to align the bottom lip to the bottom of where the system should be.
Pull open the clip and insert the prongs through the corresponding holes in the second rack unit. Make sure the prongs are fully extended. Release the clip so it locks the rack mount kit into place.
Install the round head screw in the rack mount kit to secure it to the post.
Repeat the procedure for the right side rack mount kit.