Front Fan Module Replacement#
Front Fan Module Replacement Overview#
This is a high-level overview of the steps needed to replace the front fan modules.
Identify failed front fan module through BMC or with the fan module LED and submit a service ticket
Get replacement from NVIDIA Enterprise Support
Remove failed fan module
Insert new fan module
Confirm new fan module is working correctly through BMC or the operating system tools
Return/ship the failed unit to NVIDIA Enterprise Support using the packaging provided
Identifying a Failed Fan Module#
You can identify a failed fan module using any of the following methods:
Remove the system bezel and visually inspect the fan module LEDs.
Run the
nvsm show fanscommand and view the command output.Access the BMC web user interface and view the sensor data from the fans. If a fan is running at an abnormal speed, then that fan needs to be replaced.
Viewing the Fan Module LEDs
Removing and Attaching the Bezel to expose the fan modules.
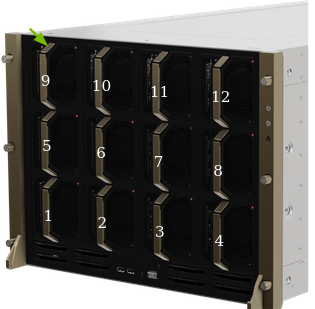
After you remove the bezel, the system looks like the following figure.
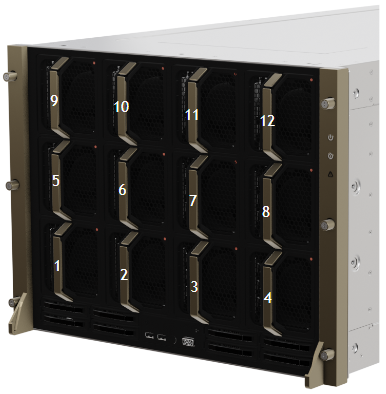
Identify the failed fan using the fan module fault LED as shown in the following figure.
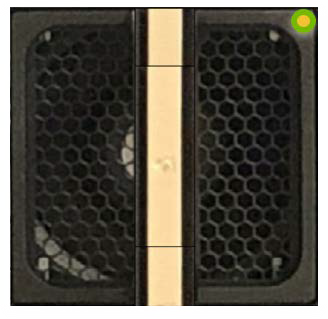
Look for the lit fault LED on the upper right corner of the faulty fan module as shown in the following figure.
Running the Show Fans command
From the operating system, run:
sudo nvsm show fans
View the command output for any alerts, failures, or an
unhealthystatus.
Viewing Fan Modules from the BMC web user interface
Identify the faulty fan module using the BMC dashboard.
Log on to the BMC.
Click Sensor from the left navigation menu.
Review the Normal Sensors section.
Look for abnormal fan speeds in the right column.

There are two fans in the fan module, identified by
SPD_FAN_SYSn_FandSPD_FAN_SYSn_R, wherenis the module ID. If either fan fails, then the entire module must be replaced.Use the
nvsmcommand to confirm the fan issue.sudo nvsm show fans
View the output and confirm that the status is
unhealthyfor the same fan.
Replacing and Returning the Front Fan Module#
Remove the new fan module from its packaging and be ready to install it.
Important
Replace the old fan with the new one within 30 seconds to avoid overheating of the system components.
Refer to Removing and Attaching the Bezel to expose the fan modules.
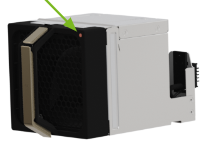
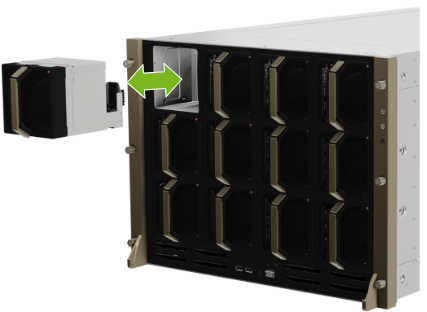
Unlock the fan module by pressing the release button, as shown in the following figure.
Replace the failed fan module with the new one.
Confirm that the fan module is healthy working properly by performing the following actions:
Using the BMC web user interface
Verifying that the amber LED on the fan module is extinguished
Running the
sudo nvsm show fanscommandInstall the bezel as described in the bezel section