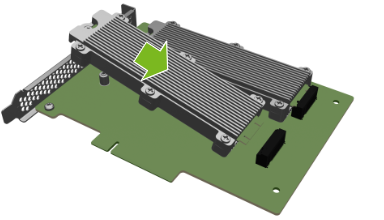
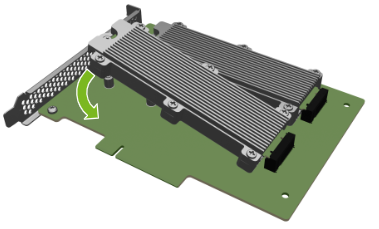
M.2 NVMe Boot Drive Replacement#
Caution
Static Sensitive Devices: Be sure to observe best practices for electrostatic discharge (ESD) protection. This includes making sure personnel and equipment are connected to a common ground, such as by wearing a wrist strap connected to the chassis ground, and placing components on static-free work surfaces.
M.2 NVMe Boot Drive Replacement Overview#
This is a high-level overview of the procedure to replace a boot drive.
Determine which M.2 device needs to be replaced with the help of NVIDIA Enterprise Support
Get a replacement M.2 disk from NVIDIA Enterprise Support
Make sure the system is shut down
If cables don’t reach, label all cables and unplug them from the motherboard tray
Slide motherboard out until it locks in place
Open rear compartment
Pull out the M.2 riser card with both M.2 disks attached
Replace the failed M.2 device on the riser card
Install the M.2 riser card with both M.2 disks
Close the rear motherboard compartment
Slide the motherboard back into the system
Plug in all cables using the labels as a reference
Power on the system
Confirm the M.2 RAID 1 mirror is synchronizing
Ship back the failed unit to NVIDIA Enterprise Support using the packaging provided
Identify the Failed M.2 NVMe#
The NVIDIA DGX™ H100/H200 system automatically sets the failed M.2 drive offline when it detects the failure.
The boot drives are mirrored, so the mdadm command-line utility can identify the drive to replace.
Determine which drive failed:
sudo nvsm show health
The command output indicates the drive name,
nvme0n1ornvme1n1.Confirm the drive name by using the
mdadmcommand:sudo mdadm -D /dev/md0
The command output indicates the drive names and the drive state.
Contact NVIDIA Enterprise Support to request a replacement M.2 drive.
When the new drive arrives, you must remove the failed drive from the RAID volume. Run the following commands to mark the drive as failed and to remove the drive from the array.
Mark the disk as failed, if it is not already marked as failed:
sudo mdadm --manage /dev/md0 --fail /dev/nvmeXn1
Remove the failed disk from the array:
sudo mdadm --manage /dev/md0 --remove /dev/nvmeXn1
Replace X in the preceding commands with the ID of the failed drive.
Back up any critical data to a network shared volume or some other means of backup.
Power down the system.
Remove the M.2 Boot Drive Carrier#
Before attempting to remove M.2 boot drive carrier, make sure that you performed the following prerequisites:
Label all network, monitor, and USB cables connected to the motherboard tray for easy identification when reconnecting.
Unplug all power cords, and all network, monitor, and USB cables.
Refer to Motherboard Tray - Opening and Closing the IO door for more information.
After the IO section of the motherboard is open, unlock the M.2 drive carrier by loosening the PCI card locking mechanism by loosening the black captive thumbscrew on the right side of the motherboard:
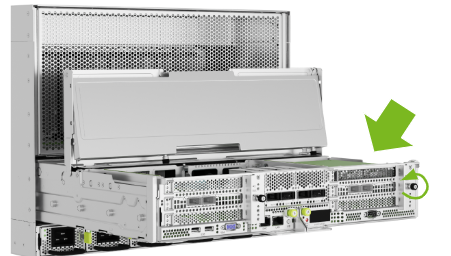
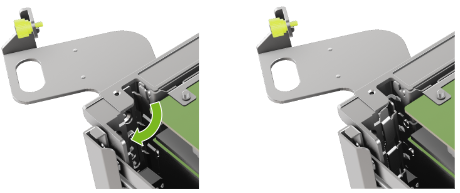
Rotate the locking mechanism for the PCI carrier out of the way:
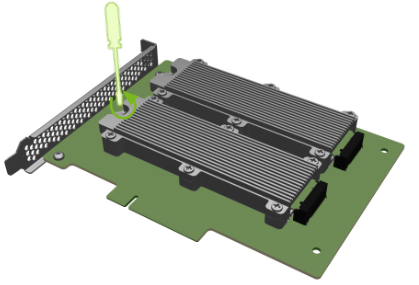
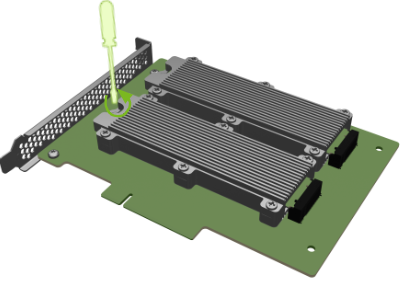
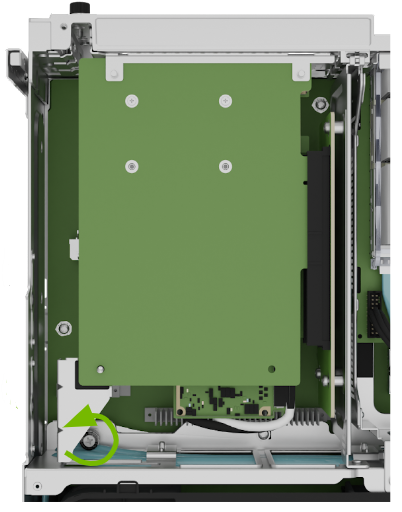
Lossen the captive screw on the support bracket of the M.2 riser card:
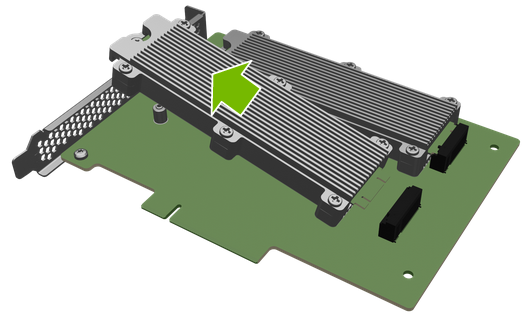
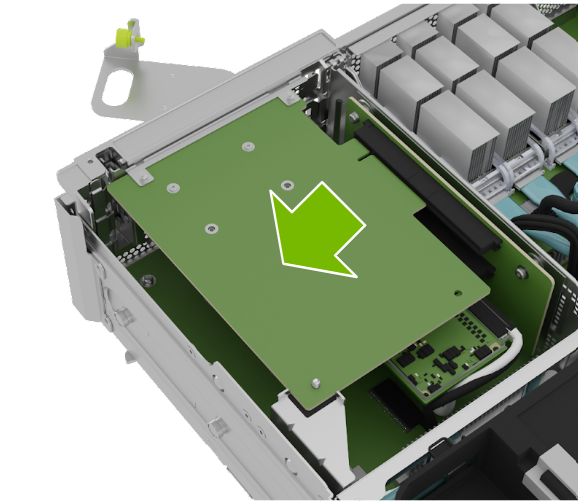
Pull the M.2 riser card from the slot:
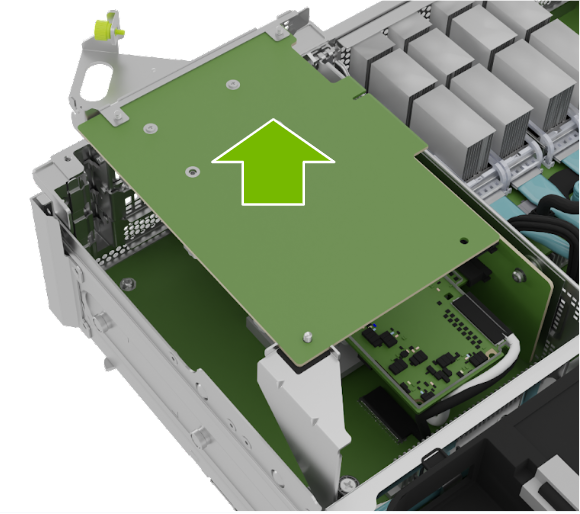
Lift the M.2 riser card to remove it from the system:
Remove the M.2 Drive#
Before attempting to remove one of the M.2 NVMe drives, make sure that you performed the following prerequisites:
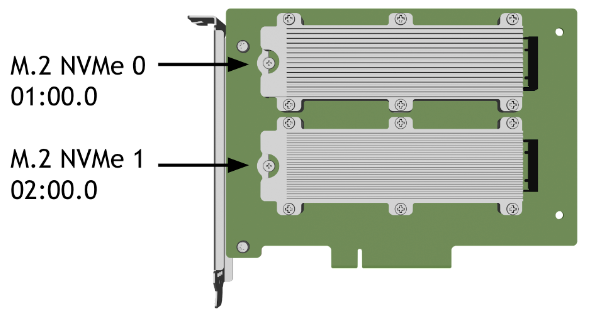
Determined the location ID of the faulty M.2 drive.
Obtained the replacement M.2 drive and have saved the packaging for use when returning the faulty drive.
Replace the M.2 Drive#
Install the M.2 Boot Drive Carrier and Close the System#
Position the M.2 riser card into the system:
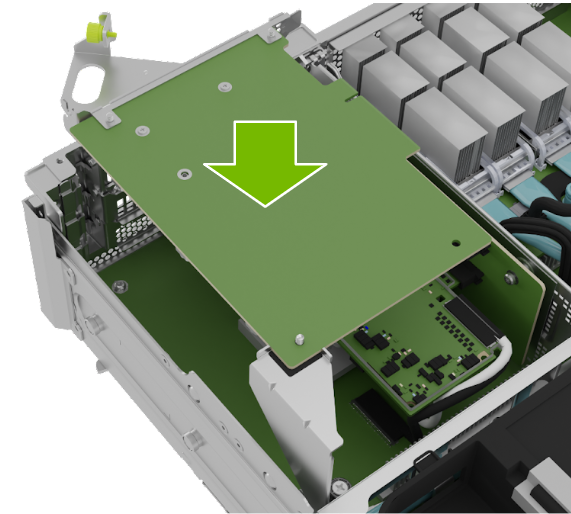
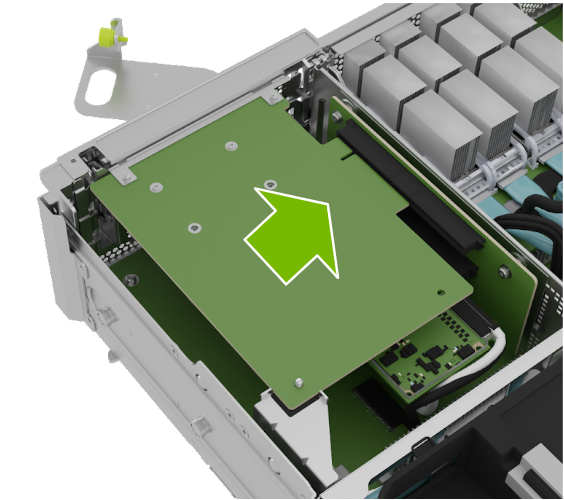
Install the M.2 carrier card into the PCI riser by aligning it with the slot and then pressing it against the riser:
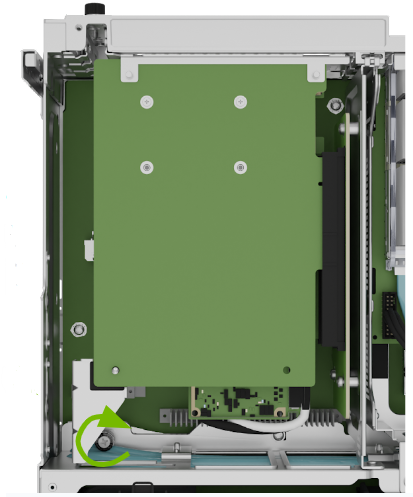
Tighten the captive screw on the support bracket of the M.2 riser card:
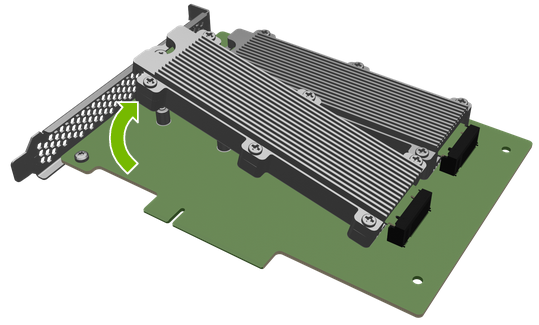
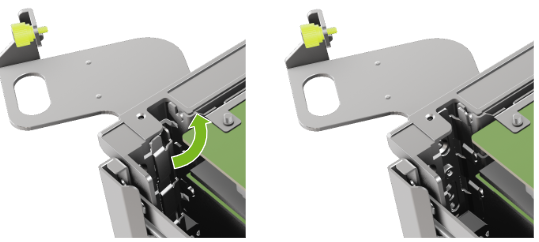
Close the latch to secure the M.2 carrier and secure it in place:
Tighten the thumb screw to make sure the locking mechanism stays in place:
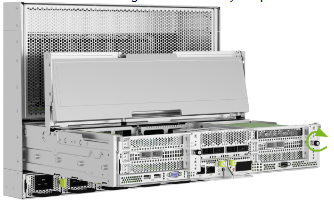
Integrate the New Drive and Complete Installation#
Return the motherboard to its regular position and power on the system.
Refer to Motherboard Tray - Opening and Closing the IO door for more information.
Boot the Operating System.
Run the following command to rebuild the boot drive mirror:
sudo nvsm start /systems/localhost/storage/volumes/md0/rebuild/
At the
Type of volume rebuildprompt, enterraid-1and pressEnter:PROMPT: In order to rebuild volume, volume type is required. Please specify the volume type to rebuild from options below. raid-0: create raid-0 data volume raid-1: rebuild OS boot and root volumes esp: find and replicate an empty EFI system partition Type of volume rebuild (CTRL-C to cancel): raid-1
At the
Name of spare driveprompt, enter the replacement drive name,nvme0n1ornvme1n1, and pressEnter:PROMPT: In order to rebuild this volume, a spare drive is required. Please specify the spare drive to use to rebuild RAID-1. Name of spare drive for RAID-1 rebuild (CTRL-C to cancel): nvmeXn1
At the warning prompt, enter
yand pressEnter:WARNING: Once the volume rebuild process is started, the process cannot be stopped. Start RAID-1 rebuild on md0? [y/n] y
Example Output
Initializing rebuild ...Monitor the progress. After approximately
30seconds, the following message appears:/systems/localhost/storage/volumes/md0/rebuild started at 2018-10-12 15:27:26.525187 Rebuilding RAID-1 rebuild on volume md0… 31.0% [=============/ ]
If this message remains at
Initiating RAID-1 rebuildfor more than30seconds, then there is a problem with the rebuild process. In this case, make sure the name of the replacement drive is correct and try again.Use the packaging from the new drive to ship back the failed drive back to NVIDIA Enterprise Support
Note
If your organization purchased a media retention policy, you might be able to keep failed drives for destruction. Check with NVIDIA Enterprise Support on the status of the policy for specifics.
