U.2 NVMe Cache Drive Replacement#
U.2 NVMe Cache Drive Replacement Overview#
This is a high-level overview of the procedure to replace a cache Non-Volatile Memory Express (NVMe) drive.
Identify failed SSD
Get replacement SSD from NVIDIA Enterprise Support
Power off the system
Remove failed SSD identified earlier
Insert new SSD
Power on the system
Rebuild the RAID volume and mount the filesystem
Ship back the failed unit to NVIDIA Enterprise Support using the packaging provided
Identifying the Failed U.2 NVMe SSD#
Identifying the Failed NVMe from the Front
If physical access to the system is available, you can identify a failed drive by the illuminated amber LED.
Identifying the Failed NVMe from the Console
To identify the failed data drive, you can use the
nvsmcommand:sudo nvsm show health
View the command output and look for drive alerts to identity the failed drive.
Alternatively, you can use the BMC web user interface to access the Sensor screen, the IPMI event log, and the System log to identify issues with the U.2 drives.
Identifying the NVMe Manufacturer and Model#
Use the
nvsmcommand to display the drive information:sudo nvsm show /systems/localhost/storage/drives/nvmeXn1
Replace X in the preceding command with the number that corresponds to the Linux device name for the failed drive.
Example Output
 /systems/localhost/storage/drives/nvme5n1
 Properties:
     PhysicalLocation_Info = SlotU.2_Slot3
     BlockSizeBytes = 512
     SerialNumber = 22L0A01WT2N8
     Model = KCM6DRUL3T84
     Revision = 0107
     Manufacturer = KIOXIA Corporation
     Status_State = Enabled
     Status_Health = OK
     Name = nvme5n1
     MediaType = SSD
     EncryptionStatus = Unlocked
     CapacityBytes = 3840755982336
     Id = nvme5n1
 Targets:
 Verbs:
     cd
     set
     show
Refer to the
ManufacturerandModelfields in the output. Request a replacement NVMe from NVIDIA Enterprise Support, specifying this information.
Replacing the U.2 NVMe Drive#
Make sure that you requested and obtained the replacement drive from NVIDIA Enterprise Support.
Back up any critical data to a network shared volume or some other means of backup.
Power off the system using the power button.
Remove the bezel. Refer to Removing and Attaching the Bezel for more information.
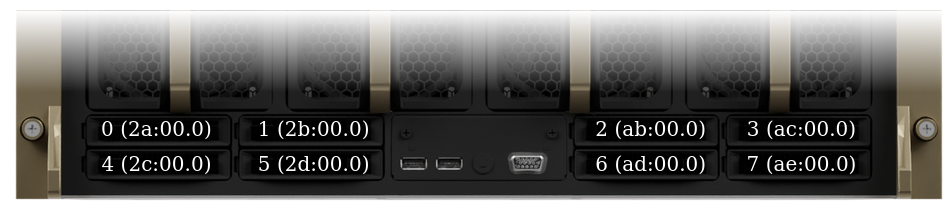
After the system powers off, use the following figure to identify the drive to replace on the chassis.
The figures in the following procedures show replacing drive number
7at PCI addressae.
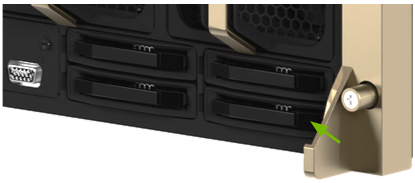
Remove the NVMe drive.
Press the tab on the right side of the drive to release the lever:
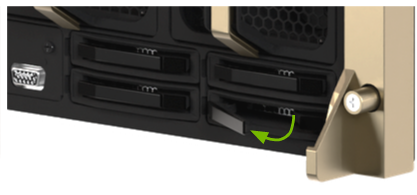
Pull the drive out by using the lever:
Remove the drive:
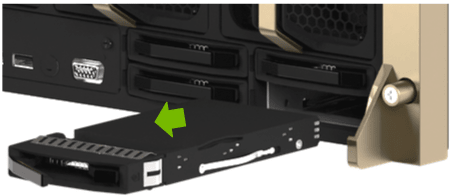
Insert the U.2 NVMe Drive#
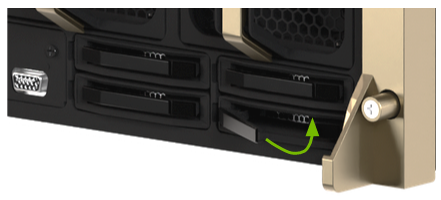
Open the lever on the drive and insert the replacement drive in the same slot:
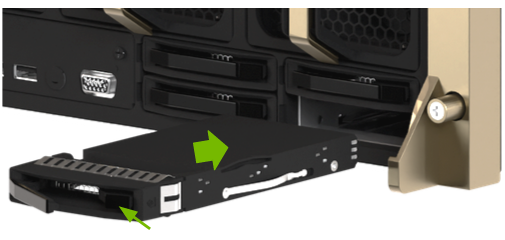
Close the lever and secure it in place:
Confirm the drive is flush with the system:
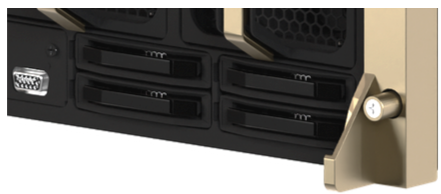
Install the bezel after the drive replacement is complete.
Power on the system.