M.2 Boot Drive Assembly Replacement#
This section applies when you must replace both M.2 operating system drives. In this case, a replacement assembly—which includes both M.2 NVMe drives—should be ordered.
M.2 Boot Drive Riser Assembly Replacement Overview#
This is a high-level overview of the procedure to replace the boot drive riser assembly.
Note
If your organization purchased a media retention policy, you might be able to keep failed drives for destruction. Check with NVIDIA Enterprise Support on the status of the policy for specifics.
Get a replacement M.2 boot drive assembly from NVIDIA Enterprise Support
Make sure the system is shut down
If cables don’t reach, label all cables and unplug them from the motherboard tray
Slide motherboard out until it locks in place
Open rear compartment
Pull out the M.2 riser card with both M.2 disks attached
Install the M.2 riser card with both M.2 disks
Close the rear motherboard compartment
Slide the motherboard back into the system
Plug in all cables using the labels as a reference
Power on the system
Re-install using the latest DGX Operating System
Ship back the failed unit to NVIDIA Enterprise Support using the packaging provide
Preparing the System for Replacement#
This failure is hard to diagnose because the system won’t boot, as both boot drives are unavailable.
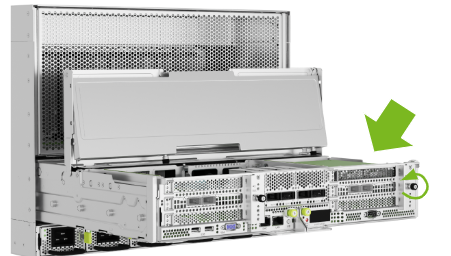
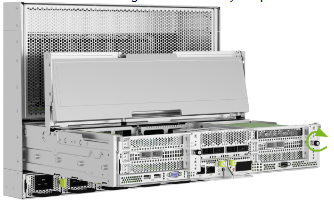
After the replacement part arrives from NVIDIA, shut down the system from the front power button or from the BMC user interface and proceed by opening the IO door of the motherboard. Refer to Motherboard Tray - Opening and Closing the IO door to get access to the M.2 boot drive carrier.
Remove the M.2 Boot Drive Carrier#
Before attempting to remove M.2 boot drive carrier, make sure that you performed the following prerequisites:
Label all network, monitor, and USB cables connected to the motherboard tray for easy identification when reconnecting.
Unplug all power cords, and all network, monitor, and USB cables.
Refer to Motherboard Tray - Opening and Closing the IO door for more information.
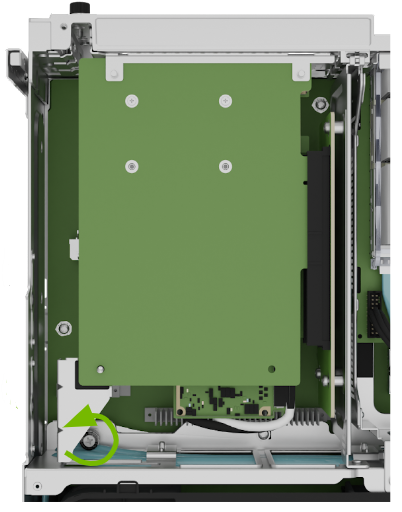
After the IO section of the motherboard is open, unlock the M.2 drive carrier by loosening the PCI card locking mechanism by loosening the black captive thumbscrew on the right side of the motherboard:
Rotate the locking mechanism for the PCI carrier out of the way:

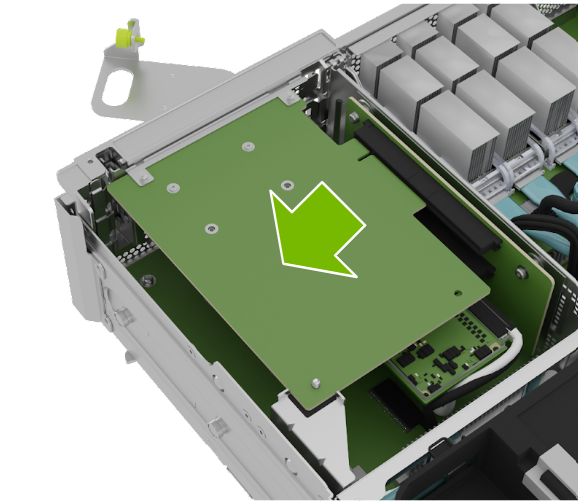
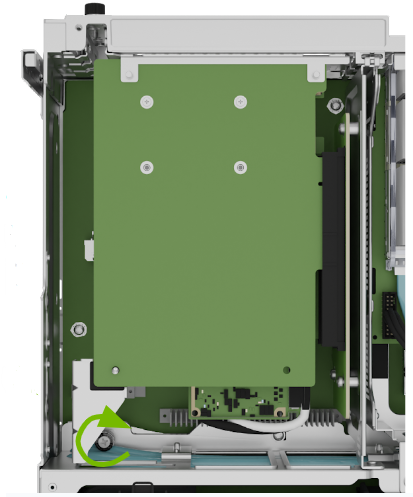
Lossen the captive screw on the support bracket of the M.2 riser card:
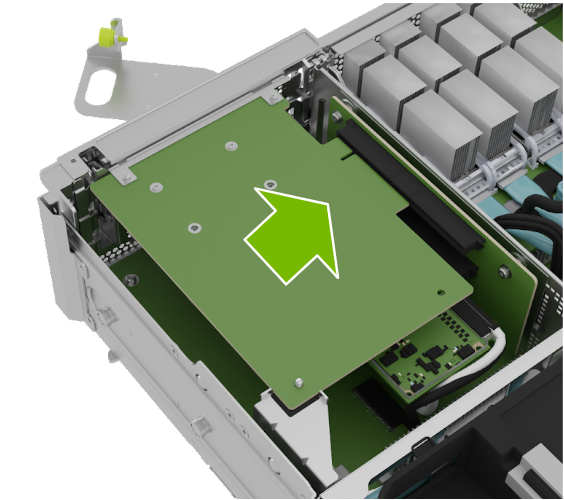
Pull the M.2 riser card from the slot:
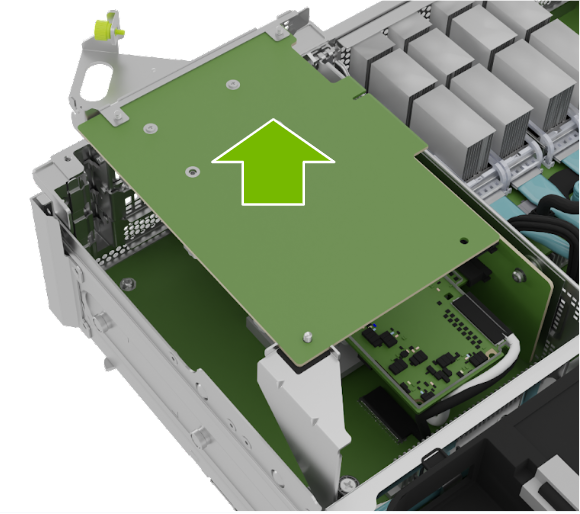
Lift the M.2 riser card to remove it from the system:
Install the M.2 Boot Drive Carrier and Close the System#
Position the M.2 riser card into the system:
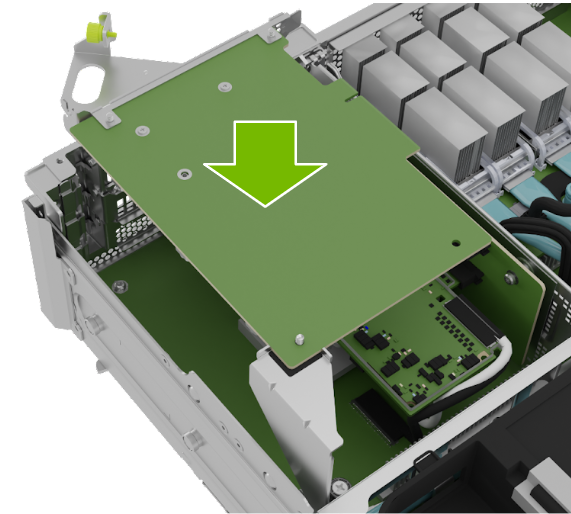
Install the M.2 carrier card into the PCI riser by aligning it with the slot and then pressing it against the riser:
Tighten the captive screw on the support bracket of the M.2 riser card:
Close the latch to secure the M.2 carrier and secure it in place:
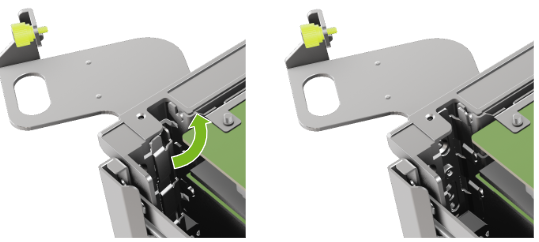
Tighten the thumb screw to make sure the locking mechanism stays in place:
Re-Install the System and Complete the Procedure#
Close the lid and insert the motherboard tray. Refer to Motherboard Tray - Opening and Closing the IO door for more information.
Reinstall the system following the instructions in the DGX OS User Guide.
Confirm the system is in working order by running:
sudo nvsm show health
Use the packaging from the new component to ship back the failed one back to NVIDIA Enterprise Support