Endoscopy (ToolTracking) App
In this part we focused on how you can use the endoscopy app on MONAI Label and the CVAT viewer. Also called the computer-assisted intervention (CAI) workflow of MONAI Label.
For this, we have prepared two use cases:
Pure inference using pretrained models in Nuclio/CVAT (Inference with CVAT+MONAI Label Function)
Active Learning functionality in MONAI Label (Usecase 2: Active Learning Workflow with MONAI Label + CVAT)
NoteIf you’ve started the Docker container for previous apps (Radiology or Pathology), the first step for this use case is to stop the previous MONAI Label server by pressing Ctrl+C and then exit from the docker container by typing exit, as shown in the next image

MONAI Label has deployed models that can be directly used in the CVAT without starting a MONAI Label server. It uses the deployed functions in nuclio already available in this LabFirst, we need to create a username and password for the CVAT and then set up the MONAI Label server environment.
For this, we need to start our environment by opening the System Console and running the following command to create the username and password:
cd /home/nvidia/cvat & docker exec -it cvat bash -ic 'python3 ~/manage.py createsuperuser'
Then, the next step is open the Browser on the Desktop instance and CVAT will be on the IP address http://127.0.0.1:8080. Once opened, log in using the username and password previously created.
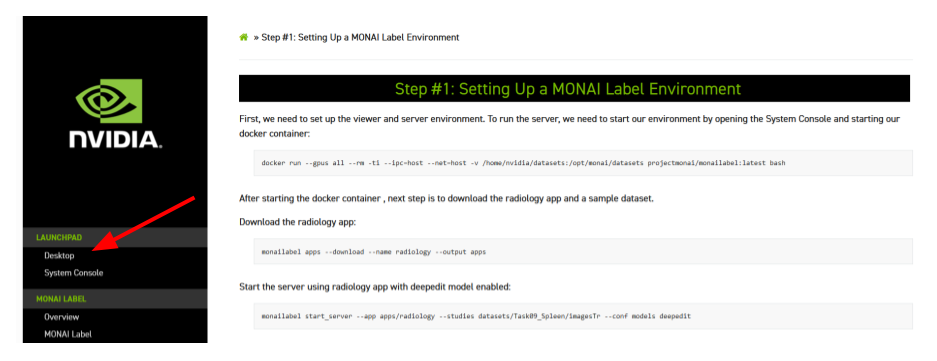
The Desktop can be found on the top left of this page:

Once logged in, create a task and upload images to CVAT. For this, click the “+” icon in the Tasks tag, create a name and add a label, and then click “Done”. Upload the zip file called “endoscopy_frames.zip” in the “Home” directory on the Desktop (/home/nvidia/datasets). Then click Submit to create a task.

A “job” will be shown in the CVAT, click the “job” to open the labeling task:

On the labeling task page, click the AI Tools on the left panel. Select Detectors, and choose tooltracking in the dropdown scroll. Pick the label and finally click the Annotate button.

The predicted mask will be shown as a polygon in the CVAT, users can edit the mask and click the Save icon on the top. Once finished annotation, click “Menu”, change the job state to “complete”, and “Finish the job”.
