Installing the Rack Mount Kit#
Installing the Rails#
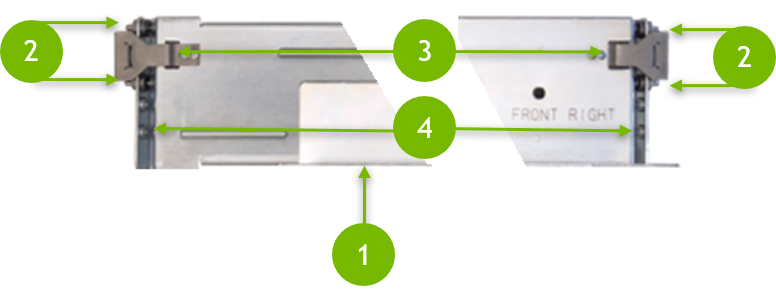
Follow these instructions to install the DGX A100 server rack mount kit. The rack mount kit acts as a shelf in the rack, it does not allow the system to be moved once installed. All components are serviceable from the front or rear, so this movement is not necessary.
Item |
Description |
|---|---|
1 |
Bottom lip to support the DGX A100. |
2 |
Prongs that enter the holes of the rack. Holes can be square or round. |
3 |
Metal clips that hold the rail in place. |
4 |
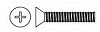
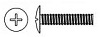
Thread for securing the rack mount kit to the rack. Two types of screws are provided.
|
Use a Phillips screwdriver to assist in mounting the rails to the rack.
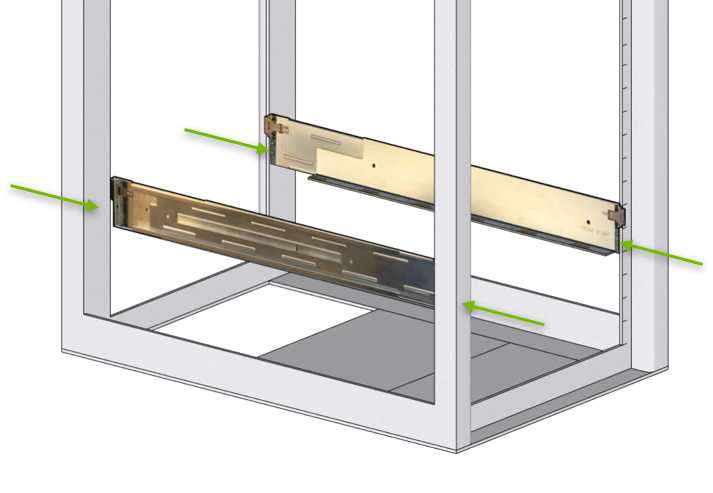
Follow any designations on the slide rail to determine front/back and left-side/right-side positioning against the rack.
Align the bottom lip of the left or right rail to the bottom of the first rack unit for the server.
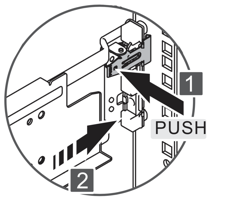
Attach the front of the rail to the rack.
Push the metal tab on the rail and then insert the two spring-loaded prongs into the holes on the front rack post.
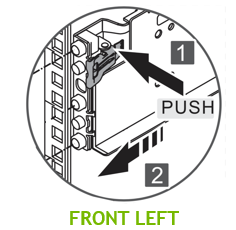
On square-holed racks, make sure the prongs are completely inserted into the hole by confirming that the spring is fully extended.
The metal clip helps secure the rail in place while installing the rail to the rear of the rack.
Extend the rail to the rear post of the rack and secure the rail to the post.
Make sure that rail is level and the attachment on the rear post is at the same rack unit as the front.
Insert the spring-loaded prongs into the holes on the rear rack post.
On square-holed racks, make sure the prongs are completely inserted into the hole by confirming that the spring is fully extended.
Repeat these steps for the other rail.
Secure the rails to the rack using the provided screws.
Install the four screws in the bottom holes of the rack kit.
Do not use the top holes, as those will be used for the captive screw in the chassis.
Confirm that the rails have been installed properly.
Both sides are installed on the same rack unit and are horizontal to each other.
The bottom lip is at the same height on all four posts.
The metal clips are properly attached.
Four screws are installed - flat head on the front and pan head on the back.
Installing the Cage Nuts#
The DGX A100 server is secured to the rack using four captive screws - one at each corner of the front of the unit.
If your rack has round holes with 10-32 threads, then the screws will attached directly to the rack mounting holes.
If your rack has square holes, then you need to install the included cage nuts to provide attachment points for mounting the DGX A100 server to the front of the rack.
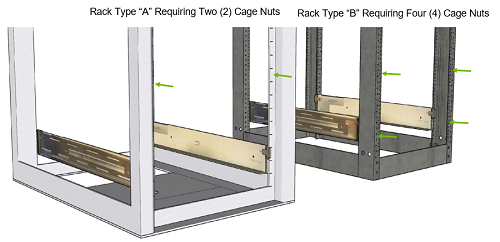
The number of cage nuts to install depends on the type of rack that is used. On most racks, cage nuts are needed only for the top screws. The bottom screws will attach to the threads in the rails. The image on the left side of the following diagram shows this type. Green arrows indicate the general area for the cage nuts.
The image on the right side shows a rack with square posts such that the rail does not meet the front-most part of the rack, In this rack, cage nuts need to be installed at the bottom holes as well, as indicated by the green arrows. All four cage nuts are also needed if you have installed a rack shelf instead of rack rails.
Use the provided template to determine the exact location for installing the cage nuts.
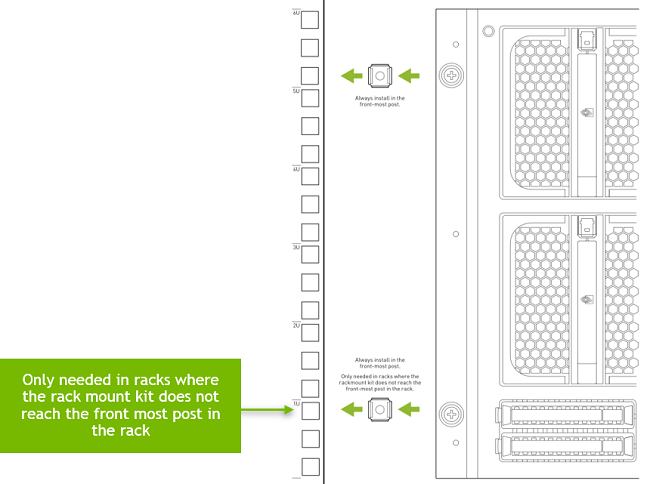
Place the template so that the bottom of the template rests on the rail lip (or at the same level as the rail lip).
The template is double sided so it can be used as a reference on the left and right posts of the rack.
Install the cage nuts at the positions indicated on the template.
Rail kits attached to Type A racks require two (2) cage nuts installed; top positions only.
Rail kits attached to Type B racks require four (4) cage nut installed; both top and bottom positions.