Motherboard Tray Battery Replacement#
Motherboard Tray Battery Replacement Overview#
This is a high-level overview of the procedure to replace the DGX A100 system motherboard tray battery.
Get a replacement battery - type CR2032.
Shut down the system.
Label all motherboard cables and unplug them.
Slide out the motherboard tray.
Open the motherboard tray IO compartment.
Pull out the M.2 riser card with both M.2 disks attached.
Pull out the dual port Mellanox card (slot 4).
Replace the battery on the motherboard.
Install the dual port Mellanox card (slot 4).
Install the M.2 riser card with both M.2 disks attached.
Close the lid IO compartment on the motherboard tray.
Slide the motherboard tray into the system.
Plug in all cables using the labels as a reference.
Power on the system.
Confirm the system is healthy by running
nvsm show health
Replacing the Motherboard Tray Battery#
A battery failure can be determined in a few ways.
“Invalid configuration” will appear on your screen.
Setup appears on your screen before booting.
“Press F1 to continue” appears on the console.
A Clock Error or Clock Message appears on your screen.
The system clock loses time and date.
Call NVIDIA Enterprise Support to confirm that the battery is the right component to replace. The CR2032 battery is not provided by NVIDIA, but can be purchased from a convenience store.
Caution
Static Sensitive Devices: - Be sure to observe best practices for electrostatic discharge (ESD) protection. This includes making sure personnel and equipment are connected to a common ground, such as by wearing a wrist strap connected to the chassis ground, and placing components on static-free work surfaces.
Power down the system.
Label all cables connected to the motherboard tray for easy identification when reconnecting.
Unplug the cables.
Remove the motherboard tray.
Refer to the instructions in the section Accessing the Motherboard Tray.
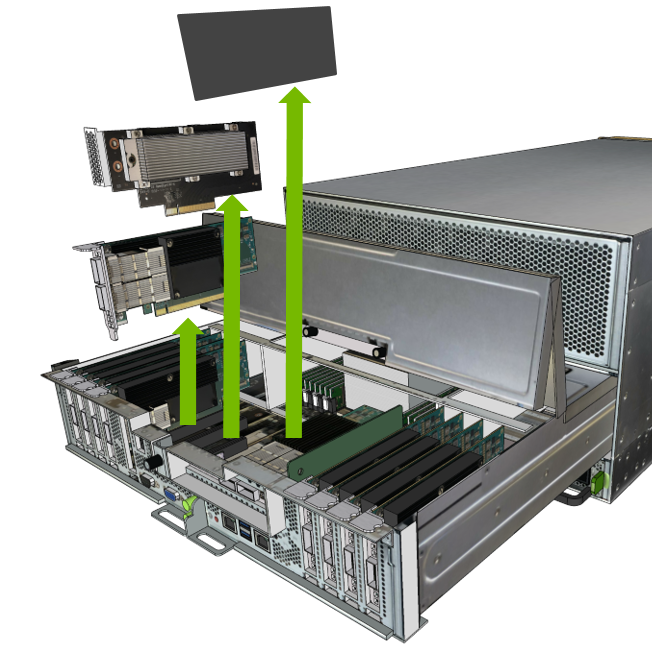
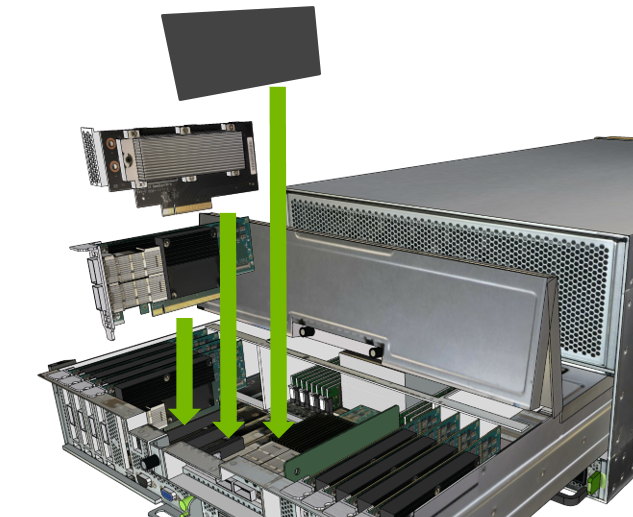
Remove the M.2 riser card, the IO card, and the air baffle.
These components need to be removed to gain access to the battery.
Confirm the locations of the components to remove using the following diagram.
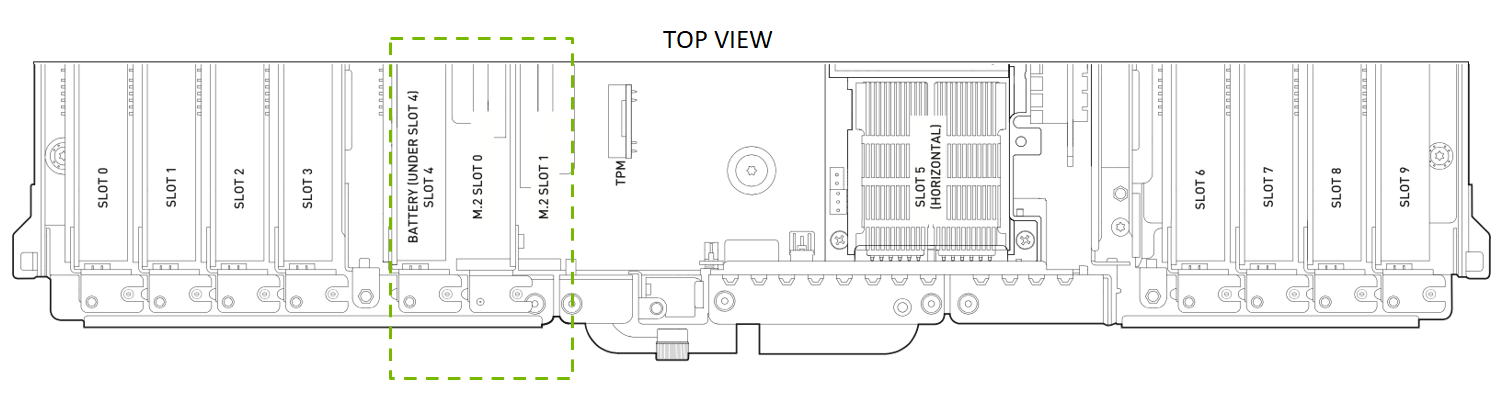
Lift off the IO card, the M.2.riser, and the air baffle and set them on a solid surface.
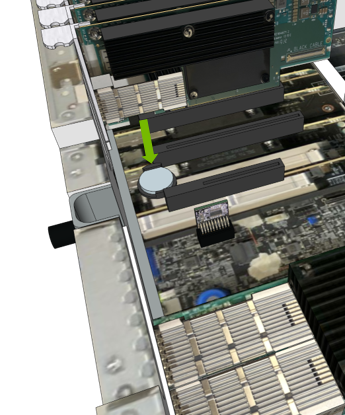
Replace the battery.
Locate the battery, using the following image as a guide.
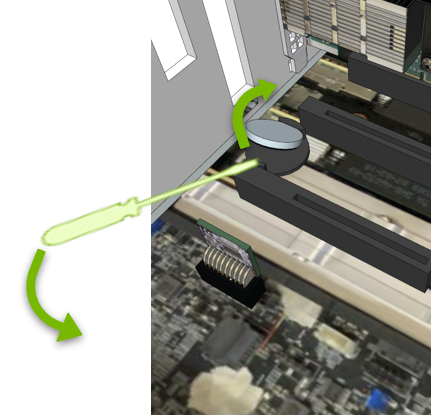
Use a small flat-head screwdriver or similar thin tool to gently lift the battery from the battery holder.
Replace the battery with a new CR2032, installing it in the battery holder.

Re-insert the IO card, the M.2 riser card, and the air baffle into their respective slots.
Replace the motherboard tray.
Refer to the instructions in the section Replacing the Motherboard Tray.
Connect all the cables and power cords to the motherboard tray.
Apply power to the system and then log in.
Restore the date on the system.
Set the date.
$ sudo date [MMDDhhmm[[CC]YY][.ss]]
Sync the date and time to the hardware real time clock.
$ sudo hwclock -w
Reset the BMC
$ sudo ipmitool mc reset cold
Confirm that the time and date on the system are updated.
$ sudo nvsm show health