Motherboard Tray - Removal and Installation#
You will need to completely remove the motherboard tray from the server in order to service the following components.
DIMMs (either adding or replacing)
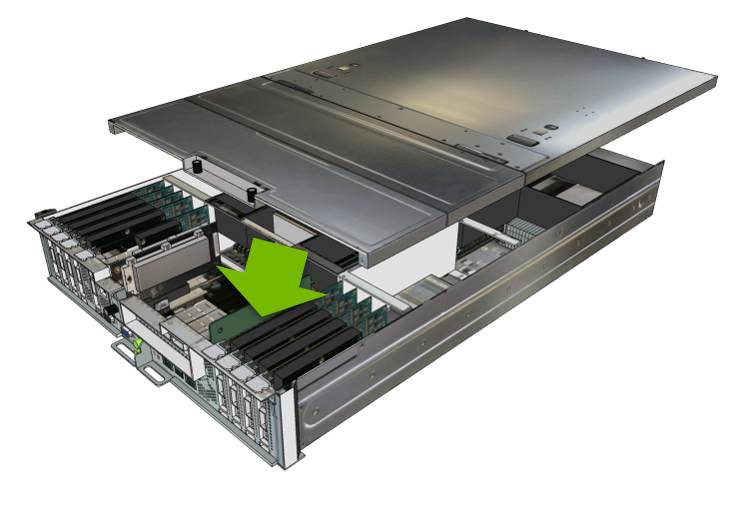
Removing the Motherboard Tray#
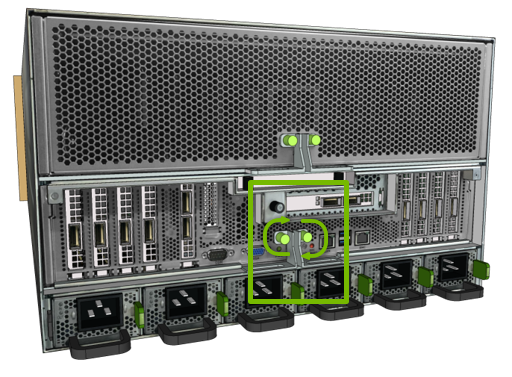
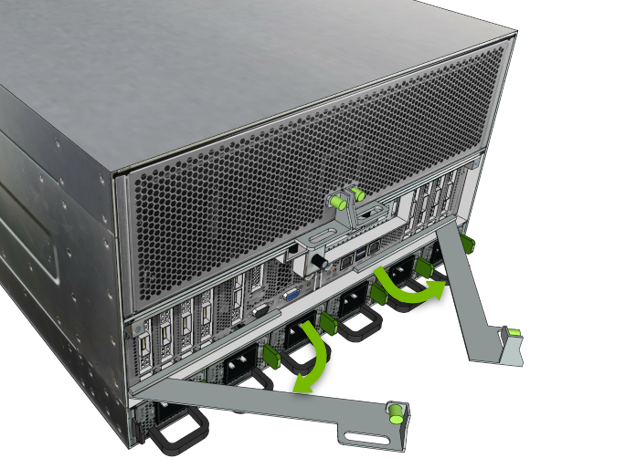
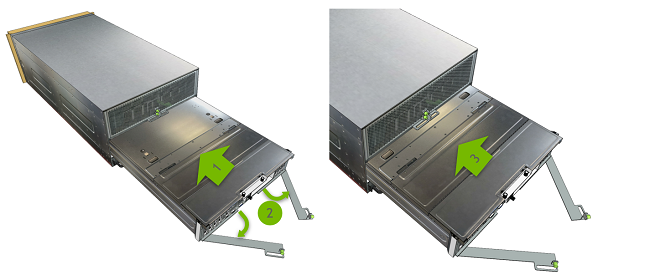
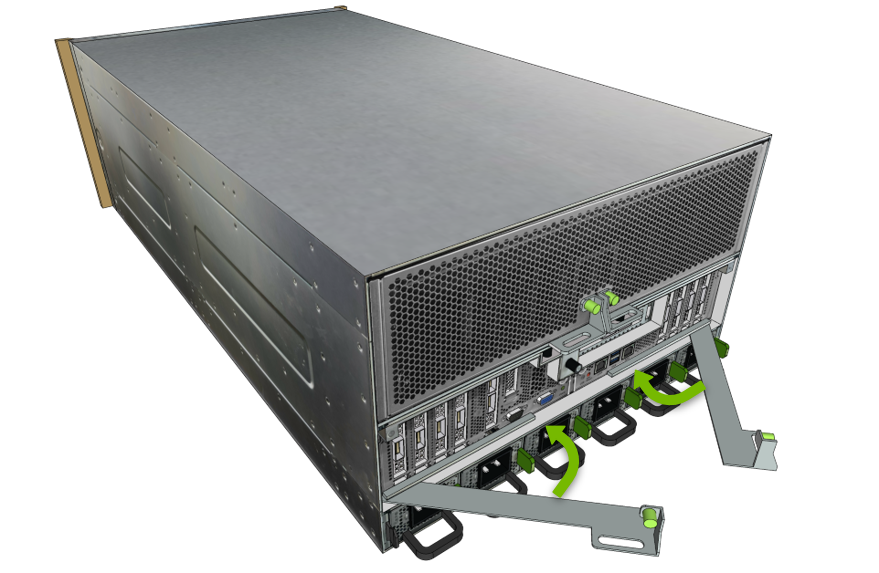
Loosen the two motherboard thumbscrews and then pull the handles out to eject the motherboard tray.

Pull the motherboard tray out of the system until it locks, then press the two buttons on the top of the lid to release the tray and finish pulling the tray out of the system.
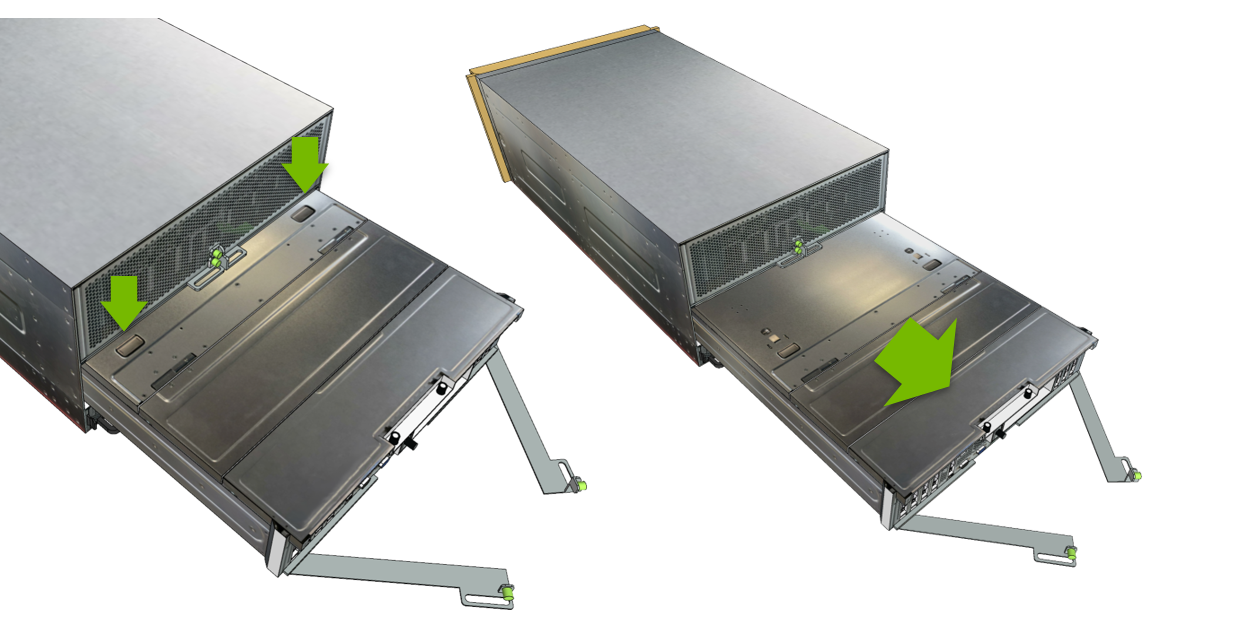
Place the tray on a solid, flat work surface.
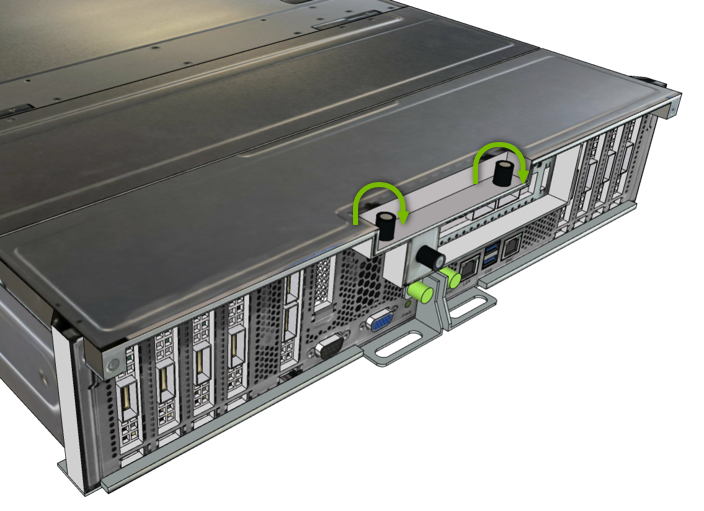
Loosen two rear thumbscrews on the motherboard lid.

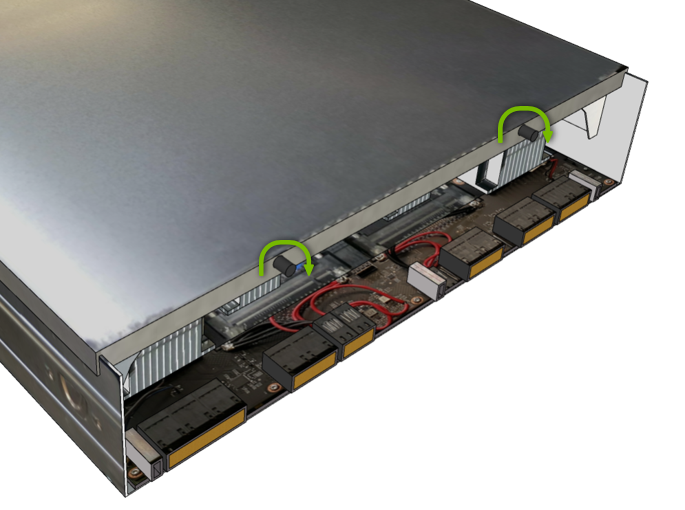
Loosen the two front thumbscrews on the motherboard tray lid.

Lift the lid off of the tray and set aside.

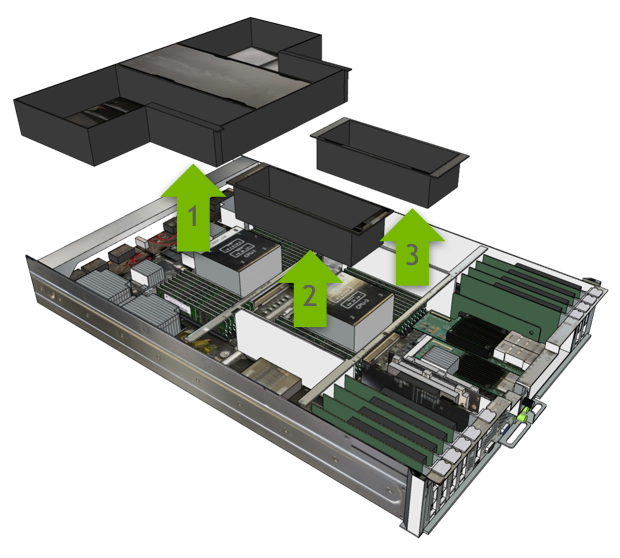
Remove all three air baffles to allow access to the DIMMs.
Reinstalling the Motherboard Tray#
Reinstall the three air baffles.

Replace and secure the lid.
Install the lid.
Tighten the rear thumbscrews
Tighten the front thumbscrews.
Slide the motherboard tray into the slot, open the tray handles, and then continue pushing the motherboard tray in.
Close the handles to secure the motherboard tray in place.
Tighten the motherboard tray thumbscrews to complete the motherboard insertion.