Adding the Optional Dual-port Horizontal Network Card#
The DGX A100 comes with a vertical dual-port network card. You can expand the ports by adding a horizontal dual-port network card for slot 5.
Dual-port Network Card Upgrade Overview#
This is a high-level overview of the procedure to install the optional horizontal dual-port network card on the DGX A100 system.
Obtain the new card from NVIDIA Sales.
Shut down the system.
Label all motherboard tray cables and unplug them.
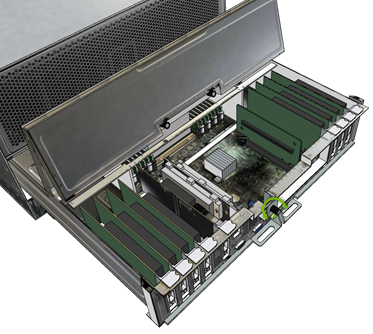
Slide out the motherboard tray until it locks and then open the lid.
Remove the PCI slot filler for slot 5.
Insert the new card into the slot and secure with the screw.
Close the lid on the motherboard tray, then insert the tray into the system.
Plug in all cables using the labels as a reference.
Power on the system.
Verify that the network card is healthy using
nvsm show health.
Adding the Horizontal Network Card#
Be sure you have obtained the horizontal dual-port network card.
Caution
Static Sensitive Devices: - Be sure to observe best practices for electrostatic discharge (ESD) protection. This includes making sure personnel and equipment are connected to a common ground, such as by wearing a wrist strap connected to the chassis ground, and placing components on static-free work surfaces.
Power down the system.
Label all network, monitor, and USB cables connected to the motherboard tray for easy identification when reconnecting.
Unplug all power cords, and all network, monitor, and USB cables.
Remove the motherboard tray.
Refer to the instructions in the section Accessing the Motherboard Tray.
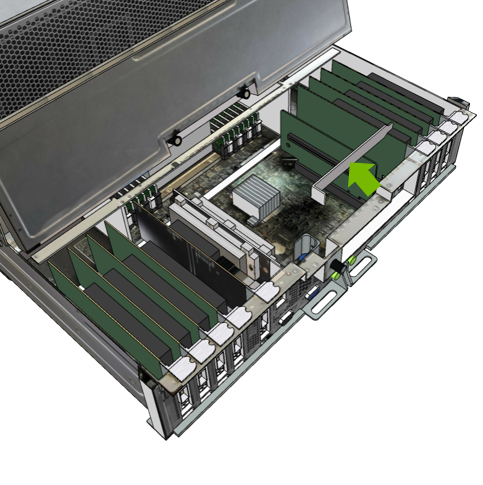
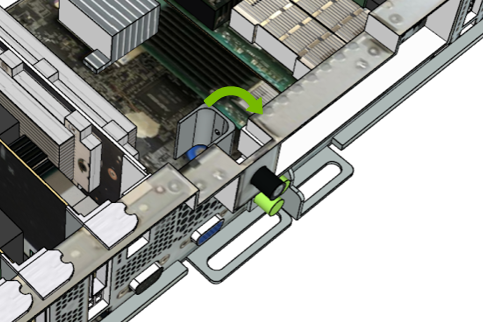
Unlock the PCI EMI shield.
Loosen the black thumbscrew that secures the locking mechanism in place.
Open the locking mechanism by turning 90 degrees or more.

Remove the EMI shield.
Slide the EMI shield to the left to release it from the PCI slot on the riser card.
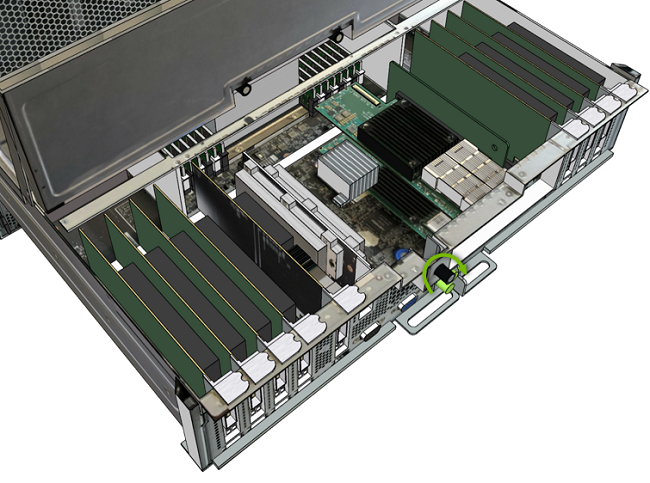
Install the new network card, inserting it into the slot on the riser card.
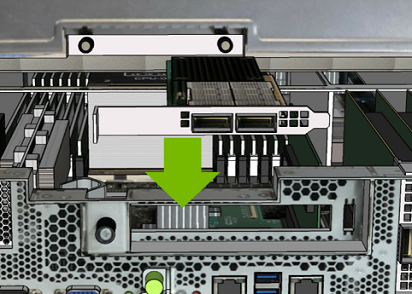
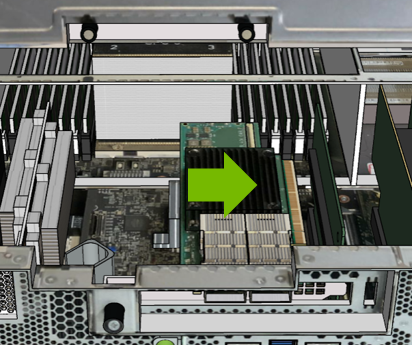
Lock the network card in place.
Close the locking mechanism by turning it back into its slot.
Tighten the black thumb screw to secure the card in place.
Install the motherboard tray lid and then install the motherboard tray.
Refer to the instructions in the section Replacing the Motherboard Tray.
Connect all cables back into the network card ports.
Power on the system and log in.
Confirm that the system is healthy.
$ sudo nvsm show health
There should be no new alerts listed.
Verify that the firmware is up to date according to the instructions in Updating the Mellanox Network Card Firmware.