

Establish the Cube Link#
The Attic Portal is live, but it is still only a window. You can see the glowing Memory Cube; a future robot application needs a structured object identity and a command route it can trust.
What you are learning: ovstream transports browser input, application commands, rendered video, and application state. It does not call ovrtx directly. Your application connects the two by validating messages, queuing renderer-owned work, and publishing the result.
Next Mission: Prepare the Memory Cube as a dependable action target. Prove the portal can find the correct OpenUSD prim, control it without drift, and focus a camera on its full motion envelope without touching the source attic.
Why this matters for a robot-ready scene: A robot cannot act on “the glowing object over there.” Its software needs a stable identity, an explicit transform contract, and confirmed state. It also needs repeatable inspection views that remain valid as the target moves. These contracts let a robotics team connect perception and planning to the same object without depending on appearance or an operator’s current camera.
Your 3D skills at work: Scene hierarchy and naming become machine identity. Rigging and animation knowledge becomes safe transform authoring, coordinate-space discipline, and repeatable poses. Camera and layout craft becomes sensor placement, coverage, and consistent evidence rather than a purely aesthetic shot.
Establish the Cube Link: Identity, Control, Focus#
The ideas behind this page’s build. Step through the slides, then make the 3D decisions that shape the two mission briefs below.
Mission 2.b — Establish the Cube Link#
1. Inspect — Define the Object and Transform Contract#
You can recognize the glowing Memory Cube by sight. A robot application needs a more dependable connection: the cube’s exact OpenUSD prim path and a transform command with a predictable result.
Before the scene is approved for robot integration, prove the application can:
Resolve the correct prim in the composed OpenUSD stage.
Record its complete starting transform.
Move it to three known poses.
Report the resulting state in the browser.
The Signal Panel will receive three controls:
LEFT POSE −15
HOME
RIGHT POSE +15
These are the named poses we extend from the browser to the Memory Cube:
LEFT  = HOME transform with parent-space X −15
HOME  = exact recorded starting transform
RIGHT = HOME transform with parent-space X +15
For this lab, 15 means 15 authored scene units along the X axis of the cube’s parent - not screen pixels or “left from the current camera.” Because every target derives from the recorded HOME, repeating a named-pose command produces the same final transform. This property is idempotence, and it is why R-17 uses a named-pose interface rather than a relative jog: LEFT, HOME, and RIGHT must always refer to the same three transforms.
You’ll make this concrete in Specify — Author Your Cube-Link Brief below: decide which object is safe to command and what replay-safe evidence you will require before you approve the result.
This is where rigging and animation knowledge becomes physical-AI engineering. You know that “move the cube” is incomplete until the object boundary, pivot, parent space, reference pose, and replay behavior are explicit. The application then divides the runtime work cleanly: React requests and displays; ovstream transports; the Python server validates and queues; OpenUSD supplies identity and authored state; and the renderer owner uses ovrtx to apply, step, and read.
How the Skill Combination Divides the Work#
|
Responsibility |
|---|---|
|
Find and identify prims in the loaded stage. |
|
Read and preserve authored values. |
|
Write a prim’s transform safely and repeatedly. |
|
Select camera AOVs such as color, depth, or semantic IDs. |
Responsibility |
Skill |
|---|---|
Find the Memory Cube prim. |
|
Capture its complete HOME transform. |
|
Apply the selected named pose. |
|
Produce a frame showing the result. |
|
The hero skill is writing-transforms, but it cannot complete the workflow alone. The agent must first identify the prim and read its starting state, then render the result after the write.
The skills do not add a new transform feature to ovrtx. They give the agent the version-specific procedure for using the transform capability correctly.
3. Build — Add Your Transform Judgment to the Mission Brief#
Tip
Make It Yours: Open the Prompt Builder, choose the Ray Trace Your Way to a Better Life session, and select Mission 2.b - Establish the Cube Link. Add your Context and Done when decisions, then review the complete contract before copying it.
Show a finished prompt
Goal:      Extend the R-17 Signal Panel with a Memory Cube Link. Query the loaded
           stage for exactly one prim whose mission:role is "Memory Cube" and display
           its resolved OpenUSD prim path. Record that prim's complete starting
           transform once as HOME. Add LEFT POSE −15, HOME, and RIGHT POSE +15
           controls. Use a short visible linear transition for accepted changes, but
           derive every final target from HOME rather than the cube's current position.
Skills:    Read the installed ovrtx skills for stage-queries, reading-attributes,
           writing-transforms, and stepping-and-rendering. Use writing-transforms as the
           hero skill. Read ~/RTXViewport/skills/omniverse-realtime-viewer/SKILL.md
           and only its focused prim-transform-safety, streaming-messages,
           viewer-control-patterns, viewer-feedback-status, and validation references.
           Before implementing, read ~/RTXViewport/ATTIC_PORTAL_STARTER.md and reuse
           the snippets in ~/RTXViewport/Attic_Portal_Starter_Kit for AppStreamer
           messages, ovrtx transform helpers, R-17 typed envelopes/hooks,
           request-correlated buttons, and validation.
Context:   Extend ~/RTXViewport/Attic_Portal and its existing R-17 Signal Panel.
           Use the R17CommandButton component, request-correlated r17-command-v1 sender,
           and r17-state-v1 subscription created in Part 1. Do not create another React
           provider, message protocol, renderer, stream, or WebRTC connection. Add these
           controls to
           ~/RTXViewport/Attic_Portal/frontend/src/components/R17SignalPanel.tsx:
           LEFT POSE −15 sends cube.setPose with { pose: "LEFT" }; HOME sends cube.setPose
           with { pose: "HOME" }; and RIGHT POSE +15 sends cube.setPose with
           { pose: "RIGHT" }. Each command carries a requestId. The server validates it and
           queues one named-pose intent; only the renderer-owning loop may write omni:xform
           or call renderer.step(). Capture the cube's full HOME transform before the first
           mission command and preserve its rotation and scale when deriving LEFT and RIGHT.
           Use a short visible linear translation inside the existing frame loop, disable
           all three pose controls until matching READY or ERROR state returns, and allow
           only one cube-pose request in flight. A duplicate requestId or a request for the
           already active pose must acknowledge the current result without restarting
           movement. If /Root/Workshop/MemoryCubeGlow exists, keep its translation
           synchronized with the cube without treating the light as the mission target.
           Publish server-authoritative r17-state-v1 fields for requestId, cubePath,
           requestedPose, offsetX constrained to −15, 0, or +15 relative to HOME, and
           WAITING, APPLYING, READY, or ERROR. The browser may change button status only
           from state carrying the matching requestId. Never modify files inside
           ~/RTXViewport/Attic_Nvidia.
Done when: The focused Cube Link check passes; the panel displays /Root/Workshop/Cube and
           working LEFT POSE −15, HOME, and RIGHT POSE +15 controls; each accepted change
           finishes at its exact HOME-relative target; duplicate or already-active commands
           do not restart or change the final transform; HOME restores the complete recorded
           transform; rotation and scale remain unchanged; matching server state drives
           status; the existing renderer and stream remain healthy; source hashes are
           unchanged; and the agent reports the changed files, browser URL, start/restart
           command, and concise validation evidence. Return control without waiting for my
           browser interaction.
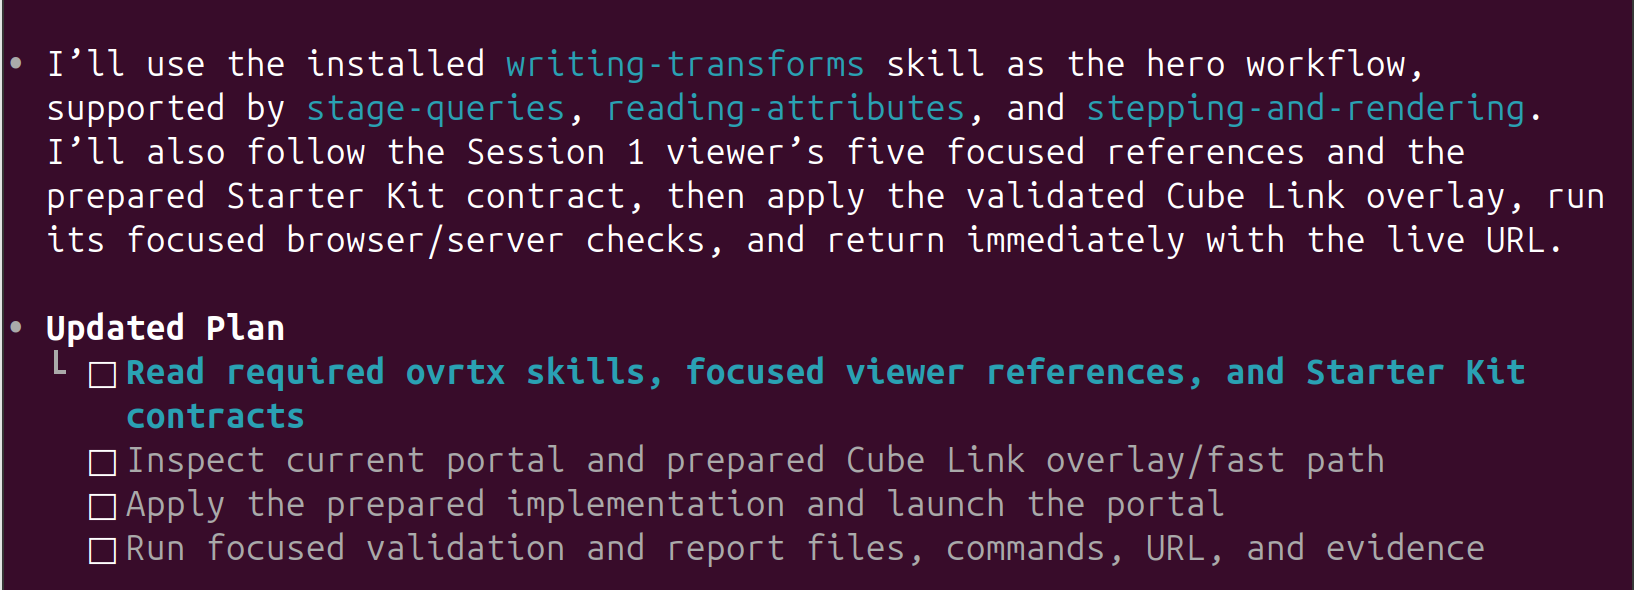
4. Verify — Approve the Transform Contract#
Test HOME → LEFT → LEFT → RIGHT → HOME. The repeated LEFT request must finish at the identical transform rather than accumulating another offset. HOME must restore the complete recorded transform, including rotation and scale. Confirm that the panel reports the same stable prim path and that matching server state—not a local button animation—proves completion.
Then compare the result with the brief you authored. Your hierarchy and rigging judgment defined which prim was safe to command and what replay-safe meant; the skills taught the agent how to implement that contract with the installed ovrtx version.
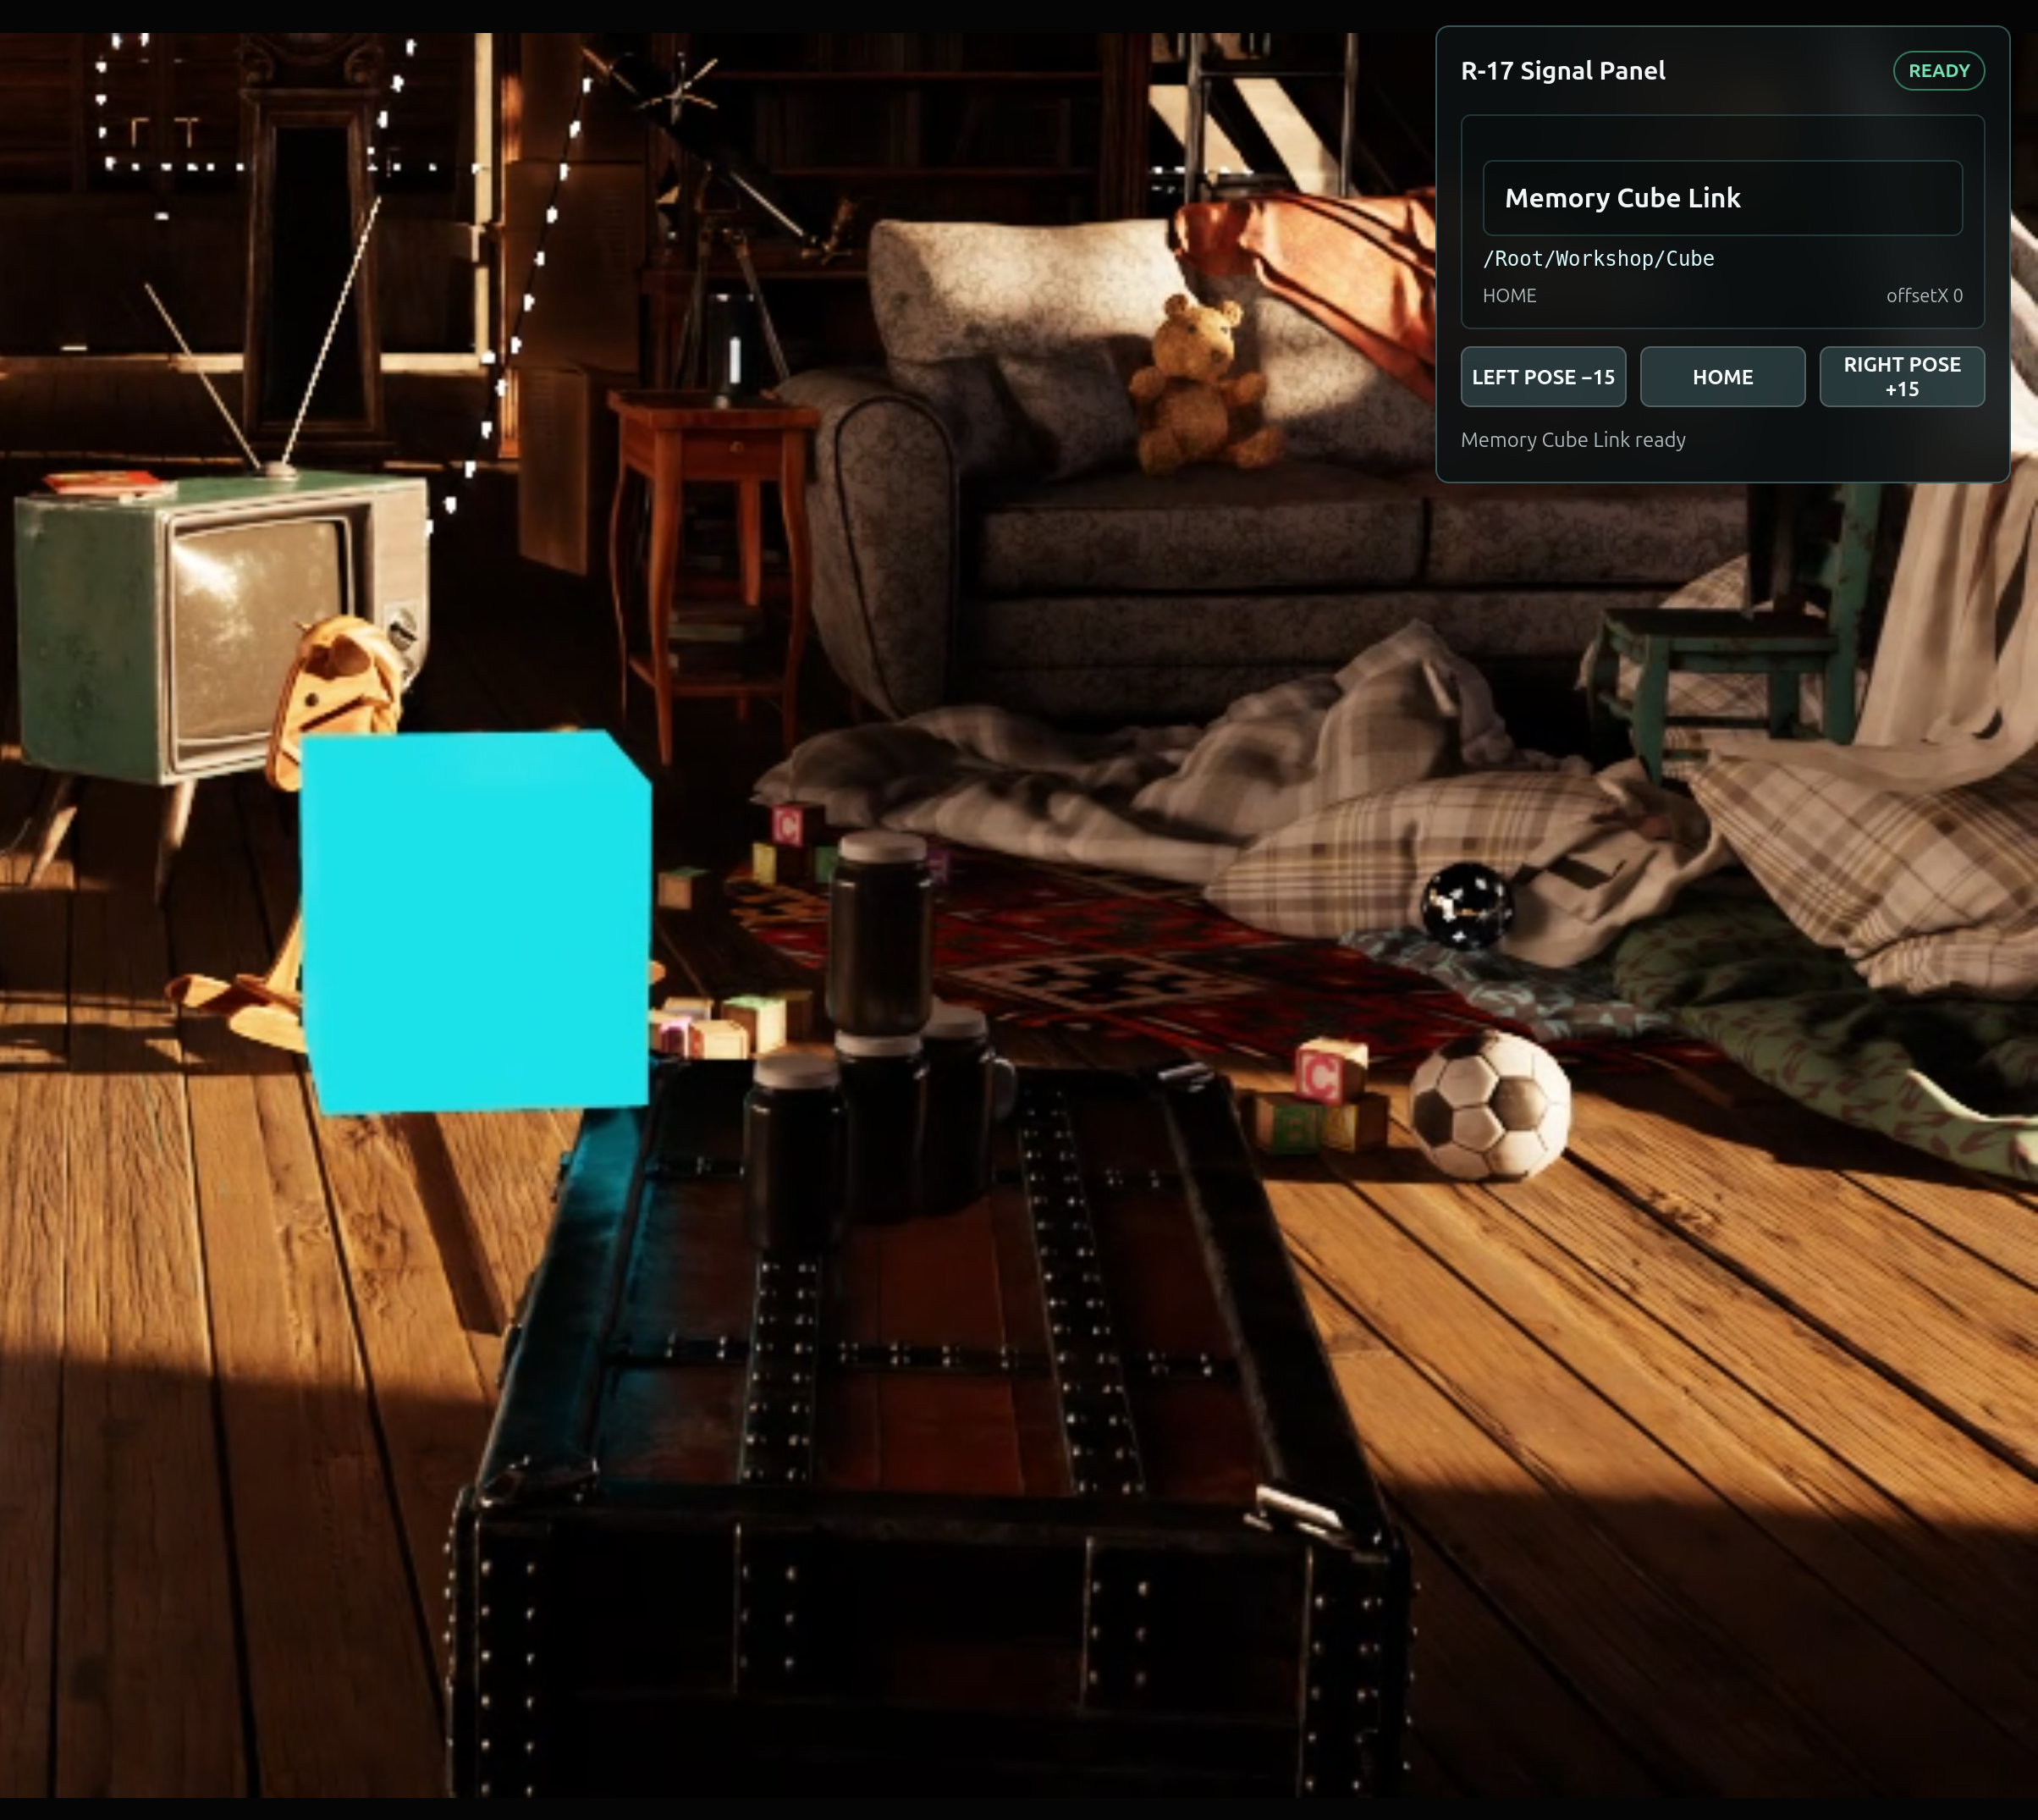
Mission 2.c — Build a Trustworthy Cube Focus View#
1. Inspect — Treat the Camera as a Virtual Sensor#
The Cube Link proves the application can name and control the correct prim. Now commission a close inspection view without modifying the Old Attic.
Why this matters for a robot-ready scene: A useful inspection camera must cover the target’s full expected motion, not merely compose one attractive frame. That repeatable view gives robotics engineers a controlled observation for debugging perception, checking clearances, and comparing runs.
Your 3D skills at work: Camera blocking, lens choice, bounds, and composition become virtual-sensor coverage. OpenUSD layering brings the non-destructive editorial workflow you already use in production: the application can add a calibrated view while the canonical environment remains unchanged.
Its transform defines extrinsics - where it is and where it points.
Its lens attributes define intrinsics - how it observes the world.
Its target bounds determine whether the object stays visible across the cube’s expected motion.
Its viewer-owned layer keeps this inspection configuration separate from the shared digital twin.
There is no single “create a camera” skill. A camera is an OpenUSD prim, so the workflow combines several kinds of guidance:
Protect the source scene. OpenUSD composition and Realtime Viewer
stage-loadingput the camera in a viewer-owned layer above the attic.Design the observation. Realtime Viewer
camera-controlshelps calculate a valid Z-up pose covering the full target envelope.Apply the preset.
ovrtxwriting-transformsapplies its pose, andwriting-attributesapplies its lens values.Connect it to the application. Realtime Viewer
camera-pickerroutes the preset command and reports the active view.
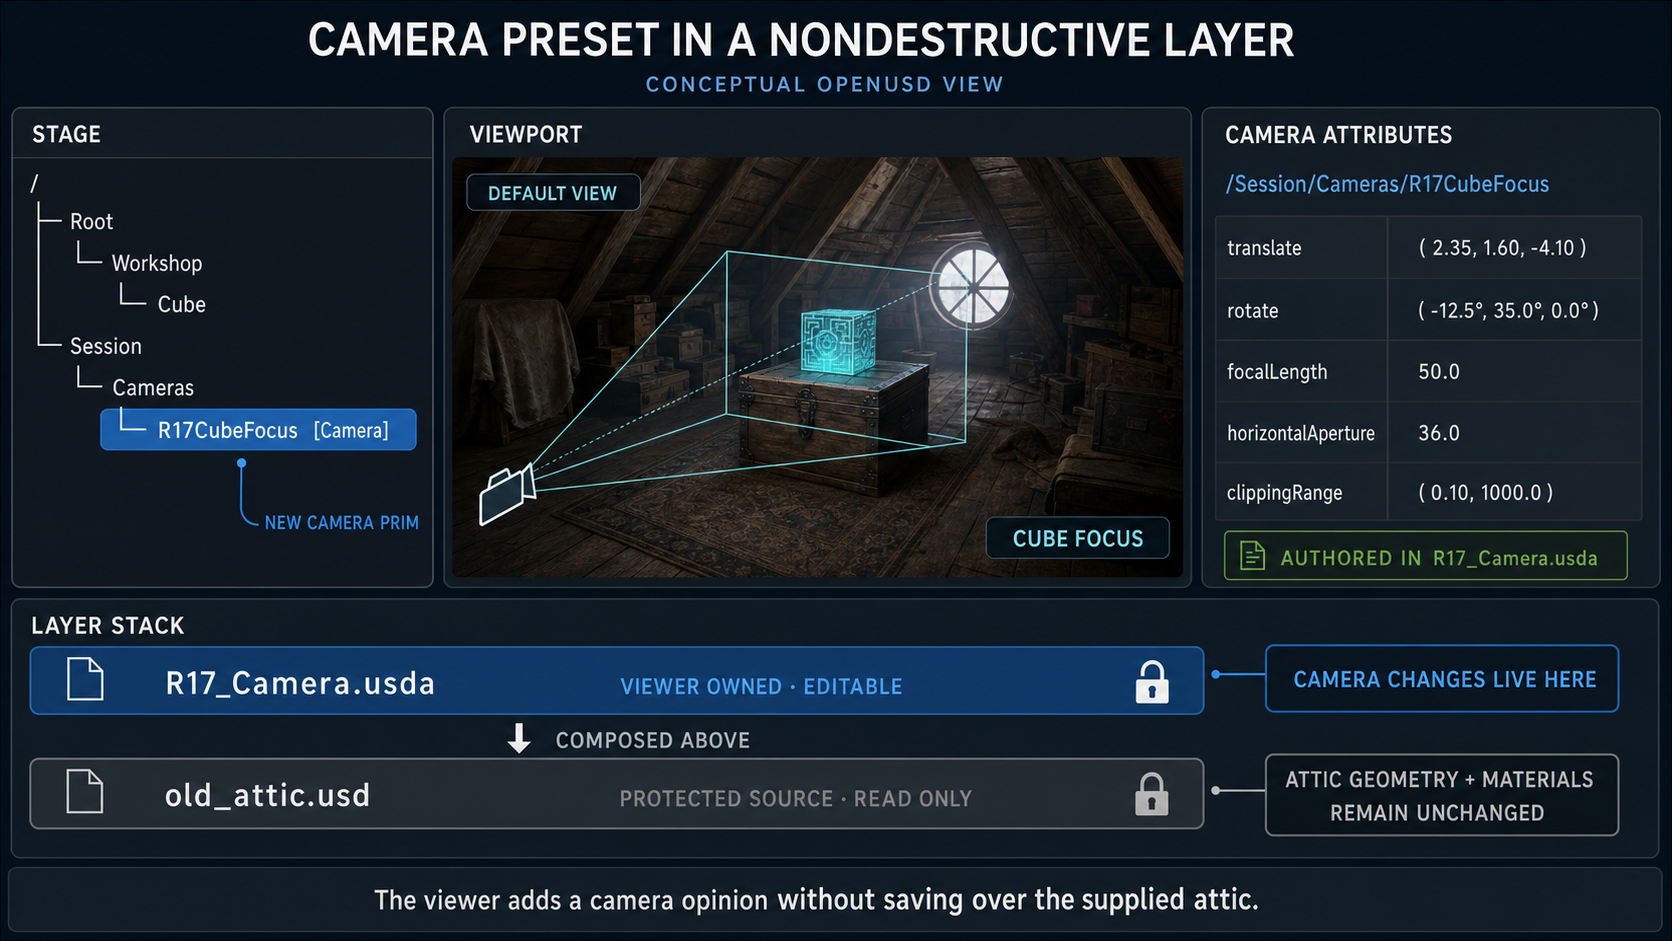
The skills tell the agent how to implement the camera. They cannot decide whether the framing is useful. Your layout and cinematography experience defines coverage, readable scale, necessary context, potential occlusion, and what would make the observation unacceptable.
3. Build — Add Your Camera Judgment to the Mission Brief#
Tip
Make It Yours: Open the Prompt Builder, choose the Ray Trace Your Way to a Better Life session, and select Mission 2.c - Commission the Cube Focus Camera. Add your camera decisions to Context and Done when, then review the complete contract before copying it.
Show a finished prompt
Goal:      Create an R-17 Cube Focus camera preset that frames /Root/Workshop/Cube for
           close inspection. Author /Session/Cameras/R17CubeFocus in
           ~/RTXViewport/Attic_Portal/usd/R17_Camera.usda, compose that viewer-owned
           layer above the protected scene, and add DEFAULT VIEW and CUBE FOCUS controls
           to the R-17 Signal Panel.
Skills:    Read the installed ovrtx stage-queries, writing-transforms, and
           writing-attributes skills. Read
           ~/RTXViewport/skills/omniverse-realtime-viewer/SKILL.md and only its
           stage-loading, camera-controls, camera-picker, streaming-messages,
           viewer-control-patterns, and validation references. Do not use camera-outputs-rt2
           as a camera-creation skill; it selects requested render outputs, often called
           AOVs, rather than authoring cameras.
Context:   Reuse the Cube Link's resolved prim path, R17CommandButton, request-correlated
           r17-command-v1 sender, and r17-state-v1 subscription. Add DEFAULT VIEW and CUBE
           FOCUS to R17SignalPanel.tsx without creating another provider or connection.
           DEFAULT VIEW sends camera.setView with { view: "DEFAULT" }; CUBE FOCUS sends
           camera.setView with { view: "CUBE_FOCUS" }; every command carries a requestId.
           Compute one valid Z-up focus pose from the union of the cube's LEFT, HOME, and
           RIGHT world bounds so the target remains framed at every named pose while enough
           attic context remains visible. Keep R17_Camera.usda application-owned and never
           save over ~/RTXViewport/Attic_Nvidia. DEFAULT VIEW is the fitted startup transform
           and lens preset captured in Part 1, not the learner's camera position when this
           prompt runs. Treat R17CubeFocus as another authored preset: on a validated
           command, the renderer owner uses writing-transforms for its pose and
           writing-attributes for its lens values on the existing active viewer camera,
           preserving one RenderProduct and one video track. Publish requestId, activeView,
           and READY or ERROR as matching server state only after a successful frame. An
           accepted native orbit, pan, or zoom intent changes activeView to CUSTOM. Preserve
           navigation after every preset selection.
Done when: The focused camera check passes; R17_Camera.usda contains
           /Session/Cameras/R17CubeFocus; DEFAULT VIEW restores the Part 1 startup preset;
           CUBE FOCUS frames the full three-pose cube envelope; the panel reports DEFAULT,
           CUBE_FOCUS, or CUSTOM from matching server state; orbit, pan, and zoom still
           work; no second renderer, stream, or WebRTC connection exists; source hashes are
           unchanged; and the agent reports the new layer, camera path, changed files, and
           concise evidence. Return control without waiting for my clicks.
4. Verify — Approve the Observation#
Switch between DEFAULT VIEW and CUBE FOCUS, then test LEFT, HOME, and RIGHT. Judge the result against the framing, context, margin, and rejection criteria you authored—not against whether the camera merely changed. Orbit once and confirm the view becomes CUSTOM, then restore the two presets.
Verify the nondestructive contract as well: /Session/Cameras/R17CubeFocus belongs to viewer-owned R17_Camera.usda, while the supplied attic remains unchanged. The prompt’s workflow skills implemented the camera; your camera judgment determined whether its evidence was trustworthy.
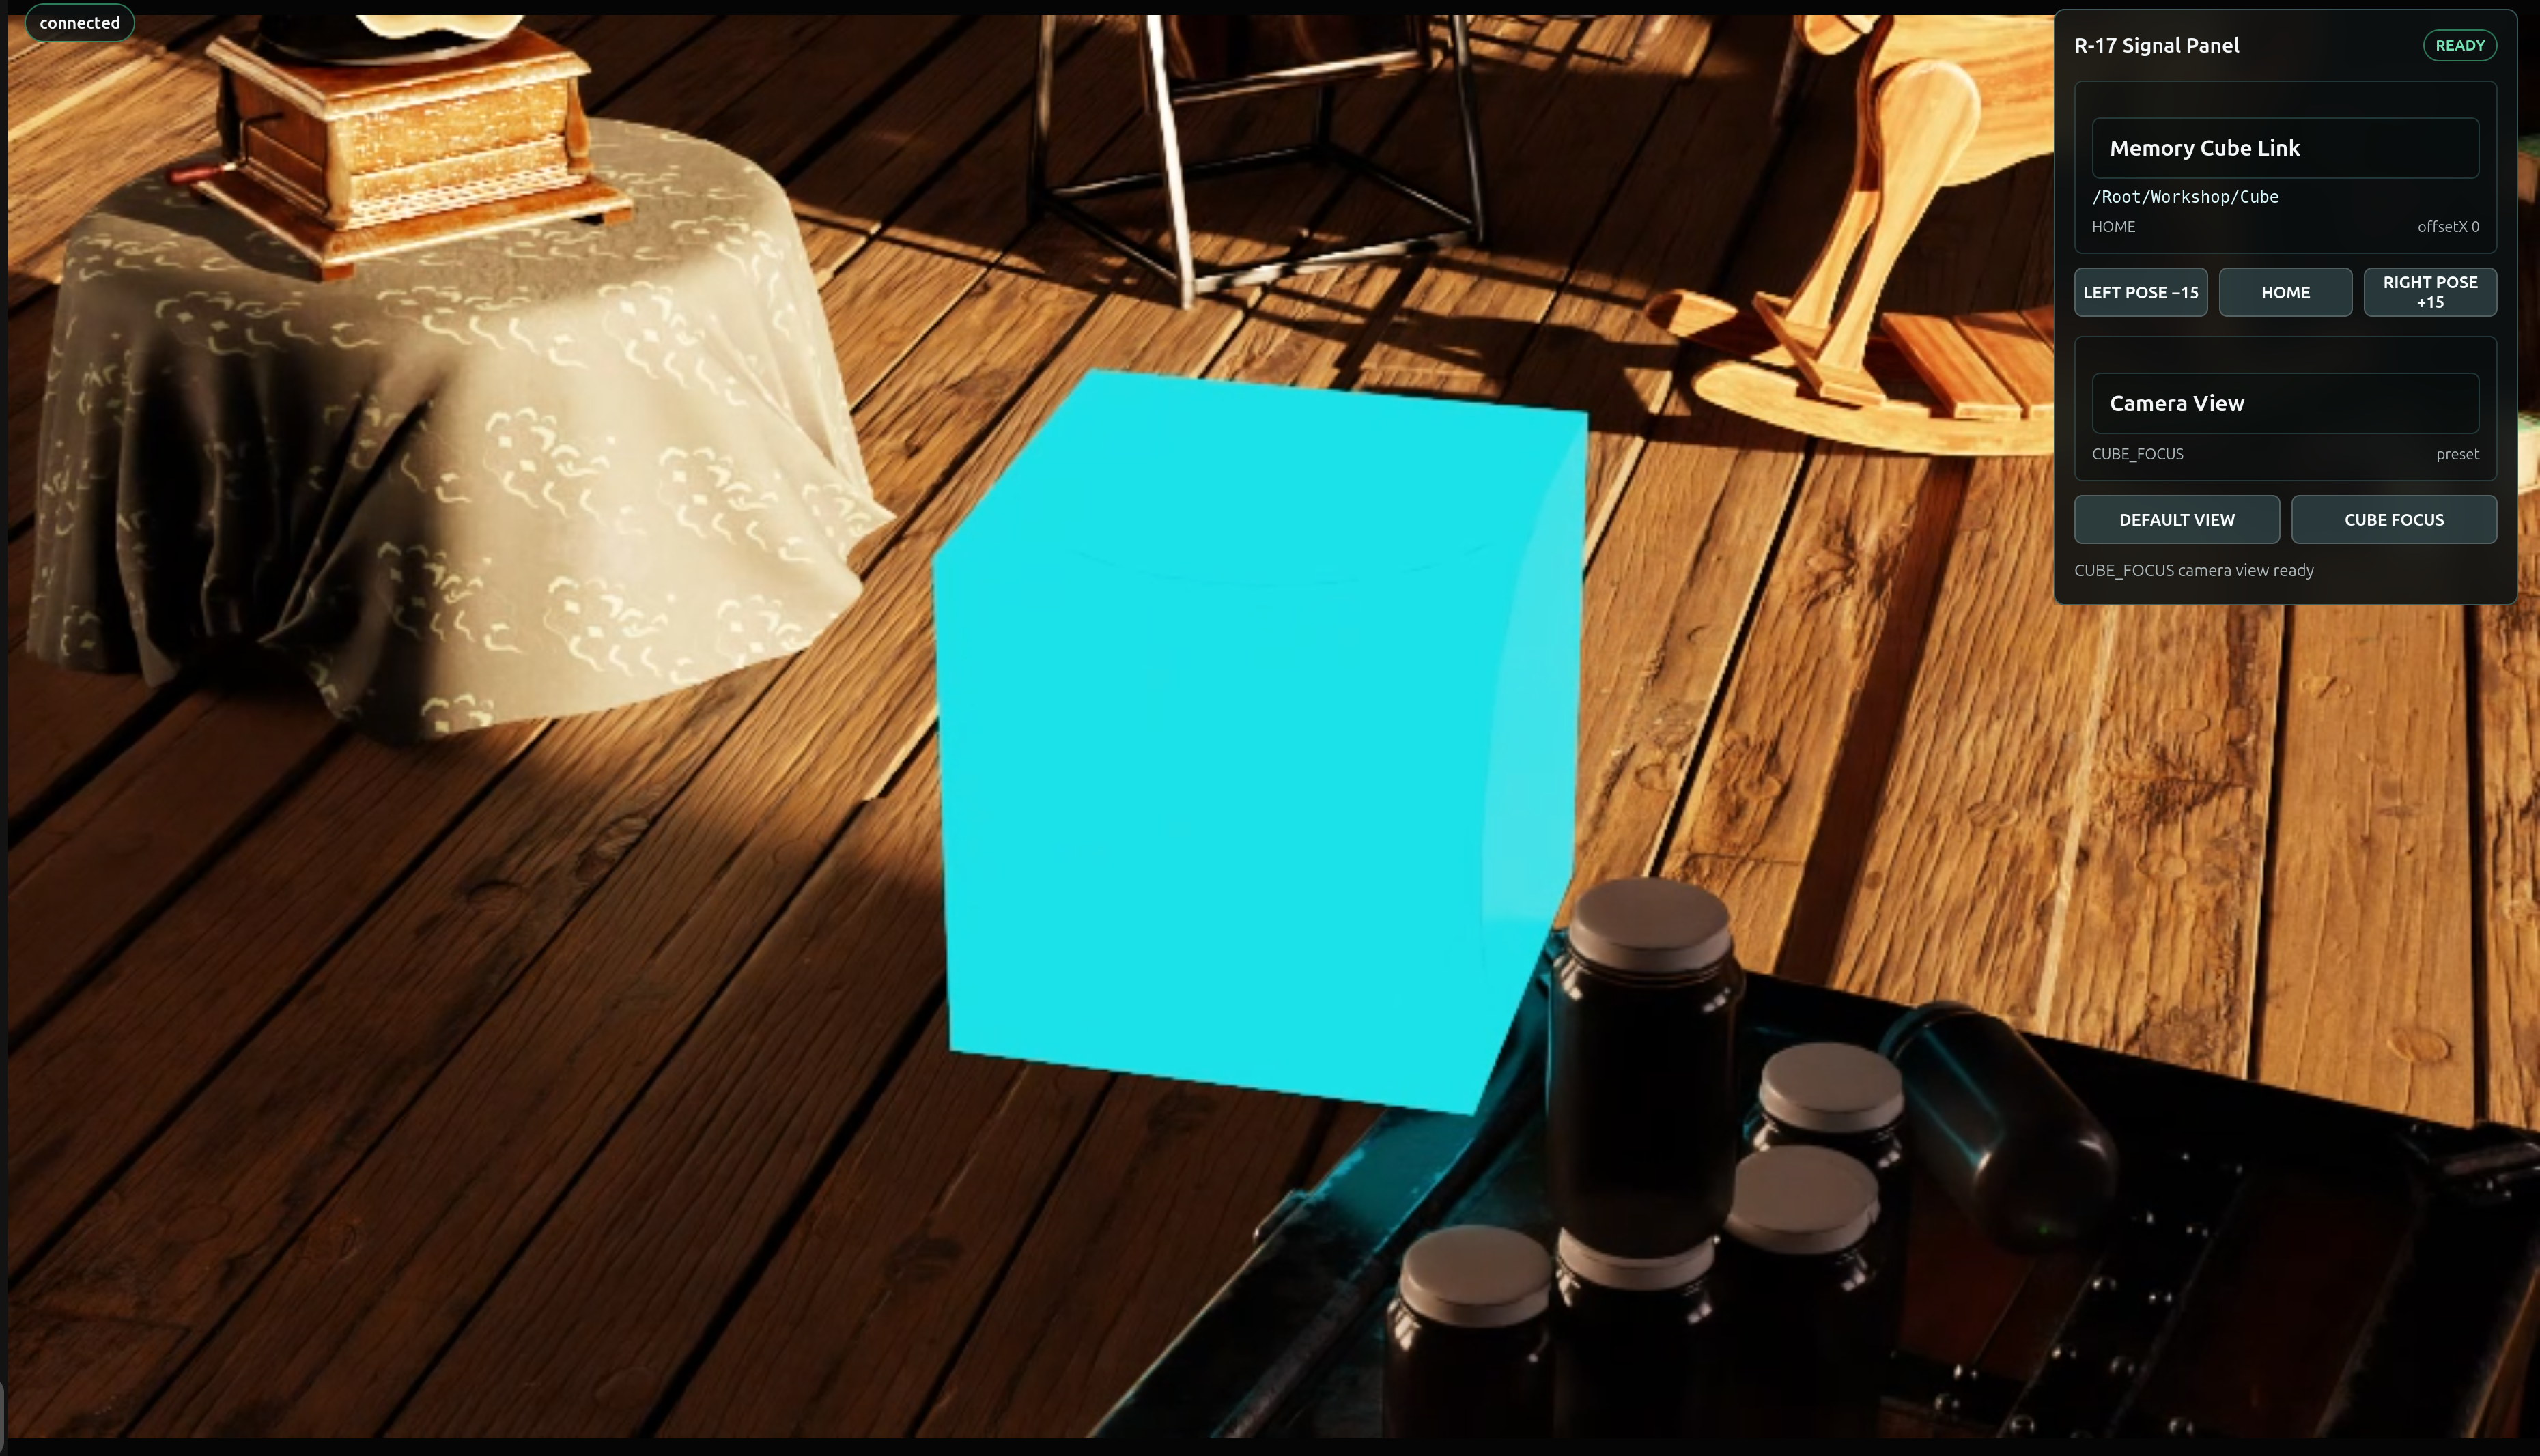
Identity, control, and focus are proven. Next, add observations a machine does not have to guess in Add Machine Perception.