Getting Started with cuMAC#
All cuMAC data structures and scheduler module classes are included in the name space cumac
The header files api.h and cumac.h should be included in the application program of cuMAC
Data Flow#
A diagram of cuMAC data flow for both CPU MAC scheduler host and GPU execution is given in follwoing figure:
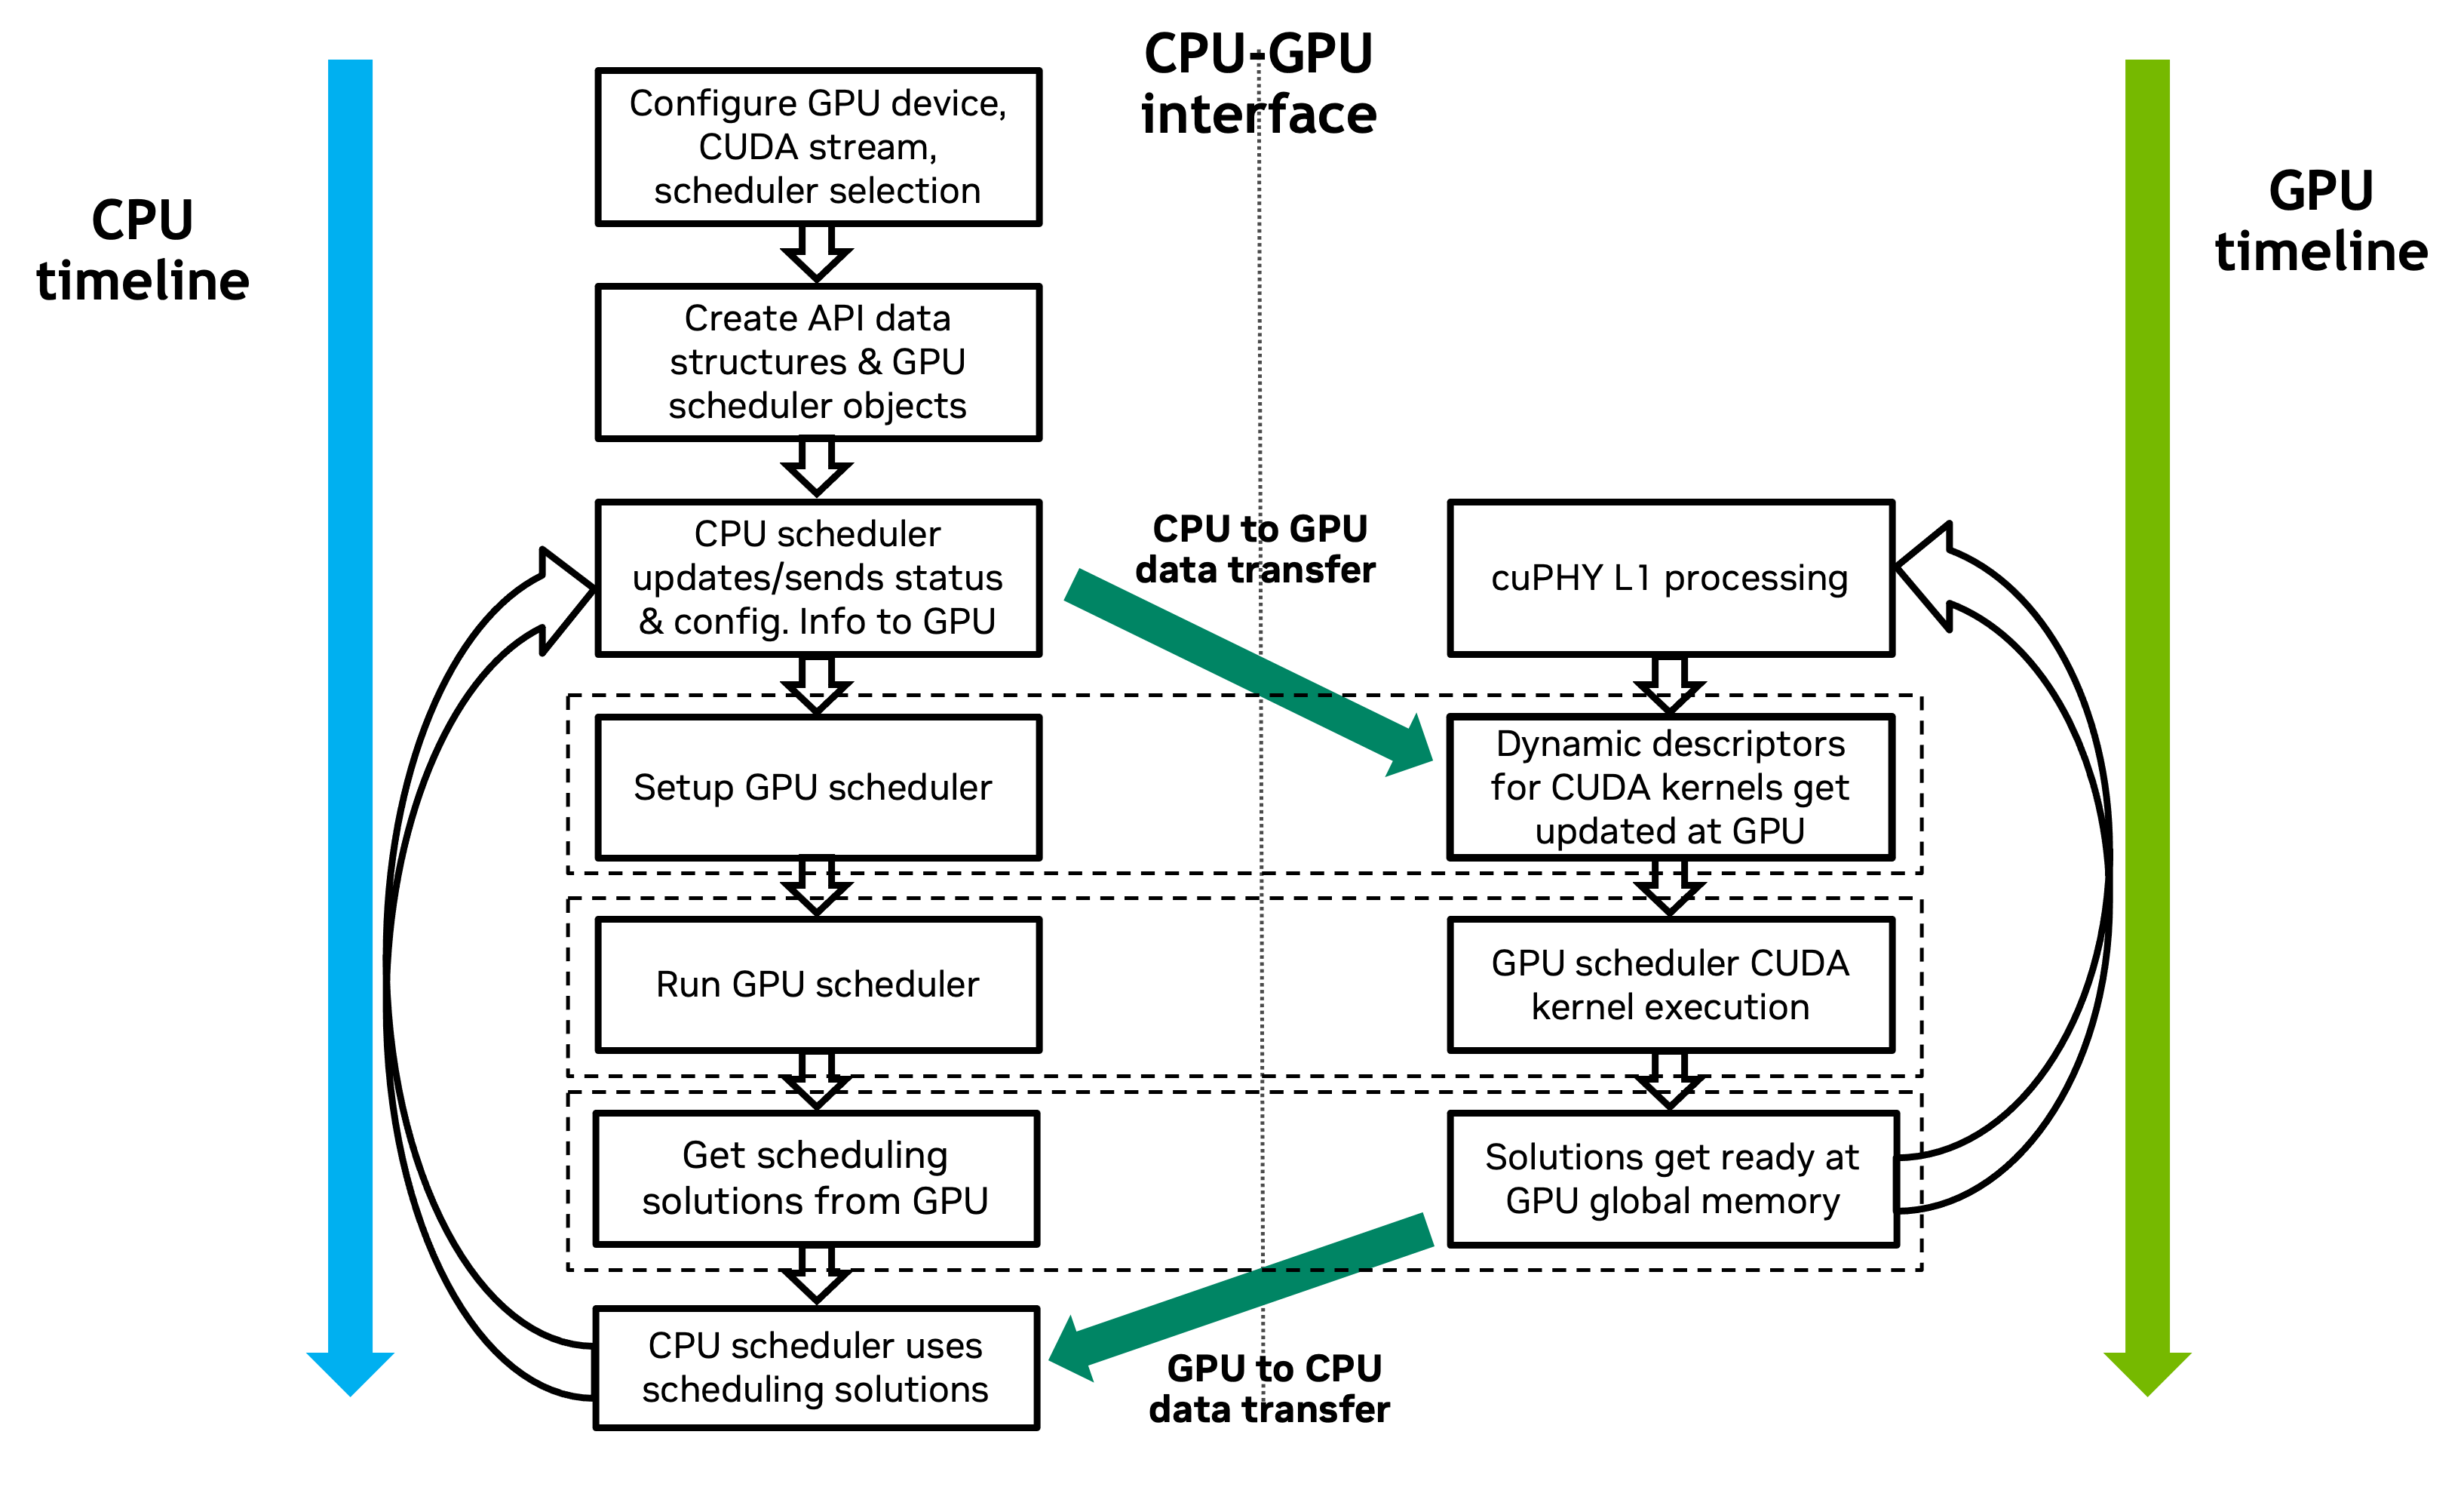
cuMAC multi-cell scheduler execution data flow#
Each cuMAC scheduler module (UE selection, PRB allocation, layer selection, MCS selection, etc.) is implemented as a C++ class, consisting of constructors with different combinations of input arguments, a destructor, a setup () function to set up the CUDA kernels in each TTI and a run () function to execute the scheduling algorithms in each TTI.
All parameters and data buffers required by the cuMAC scheduler modules are wrapped into three cuMAC API data structures, including cumacCellGrpUeStatus, cumacCellGrpPrms, and cumacSchdSol. Each of these data structures contains a number of constant parameters, and a number of data buffers whose memories are allocated on GPU.
In the initialization phase, the objects of all cuMAC scheduler modules are created using their corresponding constructors. Meanwhile, the above-mentioned three API data structures are also created, with their constant parameters being properly set up and data buffers getting memory allocations on GPU.
In the per-TTI execution, the CPU MAC scheduler host first prepares all the required data in GPU memory for the three API data structures. Then the setup () function of each cuMAC scheduler module is called 1) to pass the required constant parameters and addresses of the data buffer GPU memories from the API data structures to the scheduler module objects, and 2) to complete the internal configuration of the CUDA kernels. Next, the run () function of each schedule module is called to execute the scheduling algorithms and obtain the scheduling solutions. Finally, the CPU MAC host transfers the computed scheduling solutions from GPU to CPU and applies them in the system.
Quick Setup#
Prerequisites#
The following instructions assume the system configuration and Aerial cuBB installation are done. If not, see the cuBB Install Guide to complete the installation or upgrade process.
After powering on the system, use the following command to verify that the GPU is in the correct state:
# Verify GPU is detected and CUDA driver version matches the release manifest.

$ nvidia-smi
Set Up the Host Environment#
Set up the environment by following the cuBB Installation Guide for the server type you are using.
Launch the cuBB Container#
Use the following command to launch the cuBB container:
$ sudo docker exec -it cuBB /bin/bash
Build Aerial cuMAC in the Container#
Build cuMAC in the cuBB container using the following commands:
$ cd /opt/nvidia/cuBB/cuMAC
$ cmake -Bbuild -GNinja
$ cmake --build build