First Slurm Job with WPPS#
To verify that WPPS is properly integrated with Slurm, you can submit a simple test job and a “hero job.”
Case 1#
As a regular user, run a slurm job with no profiles attached
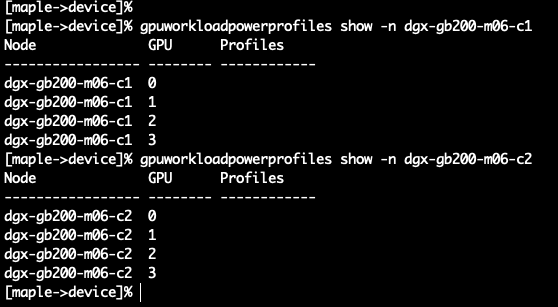
[maple->device]% gpuworkloadpowerprofiles show -n dgx-gb200-m06-c1

Node GPU Profiles

----------------- -------- ------------
dgx-gb200-m06-c1  0
dgx-gb200-m06-c1  1
dgx-gb200-m06-c1  2
dgx-gb200-m06-c1  3
Run a slurm job.
aatest@maple:~$ srun -N 2 --nodelist=dgx-gb200-m06-c1,dgx-gb200-m06-c2 \
   --ntasks-per-node=4 --gres=gpu:4 --mpi=pmix \
   --export="UCX_TLS=tcp,NCCL_DEBUG=INFO,PMIX_MCA_gds=hash,NVIDIA_DISABLE_REQUIRE=1,NCCL_MNNVL_ENABLE=0" \
   --container-image="docker://nvcr.io#nvidia/tensorrt:25.06-py3" \
   all_reduce_perf_mpi -b 8 -e 16G -f 2 -g 1 -c 0 -n 10
Check if any profiles were applied . If no profiles were used, this should be empty
[maple->monitoring->labeledentity]% instantquery -q \
    job_gpu_workload_power_profile_for_job_id \| grep " <job id> "
Case 2#
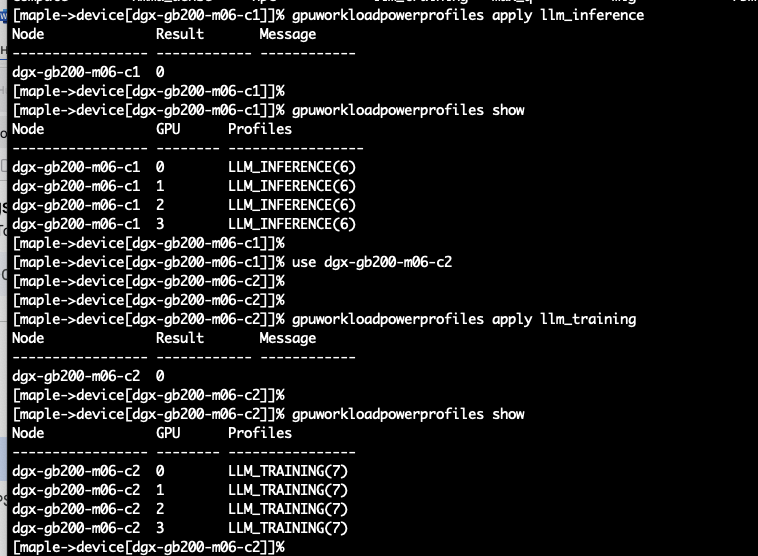
As a regular user, run a slurm job with profiles defined.
srun -N 2 --nodelist=dgx-gb200-m06-c1,dgx-gb200-m06-c2 \
   --ntasks-per-node=4 --gres=gpu:4 --mpi=pmix \
   --export="UCX_TLS=tcp,NCCL_DEBUG=INFO,PMIX_MCA_gds=hash,NVIDIA_DISABLE_REQUIRE=1,NCCL_MNNVL_ENABLE=0" \
   --container-image="docker://nvcr.io#nvidia/tensorrt:25.06-py3" \
   all_reduce_perf_mpi -b 8 -e 16G -f 2 -g 1 -c 0 -n 10
Check if the profiles were applied when the job is run

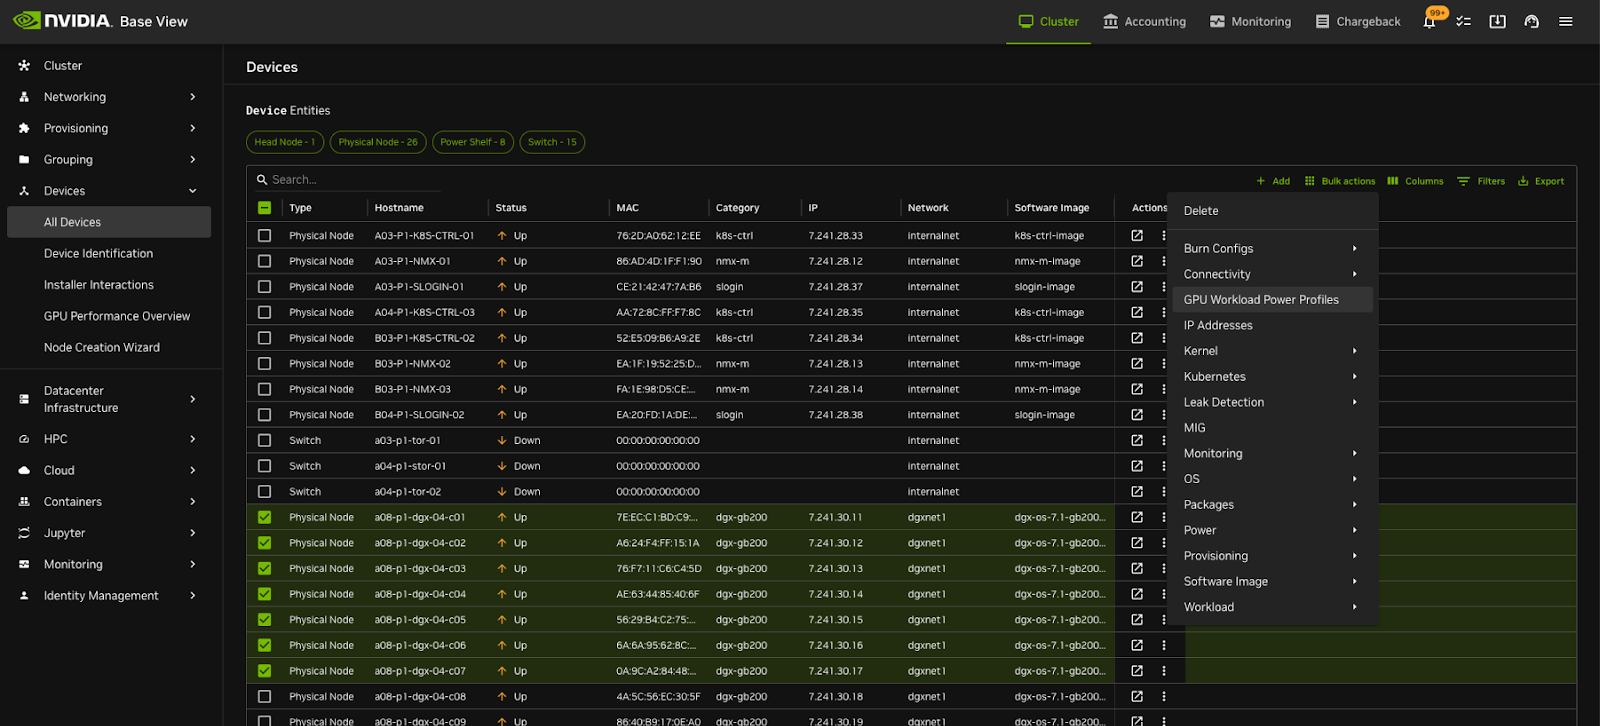
Configuring via Base view
Launch base-view
Go to Devices - All devices. Search for the device you want to apply/see the profiles
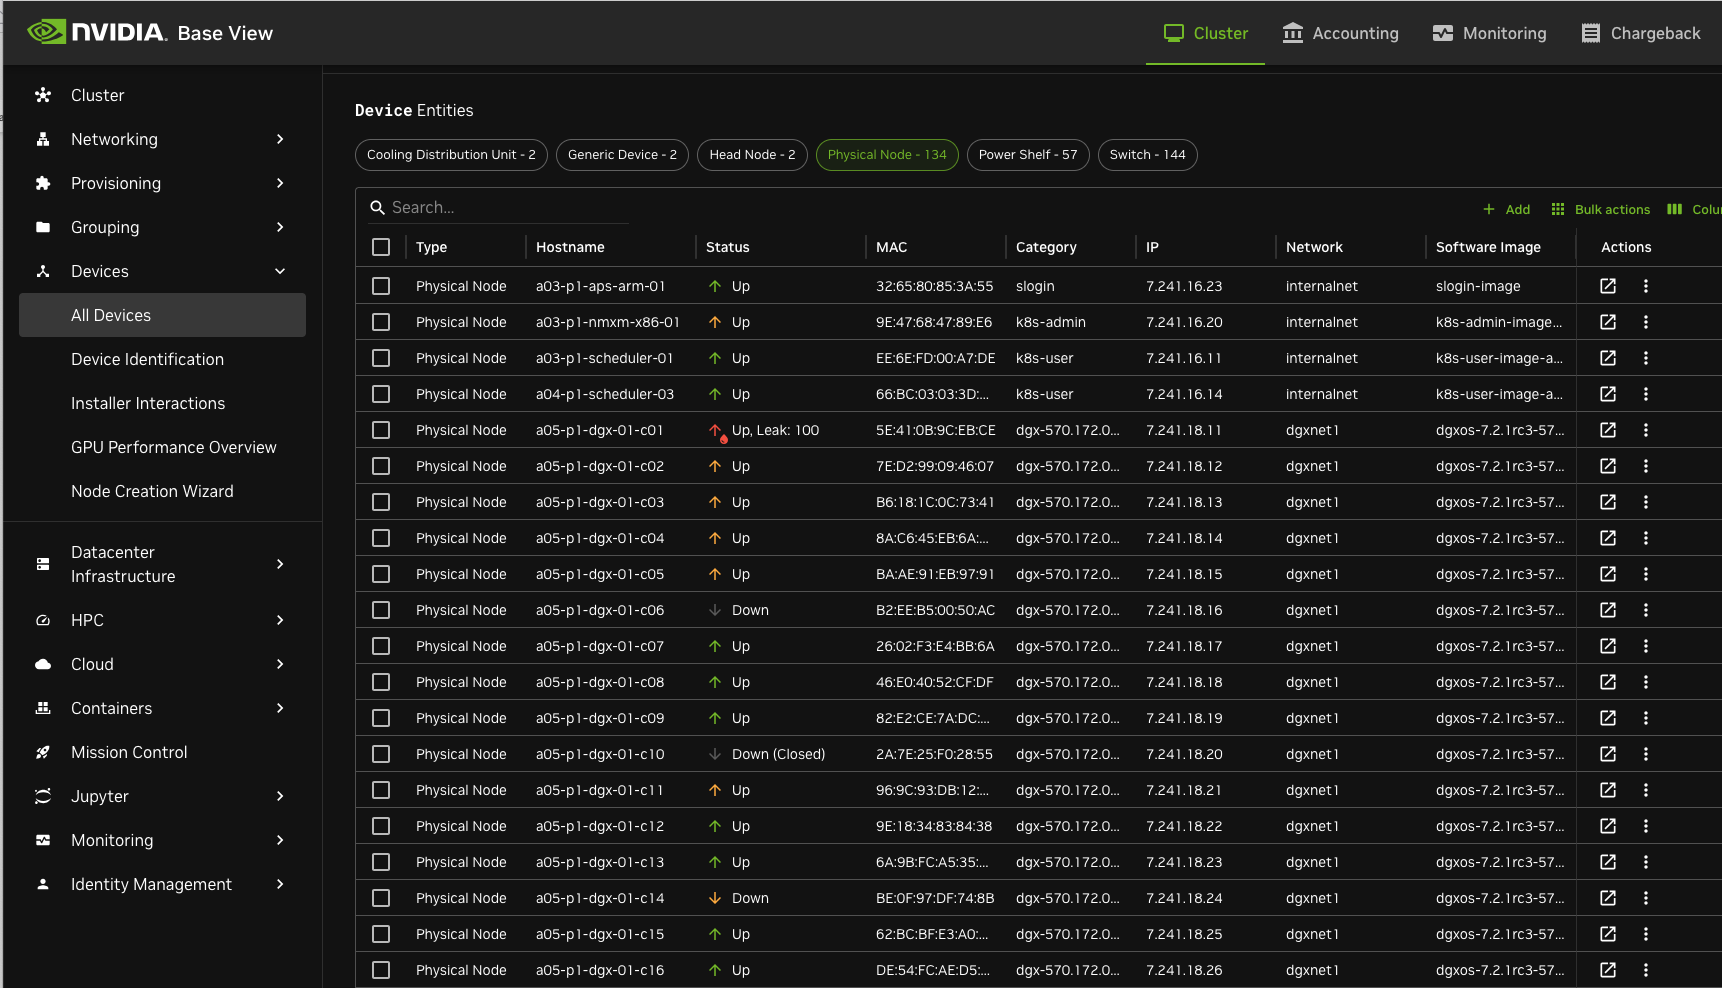
Select the device you want and go to Settings
Scroll down to GPU settings
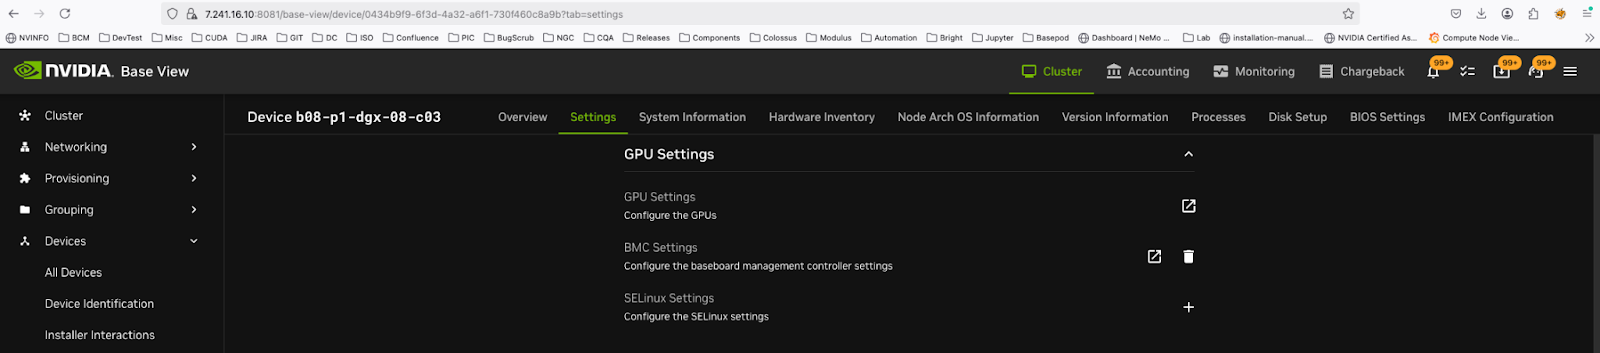
Click on the icon to the right (square with an arrow)
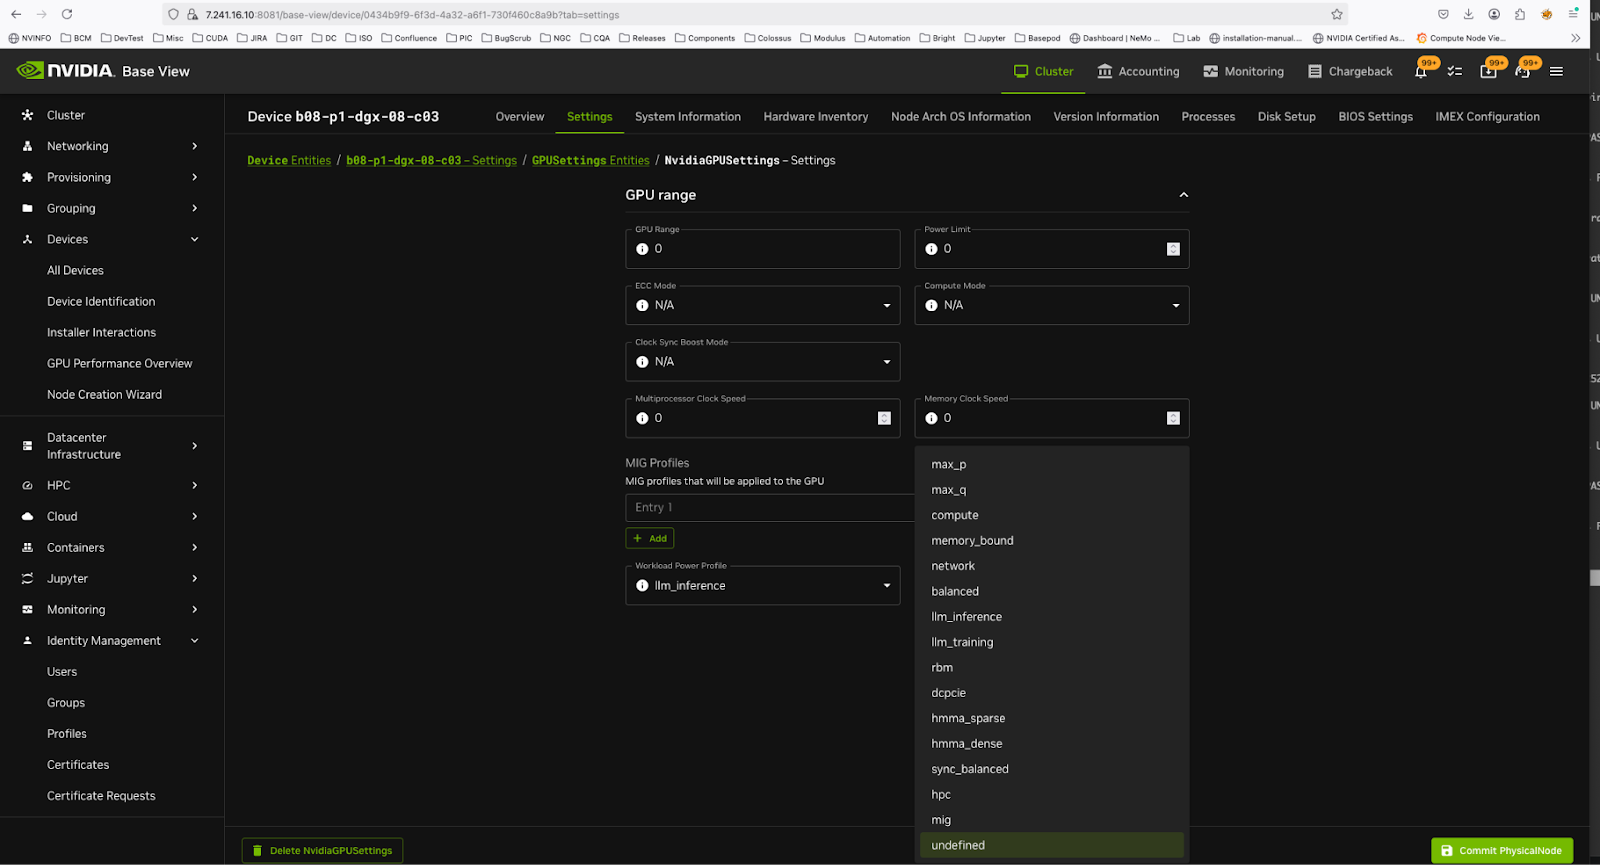
Click on the ‘actions’ icon
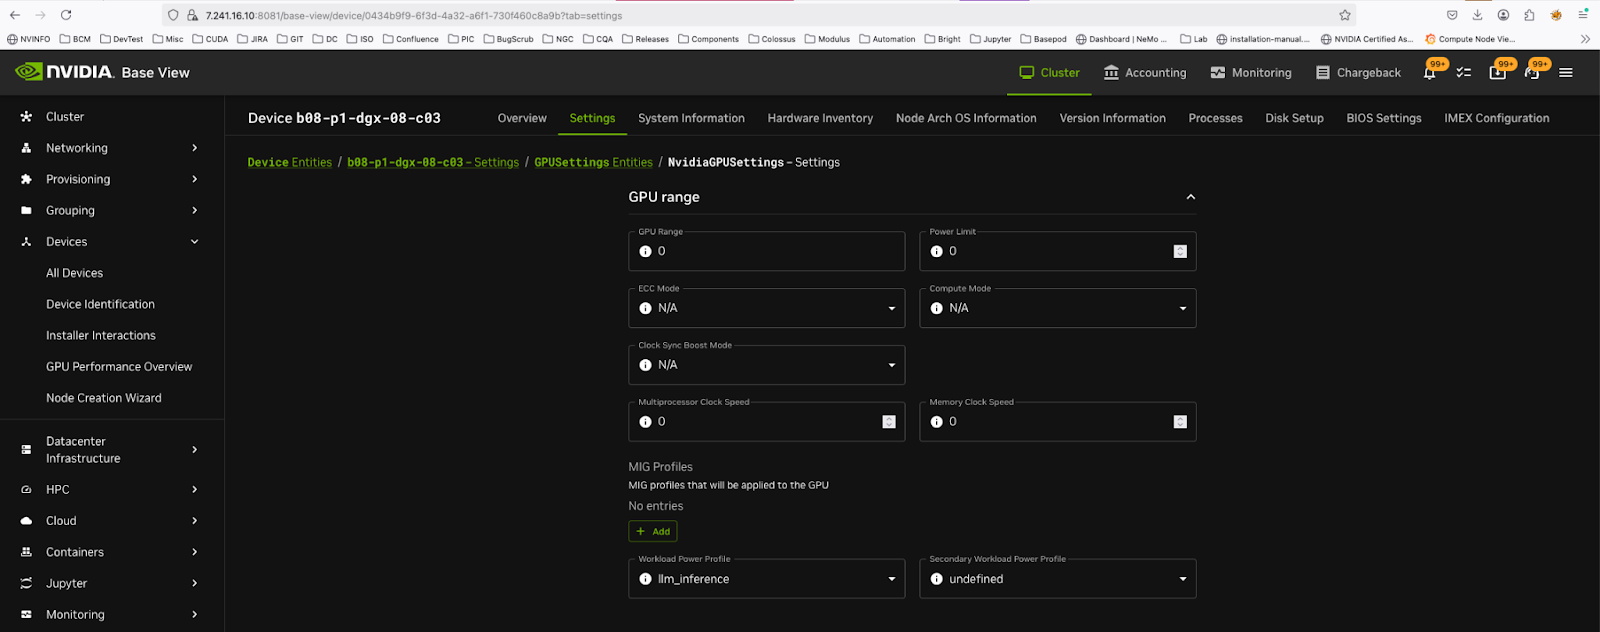
You can set the profiles here.
Example:
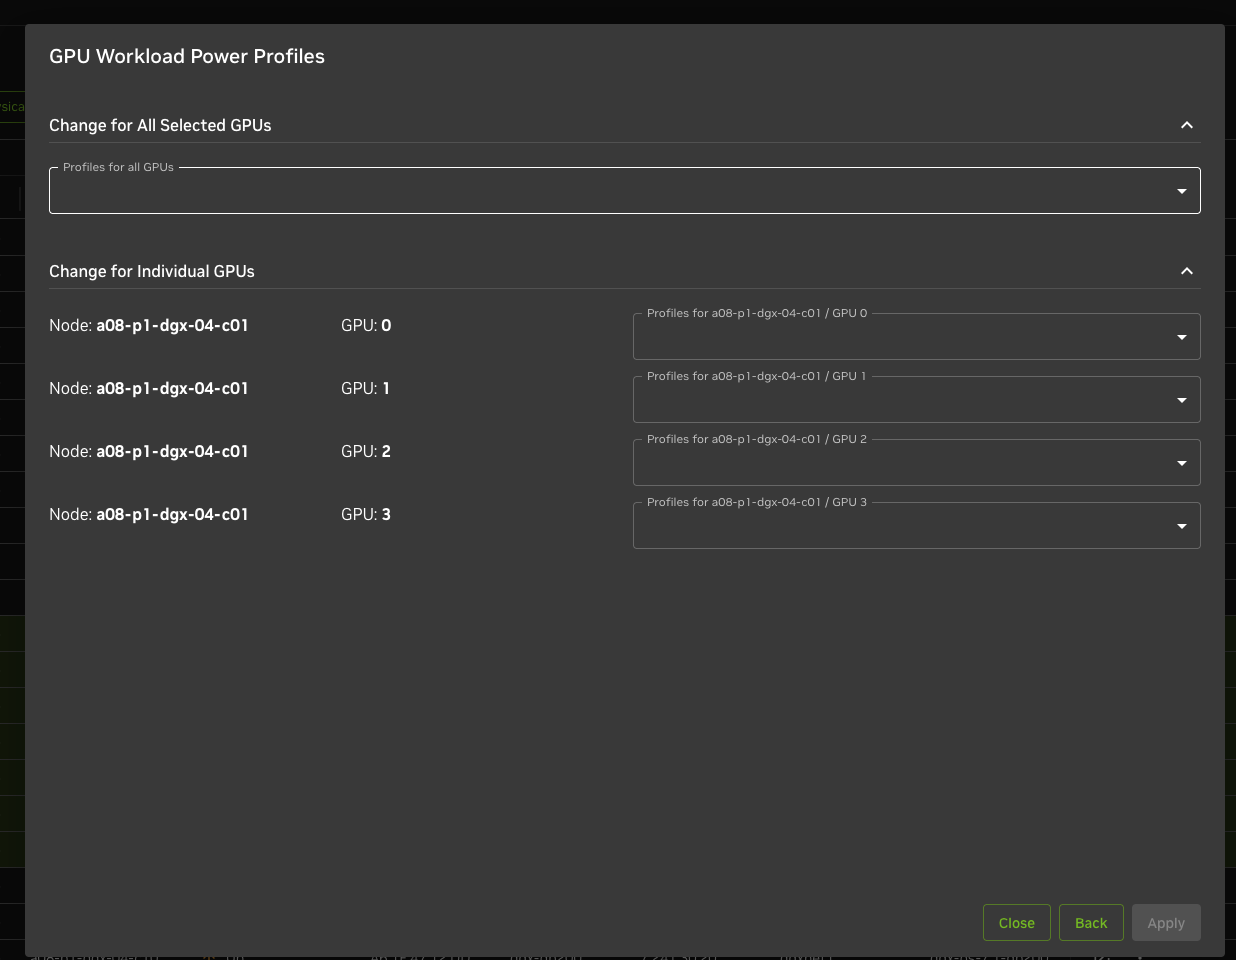
To set Power profiles on a set of nodes#
Select the nodes and click on “ Bulk action” (top hand right corner)
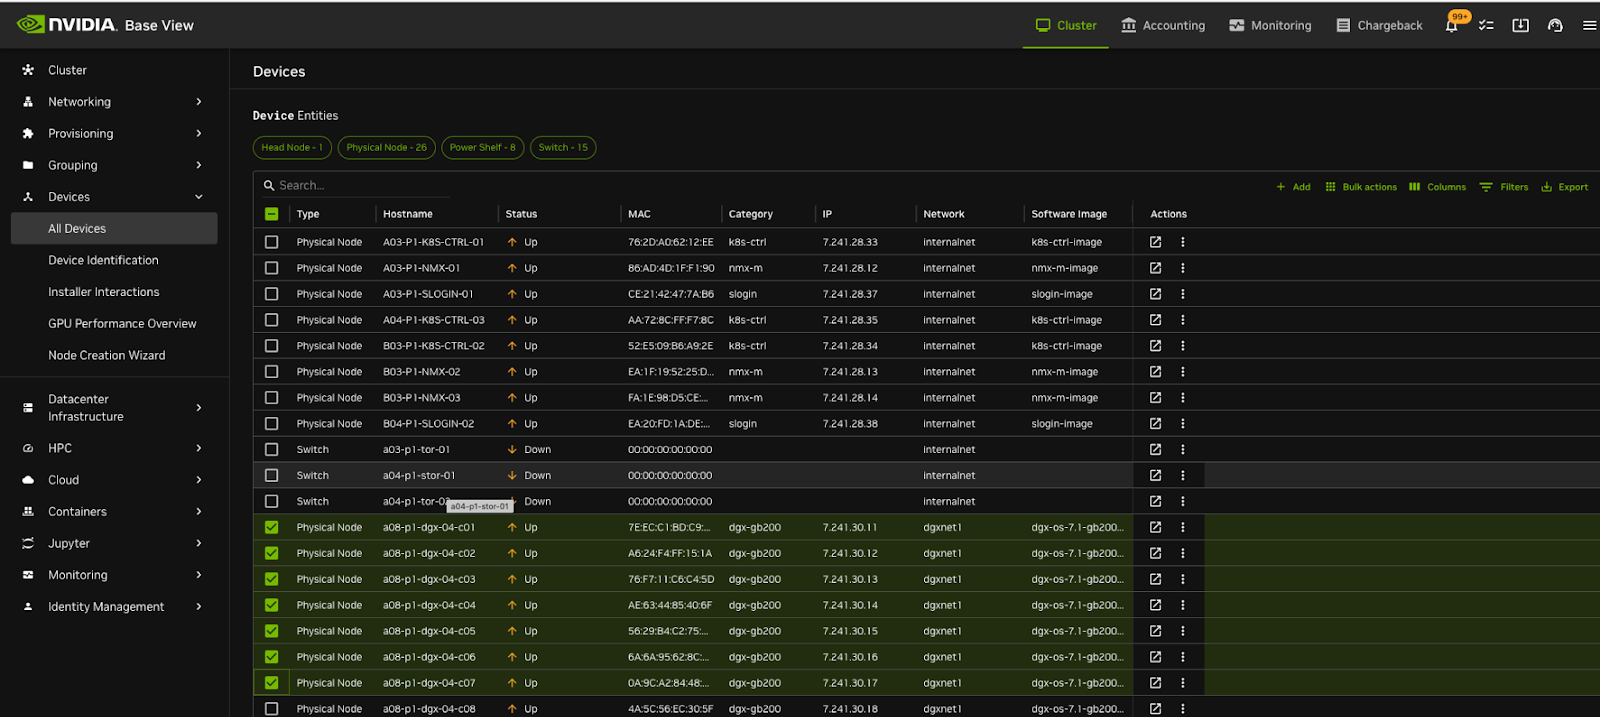
Select and click on “GPU Workload Power Profiles”
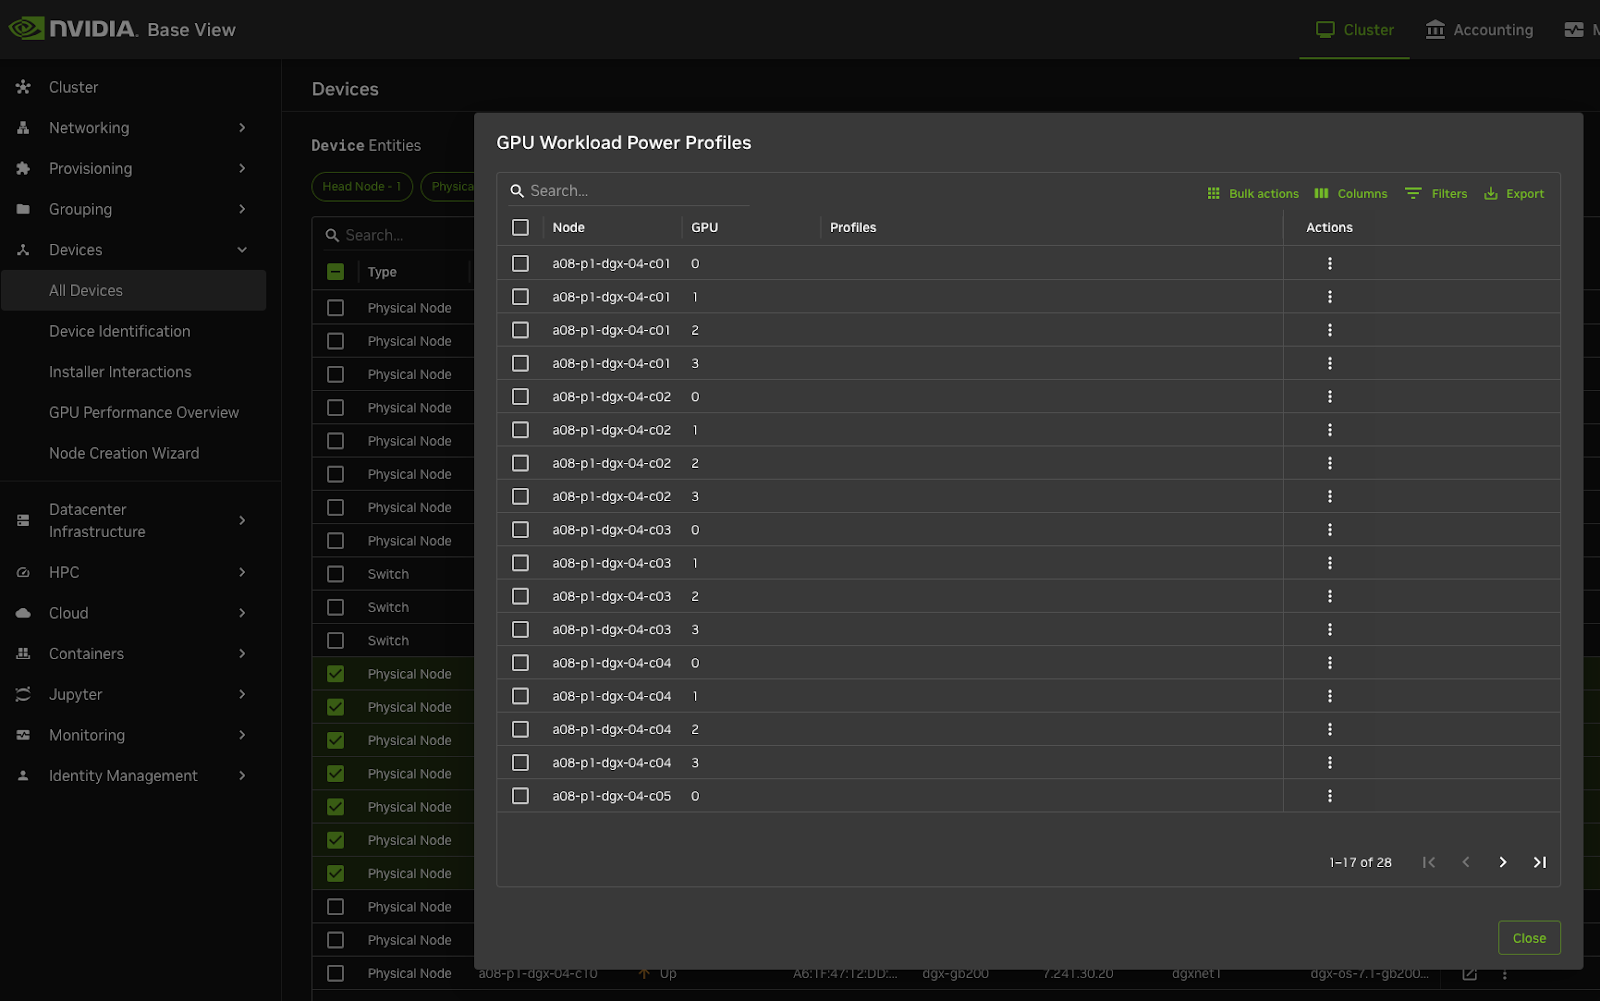
You can either Change profiles per node or do bulk actions
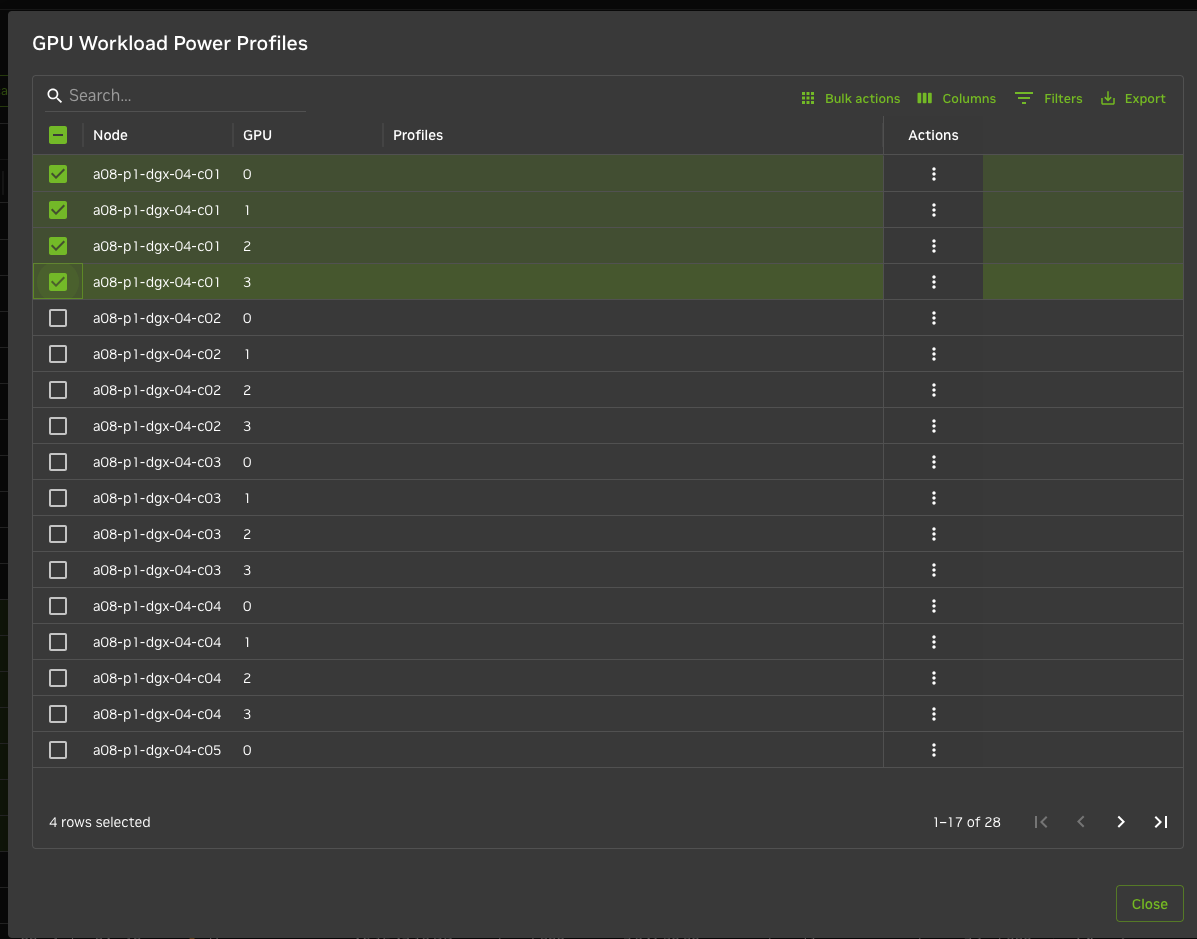
Bulk change or individual changes