Installing OpenShift Operators#
To run media applications on the cluster, the following operators are required:
Node Feature Discovery Operator
NUMA Resources Operator
NVIDIA Network Operator
NVIDIA GPU Operator
SR-IOV Network Operator
Kubernetes NMState Operator
PTP Operator
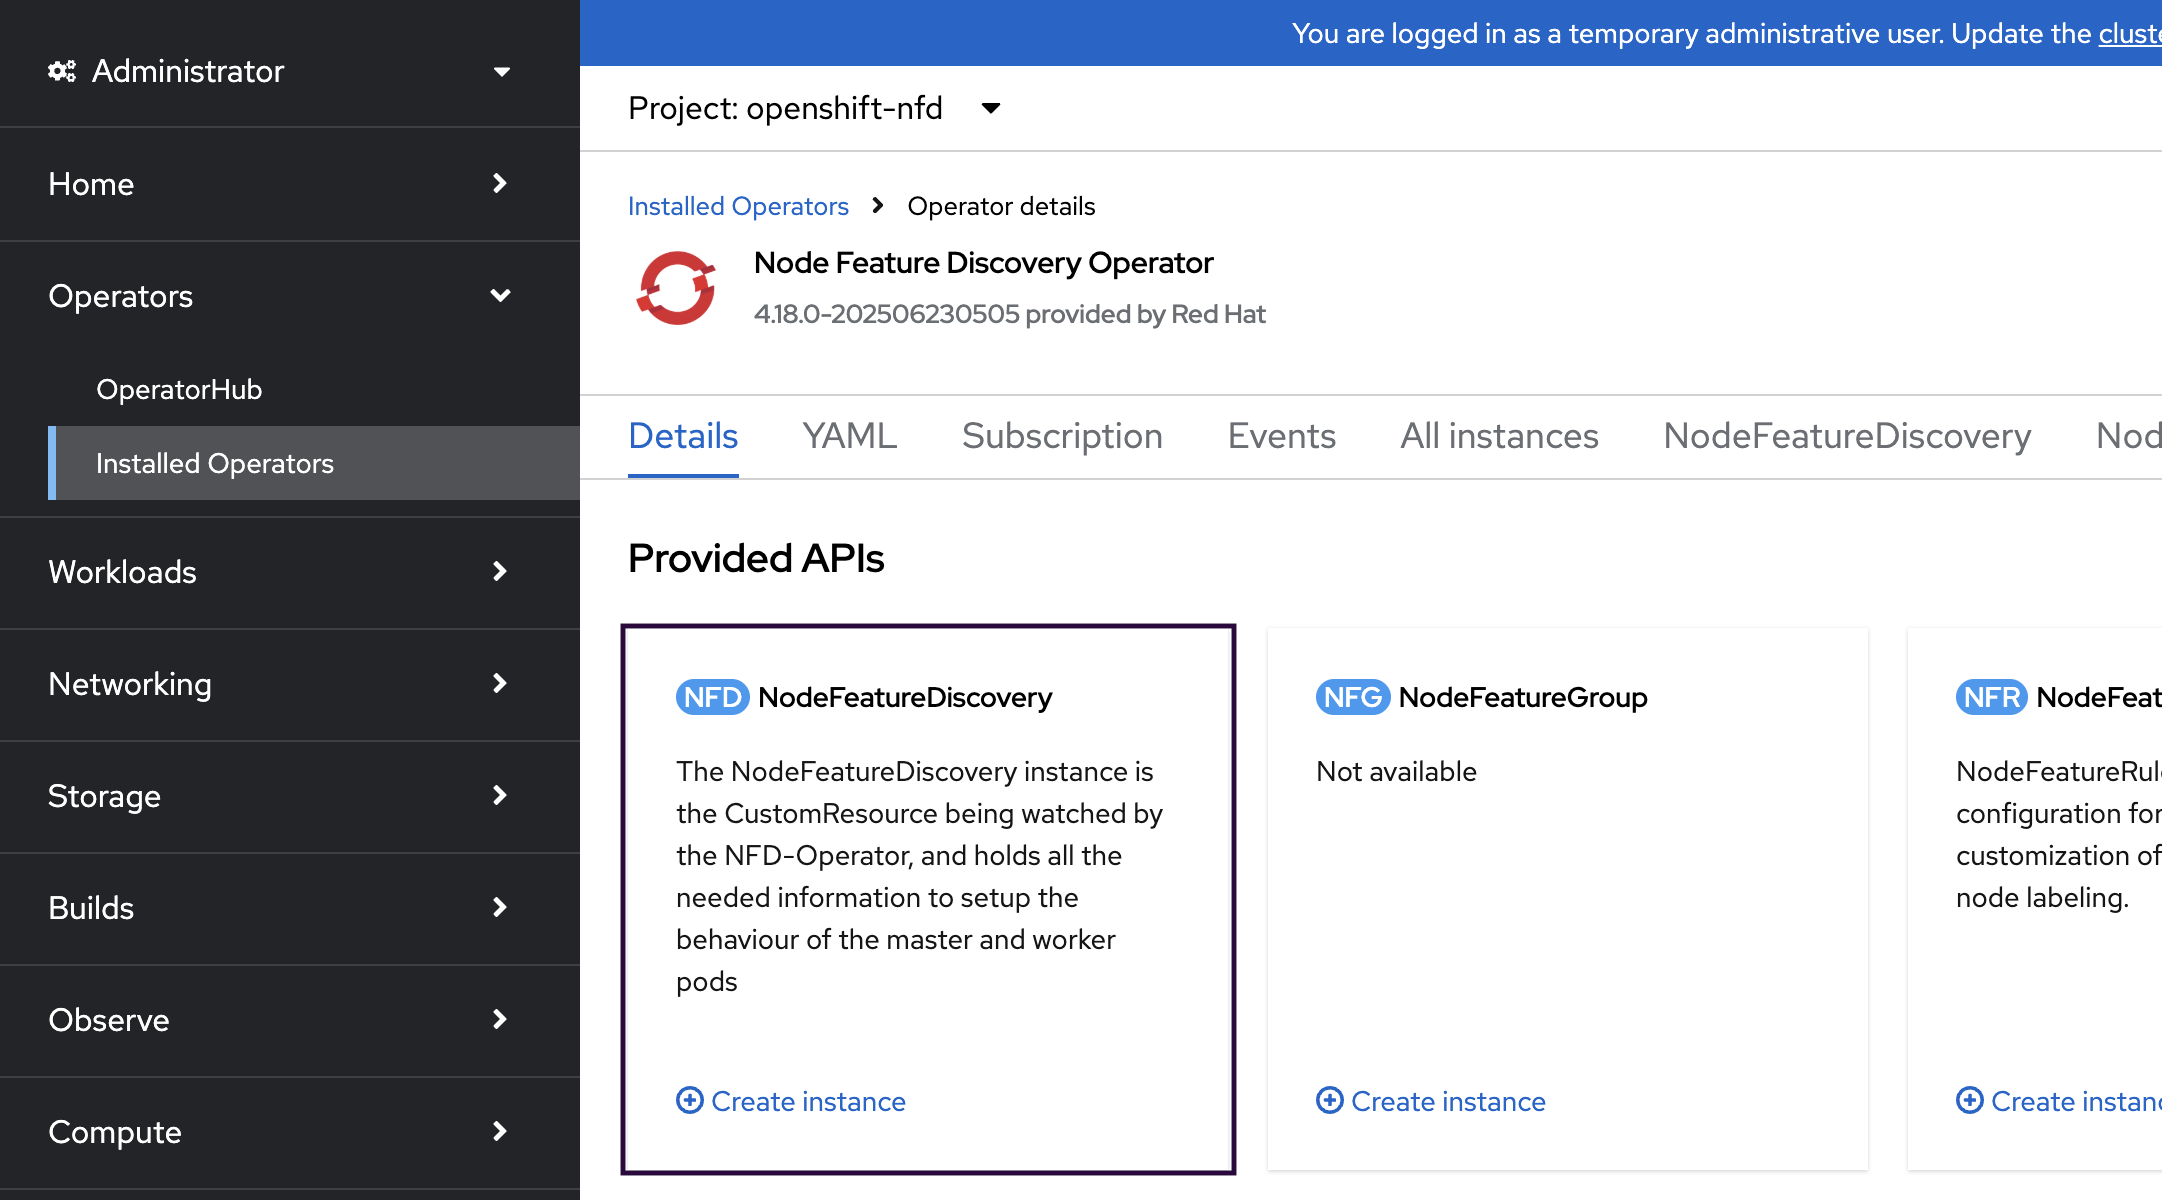
Installing Node Feature Discovery Operator#
Node Feature Discovery Operator (NFD) manages the detection of hardware features and labels the nodes with hardware-specific information. NFD labels the host with node-specific attributes, such as PCI cards, kernel, operating system version, and so on.
To install the operator using the Web console:
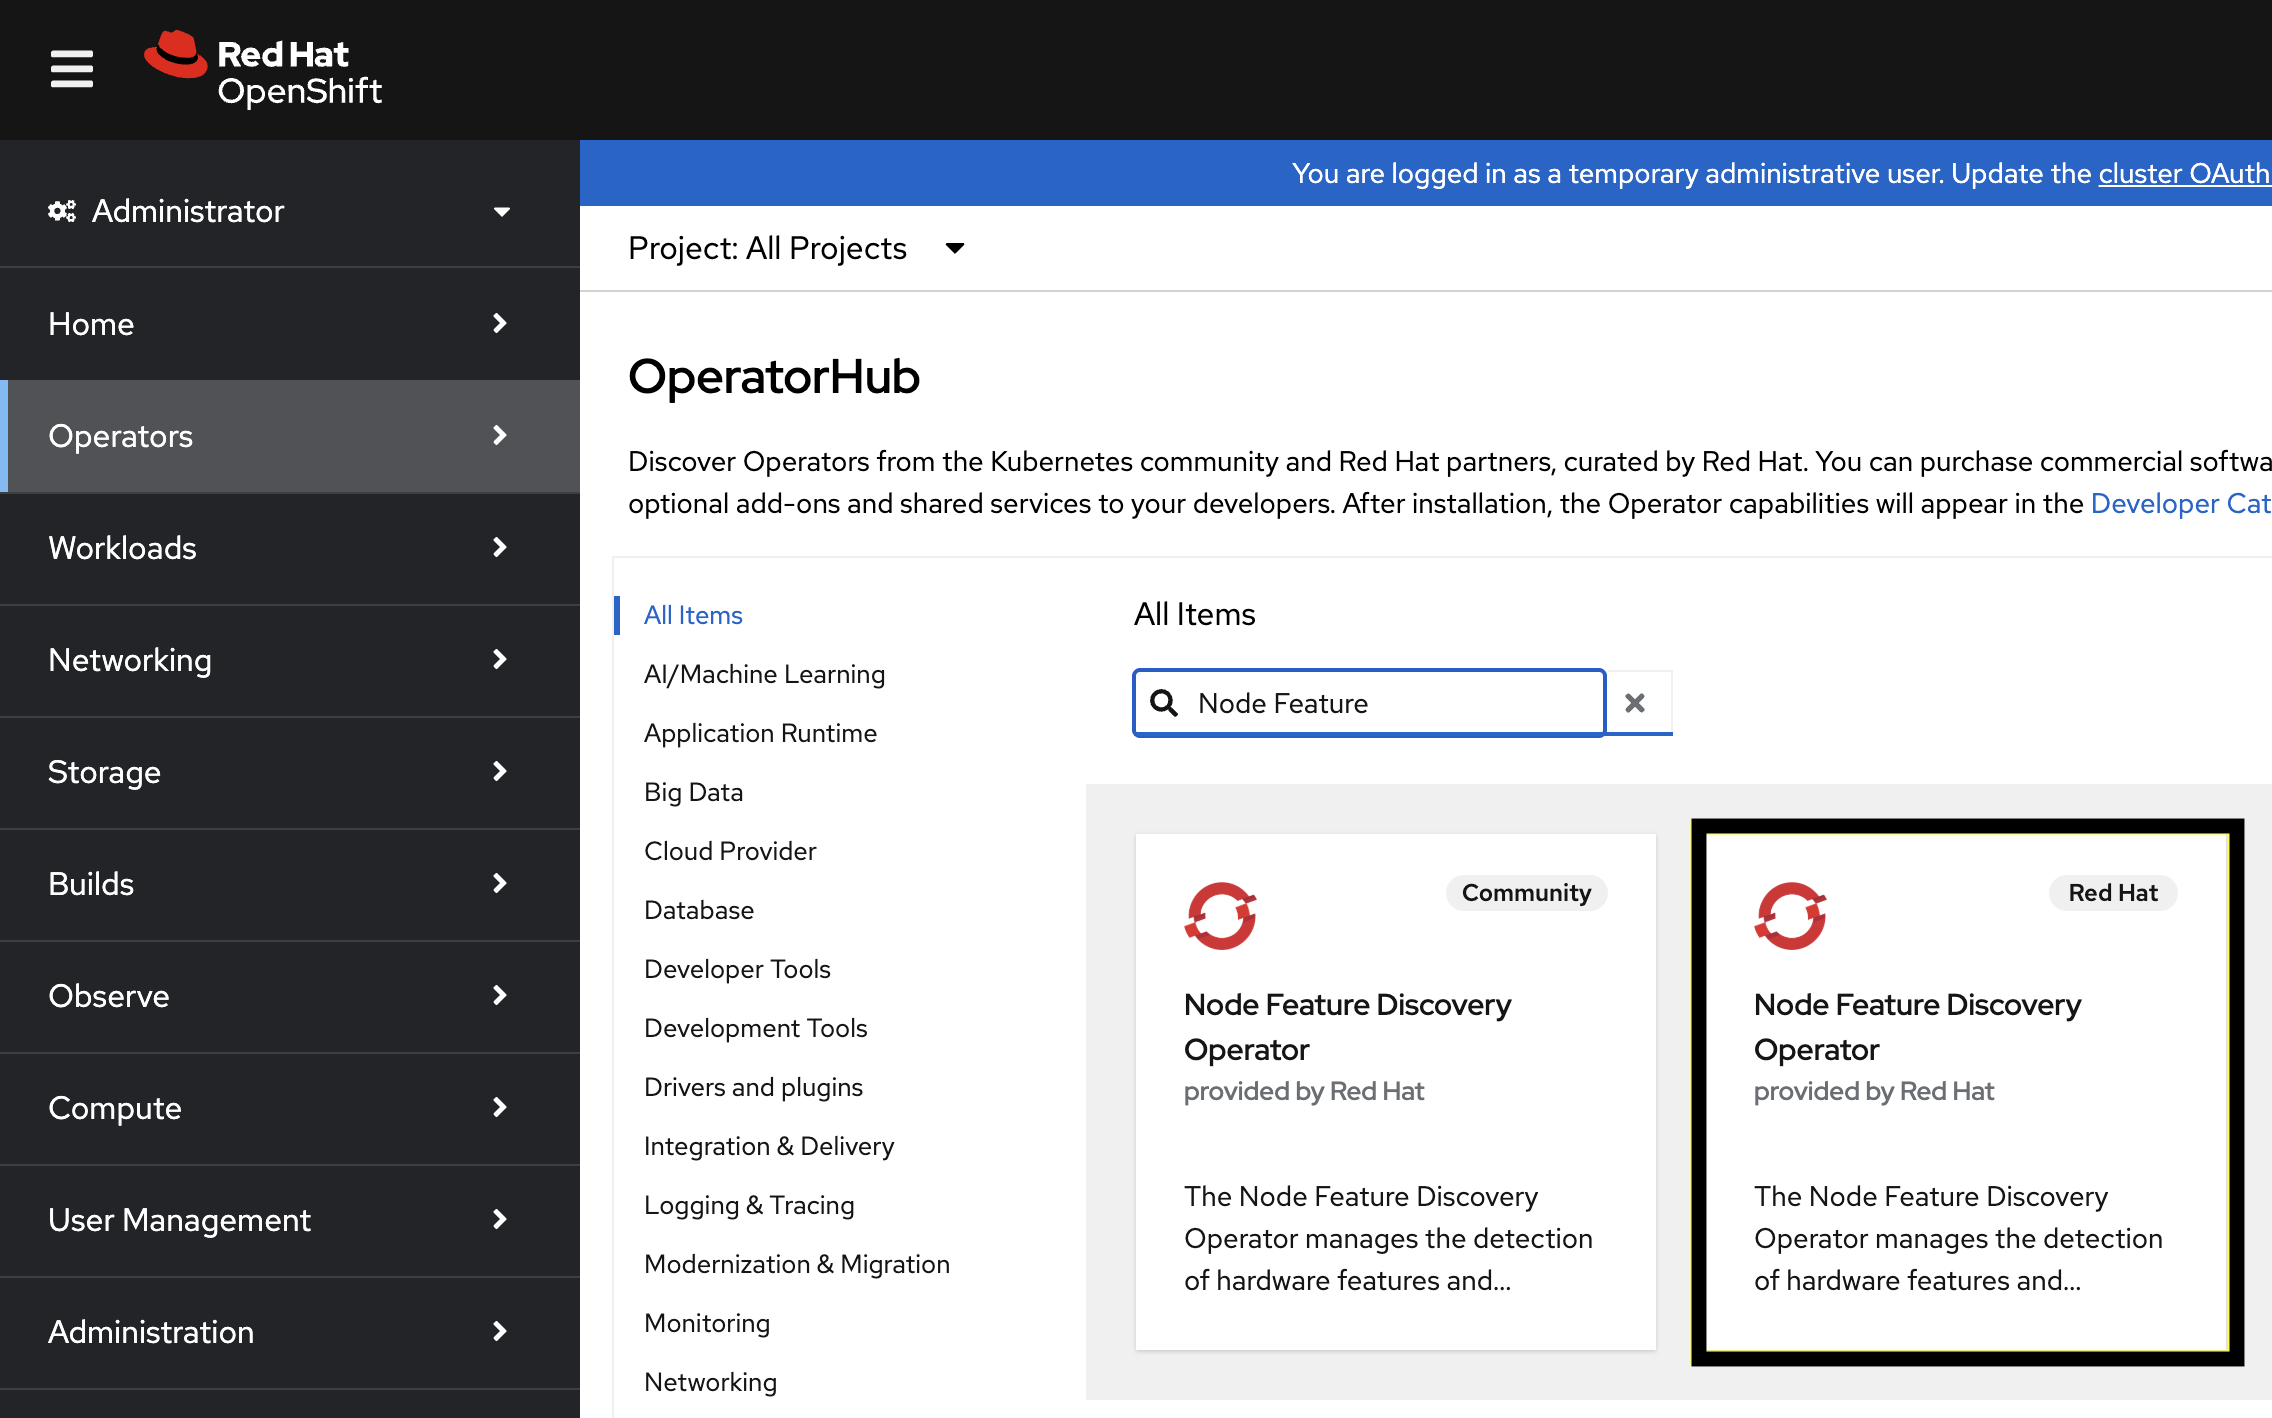
Expand the Operators section and select Operator Hub.
Use the search bar to search for Node Feature Discovery.
Select the operator that is provided by Red Hat and maintained by Red Hat.
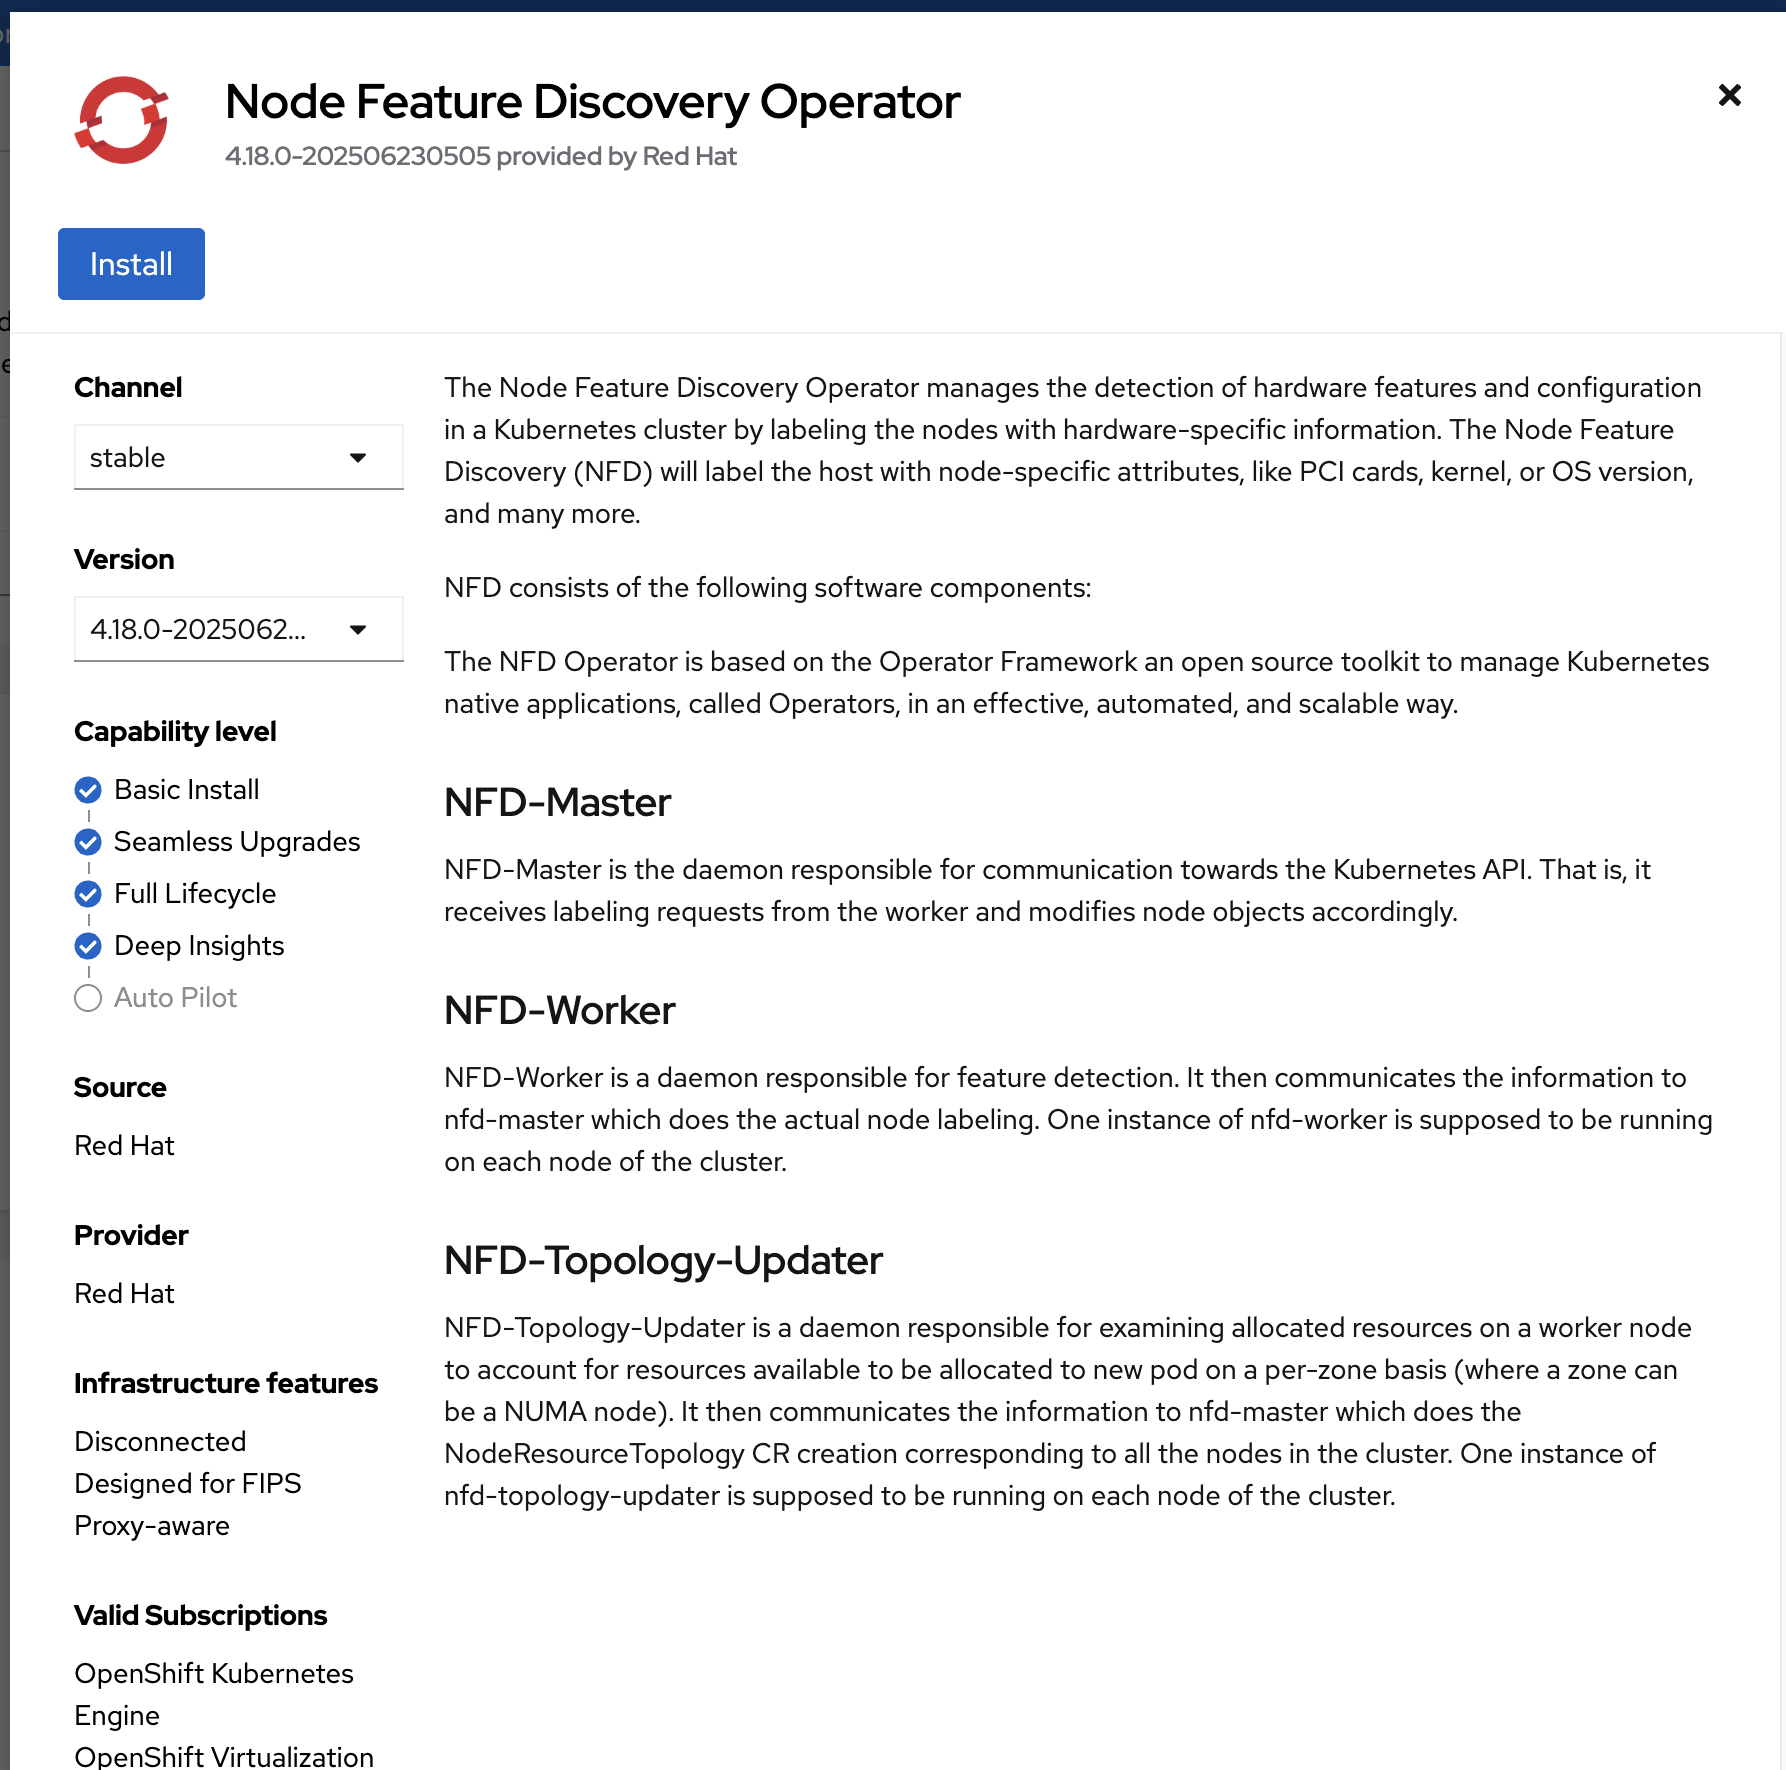
In the pop-up window, click Install.
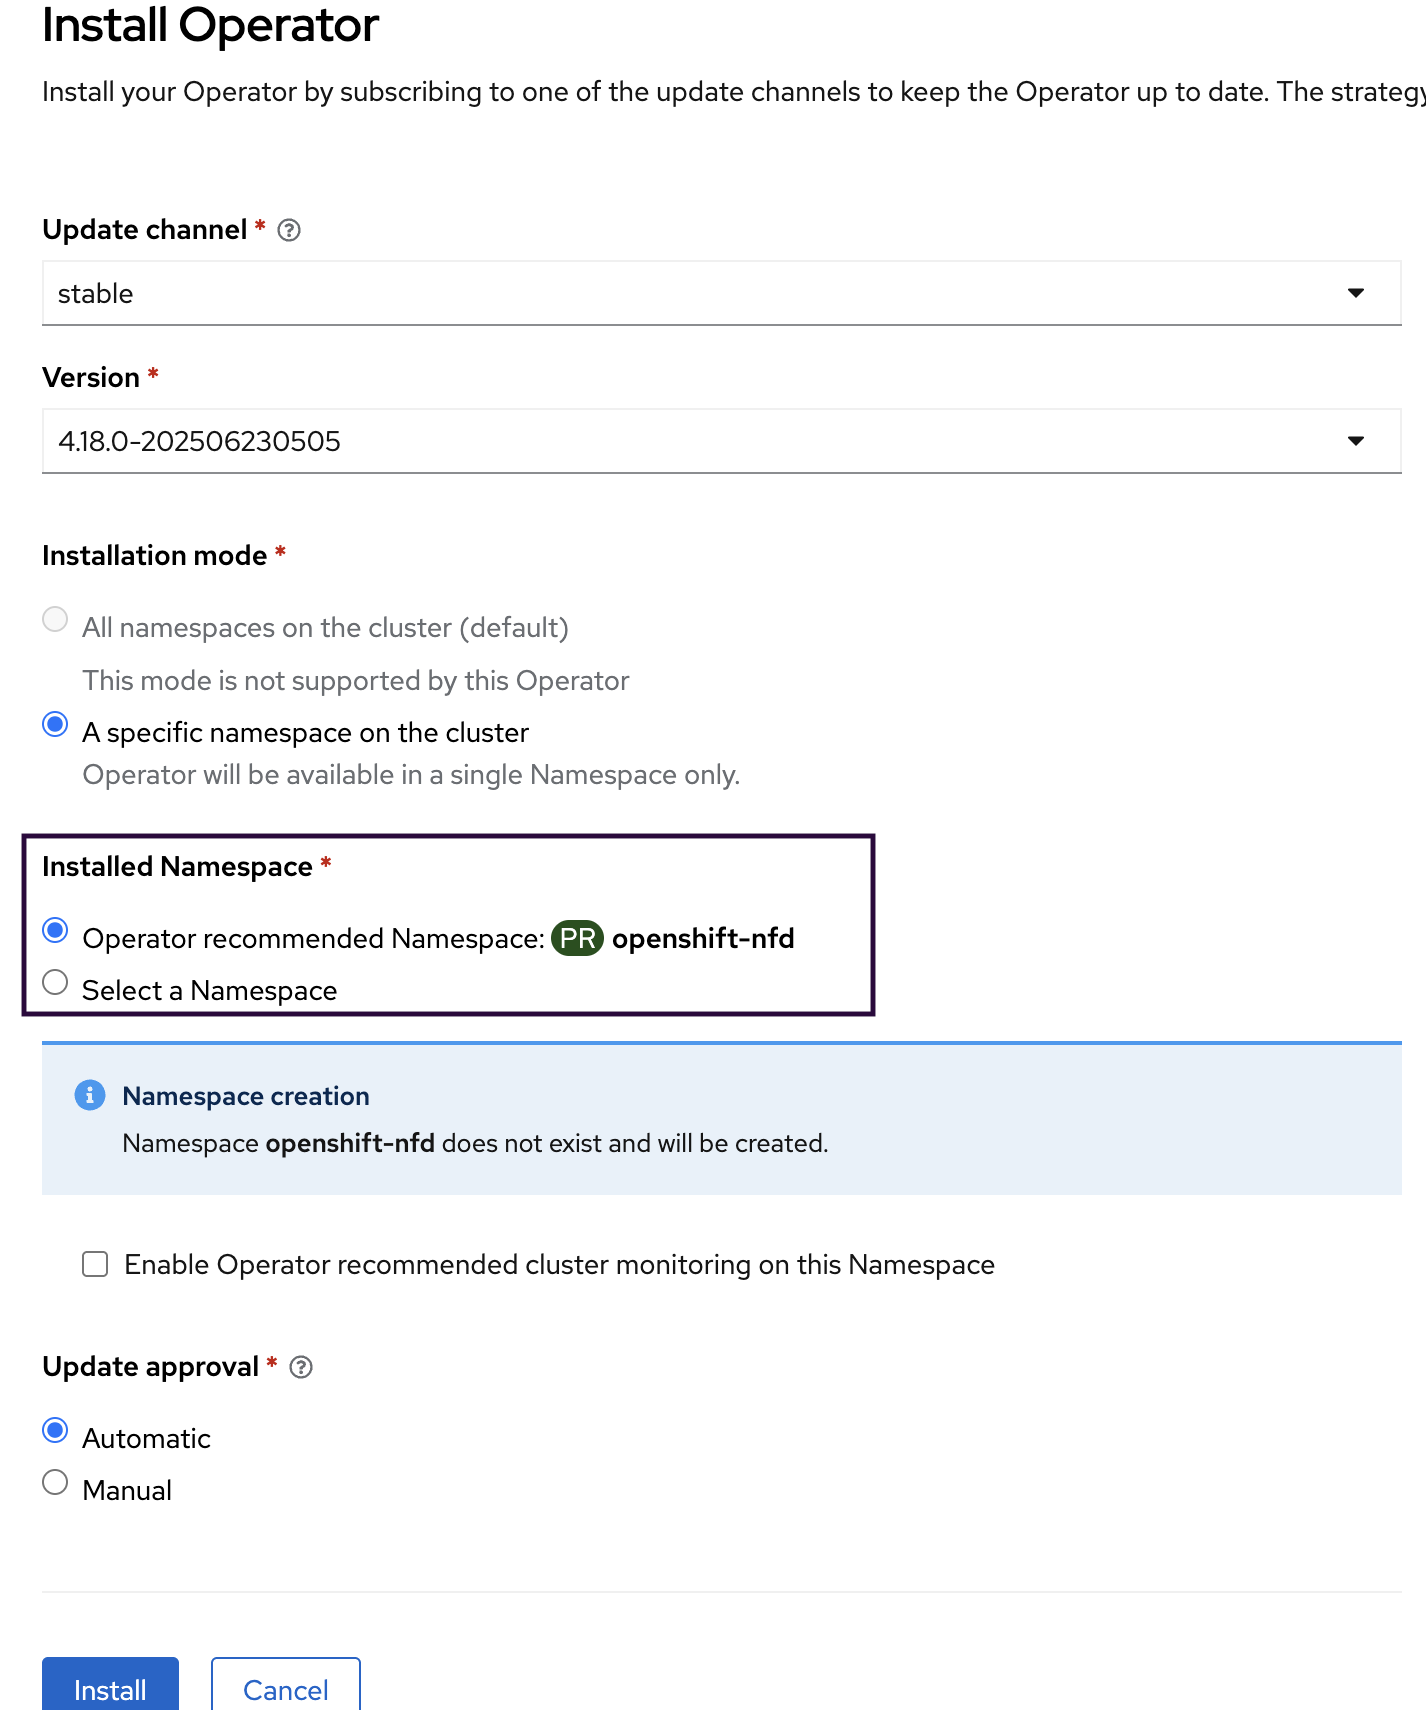
Check A specific namespace on the cluster and click Install.
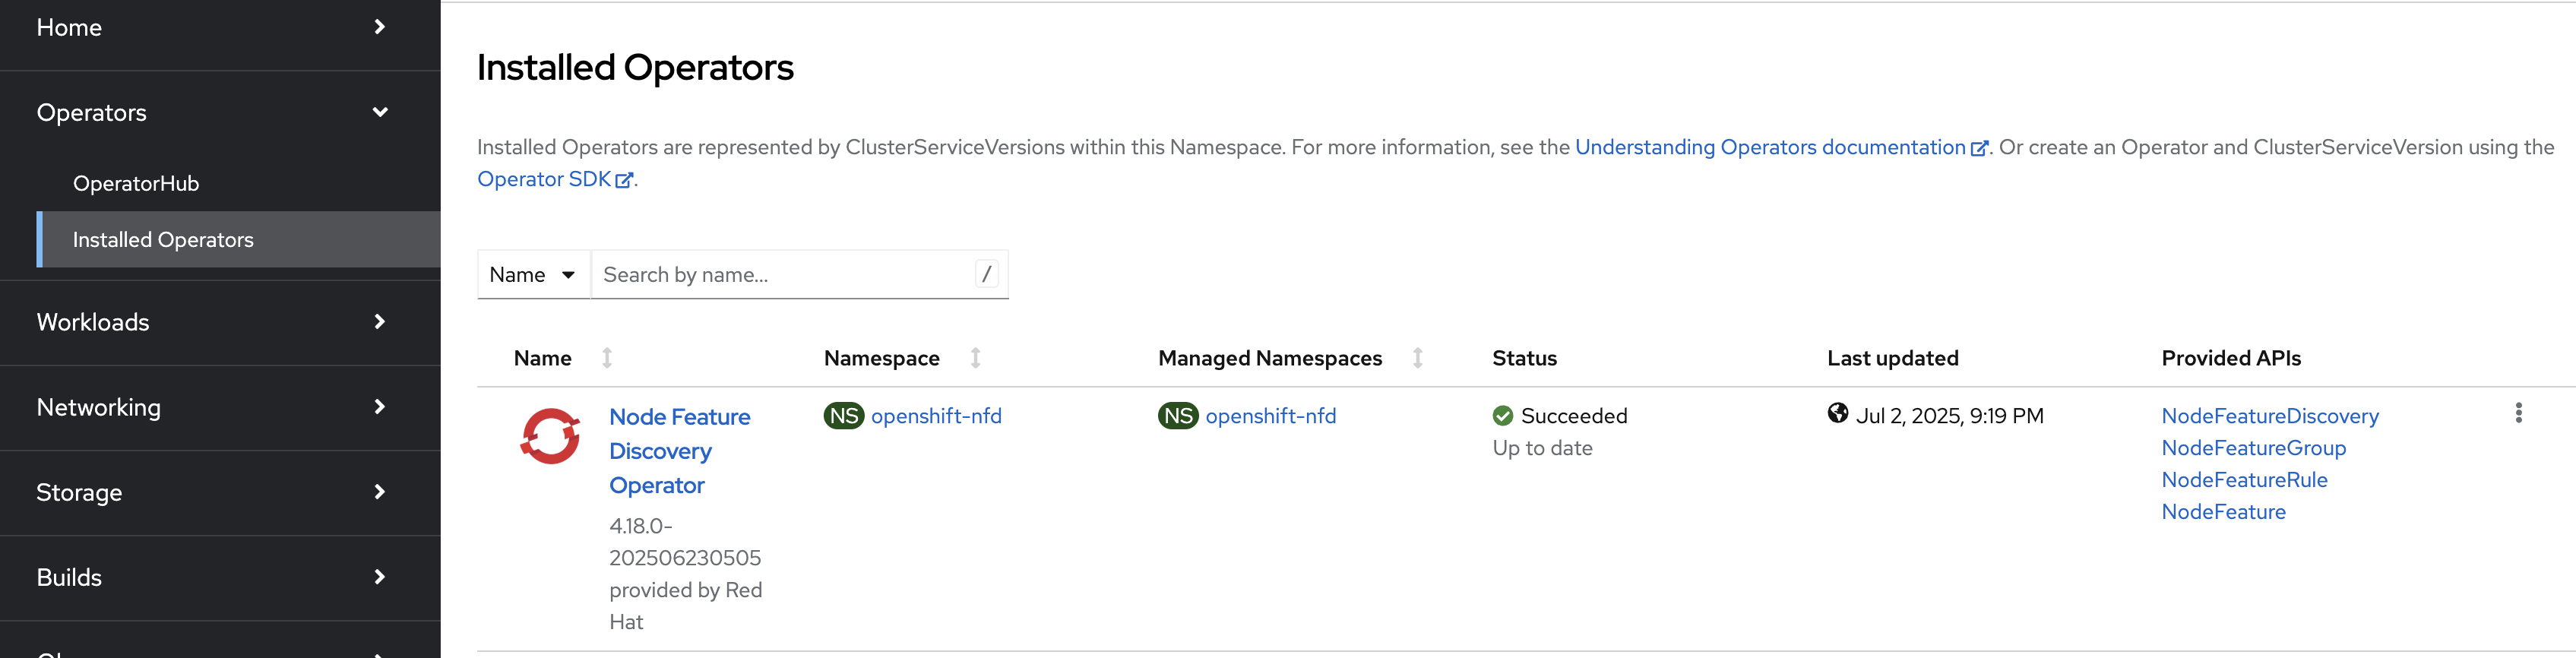
Navigate to Operators > Installed Operators and wait for 2–3 minutes for operator installation to complete.
Click Node Feature Discovery Operator. Under the Provided APIs section, click Create instance for NodeFeatureDiscovery. In the subsequent screen, click the Create button.
Wait for 2–3 minutes for Node Feature Discovery pods to start. On jump node, use
ocCLI tool to monitor status of various pods:oc get pods -o wide -n openshift-nfd NAME READY STATUS RESTARTS AGE IP NODE nfd-controller-manager-668b4cb675-pbcvz 1/1 Running 0 14h 10.131.0.32 h4m-d nfd-gc-6b46f5f846-sk4rd 1/1 Running 0 14h 10.131.0.33 h4m-d nfd-master-b4c548d99-4vfxf 1/1 Running 0 14h 10.129.0.157 h4m-a nfd-worker-pbskf 1/1 Running 0 14h 10.47.33.0 h4m-e nfd-worker-pxzqg 1/1 Running 0 14h 10.47.32.255 h4m-d
Installing NUMA Resources Operator#
NUMA Resources Operator allows you to schedule high-performance workloads in the same NUMA zone. It deploys a node resources exporting agent that reports on available cluster node NUMA resources, and a secondary scheduler that manages the workloads. For more information see Scheduling NUMA-aware workloads.
Note
For servers with fewer network adapters or GPUs, or an unbalanced topology, disable NUMA-aware scheduling (see Create Performance Profile) and skip Installing NUMA Resources Operator.
To install the operator using the Web console:
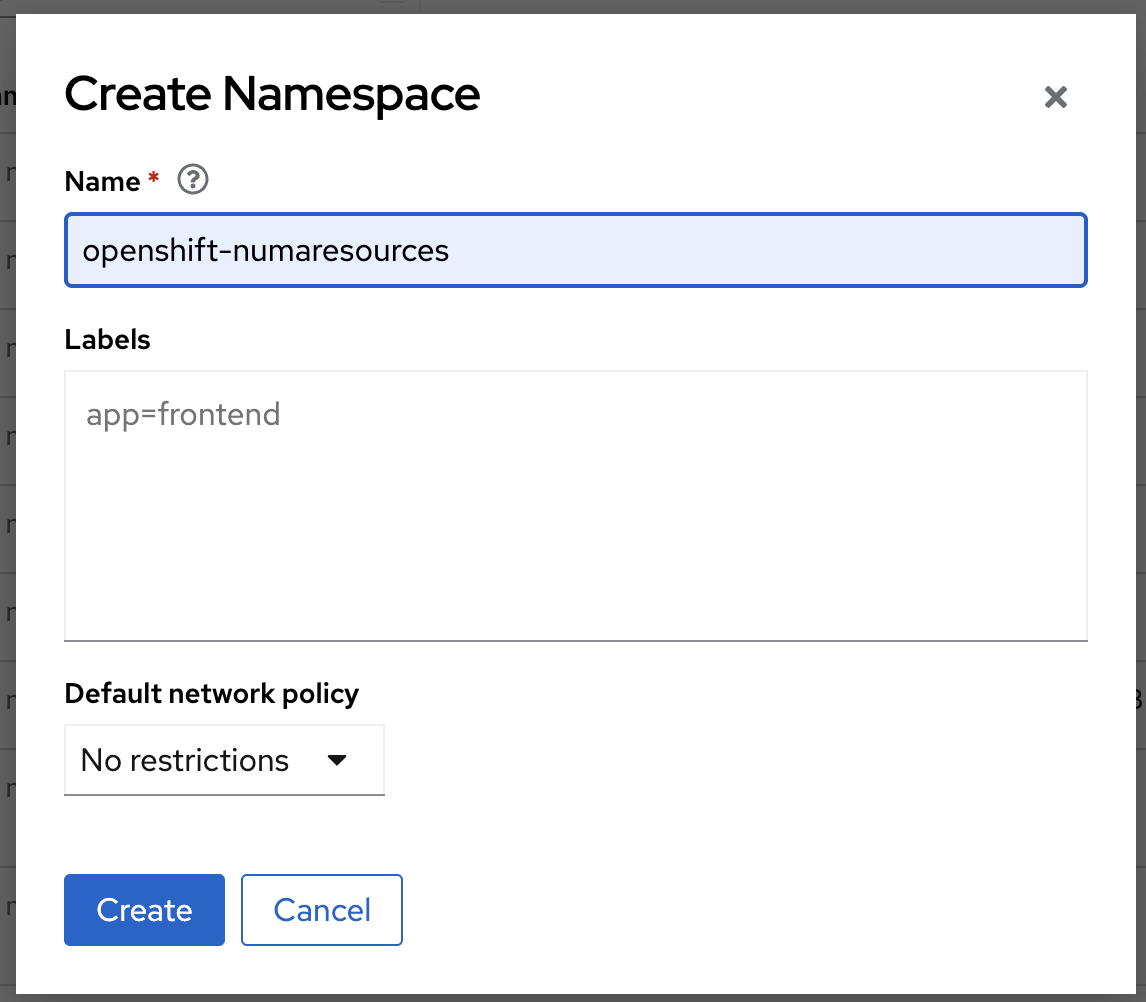
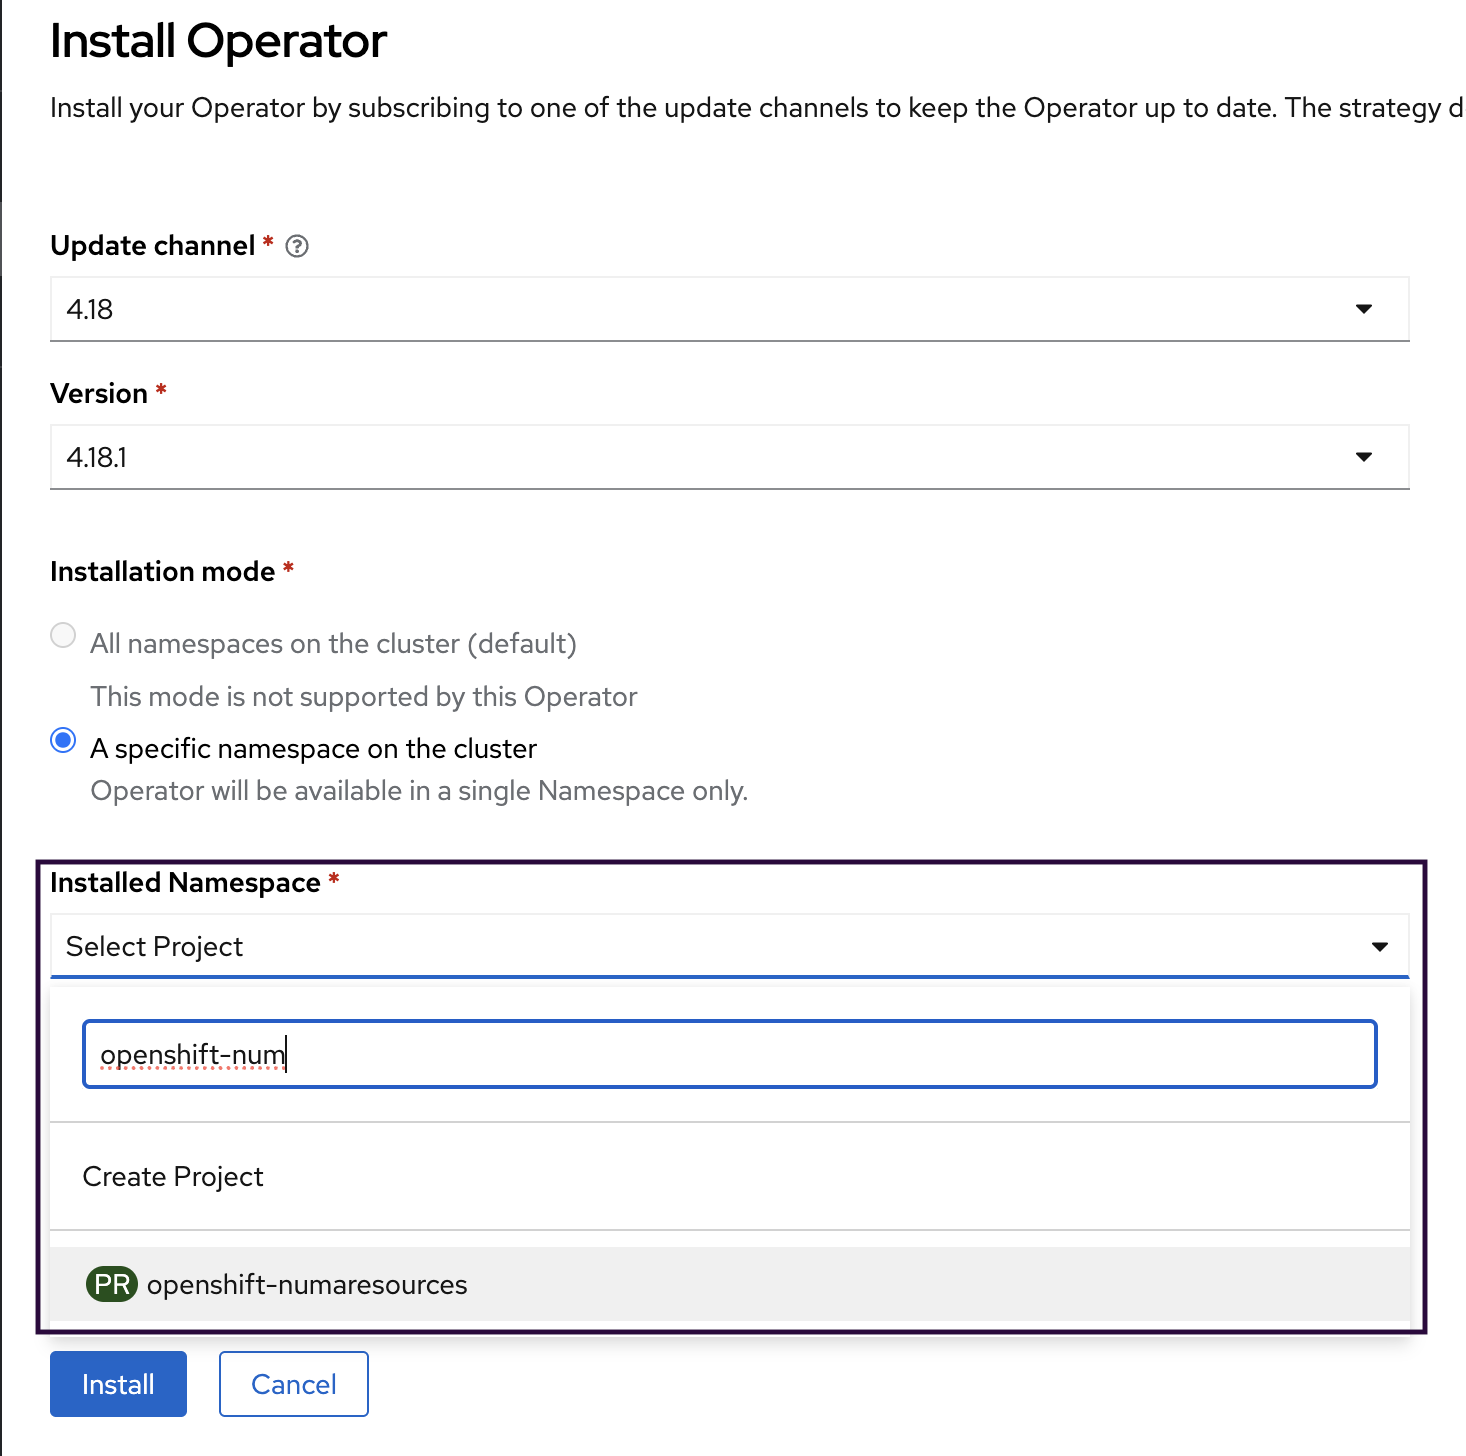
Click Administration > Namespaces > Create Namespace.
Enter openshift-numaresources in the Name field, and then click Create.
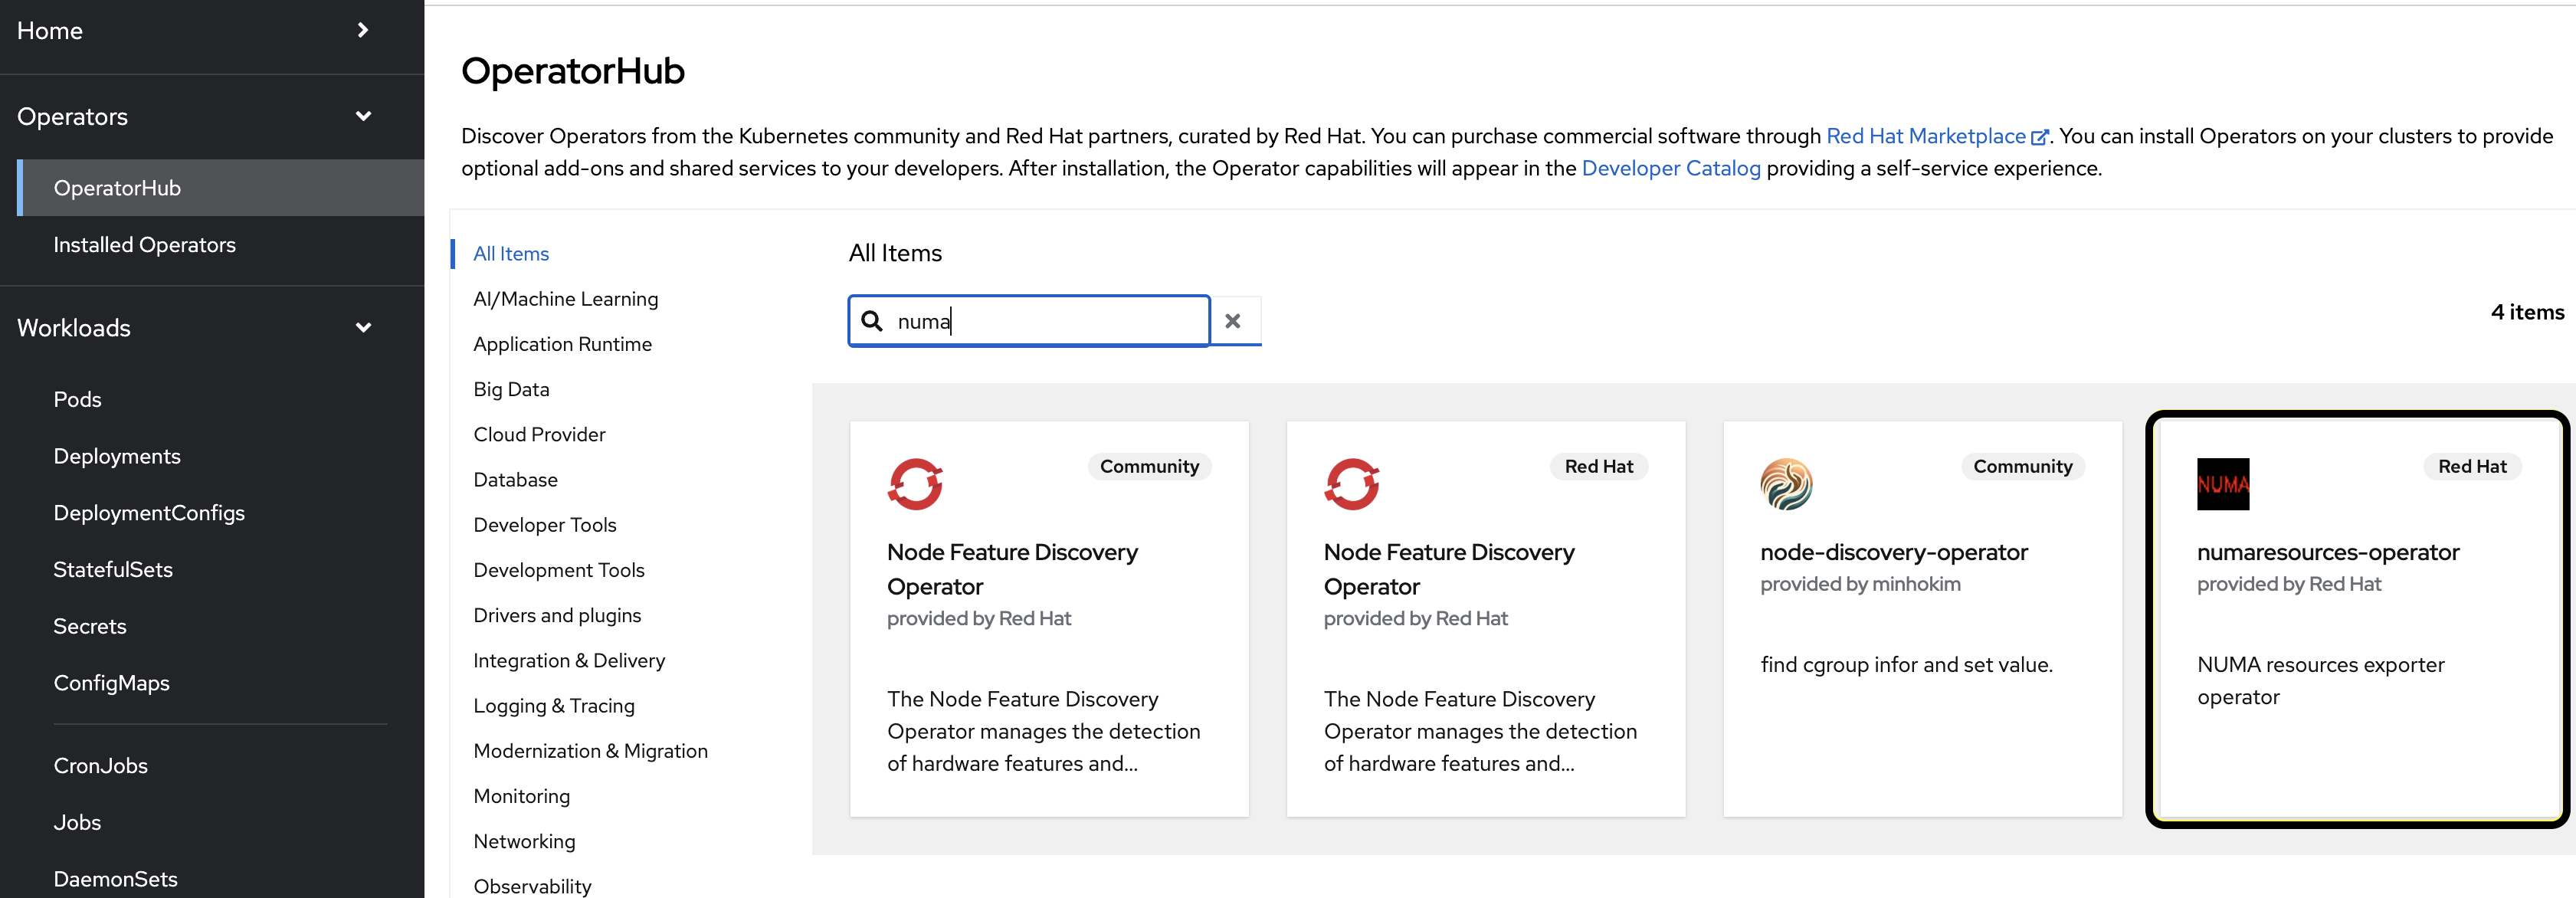
Expand the Operators section and select Operator Hub. Use the search bar to search for numa. Select numaresources-operator.
In the opened pop-up window, click Install.
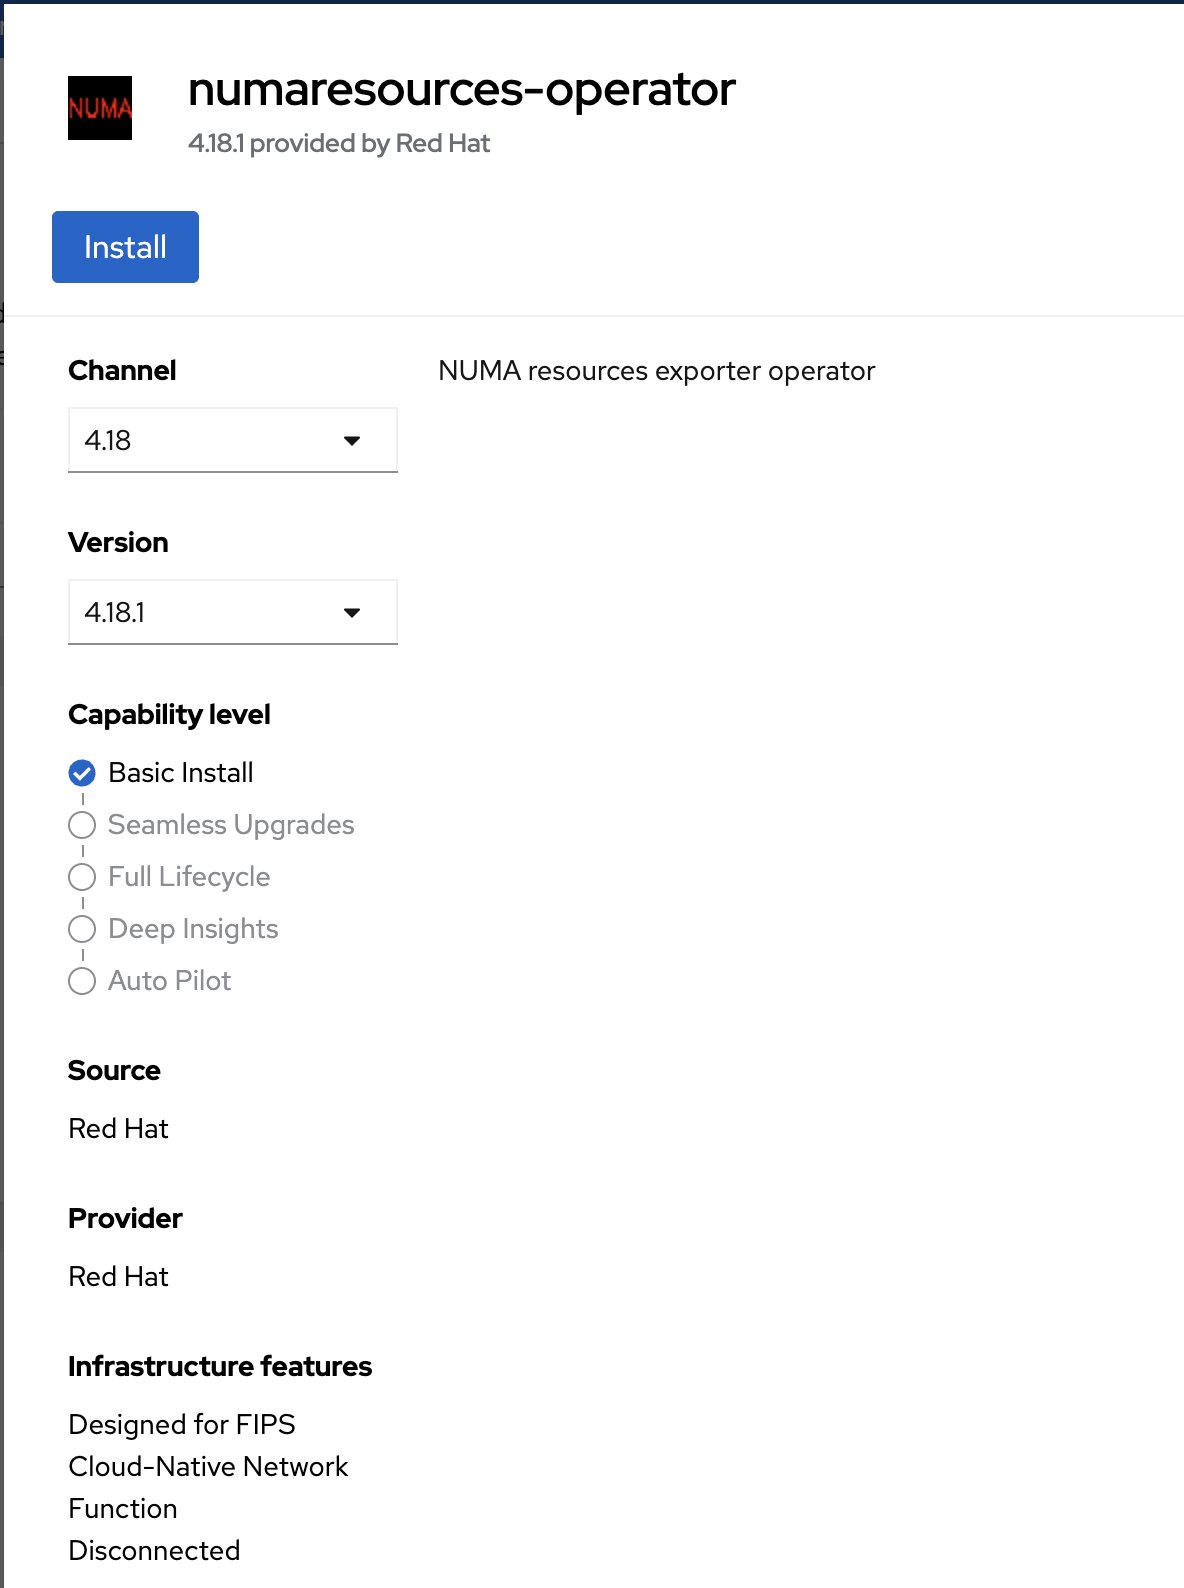
Select Installed Namespace as openshift-numaresources and click Install.
Creating a Custom Resource#
Create a file,
nrop.yaml, based on the following template:apiVersion: nodetopology.openshift.io/v1 kind: NUMAResourcesOperator metadata: name: numaresourcesoperator spec: nodeGroups: - machineConfigPoolSelector: matchLabels: <machine-config-pool> podExcludes: - name: installer-* namespace: openshift-etcd - name: revision-pruner-* namespace: openshift-etcd - name: revision-pruner-* namespace: openshift-kube-scheduler - name: installer-* namespace: openshift-kube-controller-manager - name: revision-pruner-* namespace: openshift-kube-controller-manager - name: installer-* namespace: openshift-kube-apiserver - name: revision-pruner-* namespace: openshift-kube-apiserver
Modify
<machine-config-pool>value according to the cluster type.For a standard (5-node) cluster replace
<machine-config-pool>with following line:machineconfiguration.openshift.io/role: "holoscanmedia"
For SNO or a compact (3-node) cluster, replace
<machine-config-pool>with following line:pools.operator.machineconfiguration.openshift.io/master: ""
Apply the custom resource:
oc create -f nrop.yaml
Deploying the NUMA-aware Secondary Pod Scheduler#
Create a file,
nro-scheduler.yaml, with the following content:apiVersion: nodetopology.openshift.io/v1 kind: NUMAResourcesScheduler metadata: name: numaresourcesscheduler spec: imageSpec: "registry.redhat.io/openshift4/noderesourcetopology-scheduler-rhel9:<version-tag>" cacheResyncPeriod: "5s" schedulerInformer: Shared
where
<version-tag>is based on the OpenShift version, for example,v4.18Apply the custom resource:
oc create -f nro-scheduler.yaml
After a few minutes, run the following command to confirm successful deployment of the required resources:
oc get all -n openshift-numaresources

NAME                                                    READY   STATUS    RESTARTS   AGE
pod/numaresources-controller-manager-7b58bd4c8c-7vz9b   1/1     Running   0          26m
pod/numaresourcesoperator-holoscanmedia-vggmd           2/2     Running   0          3m5s
pod/numaresourcesoperator-holoscanmedia-zkzwn           2/2     Running   0          3m5s
pod/secondary-scheduler-65bcb645b8-qtk8z                1/1     Running   0          25s

NAME                                                       TYPE        CLUSTER-IP       EXTERNAL-IP   PORT(S)    AGE
service/numaresources-controller-manager-metrics-service   ClusterIP   172.30.187.155   <none>        8080/TCP   26m
service/numaresources-rte-metrics-service                  ClusterIP   172.30.223.80    <none>        2112/TCP   3m7s

NAME                                                 DESIRED   CURRENT   READY   UP-TO-DATE   AVAILABLE   NODE SELECTOR                            AGE
daemonset.apps/numaresourcesoperator-holoscanmedia   2         2         2       2            2           node-role.kubernetes.io/holoscanmedia=   3m7s

NAME                                               READY   UP-TO-DATE   AVAILABLE   AGE
deployment.apps/numaresources-controller-manager   1/1     1            1           26m
deployment.apps/secondary-scheduler                1/1     1            1           25s

NAME                                                          DESIRED   CURRENT   READY   AGE
replicaset.apps/numaresources-controller-manager-7b58bd4c8c   1         1         1       26m
replicaset.apps/secondary-scheduler-65bcb645b8                1         1         1       25s
Note
Pods that request Guaranteed QoS for isolated CPUs and memory on the same NUMA node, and/or huge pages, GPU, or SR-IOV networking, must specify schedulerName: topo-aware-scheduler.
After configuring the Topology Manager single-numa-node policy, relying on the default-scheduler for these pods can cause runaway pod creation errors (ContainerStatusUnknown).
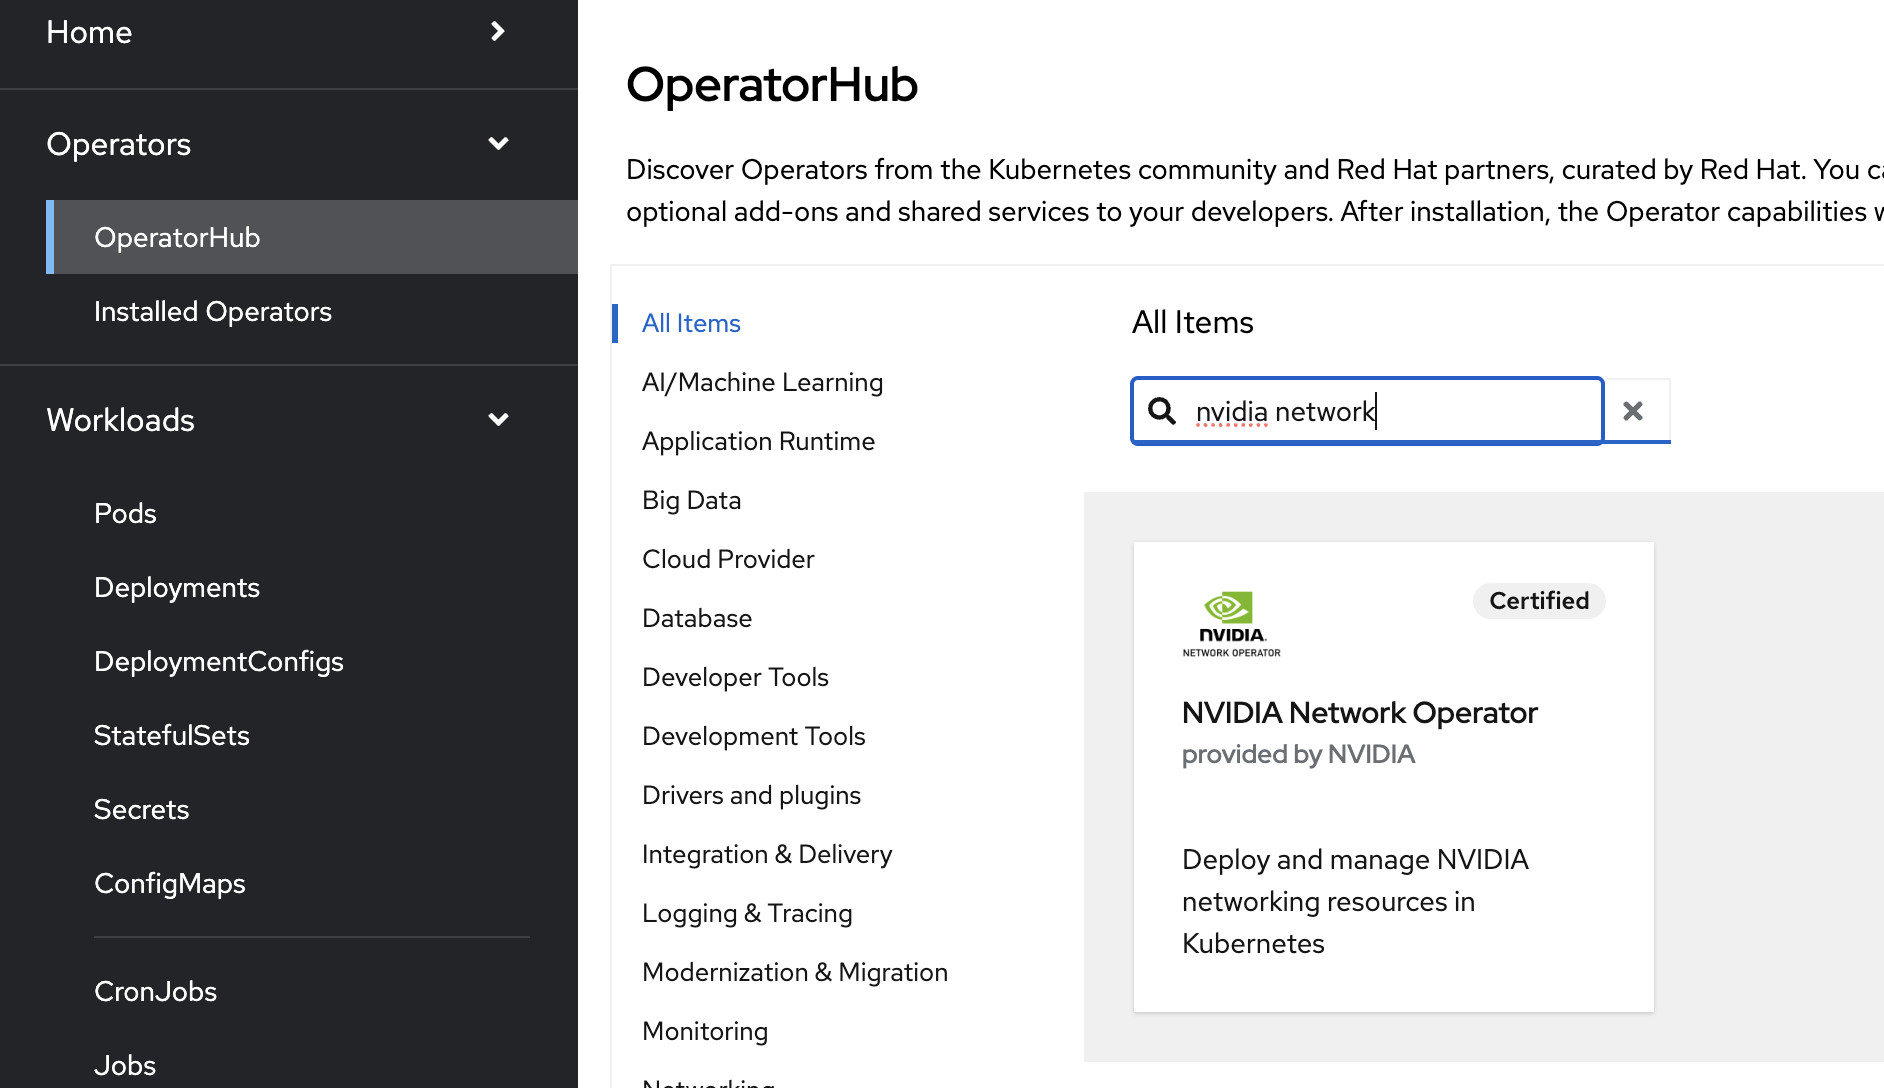
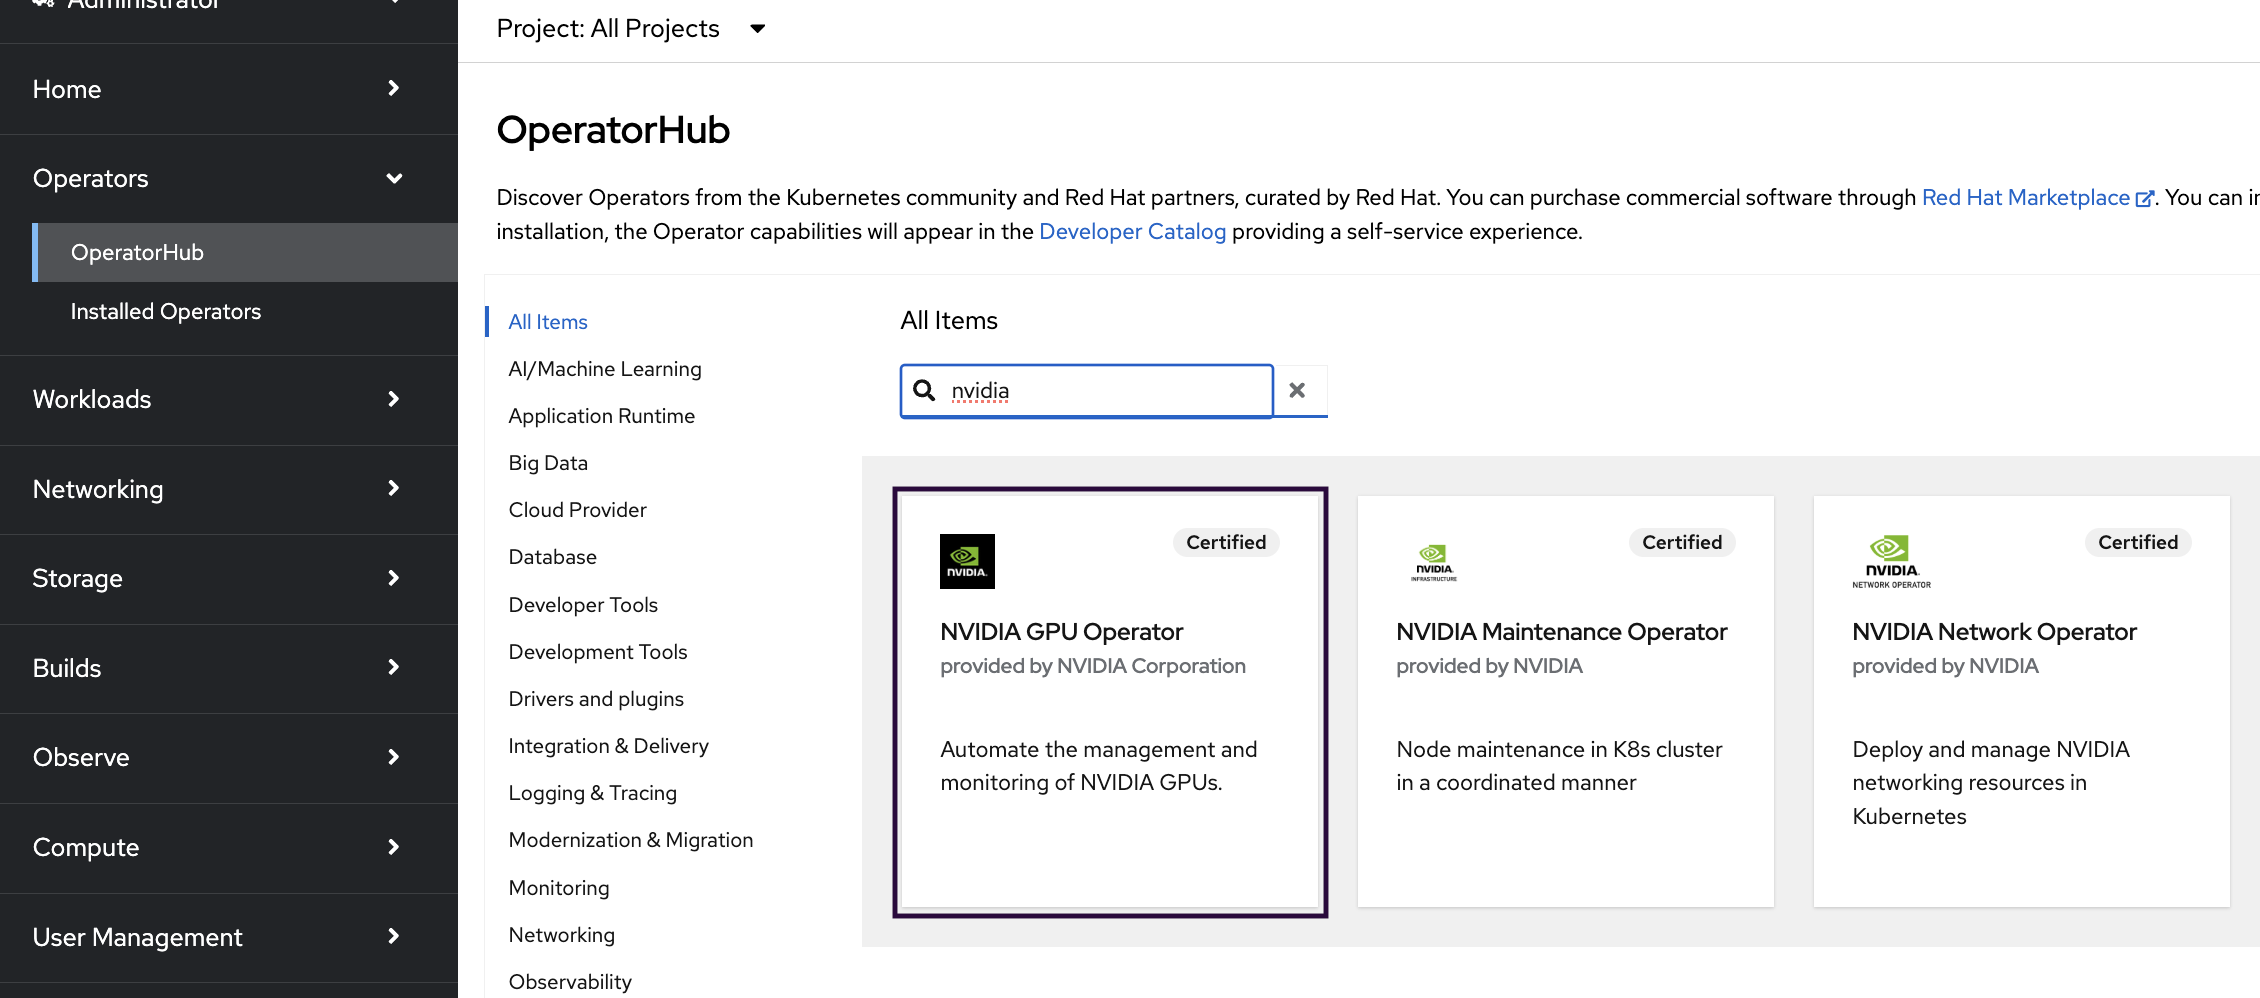
Installing NVIDIA Network Operator#
NVIDIA Network Operator is required on the cluster to enable availability to compile and install the RDMA GPUDirect module as part of the NVIDIA GPU Operator.
To install the operator using the Web console:
Expand the Operators section and select Operator Hub.
Use the search bar to search for NVIDIA. Select NVIDIA Network Operator.
In the opened pop-up window, click Install.

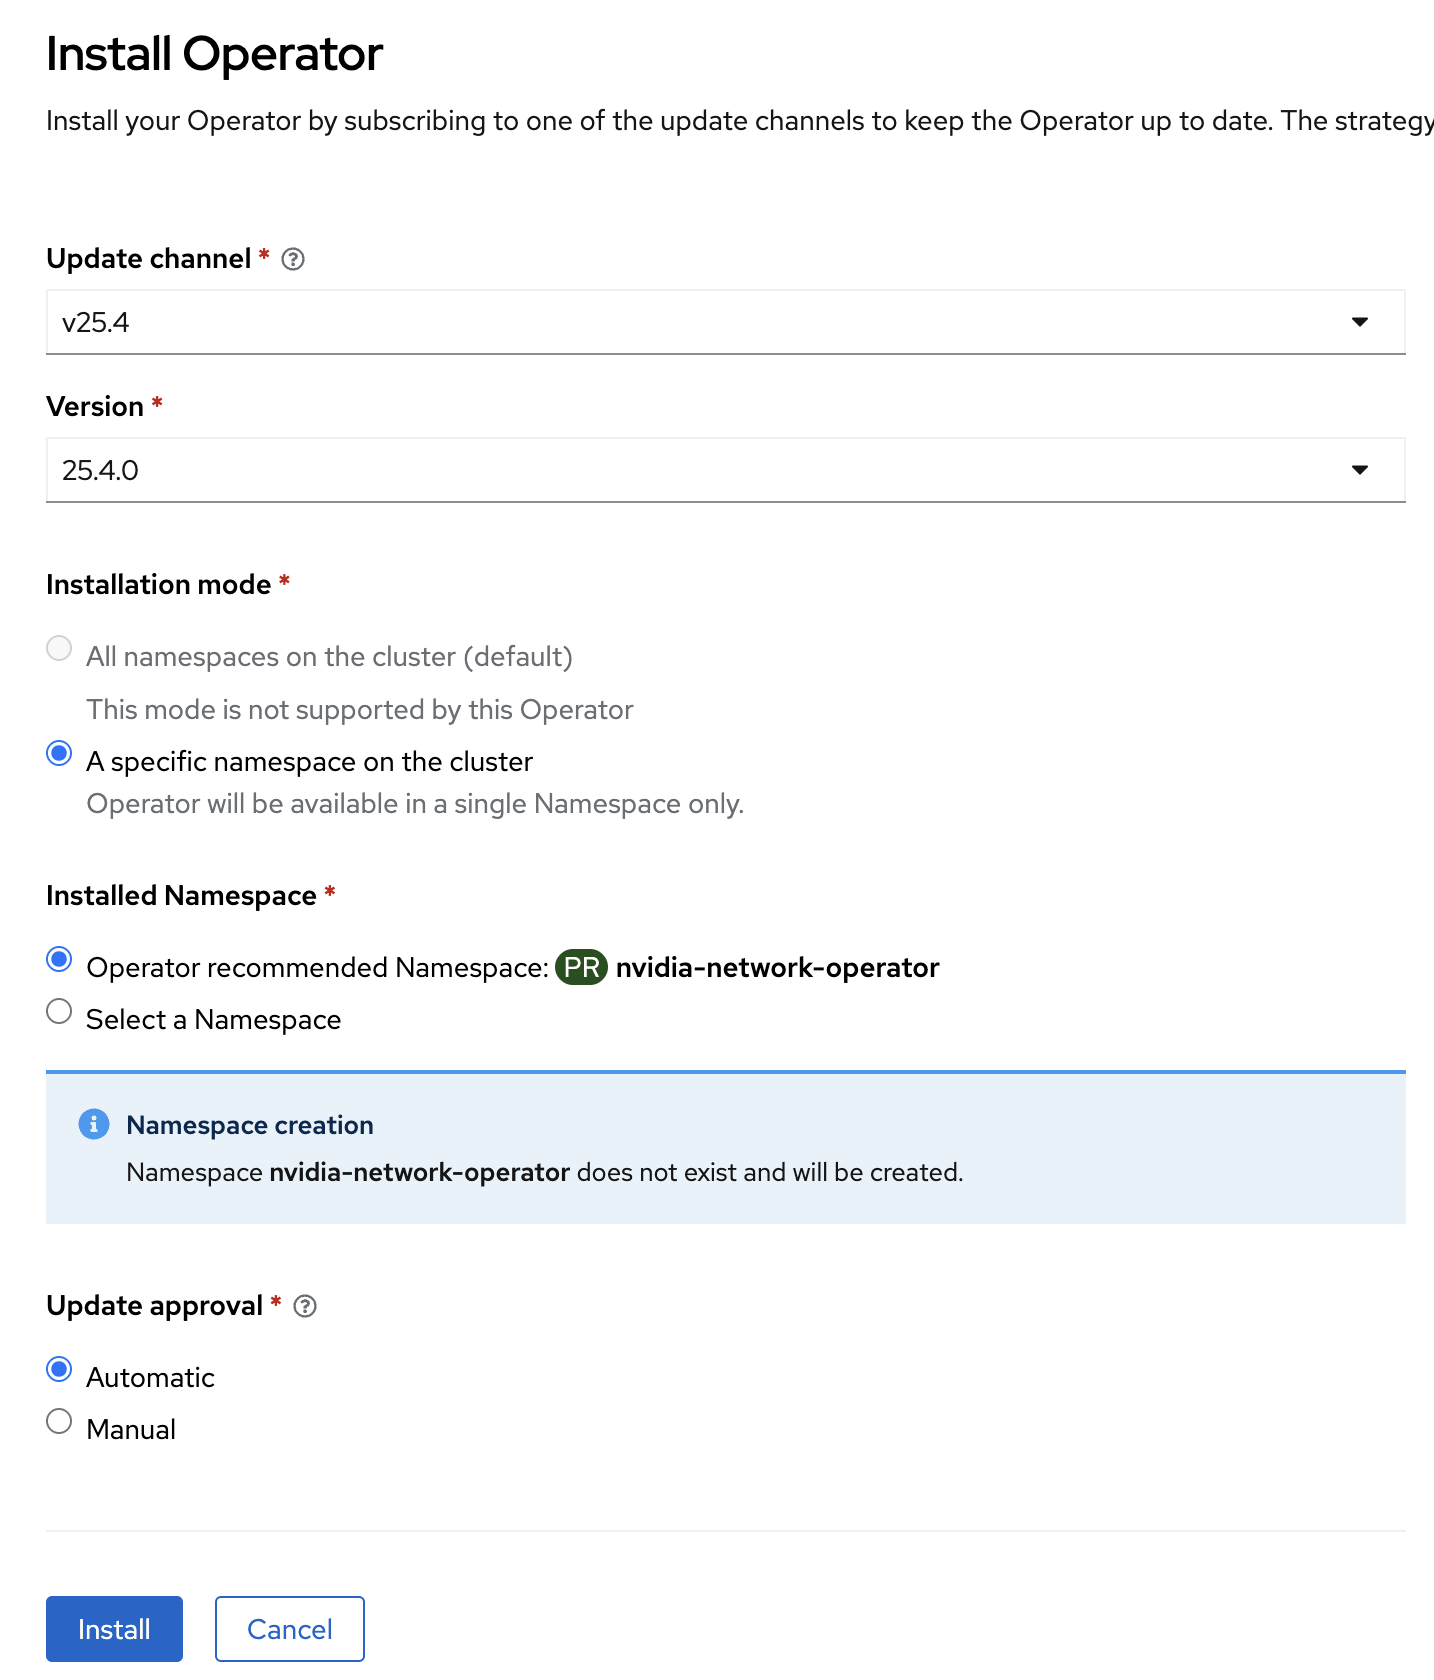
Select Update channel v25.4 and version 25.4.0. Now click Install. Installation will take about 2 minutes to complete.
Navigate to Operators > Installed Operators.
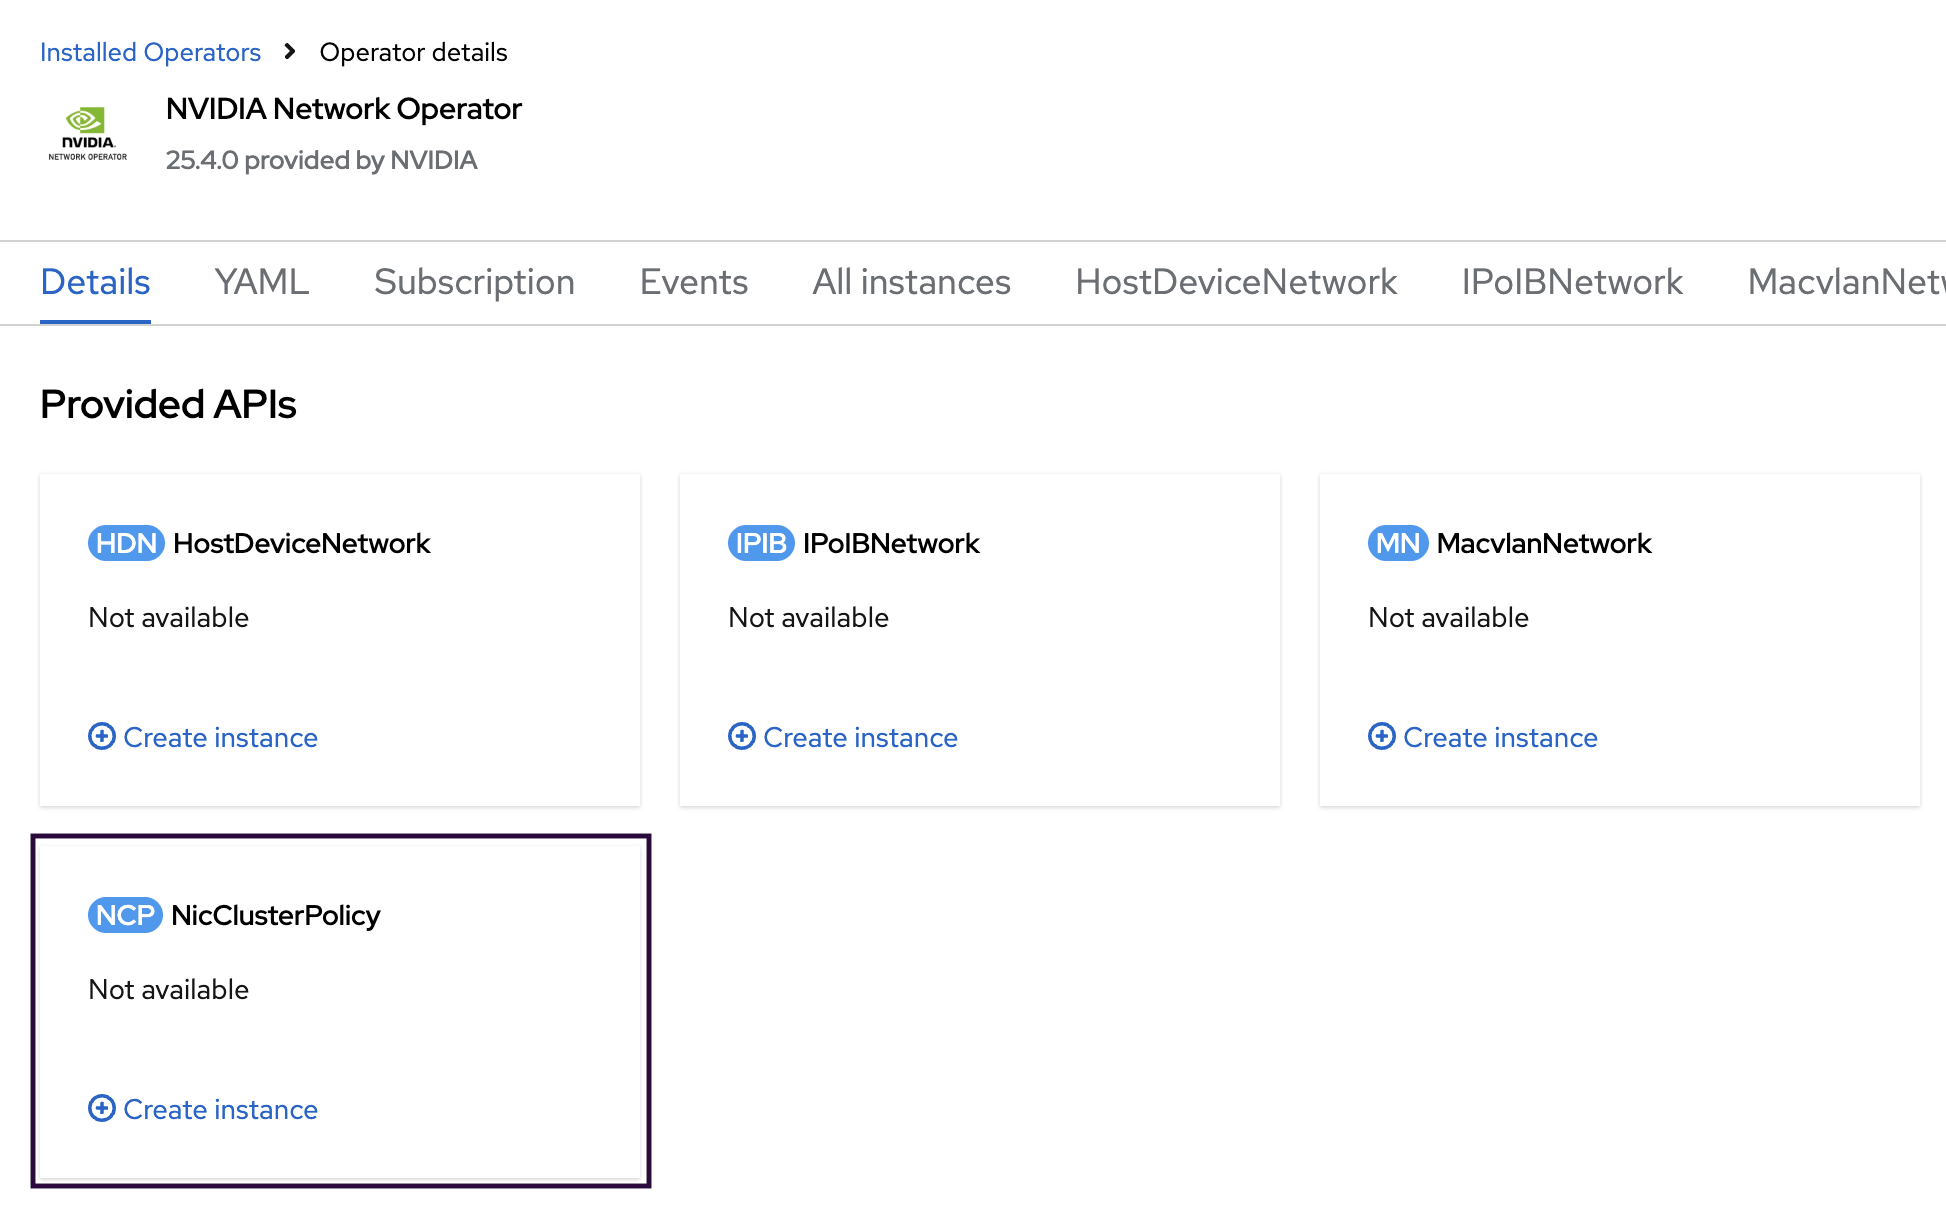
Select NVIDIA Network Operator.
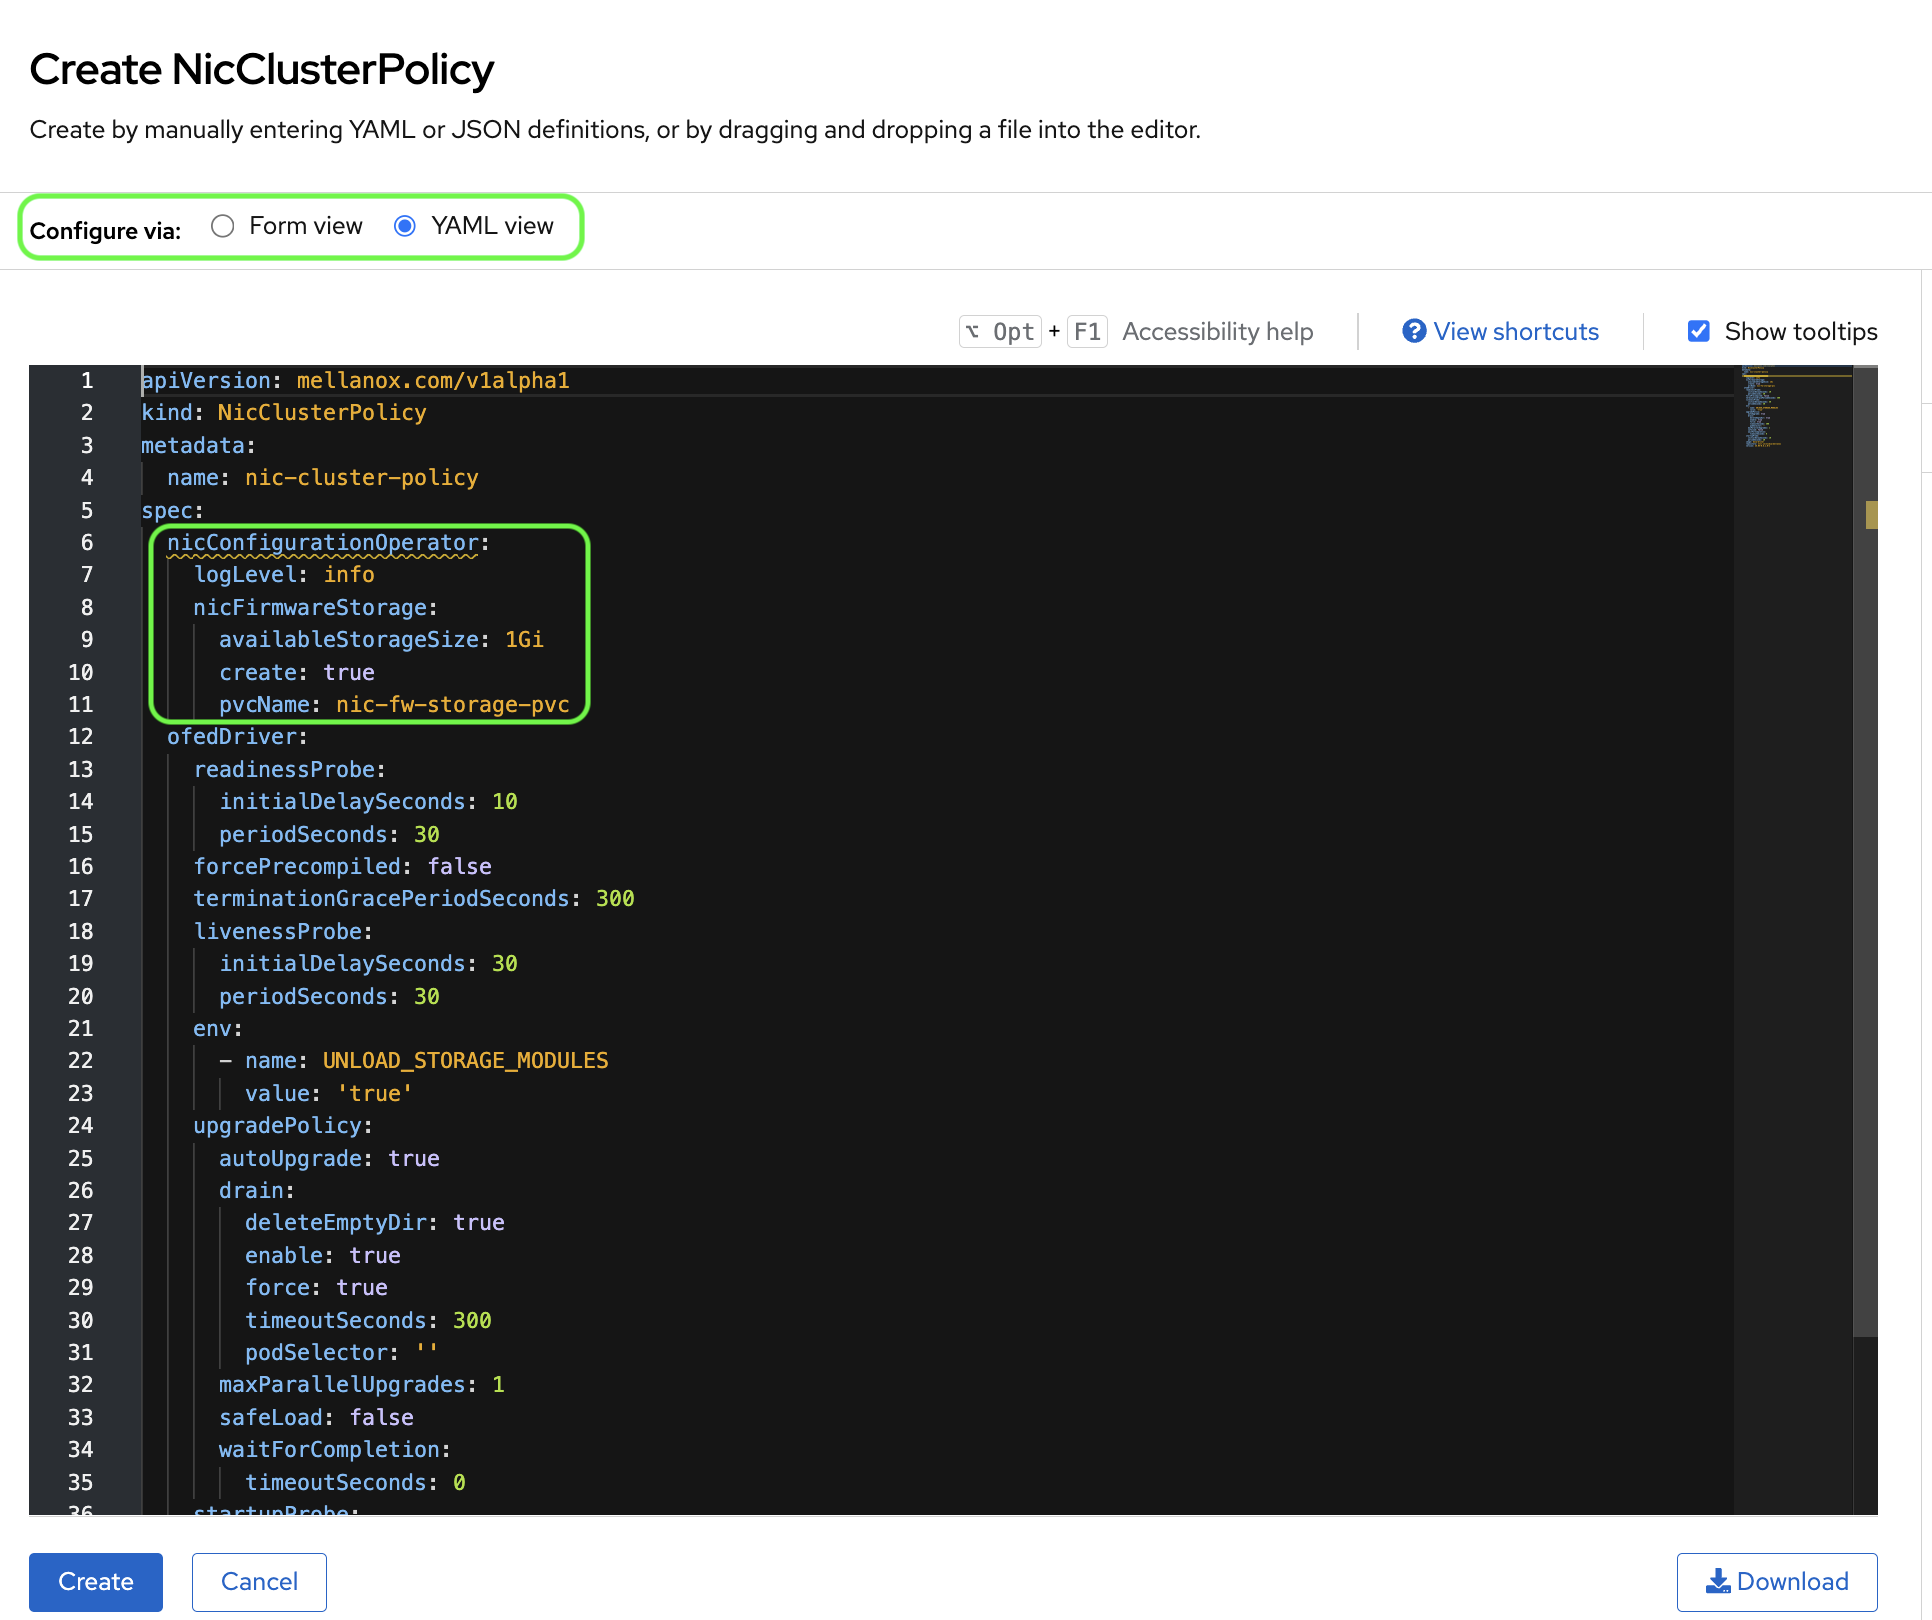
On the NVIDIA Network Operator details screen, click Create instance in the NicClusterPolicy section.
In the NicClusterPolicy tab, make the following modifications:
In the ibKubernetes section, remove the value from the periodicUpdateSeconds field.
In the ofedDriver section, expand the env subsection and add the following environment variables:
UNLOAD_STORAGE_MODULES: true
In the rdmaSharedDevicePlugin section, remove all values in the following subsections: image, repository, version and config.
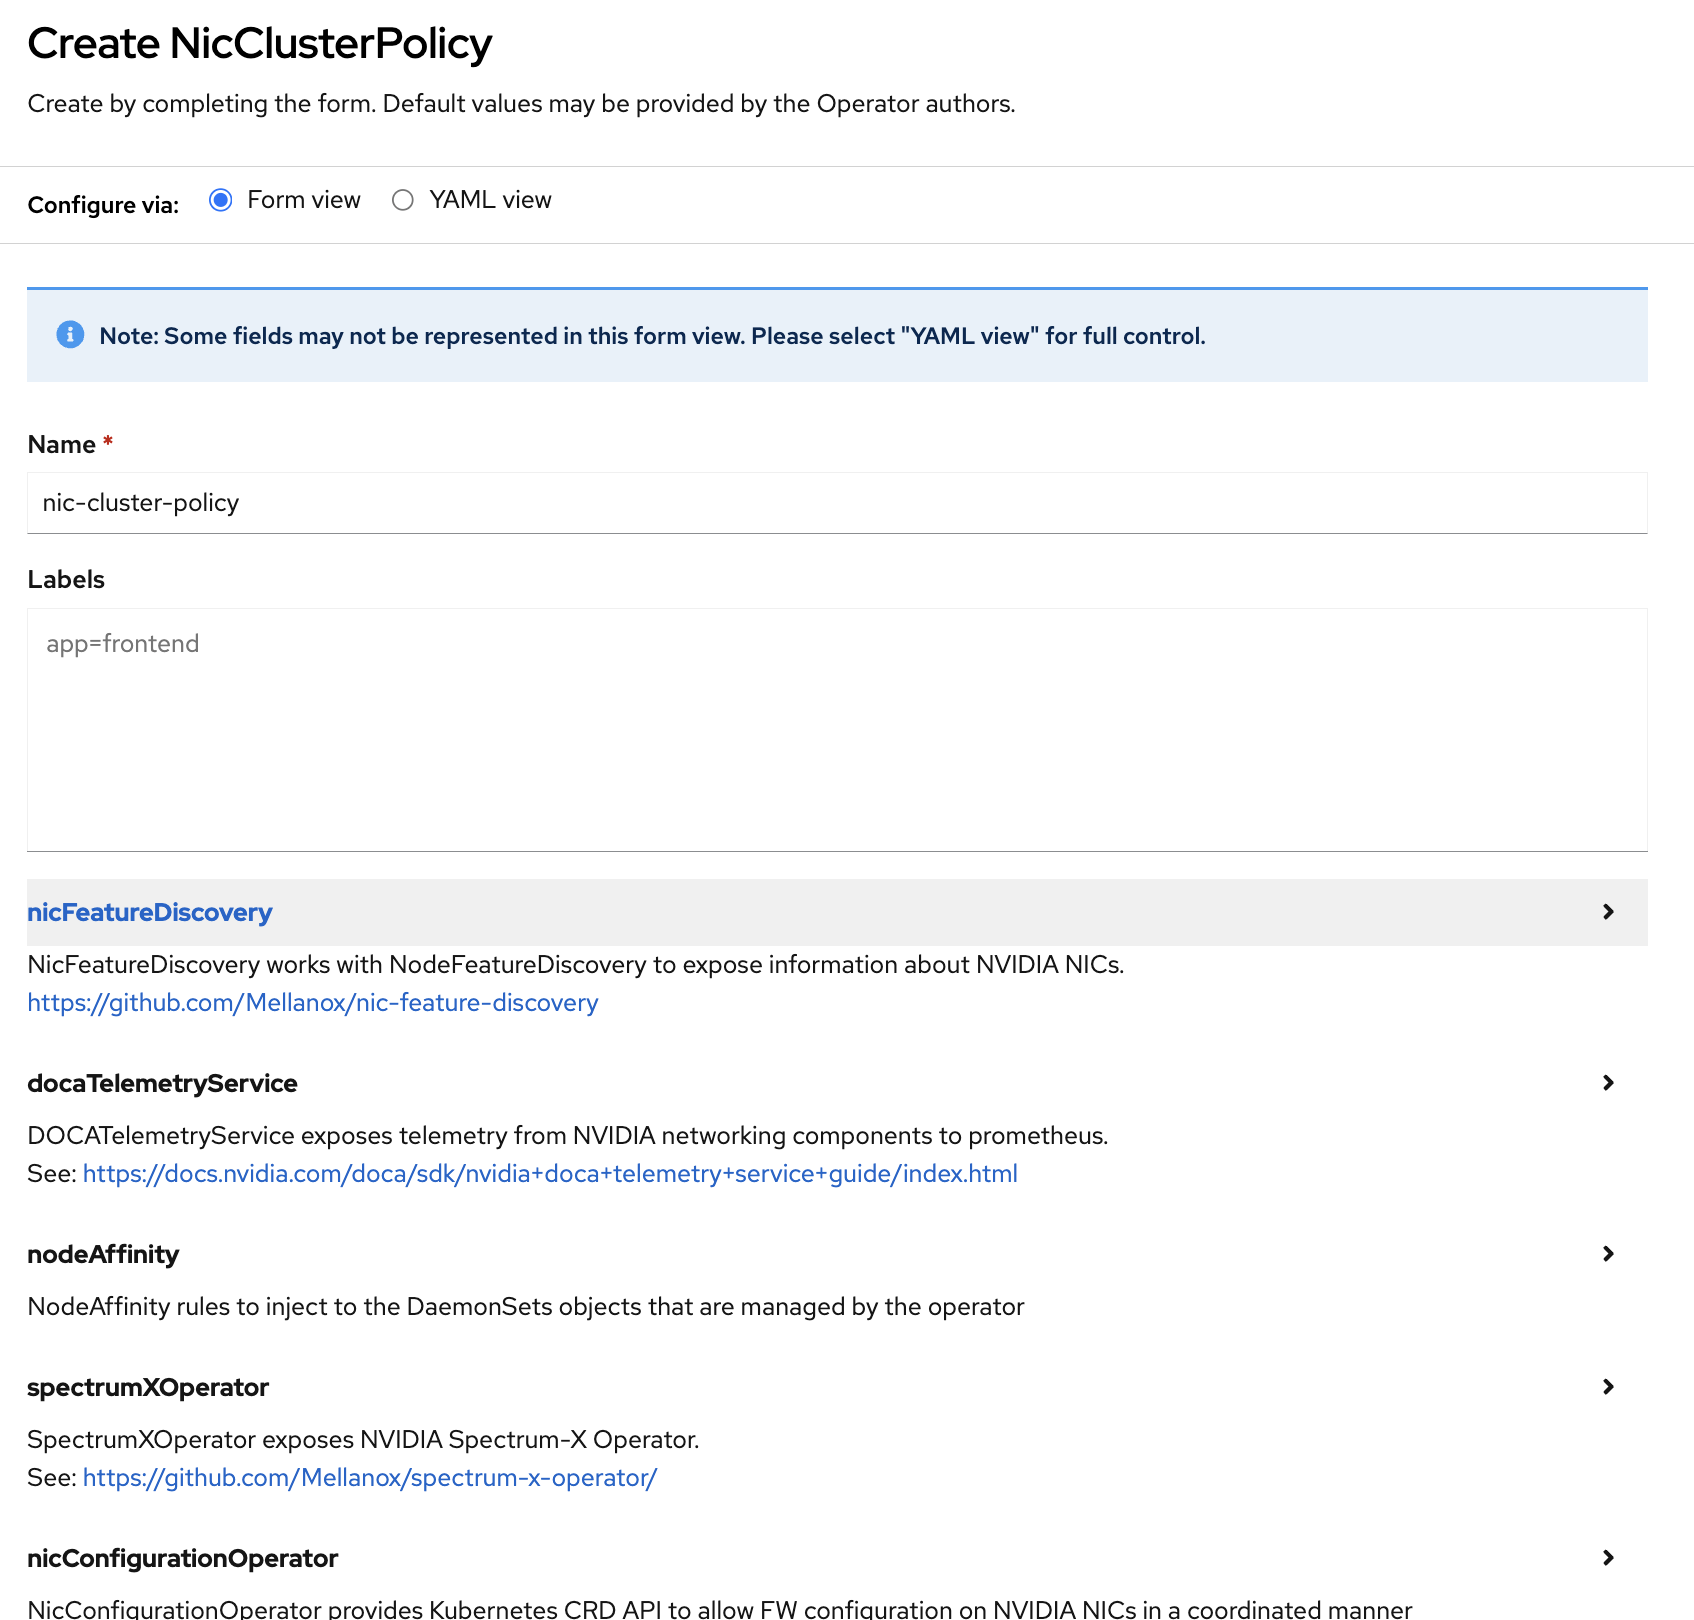
Now click YAML view and remove the
nicConfigurationOperatorsection from the YAML file.Click the Create button.
Note
Applying the NicClusterPolicy is dependent on the server platform hardware configuration and takes some time.
Wait for 5–10 minutes. Ensure that all pods in NVIDIA Network Operator namespace have
Readystatus:oc get pods -o wide -n nvidia-network-operator NAME READY STATUS RESTARTS AGE IP NODE mofed-rhcos4.18-6f4f75ff7c-ds-fh2nh 2/2 Running 0 16h 10.47.33.0 h4m-d mofed-rhcos4.18-6f4f75ff7c-ds-jdtbz 2/2 Running 0 16h 10.47.32.255 h4m-e nvidia-network-operator-controller-manager-b678d987-p297n 1/1 Running 0 16h 10.130.0.42 h4m-a
Check Network Adapter Firmware and Configuration#
To produce ST 2110 compliant streams, it is important to ensure each network adapter is optimally configured. To check and update the network adapter firmware, we will use Driver Toolkit. The Driver Toolkit is a container image, which includes the kernel packages commonly required by tools in driver containers. For more information, see the Driver Toolkit documentation.
You must iterate through this section for all of your driver-toolkit containers.
Find the Driver Toolkit image for the cluster:
oc adm release info --image-for=driver-toolkit
quay.io/openshift-release-dev/ocp-v4.0-art-dev@sha256:4feae2e6bb59f667431e11e832d294fc5900c1ab38a3bb845191ee93524208e4
Create a new project namespace:
oc new-project driver-toolkit
Create
driver_toolkit.yamlbased on the following template:apiVersion: v1 kind: ServiceAccount metadata: name: driver-toolkit-container --- apiVersion: rbac.authorization.k8s.io/v1 kind: Role metadata: name: driver-toolkit-container rules: - apiGroups: - security.openshift.io resources: - securitycontextconstraints verbs: - use resourceNames: - privileged --- apiVersion: rbac.authorization.k8s.io/v1 kind: RoleBinding metadata: name: driver-toolkit-container roleRef: apiGroup: rbac.authorization.k8s.io kind: Role name: driver-toolkit-container subjects: - kind: ServiceAccount name: driver-toolkit-container userNames: - system:serviceaccount:mft-driver:driver-toolkit-container --- apiVersion: apps/v1 kind: DaemonSet metadata: name: driver-toolkit-container spec: selector: matchLabels: app: driver-toolkit-container template: metadata: labels: app: driver-toolkit-container spec: serviceAccount: driver-toolkit-container serviceAccountName: driver-toolkit-container containers: - image: quay.io/openshift-release-dev/ocp-v4.0-art-dev@sha256:<SHA> name: driver-toolkit-container imagePullPolicy: Always command: [sleep, infinity] securityContext: privileged: true nodeSelector: node-role.kubernetes.io/<machine-config-pool>: ""
Replace
<machine-config-pool>withholoscanmediafor a 5-node cluster ormasterfor a 3-node cluster or SNO.Replace image
<SHA>with the driver-toolkit container information extracted in the section above.Deploy the daemon set:
oc create -f driver-toolkit.yaml
Note
This step reports “Warning: would violate PodSecurity “restricted:v1.24”…”. You can safely ignore it.
List pods created under the new project
driver-toolkit:oc get pods NAME READY STATUS RESTARTS AGE driver-toolkit-container-l6d5c 1/1 Running 0 19m driver-toolkit-container-qlj5d 1/1 Running 0 19m
Log into the first container:
oc exec -it driver-toolkit-container-l6d5c -- /bin/bash
Download firmware tools using the following command. The firmware tools archive will be downloaded into the current directory:
wget https://www.mellanox.com/downloads/MFT/mft-4.33.0-169-x86_64-rpm.tgzUnzip the archive:
tar -xvf mft-4.33.0-169-x86_64-rpm.tgz
Navigate to the extracted directory and install:
cd mft-4.33.0-169-x86_64-rpm
./install.sh
...
-I- In order to start mst, please run "mst start".
Install the PCI Utilities package and start
mstas instructed in previous output:yum install pciutils -y ... Complete! mst start Starting MST (Mellanox Software Tools) driver set Loading MST PCI module - Success Loading MST PCI configuration module - Success Create devices -W- Missing "lsusb" command, skipping MTUSB devices detection Unloading MST PCI module (unused) - Success
Check the network adapter firmware using the following command:
mlxfwmanager -u --online
Follow the prompts to update the firmware as required. Firmware updates take several minutes, and a restart is needed for updates to take effect. This can be done once, after all configuration changes have been made.
Check PCI address of MST devices, that is, network adapters:
mst status

MST modules:
------------
    MST PCI module is not loaded
    MST PCI configuration module loaded
MST devices:
------------

/dev/mst/mt4129_pciconf0      - PCI configuration cycles access.
                                domain:bus:dev.fn=0000:37:00.0 addr.reg=88
                                Chip revision is: 00
/dev/mst/mt4129_pciconf1      - PCI configuration cycles access.
                                domain:bus:dev.fn=0000:8b:00.0 addr.reg=88
                                Chip revision is: 00
/dev/mst/mt41692_pciconf0     - PCI configuration cycles access.
                                domain:bus:dev.fn=0000:a0:00.0 addr.reg=88
                                Chip revision is: 01
For each device listed above, ensure
REAL_TIME_CLOCK_ENABLEisTrue. Query the configuration setting using highlighted command and change as needed.mlxconfig -d /dev/mst/mt4129_pciconf0 query REAL_TIME_CLOCK_ENABLE Device #1: ---------- Device type: ConnectX7 Name: MCX713106AC-VEA_Ax Description: NVIDIA ConnectX-7 HHHL Adapter Card; 200GbE; Dual-port QSFP112; PCIe 5.0 x16; Crypto Enabled; Secure Boot Enabled Device: /dev/mst/mt4129_pciconf0 Configurations: Next Boot REAL_TIME_CLOCK_ENABLE False(0)
Because
REAL_TIME_CLOCK_ENABLEis set to False (0), let’s enable it:mlxconfig -d /dev/mst/mt4129_pciconf0 set REAL_TIME_CLOCK_ENABLE=1 Device #1: ---------- Device type: ConnectX7 Name: MCX713106AC-VEA_Ax Description: NVIDIA ConnectX-7 HHHL Adapter Card; 200GbE; Dual-port QSFP112; PCIe 5.0 x16; Crypto Enabled; Secure Boot Enabled Device: /dev/mst/mt4129_pciconf0 Configurations: Next Boot New REAL_TIME_CLOCK_ENABLE False(0) True(1) Apply new Configuration? (y/n) [n] : y Applying... Done! -I- Please reboot machine to load new configurations.
Any change in configuration requires the machine to be rebooted. This can be done once, after all configuration changes have been made.
If you are using AMD based servers, ensure
PCI_WR_ORDERINGis set toforce_relaxfor each device listed in the output of the step 15mst statuscommand. Query the the value ofPCI_WR_ORDERINGusing the following command:mlxconfig -d /dev/mst/mt4129_pciconf0 query PCI_WR_ORDERING Device #1: ---------- Device type: ConnectX7 Name: MCX713106AC-VEA_Ax Description: NVIDIA ConnectX-7 HHHL Adapter Card; 200GbE; Dual-port QSFP112; PCIe 5.0 x16; Crypto Enabled; Secure Boot Enabled Device: /dev/mst/mt4129_pciconf0 Configurations: Next Boot PCI_WR_ORDERING per_mkey(0)
Because
PCI_WR_ORDERINGis set toper_mkey (0), let’s set it:mlxconfig -d /dev/mst/mt4129_pciconf0 set PCI_WR_ORDERING=1 Device #1: ---------- Device type: ConnectX7 Name: MCX713106AC-VEA_Ax Description: NVIDIA ConnectX-7 HHHL Adapter Card; 200GbE; Dual-port QSFP112; PCIe 5.0 x16; Crypto Enabled; Secure Boot Enabled Device: /dev/mst/mt4129_pciconf0 Configurations: Next Boot New PCI_WR_ORDERING per_mkey(0) force_relax(1) Apply new Configuration? (y/n) [n] : y Applying... Done! -I- Please reboot machine to load new configurations.
If you are using a purchased Rivermax license, rather than a time-limited development license, you must enable NIC serial number validation using
VF_VPD_ENABLE.mlxconfig -d /dev/mst/mt4129_pciconf0 query VF_VPD_ENABLE Device #1: ---------- Device type: ConnectX6DX Name: MCX623106AN-CDA_Ax Description: ConnectX-6 Dx EN adapter card; 100GbE; Dual-port QSFP56; PCIe 4.0/3.0 x16; Device: /dev/mst/mt4129_pciconf0 Configurations: Next Boot VF_VPD_ENABLE False(0)
Because
VF_VPD_ENABLEis set toFalse (0), let’s enable it:mlxconfig -d /dev/mst/mt4129_pciconf0 set VF_VPD_ENABLE=1 Device #1: ---------- Device type: ConnectX7 Name: MCX713106AC-VEA_Ax Description: NVIDIA ConnectX-7 HHHL Adapter Card; 200GbE; Dual-port QSFP112; PCIe 5.0 x16; Crypto Enabled; Secure Boot Enabled Device: /dev/mst/mt4129_pciconf0 Configurations: Next Boot New VF_VPD_ENABLE False(0) True(1) Apply new Configuration? (y/n) [n] : y Applying... Done! -I- Please reboot machine to load new configurations.
Notice that any change in configuration requires the machine to be rebooted. This can be done once, after all configuration changes have been made.
Exit from the Driver Toolkit container:
exit

Exit...
Repeat the above steps for all the other driver-toolkit containers.
Delete the driver-toolkit daemon set:
oc delete -f driver-toolkit.yaml
Delete the driver-toolkit project:
oc delete project driver-toolkit
Restore the OpenShift CLI default project:
oc project default

Now using project "default" on server "https://api.h4m.example.com:6443".
Reboot each of the worker machines using the instructions listed in Reboot Node Gracefully.
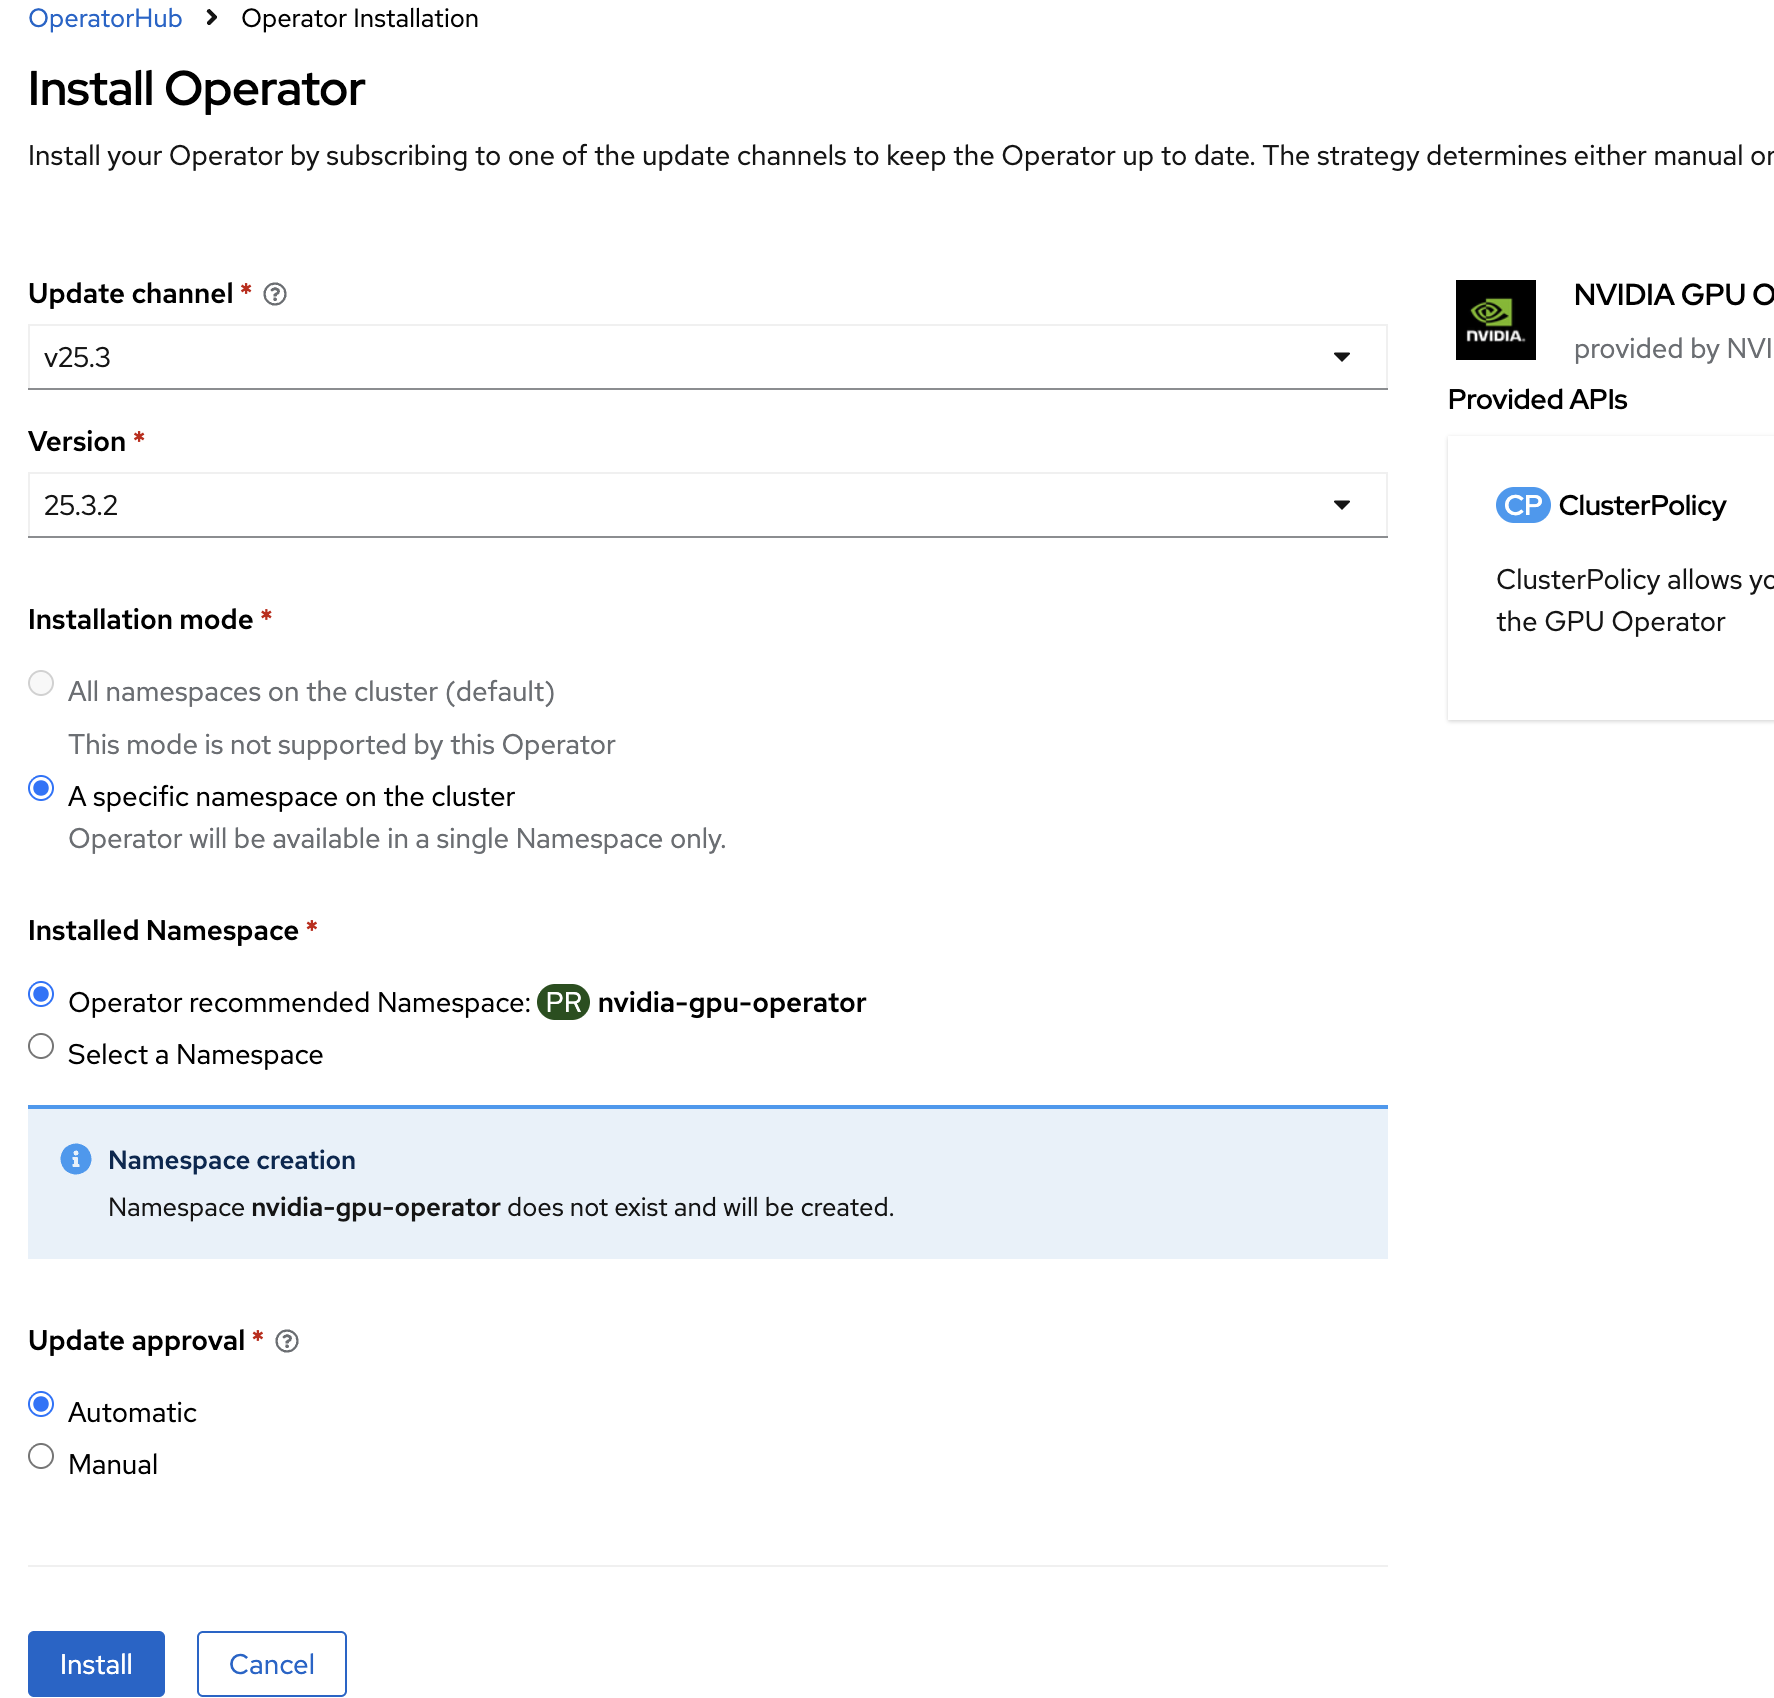
Installing NVIDIA GPU Operator#
NVIDIA GPU Operator uses the operator framework within Kubernetes to automate the management of all NVIDIA software components needed to provision GPUs. These components include the NVIDIA drivers (to enable CUDA), Kubernetes device plugin for GPUs, the NVIDIA Container Toolkit, automatic node labelling using GPU Feature Discovery (GFD), Data Center GPU Manager (DCGM) based monitoring, and others.
To install the operator using the Web console:
Expand the Operators section and select Operator Hub.
Use the search bar to search for NVIDIA.
Select NVIDIA GPU Operator and click Install in the next window.
In the opened pop-up window, click Install.
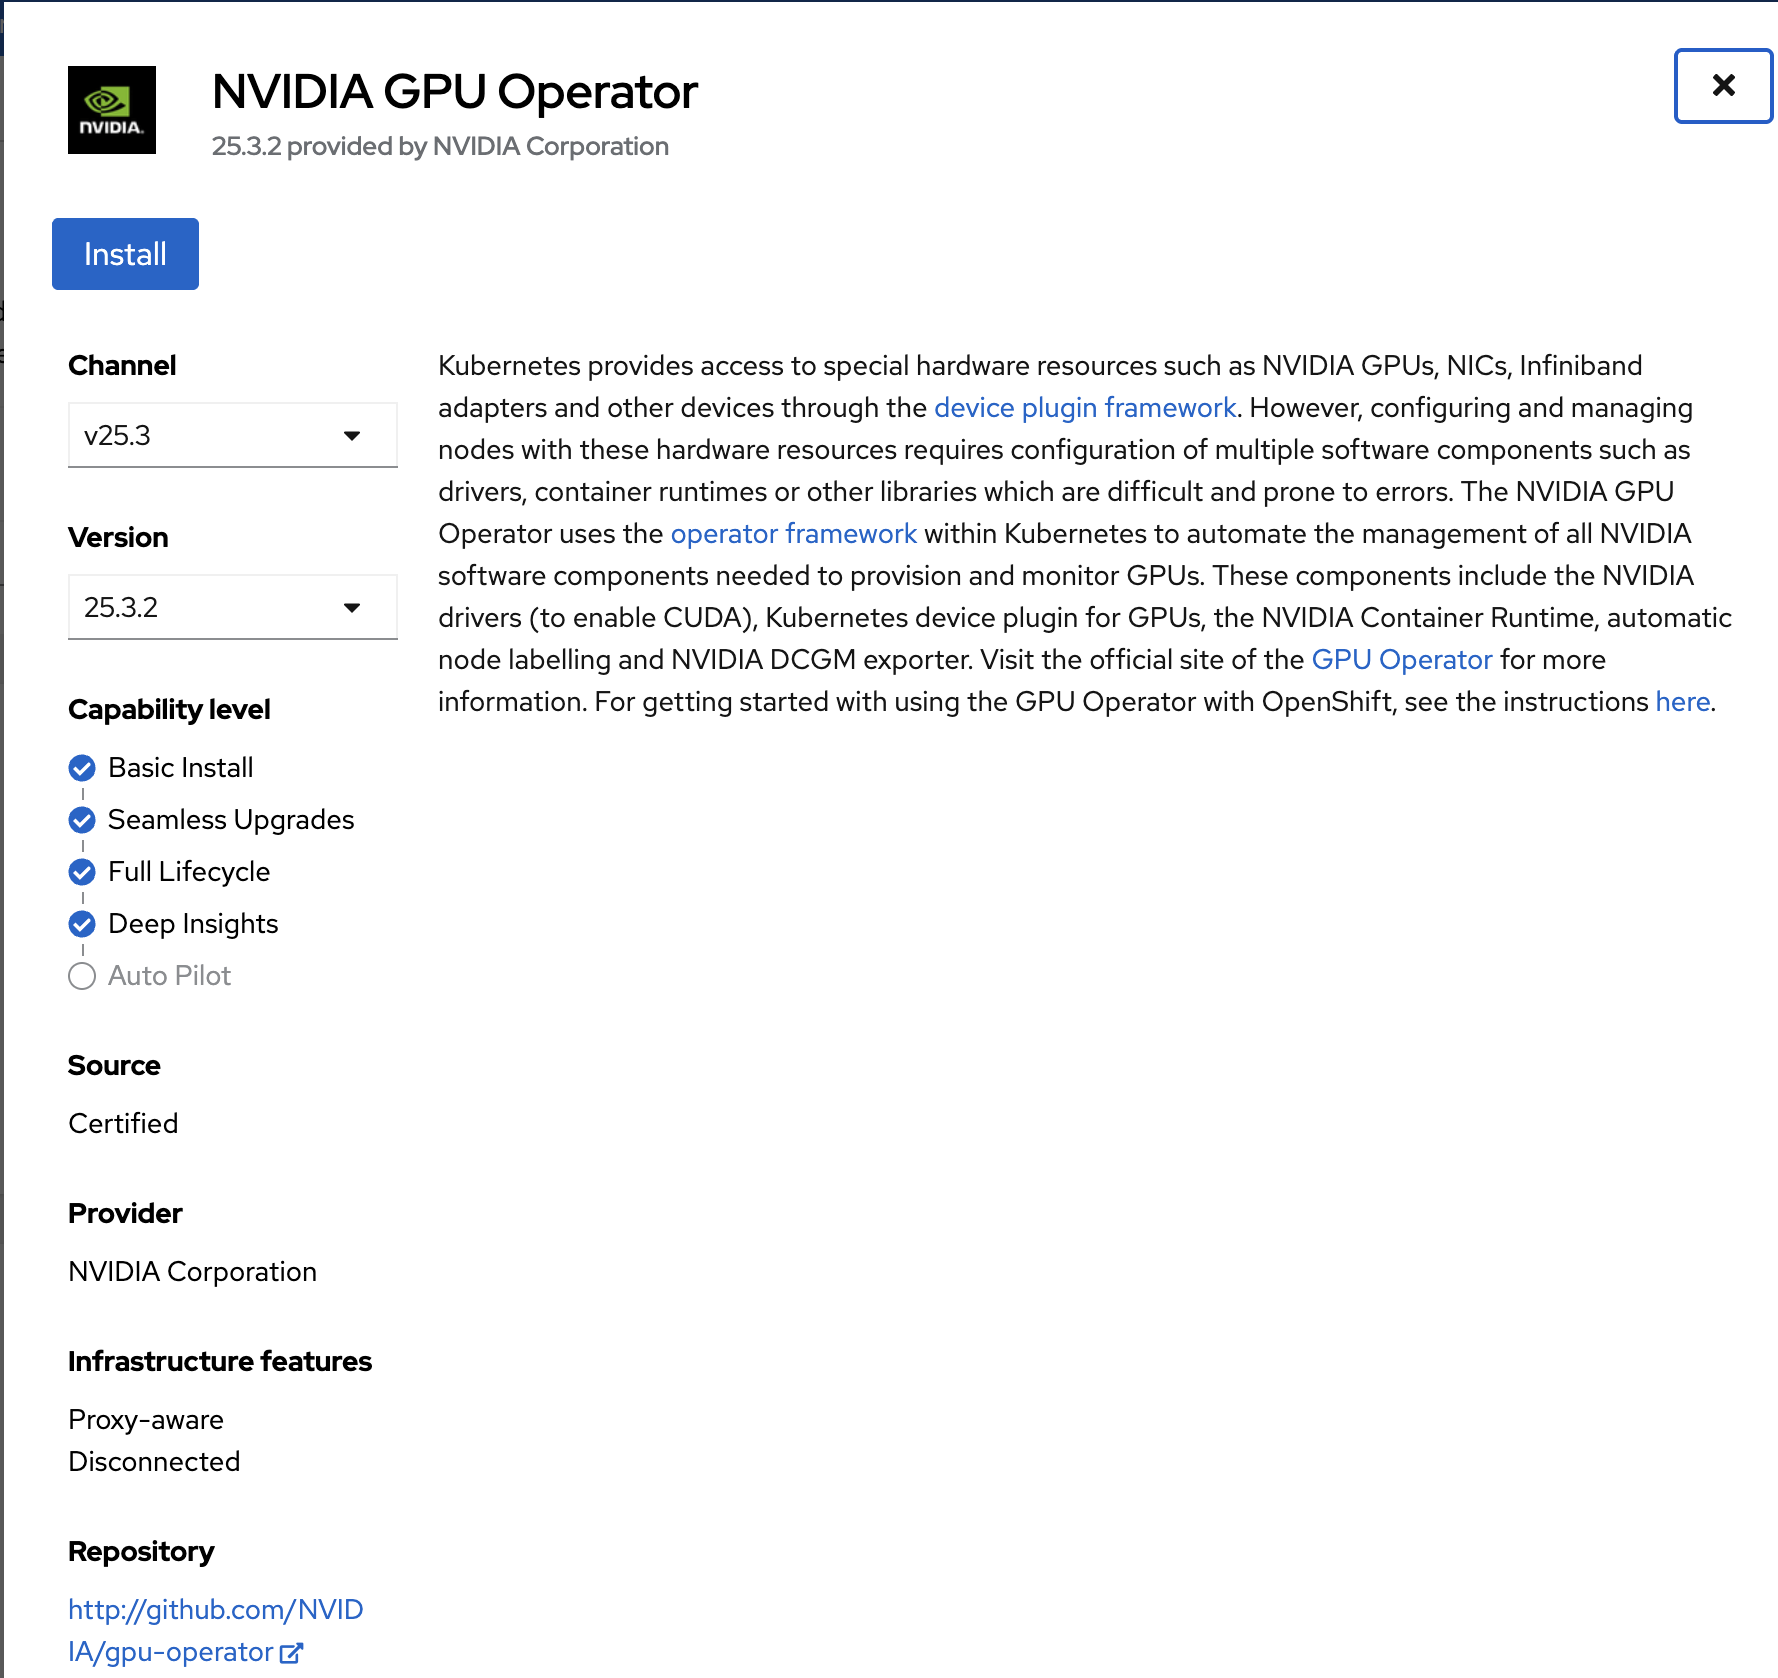
Select Update channel v25.3 and version 25.3.2. Now click Install.
When the installation is complete, in the left menu bar go to the Operators section and Click the Installed Operators, then select NVIDIA GPU Operator.
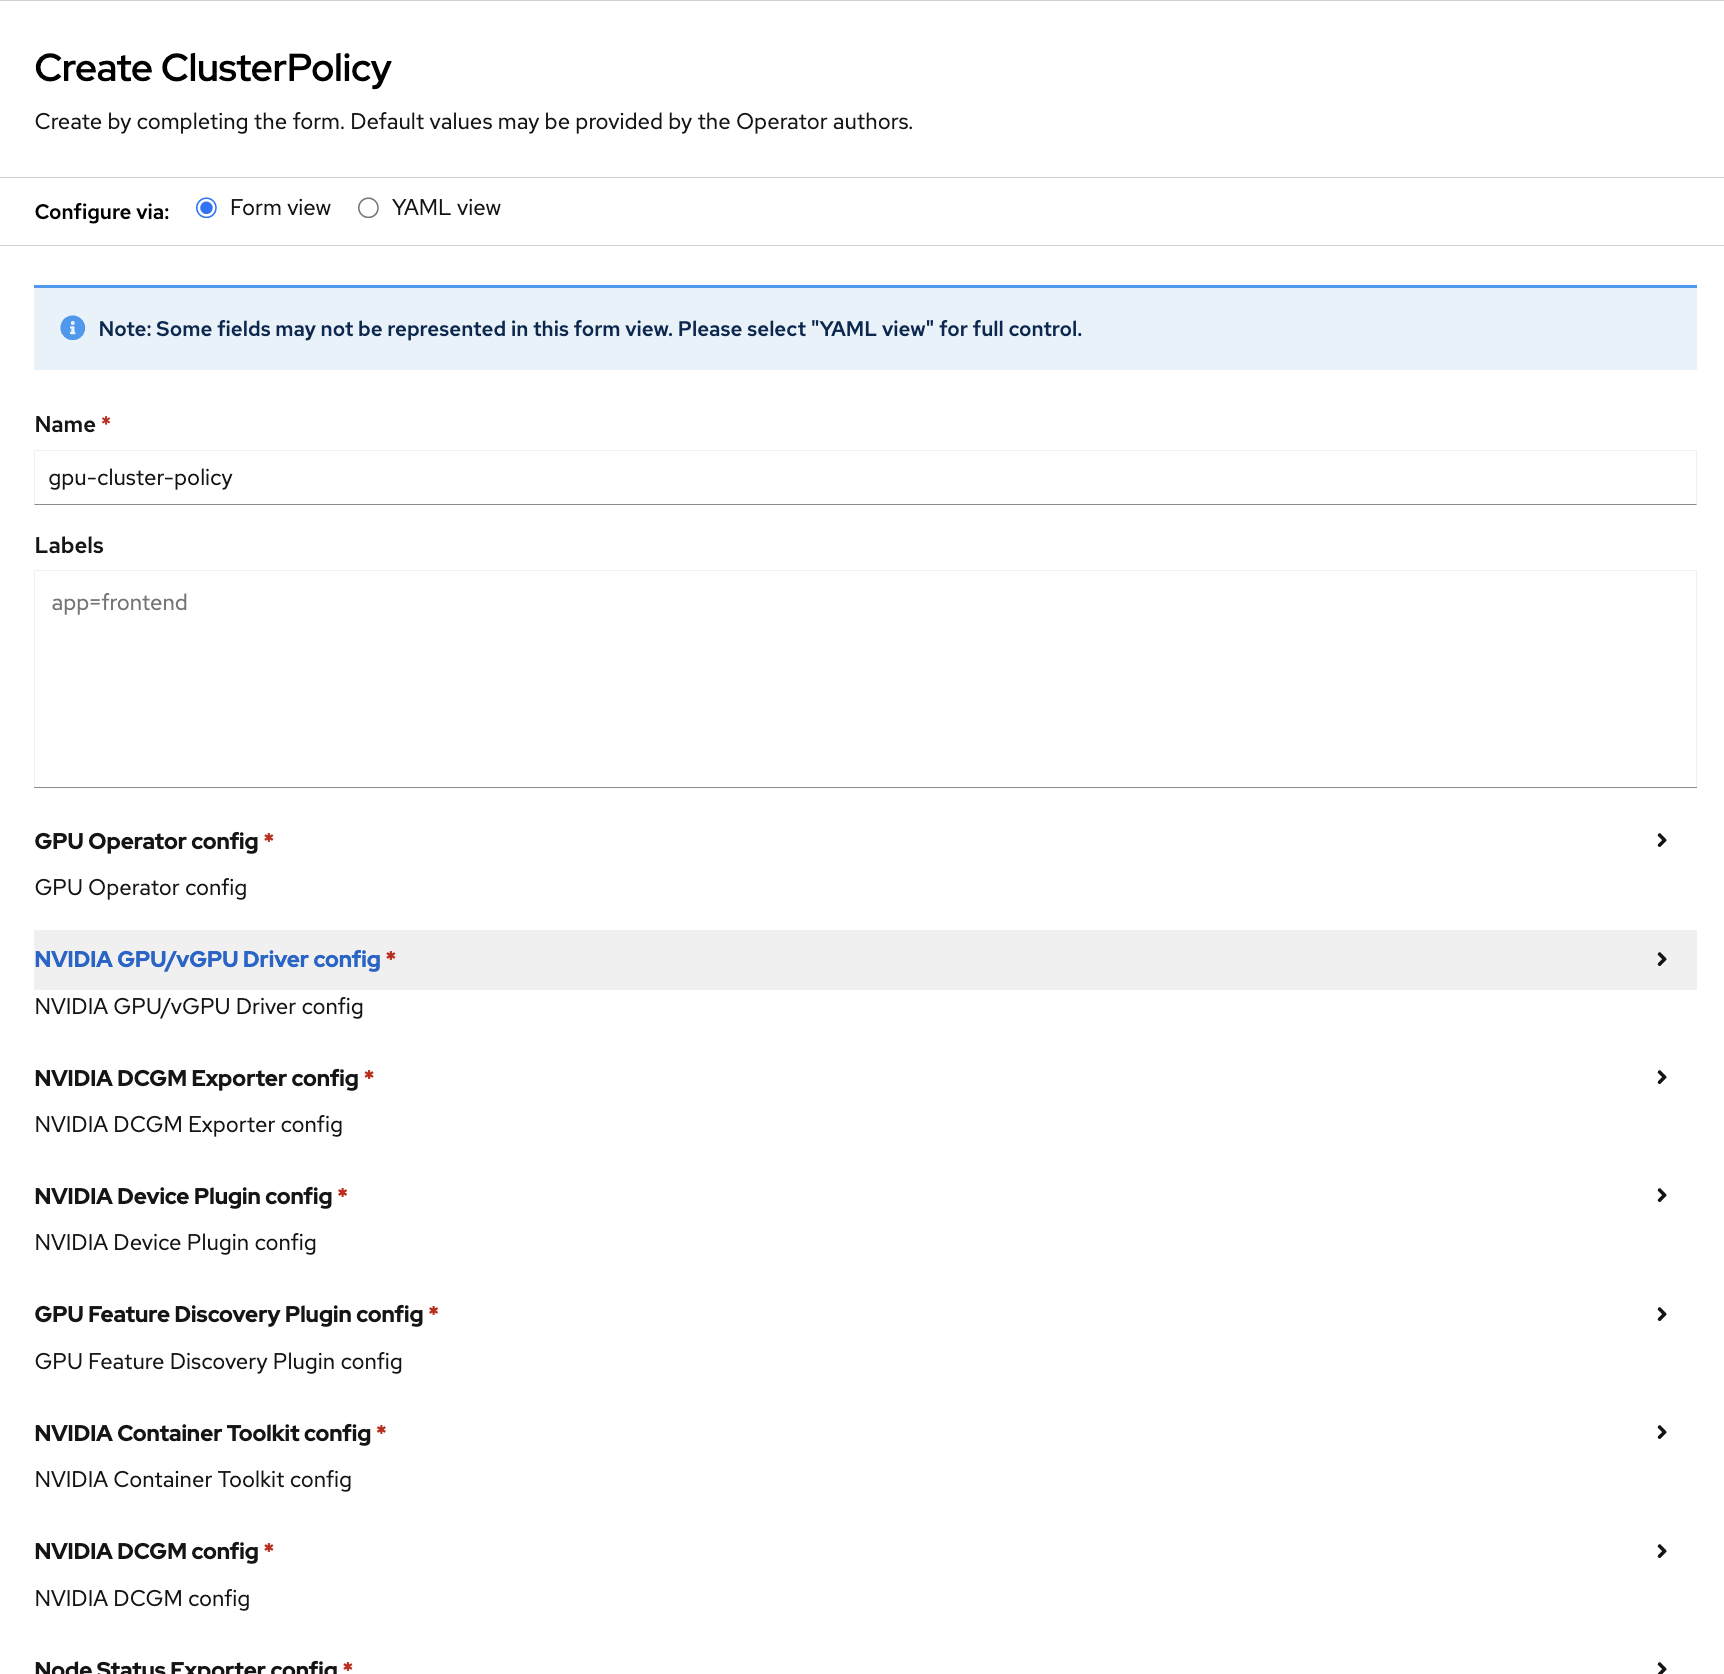
On the NVIDIA GPU Operator details screen, click Create instance in the ClusterPolicy section.
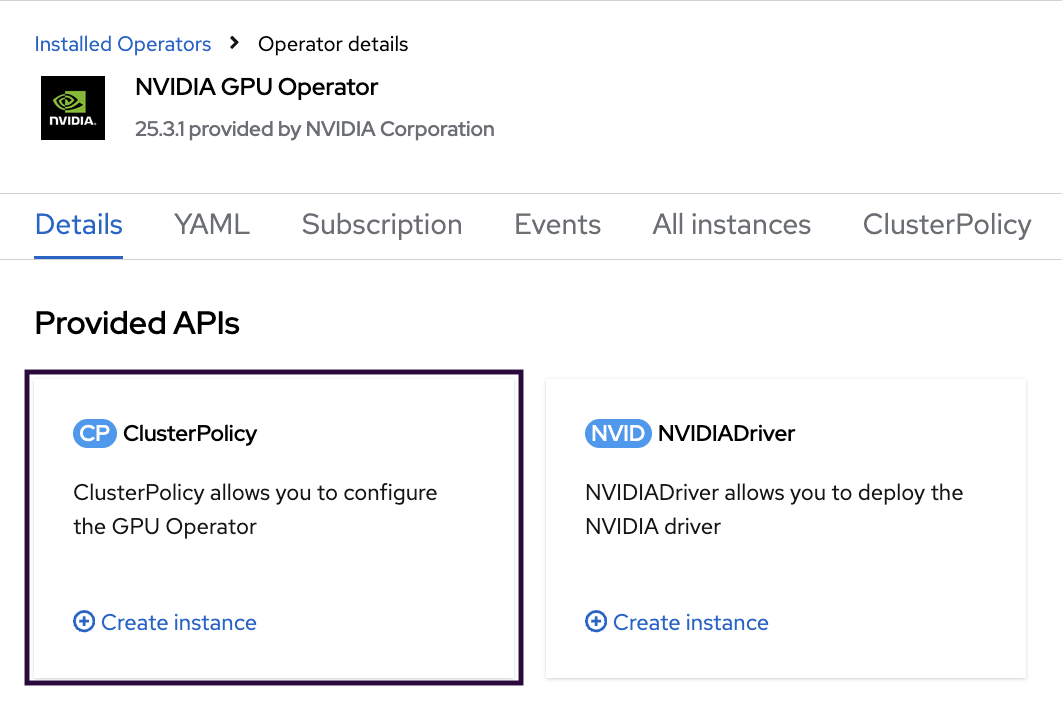
In the ClusterPolicy tab, open the NVIDIA GPU/vGPU Driver config section, tick the enabled checkbox in the rdma subsection and click the Create button.
Wait for 10–15 minutes. Ensure that all pods in NVIDIA GPU Operator namespace have
ReadyorCompletedstatus:oc get pods -n nvidia-gpu-operator -o wide NAME READY STATUS RESTARTS AGE IP NODE gpu-feature-discovery-c4qd5 1/1 Running 0 86m 10.131.0.71 h4m-d gpu-feature-discovery-wj2w4 1/1 Running 0 86m 10.128.2.70 h4m-e gpu-operator-d589cbf48-h7r6q 1/1 Running 0 88m 10.128.2.57 h4m-d nvidia-container-toolkit-daemonset-8jwns 1/1 Running 0 86m 10.128.2.66 h4m-d nvidia-container-toolkit-daemonset-lhtfq 1/1 Running 0 86m 10.131.0.73 h4m-e nvidia-cuda-validator-dmc5b 0/1 Completed 0 84m 10.131.0.77 h4m-e nvidia-cuda-validator-qtxb6 0/1 Completed 0 84m 10.128.2.72 h4m-d nvidia-dcgm-exporter-s7xxg 1/1 Running 1 86m 10.128.2.71 h4m-d nvidia-dcgm-exporter-vbpdn 1/1 Running 0 86m 10.131.0.76 h4m-e nvidia-dcgm-gx25h 1/1 Running 0 86m 10.131.0.75 h4m-e nvidia-dcgm-h8qzg 1/1 Running 0 86m 10.128.2.69 h4m-d nvidia-device-plugin-daemonset-484tb 1/1 Running 0 86m 10.131.0.72 h4m-e nvidia-device-plugin-daemonset-txpb5 1/1 Running 0 86m 10.128.2.67 h4m-d nvidia-driver-daemonset-418.94.202507091512-0-6wlrx 3/3 Running 0 87m 10.131.0.63 h4m-e nvidia-driver-daemonset-418.94.202507091512-0-gnnxl 3/3 Running 0 87m 10.128.2.58 h4m-d nvidia-node-status-exporter-9xh24 1/1 Running 0 87m 10.128.2.65 h4m-d nvidia-node-status-exporter-rpn8x 1/1 Running 0 87m 10.131.0.70 h4m-e nvidia-operator-validator-2hh9s 1/1 Running 0 86m 10.131.0.74 h4m-e nvidia-operator-validator-v2ptl 1/1 Running 0 86m 10.128.2.68 h4m-d
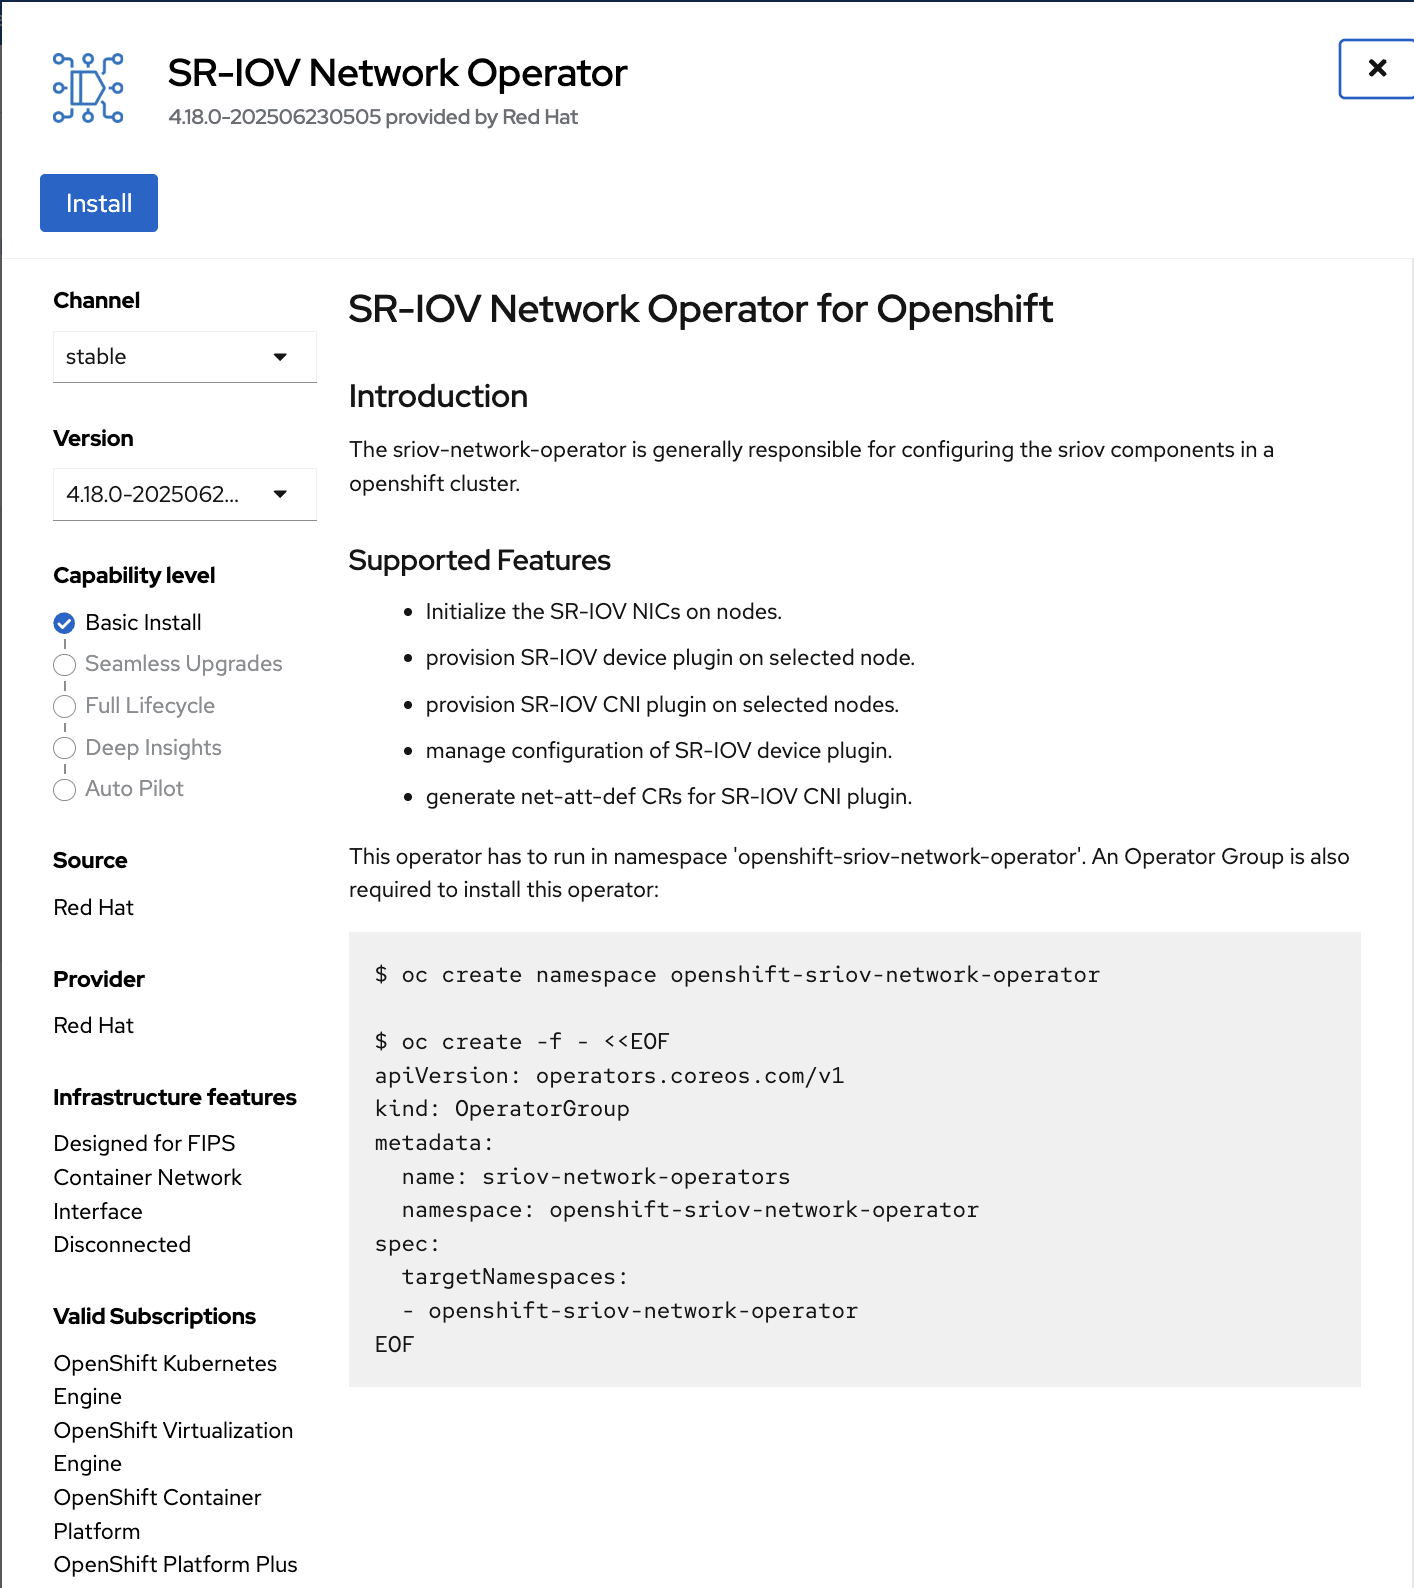
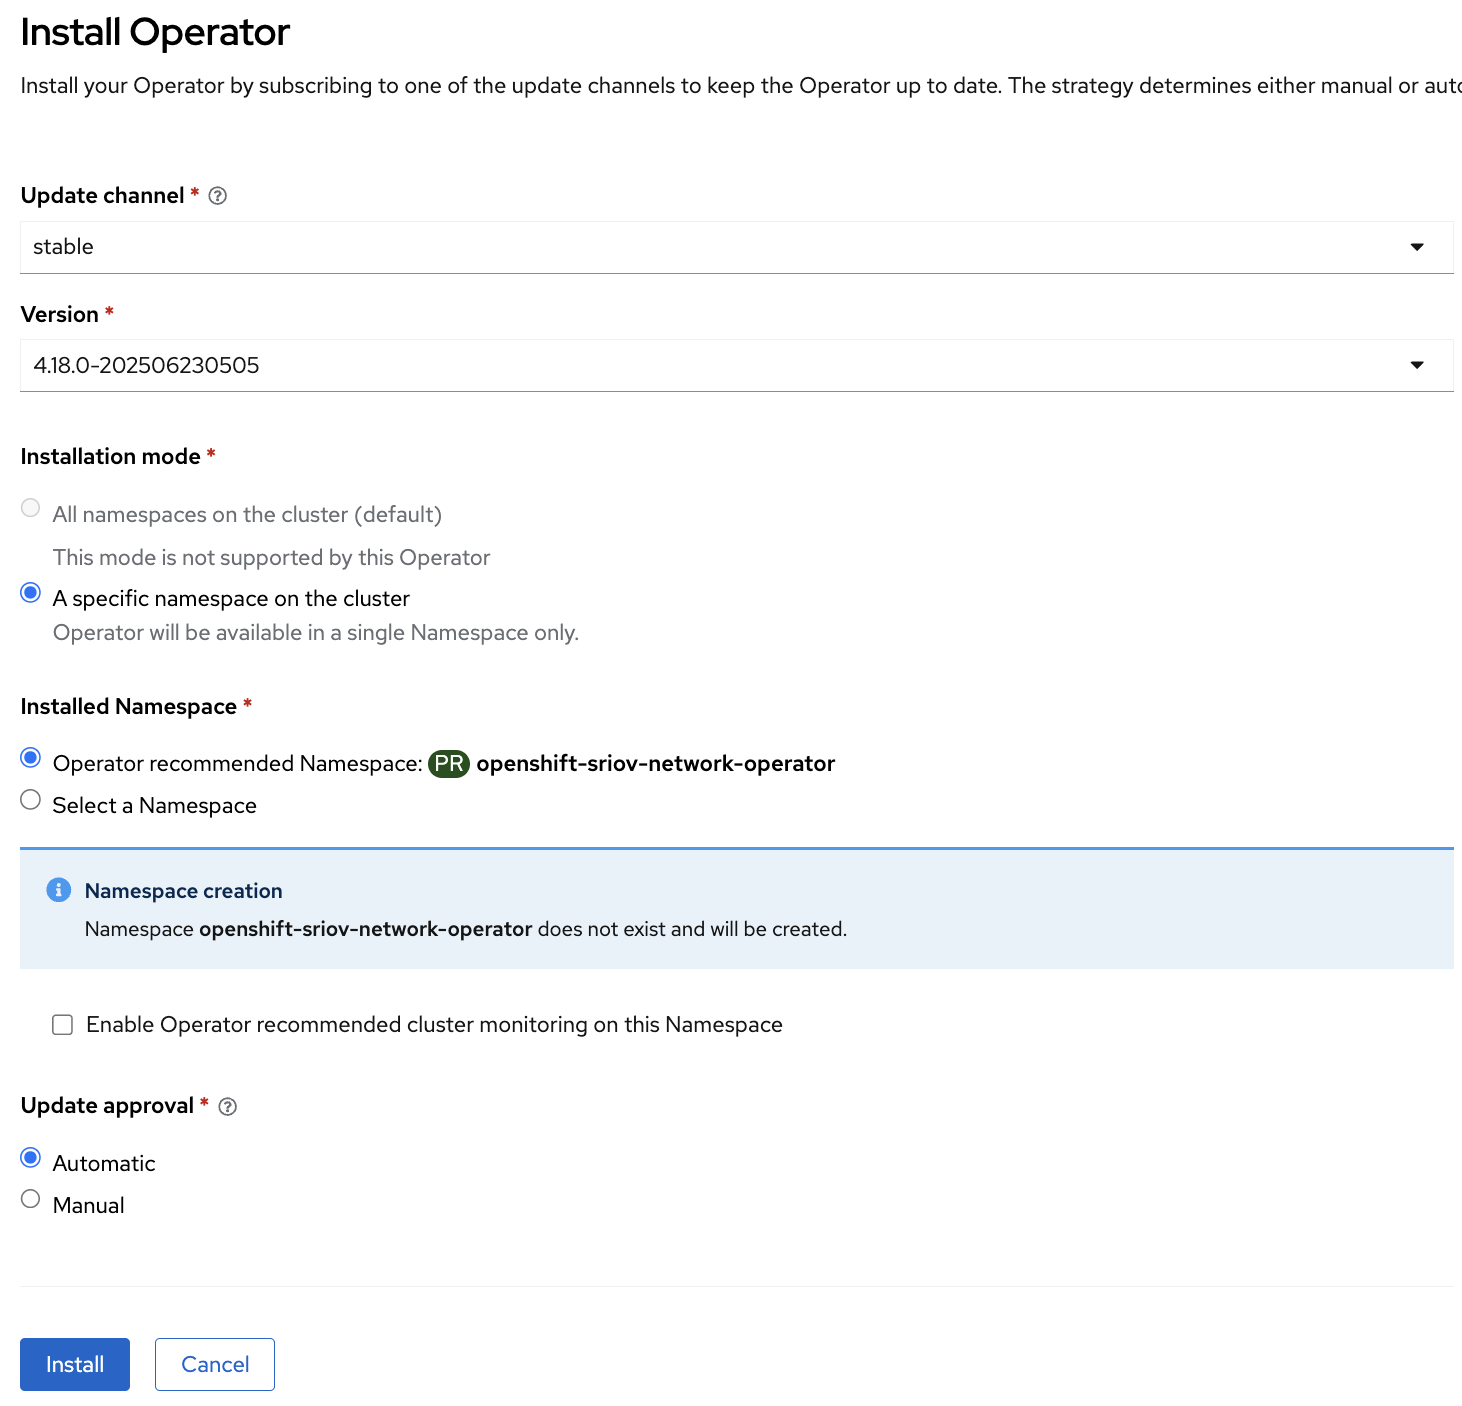
Installing SR-IOV Network Operator#
SR-IOV Network Operator is responsible for configuring the SR-IOV networking components in an OpenShift cluster.
To install the operator using the web console:
Expand the Operators section and select Operator Hub.
Use the search bar to search for SR-IOV.
Select SR-IOV Network Operator and click Install in the next window.

In the opened pop-up window, click Install.
Check A specific namespace on the cluster and click Install.
When the installation is complete, click Create SriovOperatorConfig.
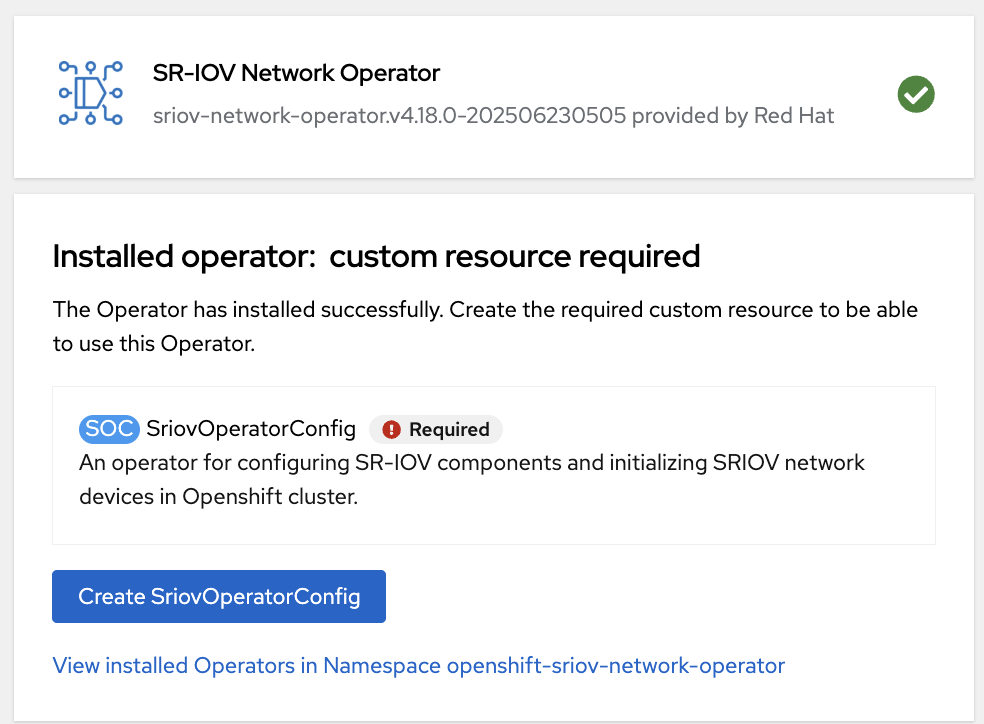
On the Create SriovOperatorConfig screen, click Create.
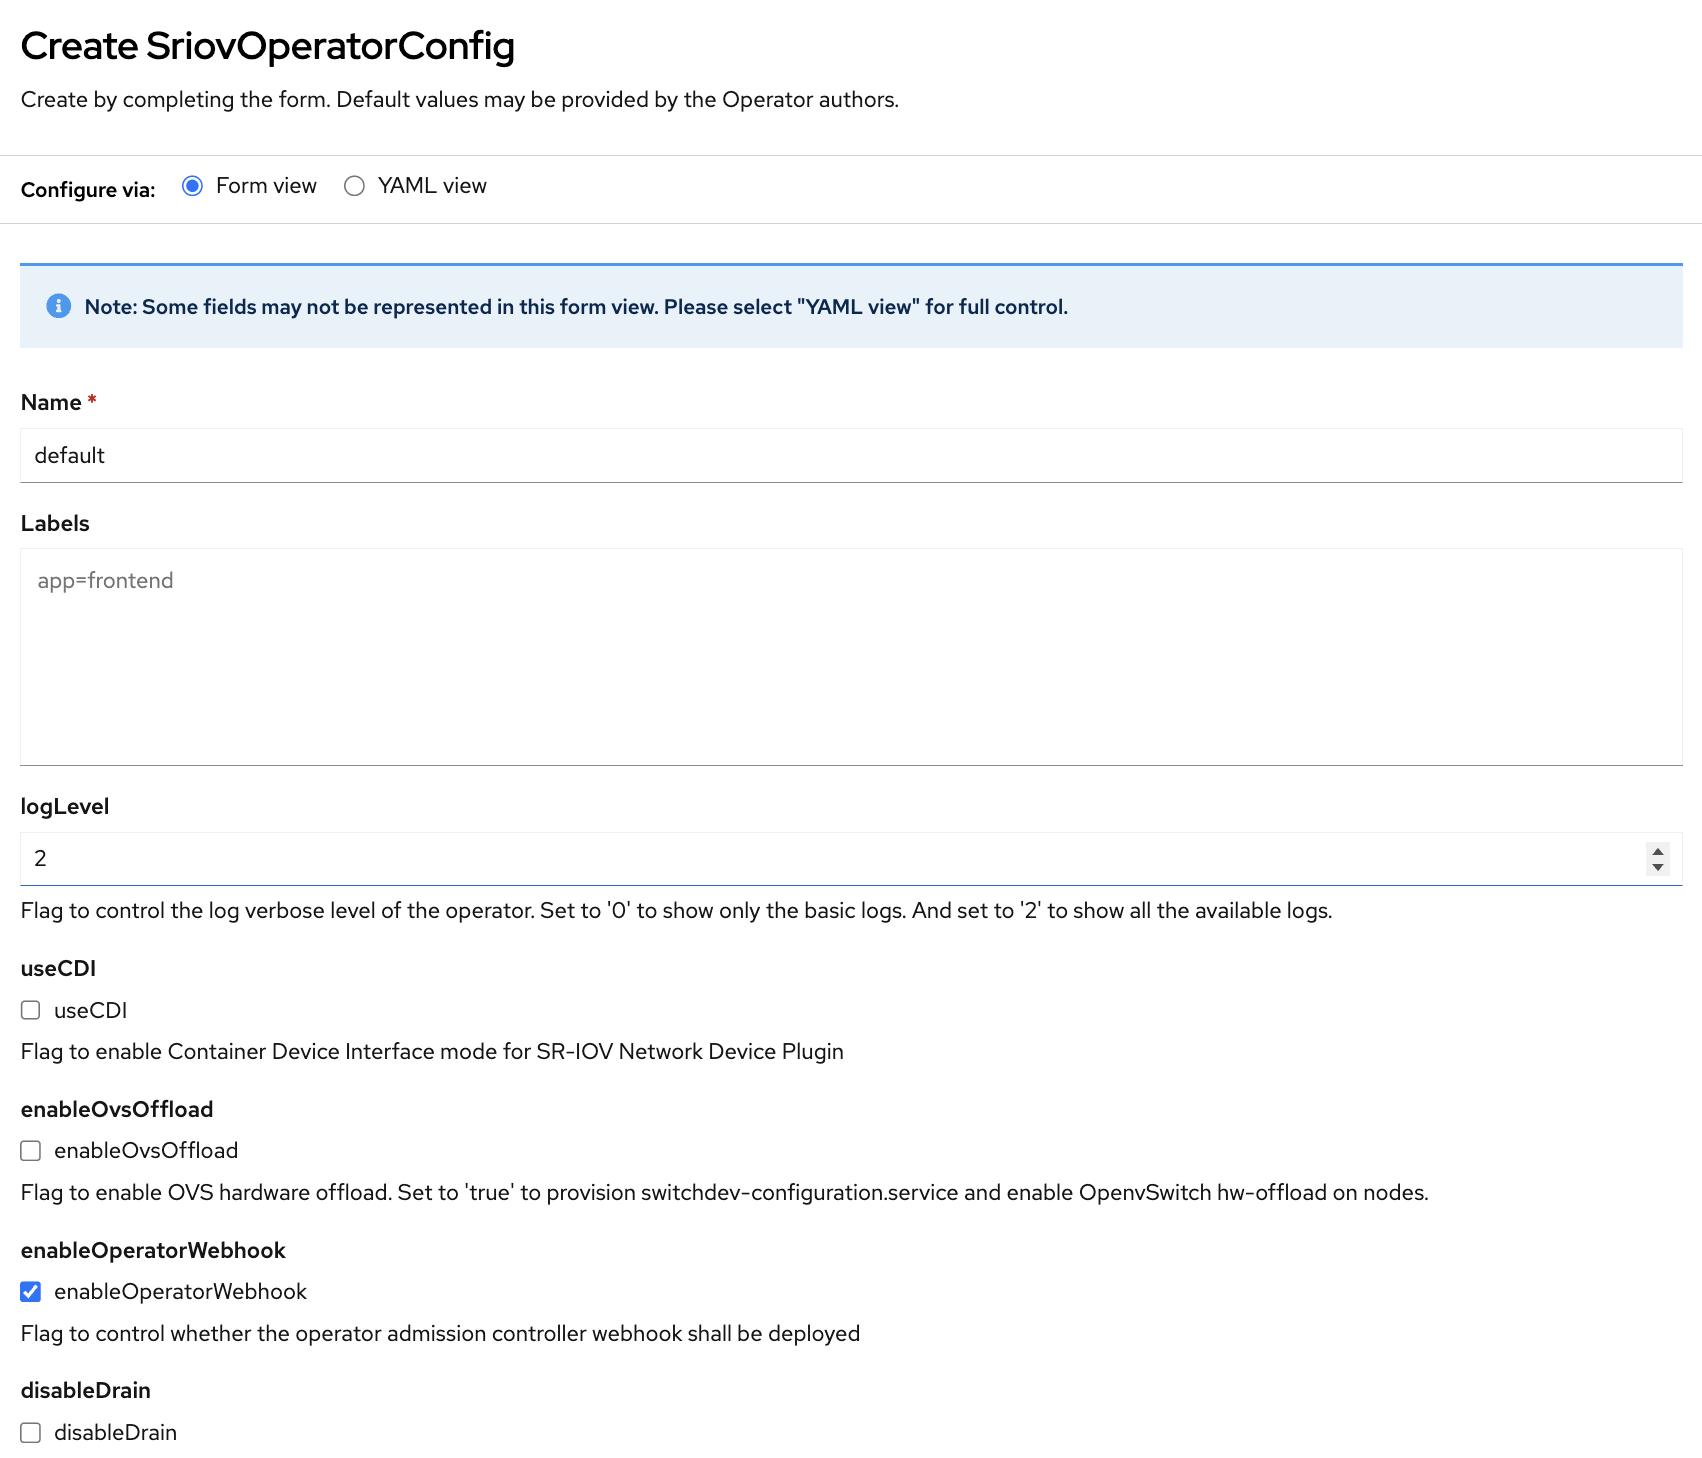
Note
For SNO, select the disableDrain checkbox. This will prevent the operator from draining the node after applying the Node Policy.
Wait for 3–5 minutes for the operator installation to complete. Verify that installation completed successfully using the following command:
oc get pods -n openshift-sriov-network-operator

NAME                                     READY   STATUS    RESTARTS   AGE
network-resources-injector-c728j         1/1     Running   0          69s
network-resources-injector-jjv9s         1/1     Running   0          69s
network-resources-injector-n2zpv         1/1     Running   0          69s
operator-webhook-4f9p7                   1/1     Running   0          69s
operator-webhook-tg6dl                   1/1     Running   0          69s
operator-webhook-zfpwr                   1/1     Running   0          69s
sriov-network-config-daemon-f6sd7        1/1     Running   0          69s
sriov-network-config-daemon-wgbrs        1/1     Running   0          69s
sriov-network-operator-694c67878-fct5t   1/1     Running   0          2m2s
For a complete network configuration, the following components must be created:
SR-IOV Network Node Policies
SR-IOV Networks
Refer to the following sections.
Configure SR-IOV Network Node Policy#
Use the following command to identify the SR-IOV capable interfaces, which are connected. Replace
<worker-node>with a node name.In the reference environment, four ports are connected on each node.
oc -n openshift-sriov-network-operator \
  get sriovnetworknodestates.sriovnetwork.openshift.io <worker-node> -o json | \
  jq '.status.interfaces[] |
      select(.linkSpeed | test("^[1-9][0-9]{4,} Mb/s$")) | .name'
"ens3f0np0"
"ens3f1np1"
"ens6f0np0"
"ens6f1np1"
Create an SriovNetworkNodePolicy CR for each of the network interfaces.
Create
sriov_policy.yamlbased on the following template:apiVersion: sriovnetwork.openshift.io/v1 kind: SriovNetworkNodePolicy metadata: name: <policy-name> namespace: openshift-sriov-network-operator spec: nodeSelector: feature.node.kubernetes.io/rdma.capable: "true" resourceName: <resource_name> priority: 99 mtu: 1500 numVfs: 32 nicSelector: pfNames: ["<interface_name>#0-31"] deviceType: netdevice isRdma: true ---
Repeat the above snippet for each interface to be configured. Replace
<interface_name>in the above snippet with the interface name from the previous command. Replace<policy-name>and<resource_name>to indicate the intended purpose of the Virtual Functions (VFs), which the resource will expose.In the reference environment, the snippet is repeated four times, to reflect the solution logical design:
<interface_name><policy-name><resource_name>Purpose
ens3f0np0media-a-tx-poolmedia_a_tx_poolTransmit-centric (red)
ens3f1np1media-b-tx-poolmedia_b_tx_poolTransmit-centric (blue)
ens6f0np0media-a-rx-poolmedia_a_rx_poolReceive-centric (red)
ens6f1np1media-b-rx-poolmedia_b_rx_poolReceive-centric (blue
Apply the network node policy:
oc create -f sriov_policy.yaml

sriovnetworknodepolicy.sriovnetwork.openshift.io/media-a-tx-pool created
sriovnetworknodepolicy.sriovnetwork.openshift.io/media-b-tx-pool created
sriovnetworknodepolicy.sriovnetwork.openshift.io/media-a-rx-pool created
sriovnetworknodepolicy.sriovnetwork.openshift.io/media-b-rx-pool created
Note
This step takes a while. This depends on the number of worker nodes and the number of VFs for each network interface.
Wait for 2–3 minutes for all pods to have the
Readystatus. Check pod state using the following command:oc get pods -n openshift-sriov-network-operator NAME READY STATUS RESTARTS AGE network-resources-injector-c728j 1/1 Running 0 69s network-resources-injector-jjv9s 1/1 Running 0 69s network-resources-injector-n2zpv 1/1 Running 0 69s operator-webhook-4f9p7 1/1 Running 0 69s operator-webhook-tg6dl 1/1 Running 0 69s operator-webhook-zfpwr 1/1 Running 0 69s sriov-network-config-daemon-f6sd7 1/1 Running 0 69s sriov-network-config-daemon-wgbrs 1/1 Running 0 69s sriov-network-operator-694c67878-fct5t 1/1 Running 0 2m2s
Wait for 15–20 minutes for virtual functions to get created. Ensure that the pools all have non-zero positive values for all worker nodes before proceeding, for example:
oc get node h4m-d -o json | jq '.status.allocatable |
with_entries(select(.key|test("^openshift.io/.+pool$")))'
{
    "openshift.io/media_a_rx_pool": "16",
    "openshift.io/media_a_tx_pool": "16",
    "openshift.io/media_b_rx_pool": "16",
    "openshift.io/media_b_tx_pool": "16"
}
Execute above command for each worker node and confirm that virtual functions have been created.
Configure SR-IOV Network#
Create SriovNetwork resources for each of the network interfaces by reference to the resourceName defined in the SriovNetworkNodePolicy resources. In the example below, two networks are created for each interface. The first is configured to use the Whereabouts plugin for dynamic IP Address Management (IPAM). The second is configured with static IPAM to allow manual, fixed, assignment of IP addresses.
Create
sriov_network.yamlbased on the following example. Update thevlanand other configuration based on your environment. For example, remove thevlanentry if not applicable.apiVersion: sriovnetwork.openshift.io/v1 kind: SriovNetwork metadata: name: media-a-tx-net namespace: openshift-sriov-network-operator spec: ipam: | { "type": "whereabouts", "range": "192.168.20.0/24", "exclude": [ "192.168.20.0/26", "192.168.20.128/25" ] } networkNamespace: default resourceName: media_a_tx_pool vlan: 200 --- apiVersion: sriovnetwork.openshift.io/v1 kind: SriovNetwork metadata: name: media-a-tx-net-static namespace: openshift-sriov-network-operator spec: ipam: | { "type": "static" } networkNamespace: default resourceName: media_a_tx_pool vlan: 200 ---
In the reference environment, the snippet is repeated four times, with appropriate
rangeandexcludevalues to reflect the solution logical design:<resource_name><network-names>Static IPAM Range
Dynamic IPAM Range
media_a_tx_poolmedia-a-tx-net(-static)192.168.20.0-63
192.168.20.64-127
media_b_tx_poolmedia-b-tx-net(-static)192.168.120.0-63
192.168.120.64-127
media_a_rx_poolmedia-a-rx-net(-static)192.168.20.128-191
192.168.20.192-255
media_b_rx_poolmedia-b-rx-net(-static)192.168.120.128-191
192.168.120.192-255
Create the networks:
oc create -f sriov_network.yaml

sriovnetwork.sriovnetwork.openshift.io/media-a-rx-net created
sriovnetwork.sriovnetwork.openshift.io/media-a-rx-net-static created
sriovnetwork.sriovnetwork.openshift.io/media-a-tx-net created
sriovnetwork.sriovnetwork.openshift.io/media-a-tx-net-static created
sriovnetwork.sriovnetwork.openshift.io/media-b-rx-net created
sriovnetwork.sriovnetwork.openshift.io/media-b-rx-net-static created
sriovnetwork.sriovnetwork.openshift.io/media-b-tx-net created
sriovnetwork.sriovnetwork.openshift.io/media-b-tx-net-static created
Execute the following command to validate success:
oc get network-attachment-definitions

NAME AGE
media-a-rx-net 31s
media-a-rx-net-static 31s
media-a-tx-net 31s
media-a-tx-net-static 31s
media-b-rx-net 31s
media-b-rx-net-static 31s
media-b-tx-net 31s
media-b-tx-net-static 31s
Installing Kubernetes NMState Operator#
Kubernetes NMState Operator is used for advanced configuration of network interface cards, for example, creation of VLAN under a specific network interface.
To install the operator using the Web console:
Expand the Operators section and select Operator Hub. Use the search bar to search for NMState. Select Kubernetes NMState Operator.
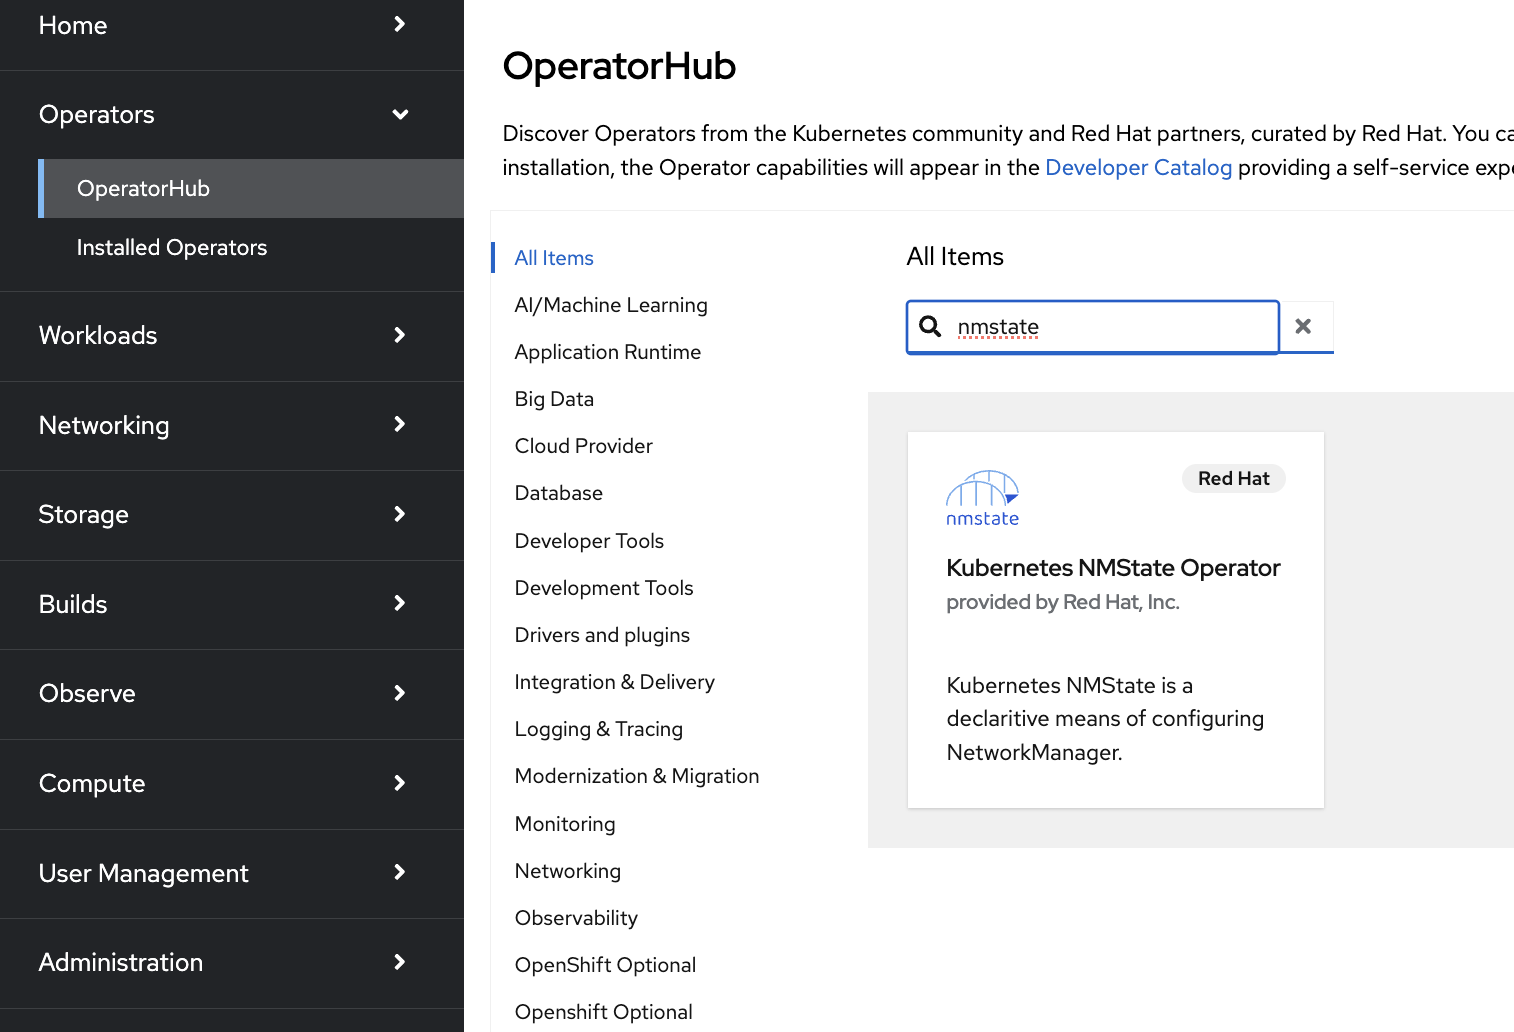
In the opened pop-up window, click Install.
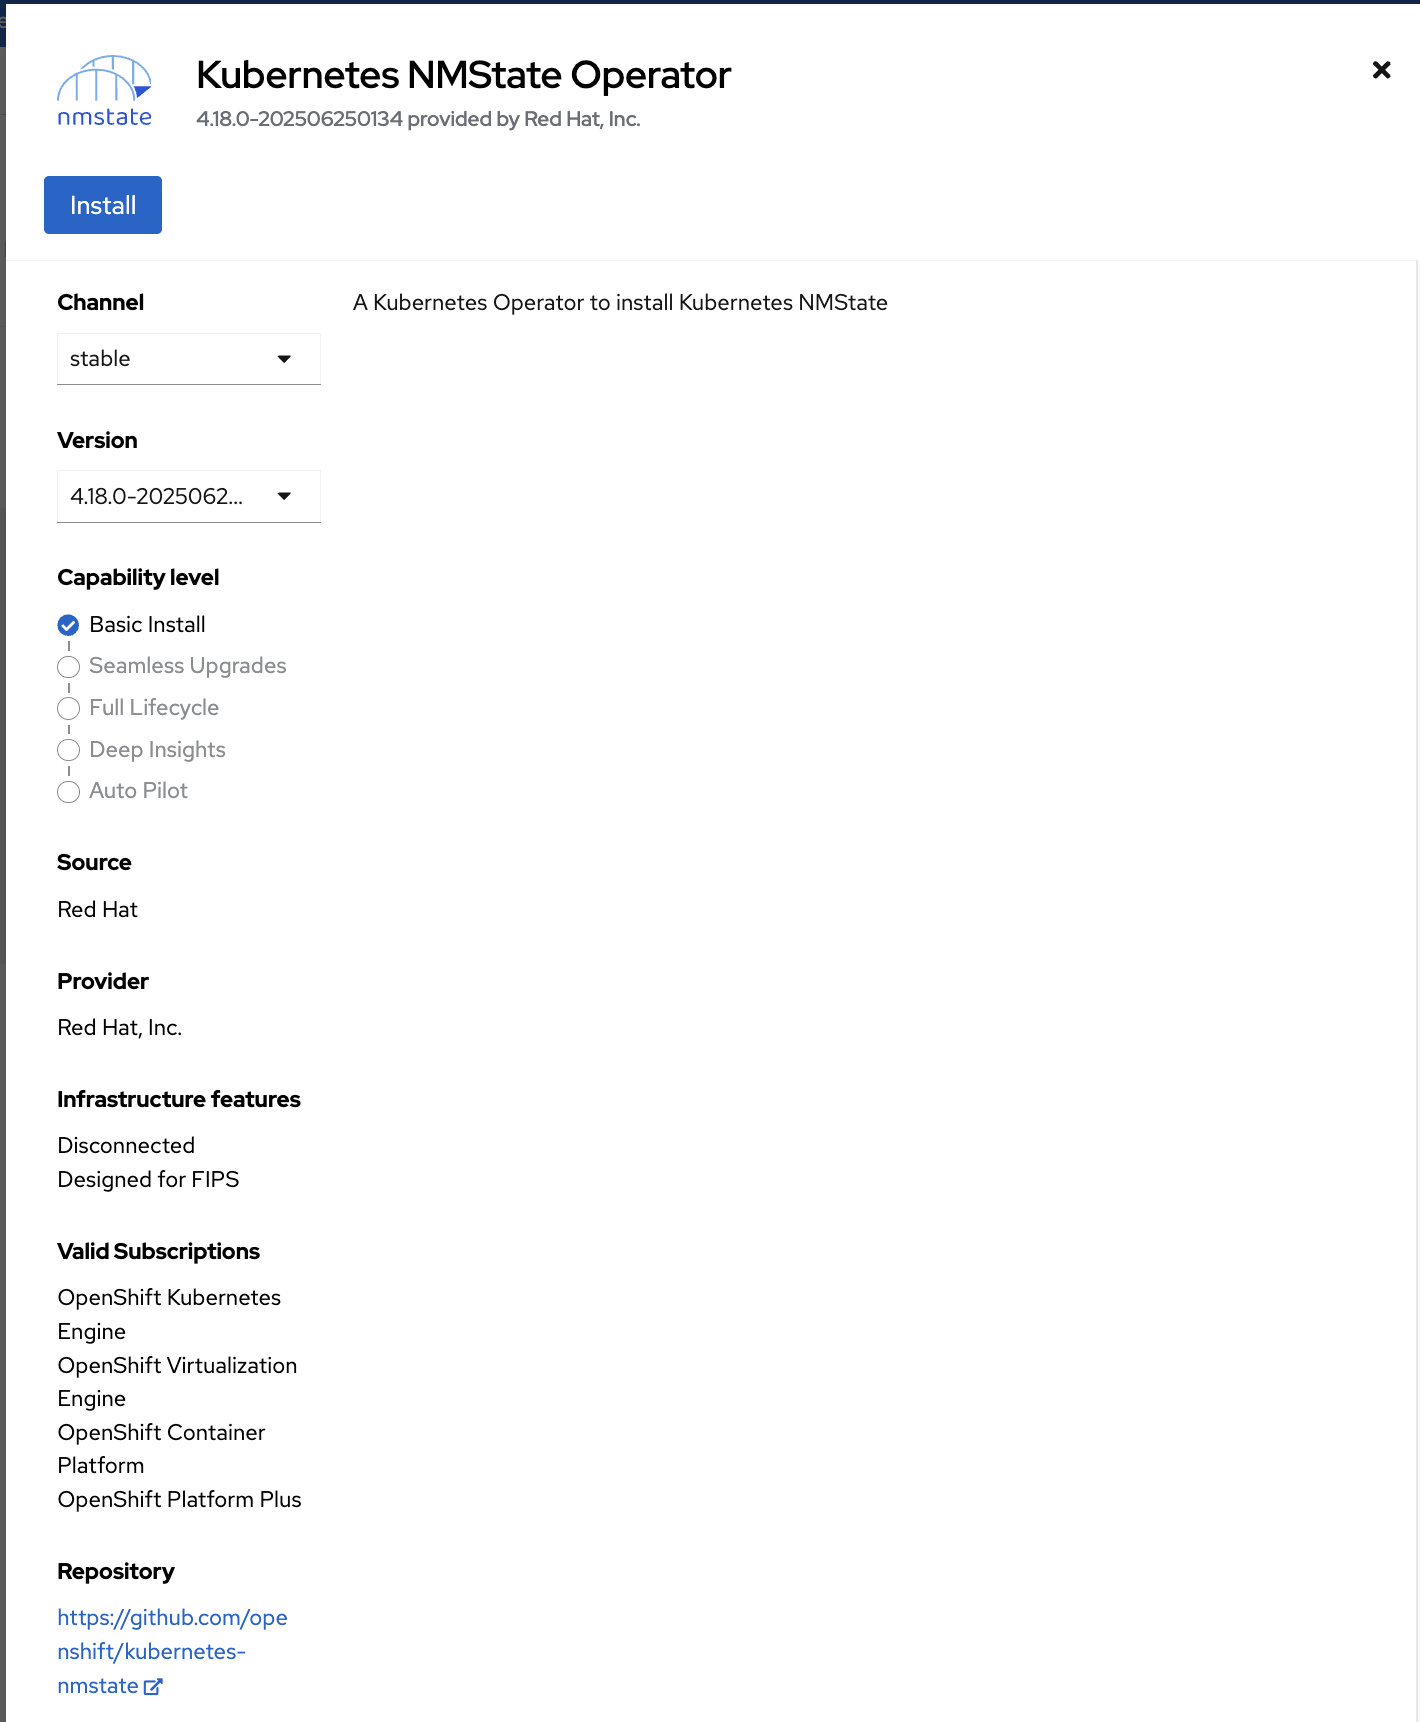
Check A specific namespace on the cluster and click Install.
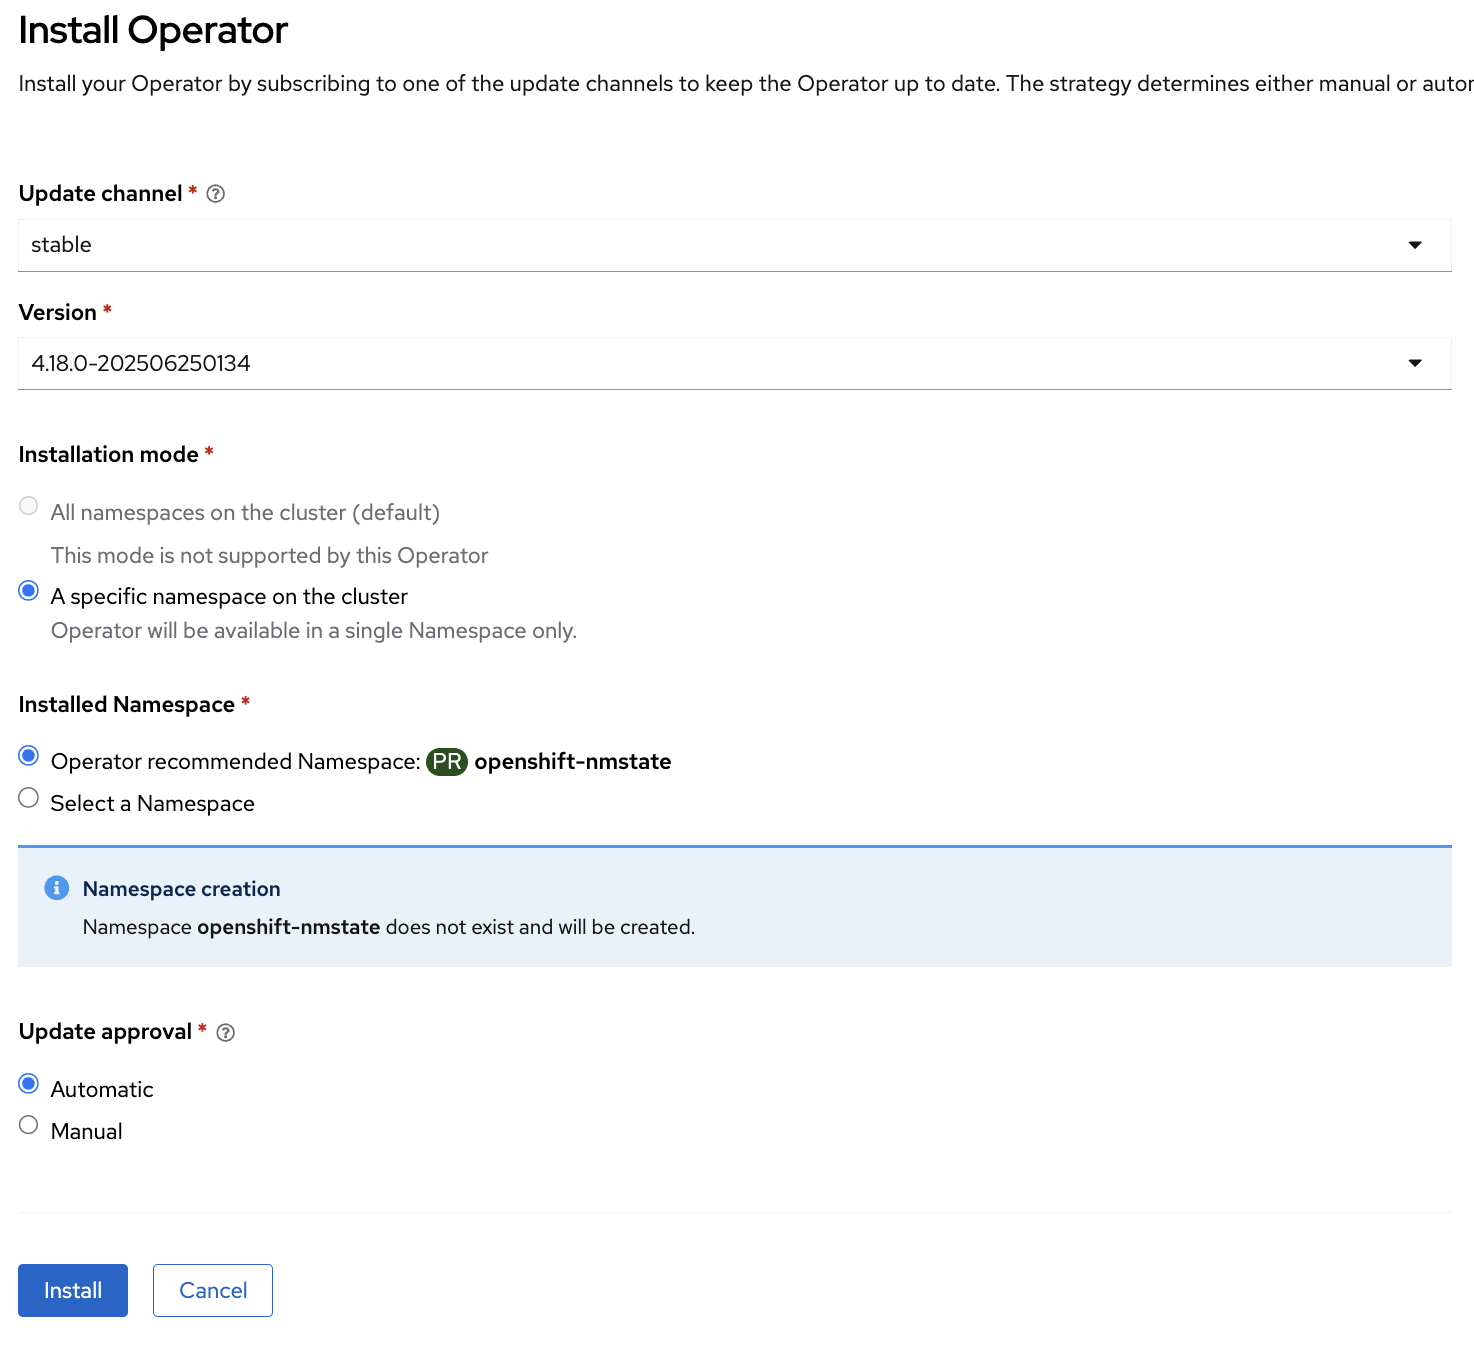
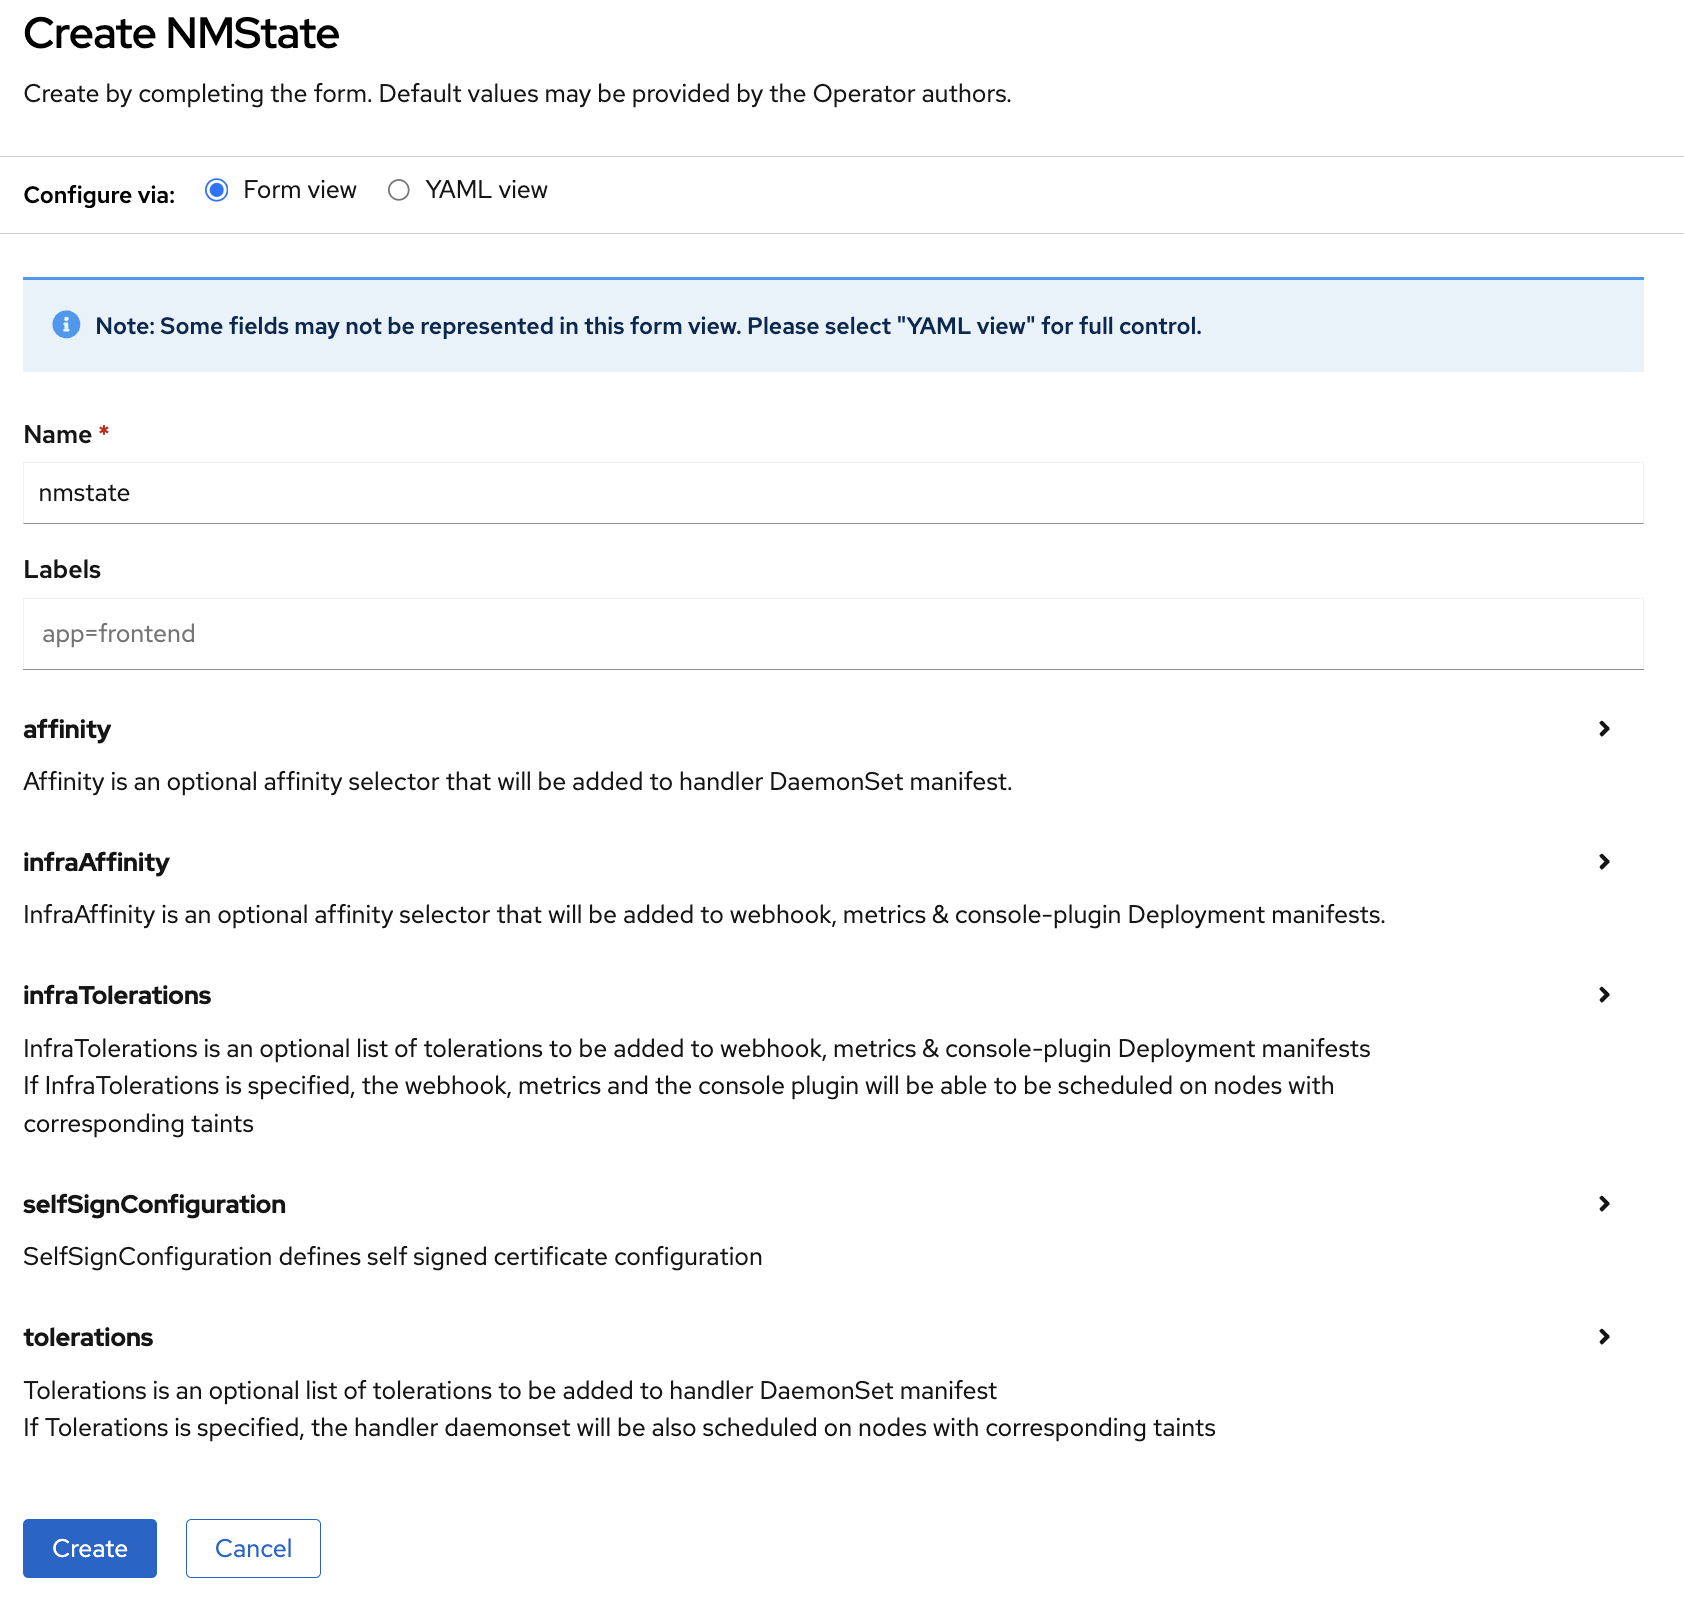
After the installation completes, navigate to the Operators section, click Installed Operators, and select Kubernetes NMState Operator. On the Kubernetes NMState Operator details screen, click Create instance in the Provided APIs section.
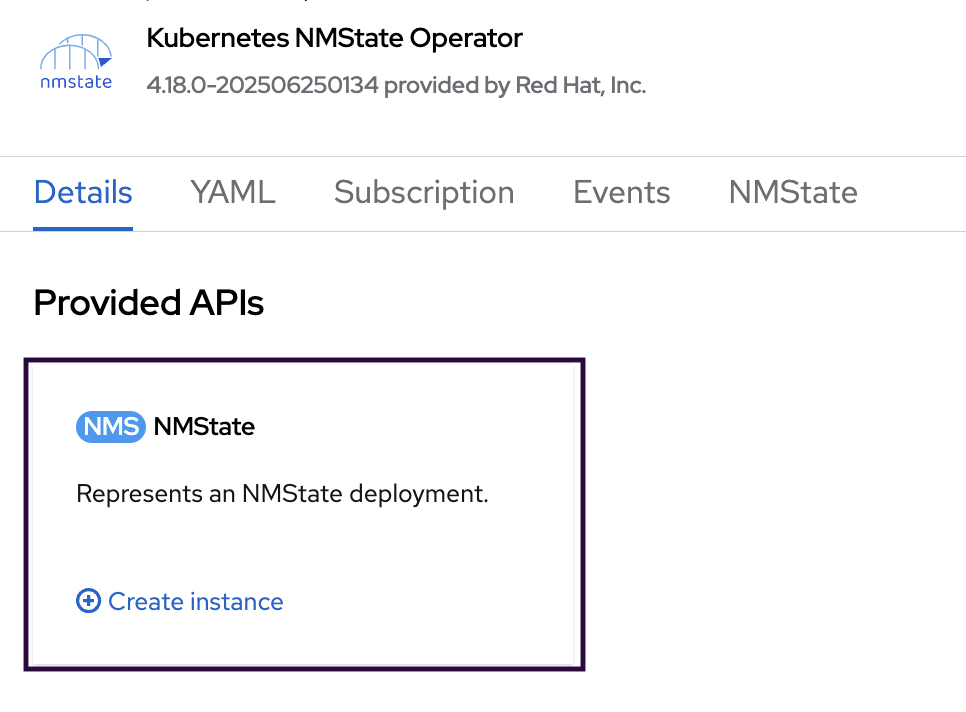
Click the Create button.
To ensure that the NMState instance is deployed properly, run the following commands:
oc get pods -o wide -n openshift-nmstate

NAME                                     READY   STATUS    RESTARTS   AGE   IP             NODE
nmstate-console-plugin-c69f95794-ztkkl   1/1     Running   0          74m   10.131.0.81    h4m-e
nmstate-handler-6vljk                    1/1     Running   0          74m   10.47.32.255   h4m-d
nmstate-handler-92t7h                    1/1     Running   0          74m   10.47.29.253   h4m-a
nmstate-handler-cq2tw                    1/1     Running   0          74m   10.47.11.228   h4m-a
nmstate-handler-gls2d                    1/1     Running   0          74m   10.47.31.241   h4m-b
nmstate-handler-gqg84                    1/1     Running   0          74m   10.47.33.0     h4m-e
nmstate-metrics-69d774d9b6-bcjf7         2/2     Running   0          74m   10.130.0.59    h4m-c
nmstate-operator-85d697d7f4-jxpvc        1/1     Running   0          75m   10.130.0.57    h4m-c
nmstate-webhook-755bbbc9fc-gdrng         1/1     Running   0          74m   10.129.1.62    h4m-a
nmstate-webhook-755bbbc9fc-xhm2x         1/1     Running   0          74m   10.130.0.58    h4m-c
Assign Static IP Addresses on Worker Nodes#
To ensure that PTP Operator can sync time from a PTP grandmaster clock, each worker node needs a network adapter to be assigned an IP address in the network where PTP is running.
Create
nmstate_config.yamlbased on the following template. Replace<config>,<worker>,<interface-name>,<ptp-vlan>, and<ptp-ip>, in the above snippet. Repeat for each worker node:apiVersion: nmstate.io/v1 kind: NodeNetworkConfigurationPolicy metadata: name: <config> spec: nodeSelector: kubernetes.io/hostname: <worker> desiredState: interfaces: - name: <interface-name>.<ptp-vlan> description: VLAN using <interface-name> type: vlan state: up vlan: base-iface: <interface-name> id: <ptp-vlan> ipv4: dhcp: false address: - ip: <ptp-ip> prefix-length: 24 enabled: true ---
Apply the NetworkManager state:
oc create -f nmstate_config.yaml
Confirm that the policy has been applied successfully on the cluster:
oc get nncp

NAME STATUS REASON
nmstate-node-d-network Available SuccessfullyConfigured
nmstate-node-e-network Available SuccessfullyConfigured
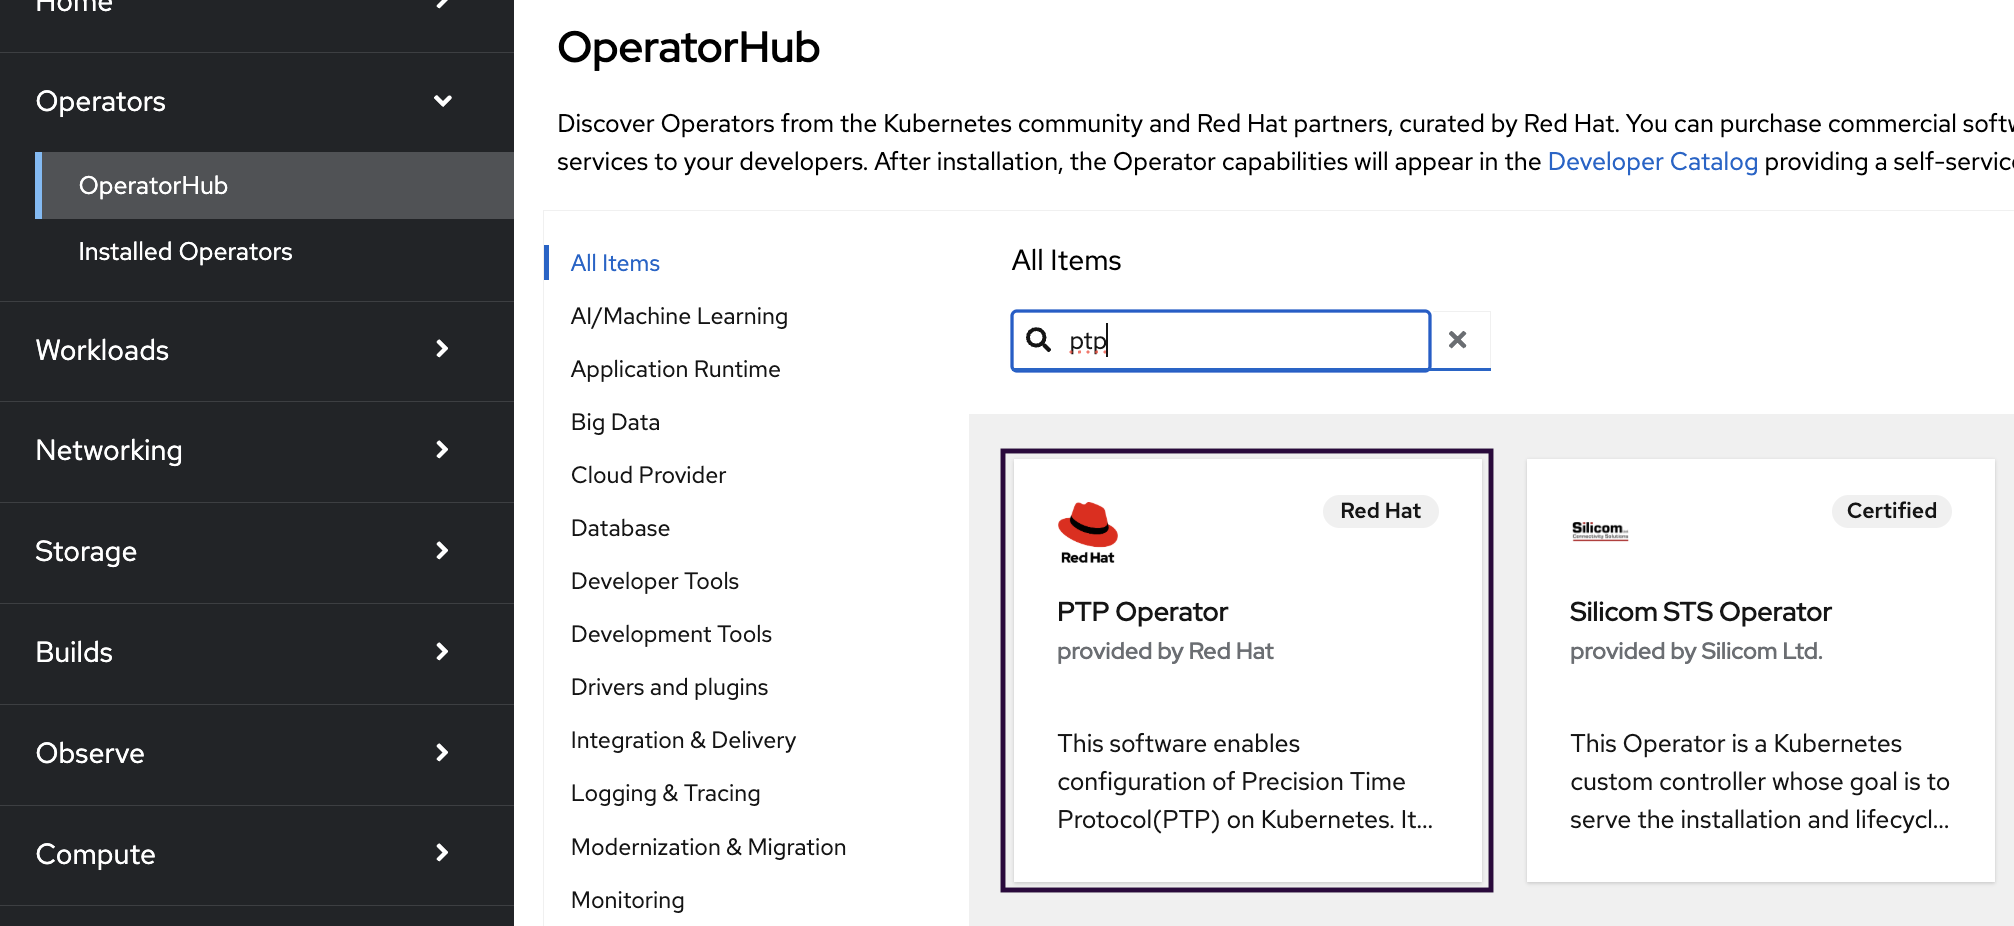
Installing PTP Operator#
To install the operator using the Web console:
Expand the Operators section and select Operator Hub. Use the search bar to search for PTP.
Select PTP Operator provided by Red Hat.
In the opened pop-up window, click Install.
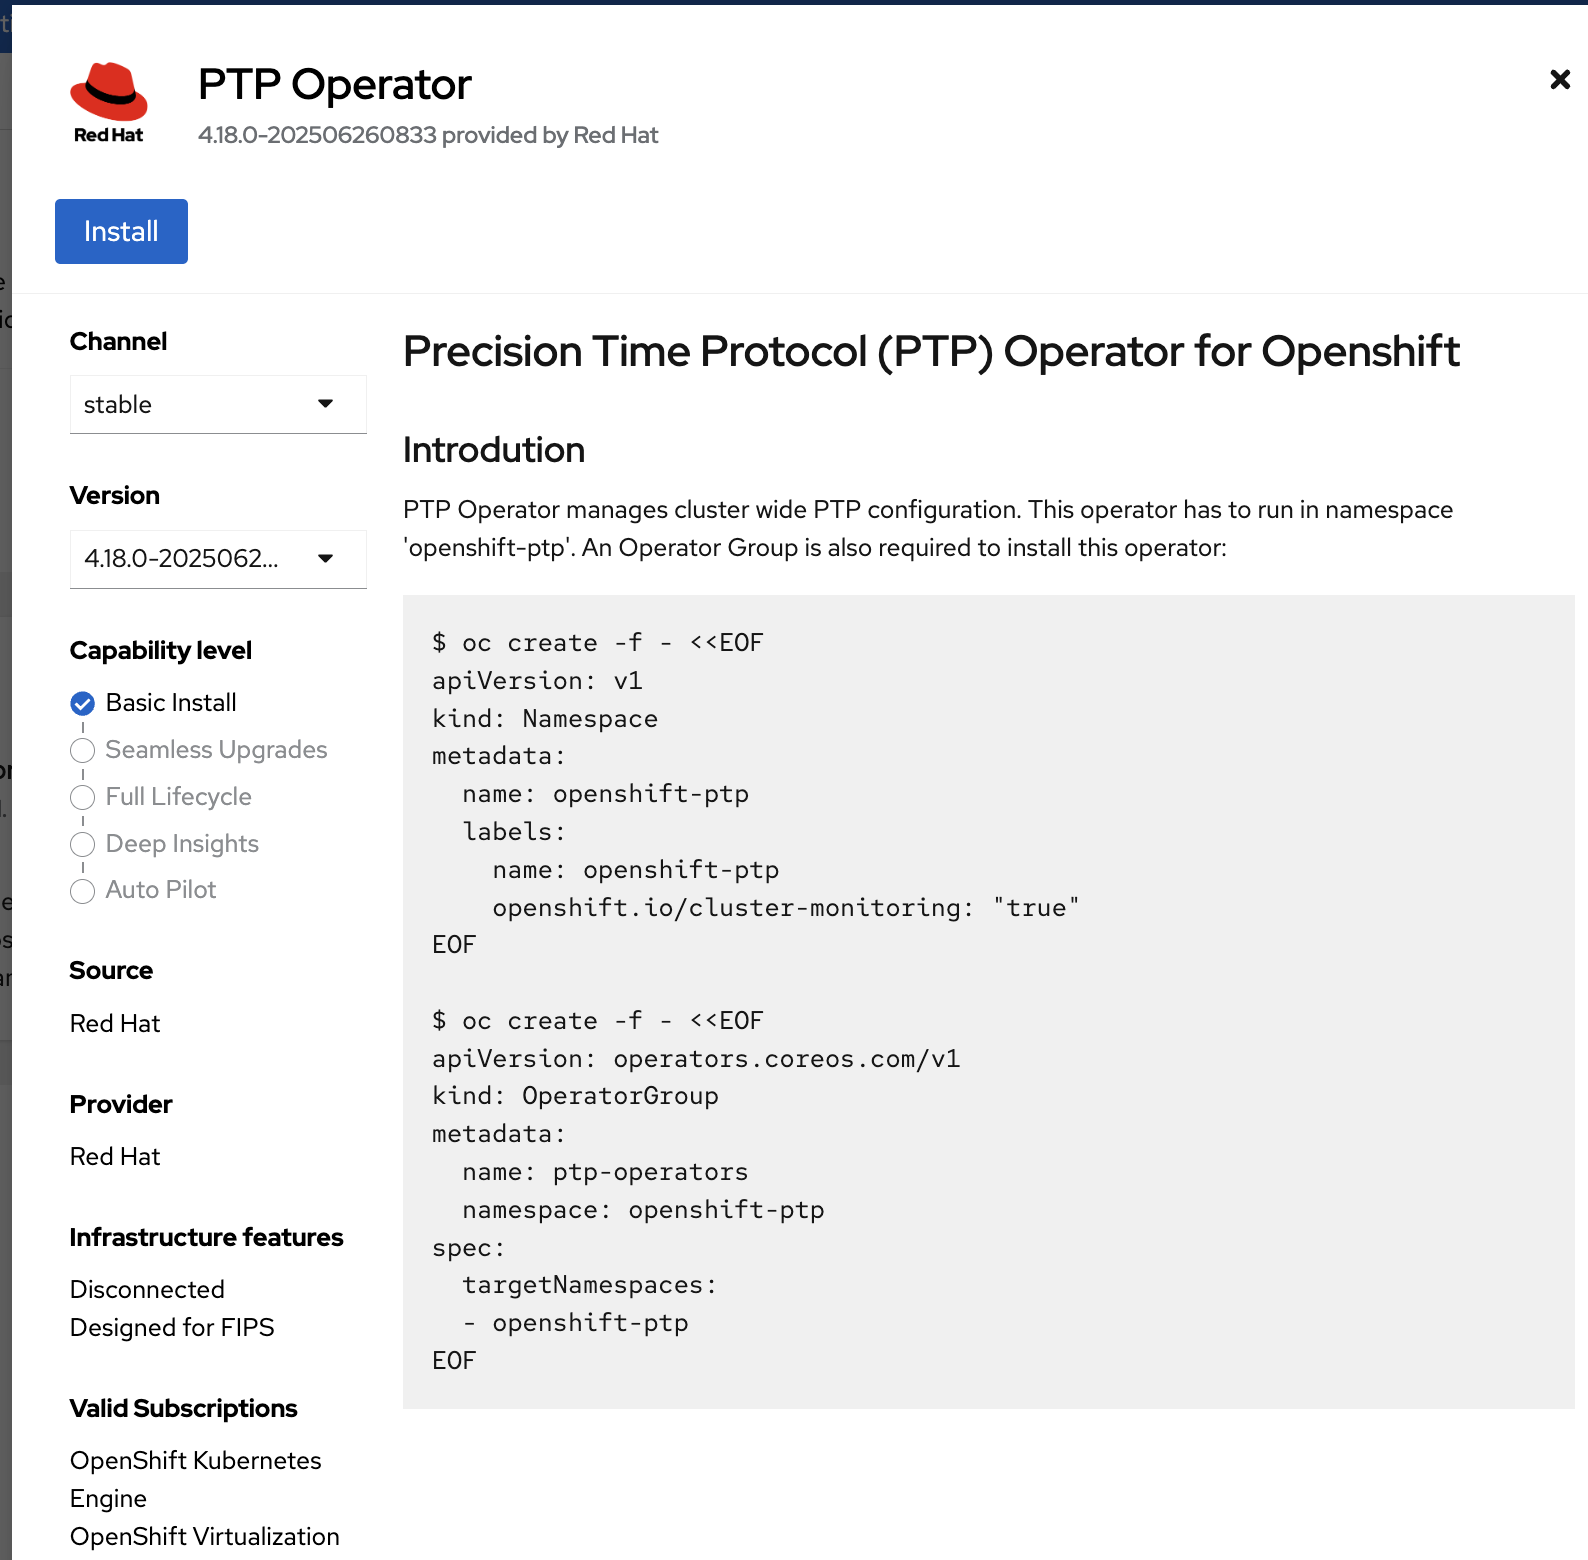
Check A specific namespace on the cluster and click Install.

Confirm that the PTP Operator is deployed properly by running the following command:
oc get pods -o wide -n openshift-ptp

NAME                           READY   STATUS    RESTARTS   AGE     IP             NODE
linuxptp-daemon-2cklw          2/2     Running   0          43m     10.47.31.241   h4m-a
linuxptp-daemon-4dnjb          2/2     Running   0          43m     10.47.33.0     h4m-b
linuxptp-daemon-g2x9t          2/2     Running   0          43m     10.47.29.253   h4m-c
linuxptp-daemon-sd7j7          2/2     Running   0          3m22s   10.47.32.255   h4m-d
linuxptp-daemon-v5hsv          2/2     Running   0          43m     10.47.11.228   h4m-e
ptp-operator-79c558dcf-5hdzb   1/1     Running   0          44m     10.129.1.66    h4m-d
Configure PTP#
Create
ptp-config.yamlbased on the following template:apiVersion: ptp.openshift.io/v1 kind: PtpConfig metadata: name: holoscanmedia-ptp-config namespace: openshift-ptp spec: profile: - name: ordinary-clock interface: "<interface_name>.<ptp-vlan>" phc2sysOpts: "-w -m -n <ptp-domain-number> -s <interface_name>.<ptp-vlan>" ptp4lOpts: "-2 -s" ptpSchedulingPolicy: SCHED_FIFO ptpSchedulingPriority: 10 ptp4lConf: | [global] # # Default Data Set # priority1 128 priority2 127 domainNumber <ptp-domain-number> use_syslog 1 logging_level 6 tx_timestamp_timeout 30 hybrid_e2e 1 dscp_event 46 dscp_general 46 [<interface_name>.<ptp-vlan>] logAnnounceInterval -2 announceReceiptTimeout 3 logSyncInterval -3 logMinDelayReqInterval -3 delay_mechanism E2E network_transport UDPv4 recommend: - profile: ordinary-clock priority: 4 match: - nodeLabel: "node-role.kubernetes.io/<role>" nodeName: "<worker-01>" - nodeLabel: "node-role.kubernetes.io/<role>" nodeName: "<worker-02>"
Replace
<interface_name>in the above snippet with interface name determined previously.Replace
<ptp-vlan>with PTP VLAN of current environment, for example300in this case.Replace
<ptp-domain-number>with the correct domain, for example127. Check other PTP parameters match the current environment.Replace
<role>withworkerfor 5-node cluster andmasterfor 3-node cluster or SNO.Replace
<worker-01>,<worker-02>with node names. Add more entries as needed.
Apply the PTP configuration:
oc create -f ptp-config.yaml
Wait for 1–2 minutes for the worker nodes to pick up new config. List the pods running under the
openshift-ptpnamespace on worker nodes and confirm that they have started syncing time from grandmaster clock.oc get pods -o wide -n openshift-ptp NAME READY STATUS RESTARTS AGE IP NODE linuxptp-daemon-2cklw 2/2 Running 0 43m 10.47.31.241 h4m-a linuxptp-daemon-4dnjb 2/2 Running 0 43m 10.47.33.0 h4m-b linuxptp-daemon-g2x9t 2/2 Running 0 43m 10.47.29.253 h4m-c linuxptp-daemon-sd7j7 2/2 Running 0 3m22s 10.47.32.255 h4m-d linuxptp-daemon-v5hsv 2/2 Running 0 43m 10.47.11.228 h4m-e ptp-operator-79c558dcf-5hdzb 1/1 Running 0 44m 10.129.1.66 h4m-d
Confirm that the worker nodes can sync time from GM clock:
oc logs linuxptp-daemon-vbx5m -n openshift-ptp -c linuxptp-daemon-container --tail=1000 -f

I0119 10:31:28.444921 7501 main.go:111] ticker pull
I0119 10:31:28.638207 7501 daemon.go:466] Recreating phc2sys...
I0119 10:31:28.638234 7501 daemon.go:359] Starting phc2sys...
I0119 10:31:28.638238 7501 daemon.go:360] phc2sys cmd: /bin/chrt -f 10
/usr/sbin/phc2sys -w -m -n 127 -s ens6f0np0.300 -u 1 -z
/var/run/ptp4l.0.socket -t [ptp4l.0.config]
...
I0119 10:31:29.281613 7501 daemon.go:466] Recreating ptp4l...
I0119 10:31:29.281640 7501 daemon.go:359] Starting ptp4l...
I0119 10:31:29.281644 7501 daemon.go:360] ptp4l cmd: /bin/chrt -f 10
/usr/sbin/ptp4l -f /var/run/ptp4l.0.config -2 -s -m
...
ptp4l[643.370]: [ptp4l.0.config] port 1: INITIALIZING to LISTENING on
INIT_COMPLETE
ptp4l[643.370]: [ptp4l.0.config] port 0: INITIALIZING to LISTENING on
INIT_COMPLETE
ptp4l[643.370]: [ptp4l.0.config] port 0: INITIALIZING to LISTENING on
INIT_COMPLETE
ptp4l[643.543]: [ptp4l.0.config] port 1: :mark:`new foreign master ec0d9a.fffe.fcd0c8-13`
I0119 10:31:29.643024 7501 daemon.go:466] Recreating phc2sys...
I0119 10:31:29.643051 7501 daemon.go:359] Starting phc2sys...
I0119 10:31:29.643054 7501 daemon.go:360] phc2sys cmd: /bin/chrt -f 10
/usr/sbin/phc2sys -w -m -n 127 -s ens6f0np0.300 -u 1 -z
/var/run/ptp4l.0.socket -t [ptp4l.0.config]
I0119 10:31:29.643111 7501 daemon.go:336]
phc2sys[1705660289]:[ptp4l.0.config] PTP_PROCESS_STATUS:1
ptp4l[644.043]: [ptp4l.0.config] selected best master clock
ec0d9a.fffe.fcd0c8
ptp4l[644.043]: [ptp4l.0.config] port 1: LISTENING to UNCALIBRATED on
RS_SLAVE
ptp4l[644.544]: [ptp4l.0.config] port 1: UNCALIBRATED to SLAVE on
MASTER_CLOCK_SELECTED
phc2sys[644.726]: [ptp4l.0.config] Waiting for ptp4l...
phc2sys[645.726]: [ptp4l.0.config] CLOCK_REALTIME rms 446078597 max
446078597 freq +0 +/- 0 delay 437 +/- 0
ptp4l[646.170]: [ptp4l.0.config] rms 12923840978 max 36554143684 freq
-2424 +/- 16106 delay -744 +/- 149
phc2sys[646.726]: [ptp4l.0.config] CLOCK_REALTIME rms 446083500 max
446083500 freq +4902 +/- 0 delay 440 +/- 0
...
phc2sys[680.731]: [ptp4l.0.config] CLOCK_REALTIME rms 2 max 2 freq
+10670 +/- 0 delay 440 +/- 0
phc2sys[681.731]: [ptp4l.0.config] CLOCK_REALTIME rms 5 max 5 freq
+10664 +/- 0 delay 440 +/- 0
ptp4l[682.184]: [ptp4l.0.config] rms 3 max 6 freq +22374 +/- 4 delay 97
+/- 0