Prerequisites#
Ensure the following prerequisites are met before proceeding with the installation.
Hardware Requirements#
Holoscan for Media requires specific motherboard, CPU, GPU and networking card requirements.
Ensure your system complies with these requirements. These configurations have been tested with the platform.
BIOS Setup#
System tuning is essential for achieving consistent high performance from your hardware.
In particular, the SMPTE ST 2110 specifications impose a strict timing policy on the flow of data across the network stack between compliant senders and receivers. To meet this standard, you should tune your systems to reduce interference from the BIOS and operating system, and between applications running on the same system.
The following steps, based on the Rivermax Performance Tuning Guide, achieve this goal.
Restart the computer and enter BIOS/UEFI setup.
Enable SR-IOV support. Refer to the specs of your workstation.
It may be included with, or require also setting, the following virtualization features, which can be found under menus like CPU/Processor Settings and PCIe Settings:
Intel Virtualization Technology for Directed I/O (VT-d) or AMD-Vi, also known as IOMMU (Input Output Memory Management Unit); not strictly required for SR-IOV but may need to be enabled
Intel Virtualization Technology (VT-x) or AMD-V; in most cases, can be disabled when working only with containers, but must be enabled when running virtual machines
PCIe ARI (Alternative Routing-ID Interpretation); must be enabled to remove the normal limit of eight VFs per device
PCIe ATS (Address Translation Services); must be enabled to improve SR-IOV performance
PCIe ACS (Access Control Services); can be disabled to improve performance when working only with containers, but should be enabled when using virtual machines
PCIe AER (Advanced Error Reporting); must be enabled
AMD-Specific BIOS Setup#
SVM Mode: Enables or disables Secure Virtual Machine (SVM) mode, AMD’s hardware-assisted virtualization technology (AMD-V), on compatible processors. Disable this if virtual machines are not used in the cluster.
SMT Mode: Controls Simultaneous Multi-Threading (SMT), which lets each CPU core run multiple threads. For most workloads, SMT can remain enabled. However, because workloads with strict timing requirements—such as ST 2110 packet pacing—can be affected by SMT, it must be disabled to ensure compliance.
APIC Mode: Controls the Advanced Programmable Interrupt Controller (APIC), which affects how interrupts are handled in multi-core processors. Set this to x2APIC.
L3 Cache as NUMA Domain: When enabled, each Core Complex (CCX) is exposed as a separate Non-Uniform Memory Access (NUMA) domain. When disabled, memory addressing and NUMA nodes are declared per socket. Set this to Disabled.
Core Performance Boost: Allows CPU cores to reach turbo frequencies. This is often enabled by default, but verify to ensure it is active.
Memory Speed: Set to the maximum supported value for best performance.
C-State: Controls power-saving states for idle CPUs. Since these reduce performance, disable Global C-state Control and DF C-states.
P-State: Controls CPU power states. To avoid performance loss, disable P-state1 and set DF P-states to P0.
Determinism Slider: Set to Power. This allows cores to scale frequency independently, improving overall performance.
Efficiency Mode: Set to Disabled.
Software Requirements#
Linux OS#
The local developer setup supports Ubuntu 22.04 and 24.04.
Check the version and distribution of Linux running on your system using the command:
lsb_release -aImportant
Check the kernel version using the command:
uname -rIf the kernel version is not listed under the section Supported Host OS per DOCA-Host Installation Profile, update the kernel to the supported version.
Git#
Ensure that Git is installed:
sudo apt update
sudo apt install git -y
Note
Git is installed by default on Ubuntu Server, but not on Ubuntu Desktop.
Network Adapter Firmware and Configuration#
Install Mellanox Firmware Tool (MFT) version 4.32.0.120 selecting Debian based OS distribution as shown in image below
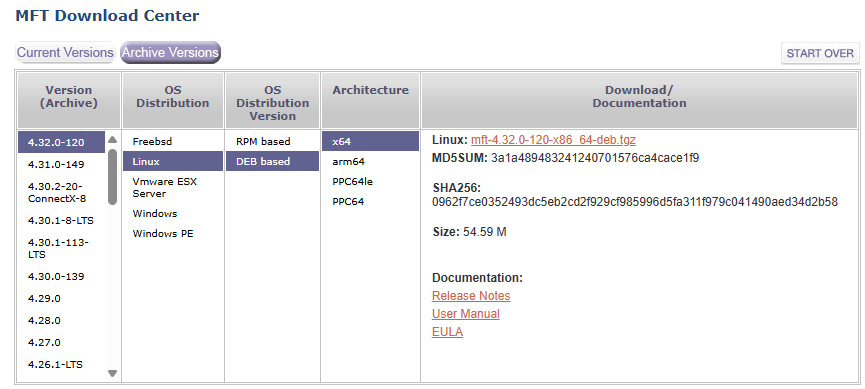
Decompress and install the package
tar xvzf mft-4.32.0-120-x86_64-deb.tgz
cd mft-4.32.0-120-x86_64-deb
sudo ./install.sh
sudo mst start

sudo mst status -v
MST modules:
------------
    MST PCI module is not loaded
    MST PCI configuration module loaded
PCI devices:
------------
DEVICE_TYPE             MST                           PCI       RDMA            NET                                     NUMA
ConnectX6DX(rev:0)      /dev/mst/mt4125_pciconf0      03:00.0   mlx5_0          net-enp3s0f0np0                         0

ConnectX6DX(rev:0)      /dev/mst/mt4125_pciconf0.1    03:00.1   mlx5_1          net-enp3s0f1np1                         0
Check the current NIC firmware version:
sudo mlxfwmanager -d <device_name> --query
where
<device_name>is the MST device name of the NIC being checked, for example,/dev/mst/mt4125_pciconf0.Querying Mellanox devices firmware ... Device #1: ---------- Device Type: ConnectX6DX Part Number: MCX623106AN-CDA_Ax Description: ConnectX-6 Dx EN adapter card; 100GbE; Dual-port QSFP56; PCIe 4.0/3.0 x16; PSID: MT_0000000359 PCI Device Name: /dev/mst/mt4125_pciconf0 Base GUID: e8ebd30300aa876a Base MAC: e8ebd3aa876a Versions: Current Available FW 22.44.1036 N/A PXE 3.7.0500 N/A UEFI 14.37.0014 N/A Status: No matching image foundCompare it with the supported firmware versions listed in the official compatibilty matrix.
If the installed version does not match the supported version
Download appropriate Ethernet firmware version from the download page using the NIC part number and PSID as shown in the image
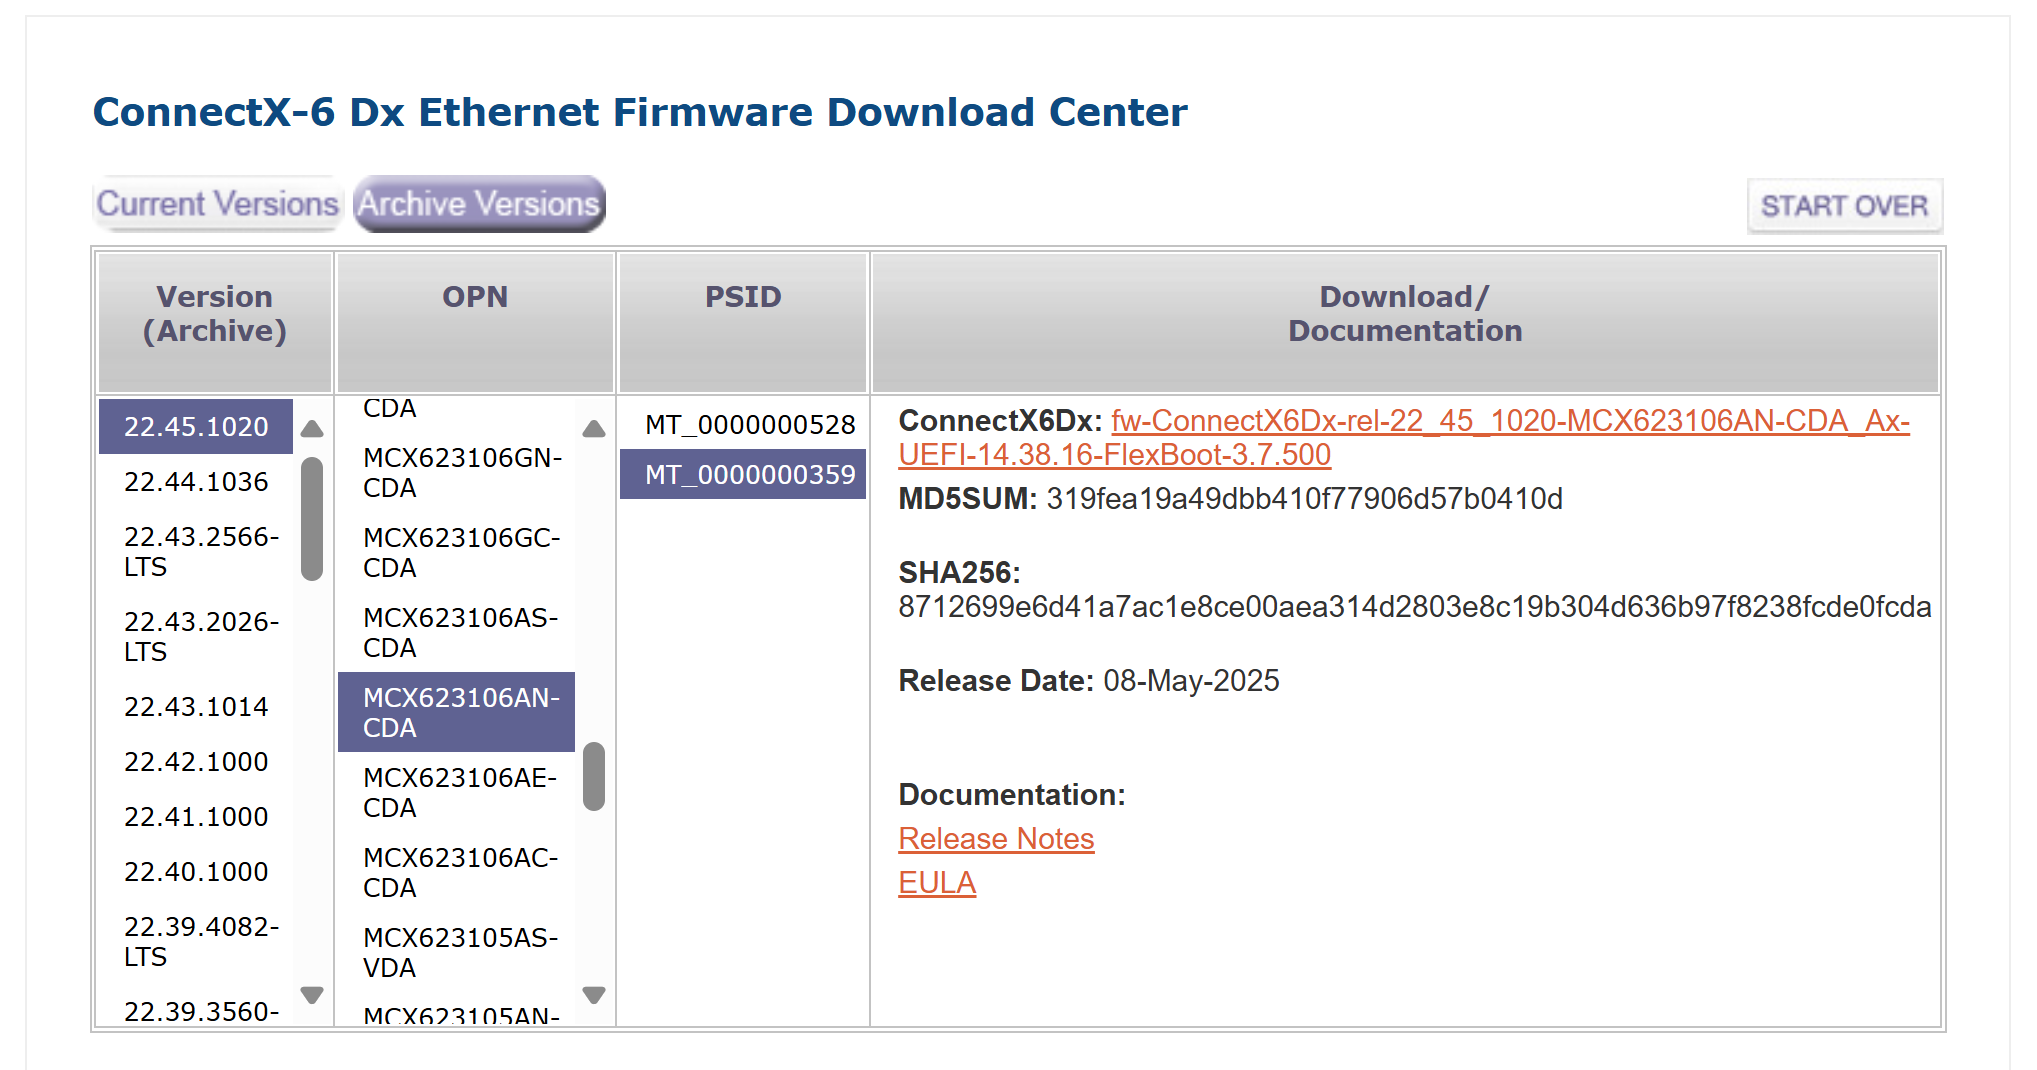
Decompress the package
unzip <firmware_package>where
<firmware_package>is the name of the downloaded firmware file, for example,fw-ConnectX6Dx-rel-22_45_1020-MCX623106AN-CDA_Ax-UEFI-14.38.16-FlexBoot-3.7.500.bin.zip.Update firmware
sudo flint -d <device_name> -i <binary_image> burn
where:
<device_name>is the MST device name of the NIC being updated, for example,/dev/mst/mt4125_pciconf0.<binary_image>is the file name of the unzipped firmware file, for example,fw-ConnectX6Dx-rel-22_45_1020-MCX623106AN-CDA_Ax-UEFI-14.38.16-FlexBoot-3.7.500.bin.
Power cycle the system
After powering on again, verify the new firmware version
sudo mlxfwmanager -d <device_name> --query
where
<device_name>is the MST device name of the NIC being verified, for example,/dev/mst/mt4125_pciconf0.
If you are using a purchased Rivermax license, rather than a time-limited development license, you must enable NIC serial number validation using
VF_VPD_ENABLE.Check the
VF_VPD_ENABLEsetting:sudo mlxconfig -d <device_name> query VF_VPD_ENABLE
where
<device_name>is the MST device name of the NIC being targeted, for example,/dev/mst/mt4125_pciconf0.Device #1: ---------- Device type: ConnectX6DX Name: MCX623106AN-CDA_Ax Description: ConnectX-6 Dx EN adapter card; 100GbE; Dual-port QSFP56; PCIe 4.0/3.0 x16; Device: /dev/mst/mt4125_pciconf0 Configurations: Next Boot VF_VPD_ENABLE False(0)Set
VF_VPD_ENABLEto True (1):sudo mlxconfig -d <device_name> set VF_VPD_ENABLE=1
where
<device_name>is the MST device name of the NIC being targeted, for example,/dev/mst/mt4125_pciconf0.Reboot the system:
sudo reboot
Verify Installed Drivers#
The platform installation can be made on a machine dedicated to Kubernetes containerized development, deployment, and testing. In that case, you do not need NVIDIA GPU and NIC drivers for Ubuntu.
You can also install NVIDIA GPU and NIC drivers to allow both native Ubuntu software development and containerized work on the same machine.
Depending on your needs, you can start from a clean Ubuntu distribution with no NVIDIA drivers installed, or you can install NVIDIA drivers.
Important
If you use a machine with NVIDIA drivers installed on Ubuntu, install the networking driver before the GPU driver.
Check DOCA-OFED (formerly known as MOFED for Mellanox OFED) installation:
ofed_info -sOFED-internal-25.04-0.6.1:
If the above command returns an error, it means the DOCA-OFED driver is not installed.
Check NVIDIA GPU driver installation:
modinfo nvidia | grep "^version:"
version: 580.95.05
If the above command returns an error, it means the GPU driver is not installed.
Based on the result follow these recommendations:
Both DOCA-OFED and GPU drivers installed:
Ensure that the installed GPU driver version is 575 or higher.
Ensure that DOCA-OFED is installed before the GPU driver by loading the nvidia-peermem module:
sudo modprobe nvidia-peermem
If you don’t get an error when running the modprobe command, it means drivers are installed in the correct order. You can proceed with installation.
If you encounter an error like this:
modprobe: ERROR: could not insert 'nvidia_peermem': Invalid
It indicates that the drivers are installed in the incorrect order. In such case, uninstall GPU Driver and DOCA-OFED, then either reinstall DOCA-OFED followed by GPU Driver or let the NVIDIA Network Operator and GPU Operator handle driver installations during CNS setup.
Only GPU driver installed:
Uninstall GPU driver then either
Install DOCA-OFED followed by GPU driver
Or let the NVIDIA Network Operator and GPU Operator handle driver installations during CNS setup.
Only DOCA-OFED driver installed:
Proceed with installation, letting the GPU Operator handle driver installation during CNS setup, or install GPU driver first.
No drivers installed:
Proceed with installation, letting the NVIDIA Network Operator and GPU Operator handle driver installations during CNS setup, or install DOCA-OFED followed by GPU driver.