Quickstart Guide#
Jetson [Not applicable for NVAIE customers]#
This section explains how to use DeepStream SDK on a Jetson device.
Boost the clocks#
After you have installed DeepStream SDK, run these commands on the Jetson device to boost the clocks:
$ sudo nvpmodel -m 0
$ sudo jetson_clocks
You should run these commands before running DeepStream application.
Run deepstream-app (the reference application)#
Navigate to the configs/deepstream-app directory on the development kit.
$ cd /opt/nvidia/deepstream/deepstream-9.0/samples/configs/deepstream-app
Enter the following command to run the reference application:
# deepstream-app -c <path_to_config_file>

e.g. $deepstream-app -c source30_1080p_dec_infer-resnet_tiled_display.txt
Where
<path_to_config_file>is the pathname of one of the reference application’s configuration files, found inconfigs/deepstream-app/. See Package Contents inconfigs/deepstream-app/for a list of the available files.Config files that can be run with deepstream-app:
source30_1080p_dec_infer-resnet_tiled_display.txtsource30_1080p_dec_preprocess_infer-resnet_tiled_display.txtsource4_1080p_dec_infer-resnet_tracker_sgie_tiled_display.txtsource1_usb_dec_infer_resnet.txtsource1_csi_dec_infer_resnet.txtsource2_csi_usb_dec_infer_resnet.txtsource6_csi_dec_infer_resnet.txtsource2_1080p_dec_infer-resnet_demux.txtsource4_1080p_dec_infer-resnet_tracker_sgie_tiled_display.ymlsource30_1080p_dec_infer-resnet_tiled_display.ymlsource4_1080p_dec_preprocess_infer-resnet_preprocess_sgie_tiled_display.txtsource2_dewarper_test.txt
Note
Refer to Sample Configurations and Streams for detailed explanation of each configuration file.
Note
You can find sample configuration files under
/opt/nvidia/deepstream/deepstream-9.0/samplesdirectory. Enter this command to see application usage:$ deepstream-app --helpTo save TensorRT Engine/Plan file, run the following command:
$ sudo deepstream-app -c <path_to_config_file>
To show labels in 2D Tiled display view, expand the source of interest with mouse left-click on the source. To return to the tiled display, right-click anywhere in the window.
Keyboard selection of source is also supported. On the console where application is running, press the
zkey followed by the desired row index (0 to 9), then the column index (0 to 9) to expand the source. To restore 2D Tiled display view, presszagain.
Expected output (deepstream-app)#
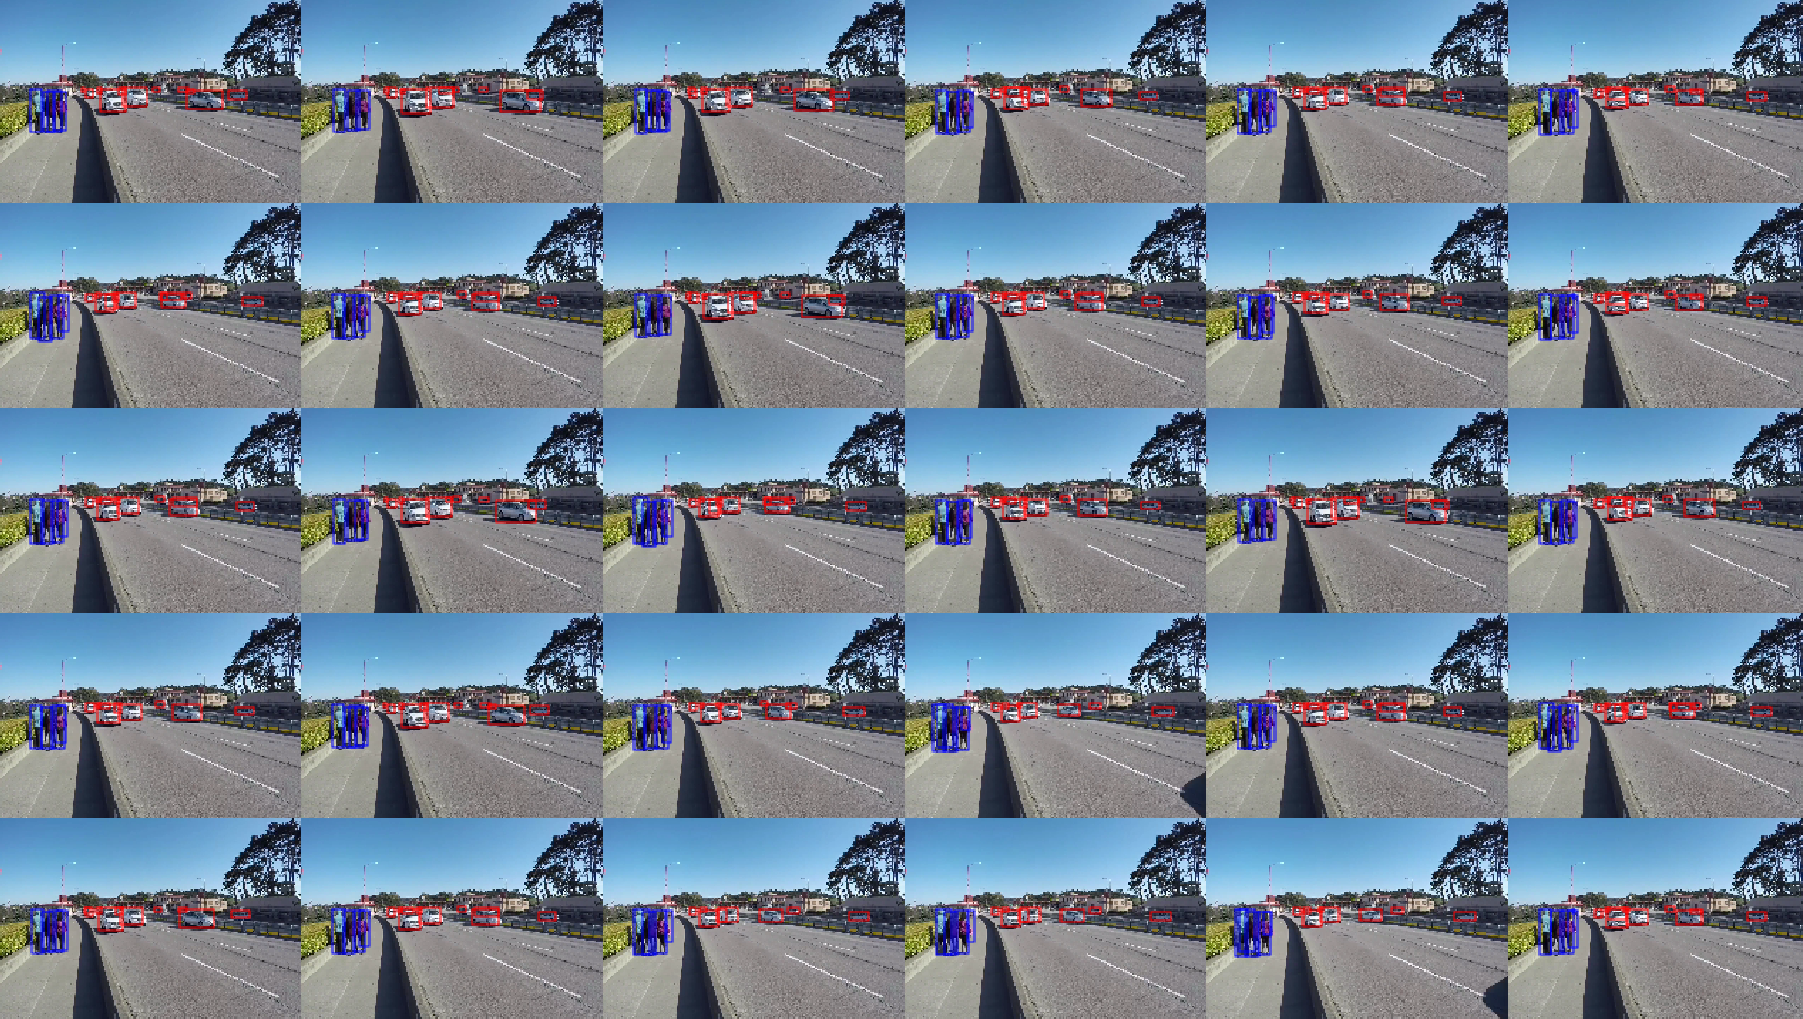
The image below shows the expected output of deepstream-app with source30_1080p_dec_infer-resnet_tiled_display.txt config:
Run precompiled sample applications#
Navigate to the chosen application directory inside
sources/apps/sample_apps.Follow the directory’s README file to run the application.
Note
If the application encounters errors and cannot create Gst elements, remove the GStreamer cache, then try again. To remove the GStreamer cache, enter this command:
$ rm ${HOME}/.cache/gstreamer-1.0/registry.aarch64.binWhen the application is run for a model which does not have an existing engine file, it may take up to a few minutes (depending on the platform and the model) for the file generation and the application launch. For later runs, these generated engine files can be reused for faster loading.
dGPU for Ubuntu#
This section explains how to use DeepStream SDK on a x86 machine.
Run the deepstream-app (the reference application)#
Navigate to the configs/deepstream-app directory on the development kit.
$ cd /opt/nvidia/deepstream/deepstream-9.0/samples/configs/deepstream-app
Enter the following command to run the reference application:
# deepstream-app -c <path_to_config_file>

e.g. $deepstream-app -c source30_1080p_dec_infer-resnet_tiled_display.txt
Where
<path_to_config_file>is the pathname of one of the reference application’s configuration files, found inconfigs/deepstream-app. See Package Contents inconfigs/deepstream-app/for a list of the available files.Config files that can be run with deepstream-app:
source30_1080p_dec_infer-resnet_tiled_display.txtsource30_1080p_dec_preprocess_infer-resnet_tiled_display.txtsource4_1080p_dec_infer-resnet_tracker_sgie_tiled_display.txtsource4_1080p_dec_infer-resnet_tracker_sgie_tiled_display_gpu1.txtsource1_usb_dec_infer_resnet.txtsource2_1080p_dec_infer-resnet_demux.txtsource4_1080p_dec_infer-resnet_tracker_sgie_tiled_display.ymlsource30_1080p_dec_infer-resnet_tiled_display.ymlsource4_1080p_dec_preprocess_infer-resnet_preprocess_sgie_tiled_display.txtsource2_dewarper_test.txt
Note
Refer to Sample Configurations and Streams for detailed explanation of each configuration file.
Note
To dump engine file, run the following command:
$ sudo deepstream-app -c <path_to_config_file>
You can find sample configuration files under
/opt/nvidia/deepstream/deepstream-9.0/samplesdirectory. Enter this command to see application usage:$ deepstream-app --help
To show labels in 2D tiled display view, expand the source of interest with a mouse left-click on the source. To return to the tiled display, right-click anywhere in the window.
Keyboard selection of source is also supported. On the console where application is running, press the
zkey followed by the desired row index (0 to 9), then the column index (0 to 9) to expand the source. To restore the 2D Tiled display view, presszagain.
Expected output (deepstream-app)#
The image below shows the expected output of deepstream-app with source30_1080p_dec_infer-resnet_tiled_display.txt config:
Run precompiled sample applications#
Navigate to the chosen application directory inside
sources/apps/sample_apps.Follow that directory’s README file to run the application.
Note
If the application encounters errors and cannot create Gst elements, remove the GStreamer cache, then try again. To remove the GStreamer cache, enter this command:
$ rm ${HOME}/.cache/gstreamer-1.0/registry.x86_64.bin
When the application is run for a model which does not have an existing engine file, it may take up to a few minutes (depending on the platform and the model) for the file generation and application launch. For later runs, these generated engine files can be reused for faster loading.
How to visualize the output if the display is not attached to the system#
1 . Running with an X server by creating virtual display#
Refer https://docs.nvidia.com/grid/latest/grid-vgpu-user-guide/index.html#configuring-xorg-server-on-linux-server for details.
2 . Running without an X server (applicable for applications supporting RTSP streaming output)#
The default configuration files provided with the SDK have the EGL based nveglglessink as the default renderer (indicated by type=2 in the [sink] groups). The renderer requires a running X server and fails without one.
In case of absence of an X server, DeepStream reference applications provide an alternate functionality of streaming the output over RTSP. This can be enabled by adding an RTSP out sink group in the configuration file. Refer to [sink2] group in source30_1080p_dec_infer-resnet_tiled_display.txt file for an example. Don’t forget to disable the nveglglessink renderer by setting enable=0 for the corresponding sink group.
DeepStream Triton Inference Server Usage Guidelines#
To migrate the Triton version in a DeepStream 8.0 deployment (Triton 25.03 for x86 or Triton 25.08 for Jetson) to a newer version, follow the instructions at DeepStream Triton Migration Guide.
Note
Before running
prepare_classification_test_video.sh, refer note in section Docker Containers.
dGPU#
Pull the DeepStream Triton Inference Server docker
docker pull nvcr.io/nvidia/deepstream:9.0-triton-multiarch
Start the docker
docker run --gpus "device=0" -it --rm -v /tmp/.X11-unix:/tmp/.X11-unix -e DISPLAY=$DISPLAY -e CUDA_CACHE_DISABLE=0 nvcr.io/nvidia/deepstream:9.0-triton-multiarch
Note
The triton docker for x86 is based on Tritonserver Release 2.60.0, NGC Container 26.01. For Jetson, triton docker is based on Tritonserver Release 2.60.0, NGC Container 25.08. It has Ubuntu 24.04.
When the triton docker is launched for the first time, it might take a few minutes to start since it has to generate compute cache.
ARM SBSA (GH200, GB200, DGX Spark)#
Pull the DeepStream Triton Inference Server docker
docker pull nvcr.io/nvidia/deepstream:9.0-triton-sbsa-dgx-spark
Start the docker
sudo docker run -it --rm --runtime=nvidia --network=host -e NVIDIA_DRIVER_CAPABILITIES=compute,utility,video,graphics --gpus all --privileged -e DISPLAY=:0 -v /tmp/.X11-unix:/tmp/.X11-unix -v /etc/X11:/etc/X11 nvcr.io/nvidia/deepstream:9.0-triton-sbsa-dgx-spark
Note
The triton docker for ARM SBSA is based on Tritonserver Release 2.56.0, NGC Container 25.08 and has Ubuntu 24.04.
When the triton docker is launched for the first time, it might take a few minutes to start since it has to generate compute cache.
ARM SBSA docker currently supports only nv3dsink for video display.
Jetson#
DeepStream Triton container image (nvcr.io/nvidia/deepstream:9.0-triton-multiarch) has Triton Inference Server and supported backend libraries pre-installed.
In order to run the Triton Inference Server directly on device, i.e., without docker, Triton Server setup will be required.
Go to samples directory and run the following commands to set up the Triton Server and backends.
$ cd /opt/nvidia/deepstream/deepstream/samples/
$ sudo ./triton_backend_setup.sh
Note
By default script will download the Triton Server Release 2.60.0 (for Jetson platforms). For setting up any other version change the package path accordingly.
Triton backends are installed into /opt/nvidia/deepstream/deepstream/lib/triton_backends by default by the script. User can update infer_config settings for specific folders as follows:
model_repo {
 backend_dir: /opt/nvidia/tritonserver/backends/
}
Single process#
Note
DLA usecases are not applicable on Jetson Thor
DeepStream reference application supports multiple configs in the same process. To run DLA and GPU in same process, set environment variable CUDA_DEVICE_MAX_CONNECTIONS as 32:
$ deepstream-app -c <gpuconfig> -c <dla0config> -c <dla1config>
Triton Inference Server In Deepstream#
For detailed information refer to the following links:
Triton inference server documentation entry: triton-inference-server/server
Triton inference server model repository: triton-inference-server/server
Triton inference server supported backends and QA: triton-inference-server/backend
Triton Model TensorRT optimization for ONNX: triton-inference-server/server