Camera Placement#
Camera placement is a critical step in scene setup, ensuring comprehensive coverage and visibility across the entire environment. This section covers both manual and automatic methods.
Manual Camera Placement:
Load the scene by Scene Loading.
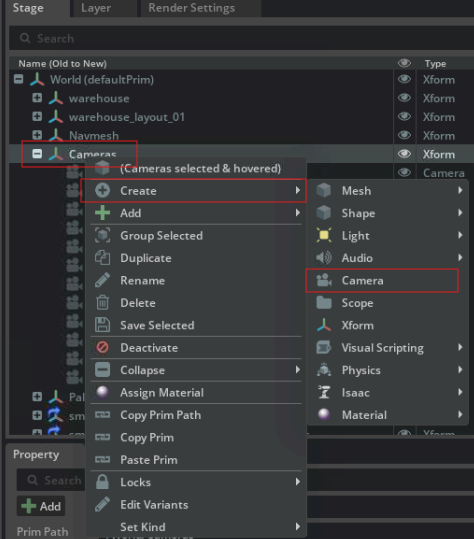
Create Xform prim by Stage > World > Right Click > Create > Xform and then rename it to Cameras.

Create a new camera under Cameras by Right Click > Create > Camera.
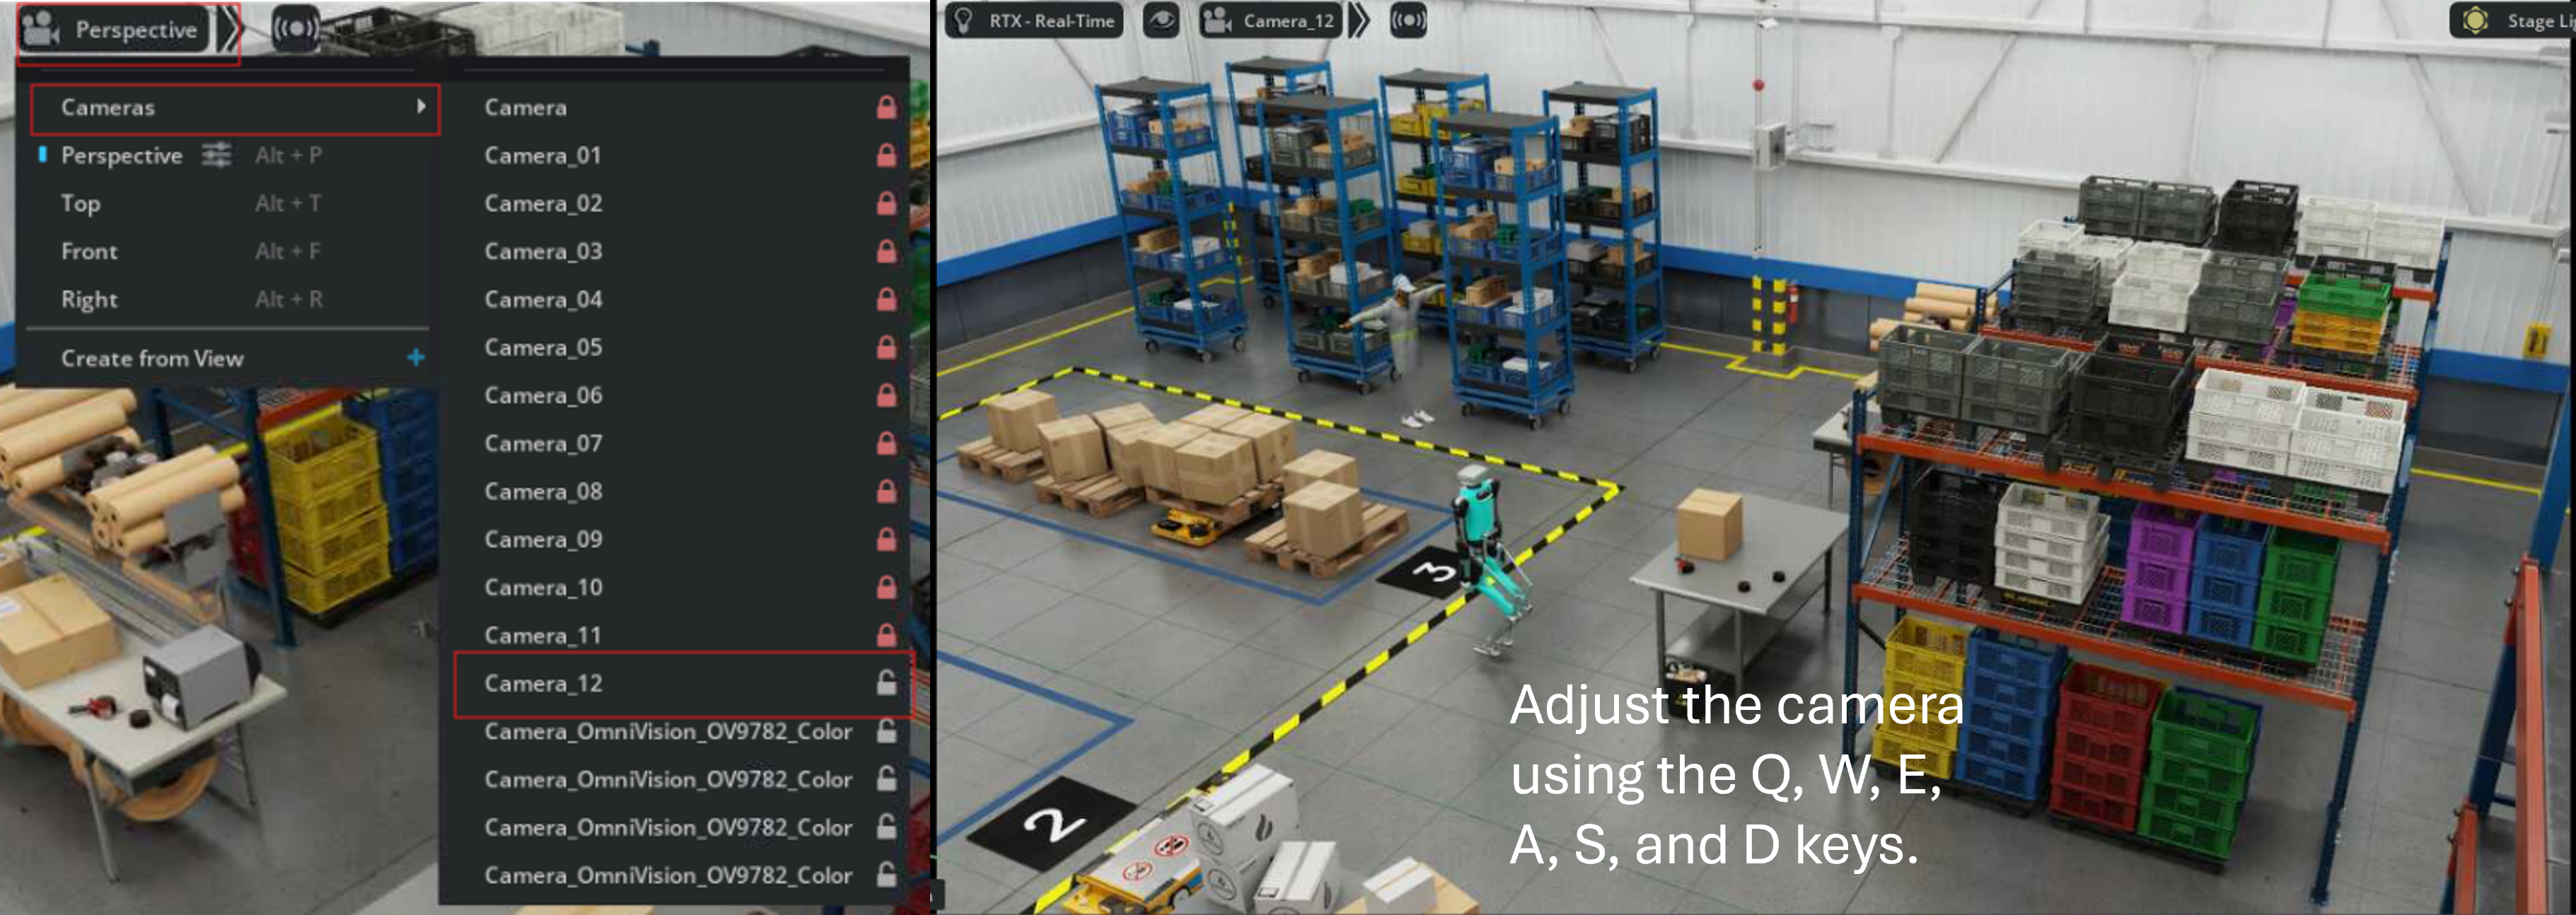
Adjust camera height, look down angles and camera-to-target distance, according to your requirements if applicable.
Save the updated USD file with newly added cameras for subsequent SDG.
Auto Camera Placement:
Tool Activation:
Open Camera Placement tool by Tools > Sensors > Camera Placement.
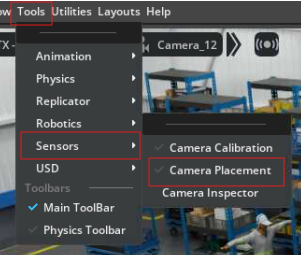
The Camera Placement tool is available on the right side of the Isaac Sim.
Quick Start:
Setting:
Ensure that asset is loaded and NavMesh is baked before starting the following steps.
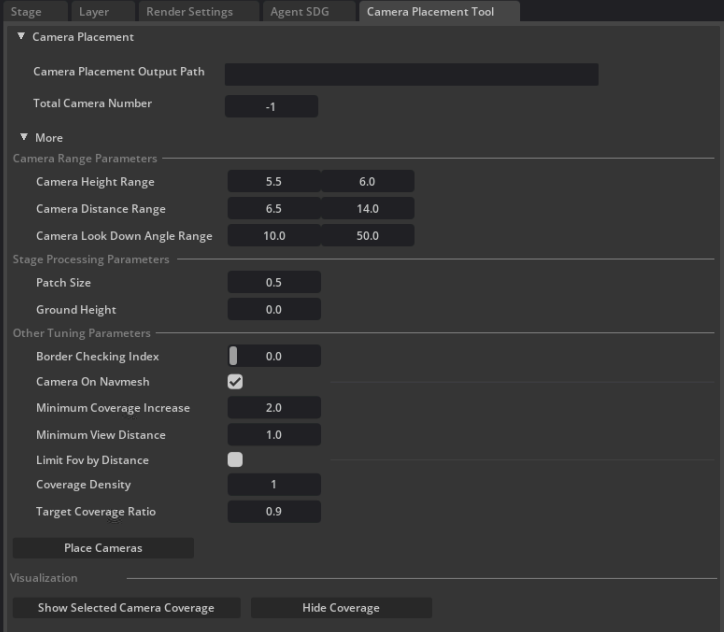
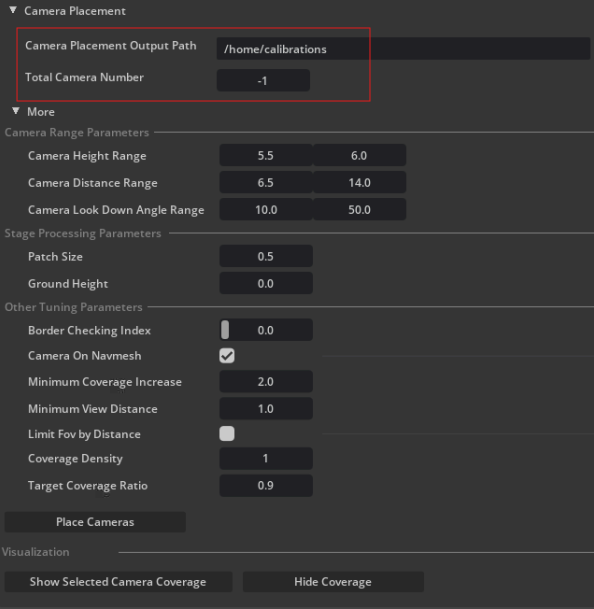
Set the Camera Placement Output Path and the Total Camera Number (Minimum number of cameras required to cover the scene when Total Camera Number = -1) in Camera Placement Section.
(optional) Adjustable parameters:
Set the Camera Range Parameters, including camera height, look down angles, and camera-to-target distance, according to your requirements if applicable.
Set the Stage Processing Parameters to adjust the voxelization resolution of the stage, and customize the ground height setting of the stage if applicable.
Set the Other Tuning Parameters to finetune camera placement logits if applicable.
Generation:
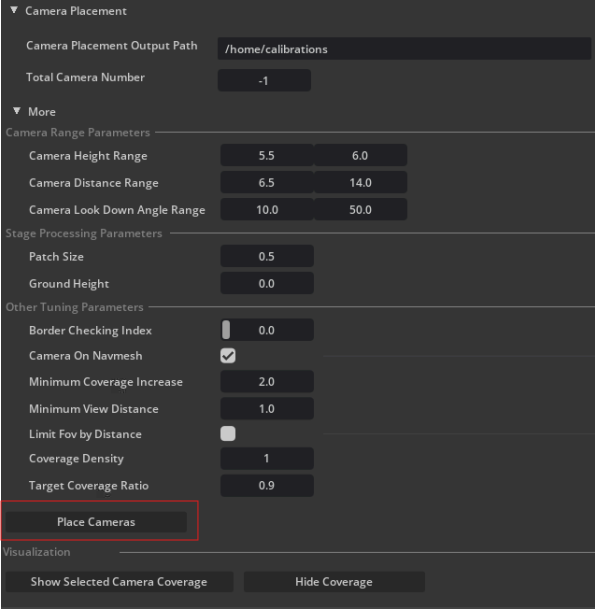
Click the Place Cameras button to start the camera placement, then wait for the process to complete.
Click the Show Selected Camera Coverage button to show the coverage of the selected camera to check whether the camera coverage is enough for the stage.

Click the Hide Coverage button to hide the visualization of the camera coverage.
Save the updated USD file with the current camera placements for subsequent SDG.
Parameter Details:
Camera Placement Settings:
Camera Placement Output Path:
The folder path where the generated camera placement information will be saved.
The output includes camera details such as position, rotation, and focus point.
Total Camera Number: The total number of cameras to be placed in the scene.
More Settings:
Camera Range Parameters:
Camera Height Range: Define the allowable range for camera heights.
Camera Distance Range: Determine the range for camera placement distances. For this value, we want to ensure that for arbitrary point P in the stage, there exists a camera C that can cover the point P and distance between C and P is within this distance scope.
Camera Look Down Angle Range: Specify the range for the camera’s downward tilt angle.
Stage Processing Parameters:
Patch Size: The patch size used to divide the stage into smaller sections, aiding in the estimation of camera coverage during placement.
Ground Height: Define the height of the ground.
Other Tuning Parameters: The parameters to finetune camera placement logits.
Border Checking Index: Control border checking during camera placement. Border checking eliminates camera candidates that are too close to the stage boundary, preventing invalid placements where cameras might be obstructed by obstacles or placed outside the stage.
Camera On Navmesh: Determine whether the camera must be placed on the navigation mesh.
Minimum Coverage Increase: The minimum coverage increase required for a camera placement to be considered valid. If the increase is below this value, placement will stop.
Limit FOV by Distance: Specify whether the camera’s field of view (FOV) should be restricted based on its distance.
Coverage Density: The minimum number of cameras that must cover each patch.
Target Coverage Ratio: The target coverage ratio the cameras must achieve. If the ratio falls below this value, camera placement will stop.
Buttons:
Place Cameras: Start the camera placement process.
Show Selected Camera Coverage: Display the coverage area of the selected camera.
Hide Coverage: Hide the camera coverage visualization.