Dual-port ConnectX-5 PCI Card/PCI Riser Replacement
The system comes with a dual-port Mellanox ConnectX-5 card that is configured to work in Ethernet mode. The card is installed in a PCI riser assembly. The following steps outline how to replace either the card alone, or the entire PCI riser assembly.
Dual-port ConnectX-5 Card Replacement Overview
- Use the nvsm show health commands to verify an issue with the dual-port ConnectX-5 card.
- Obtain the replacement parts - either the dual-port ConnectX-5 card or the PCI riser assemby - from NVIDIA Enterprise Support.
- Shut down the system.
- Label all motherboard tray cables and unplug them.
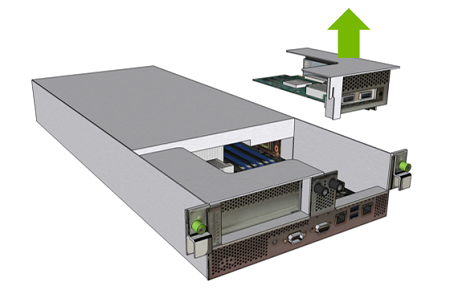
- Remove the motherboard tray and place on a solid, flat work surface.
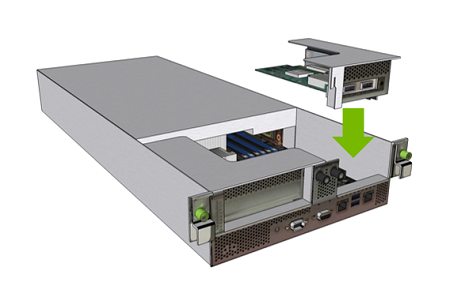
- Remove the right-side PCI card riser.
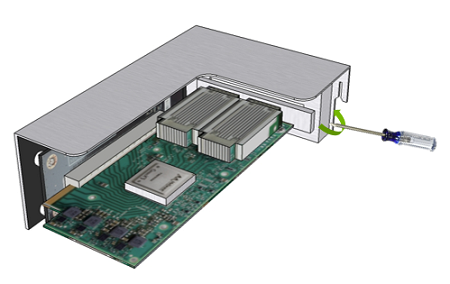
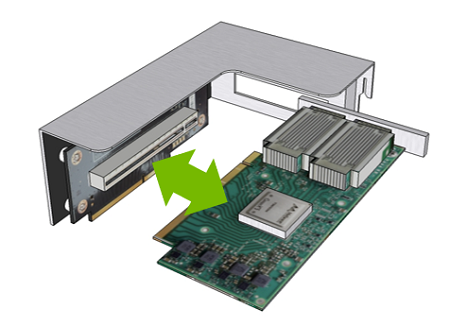
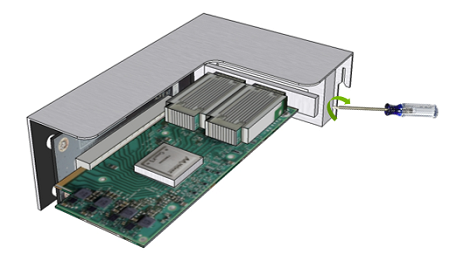
- Replace the PCI card if you are only replacing the card itself.
- Replace the right-side PCI card riser.
- Insert the motherboard tray into the system.
- Plug in all cables using the labels as a reference.
- Power on the system.
- Verify that the ConnectX-5 card is working.
Replacing the Dual-Port ConnectX-5 PCI Card

- Identify the failed card by running
nvsm.
$ sudo nvsm show health
- If the failed component is the Mellanox dual-port card located at PCIe bus 86:00, obtain a replacement part from NVIDIA Enterprise Services.
- If replacing the card alone, unpack it upon receipt and confirm that it comes with a low-profile bracket.
- Power down the system.
- Label all cables connected to the motherboard tray for easy identification when reconnecting.
- Unplug the cables.
- Remove the motherboard tray.
Refer to the instructions in the section Removing the Motherboard Tray.
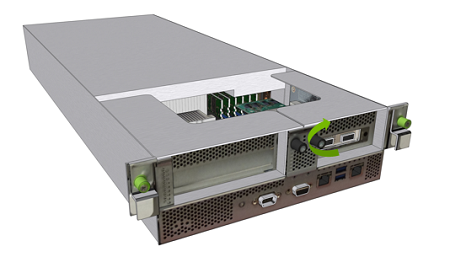
- Remove the right PCI card riser.
- Replace the dual-port PCI card (if applicable).
- Install the right PCI riser.
- Replace the motherboard tray.
Refer to the instructions in the section Installing the Motherboard Tray.
- Connect all the cables to the motherboard tray.
- Apply power to the system.
- Confirm that the PCI card is visible from the system.
$ sudo lspci |grep 86\:00
86:00.0 Ethernet controller: Mellanox Technologies MT27800 Family [ConnectX-5]
86:00.1 Ethernet controller: Mellanox Technologies MT27800 Family [ConnectX-5]
- Confirm that the system is healthy.
$ sudo nvsm show health
- Verify basic connectivity to the network.
Verify mount points are available (if mounted over the ConnectX-5 card).
Consult the DGX-2 User Guide for instructions on reconfiguring network interfaces, if necessary.