Power Supply Carrier Replacement
This chapter describes how to replace a failed DGX-2 System power supply carrier.
The power supply carrier can fail due to a power distribution board failure, or a bad carrier fan.
Power Supply Carrier Replacement Overview
This is a high-level overview of the steps needed to replace a power supply.
- Identify failed power supply carrier using the BMC and submit a service ticket.
- Get replacement power supply carrier from NVIDIA Enterprise Support.
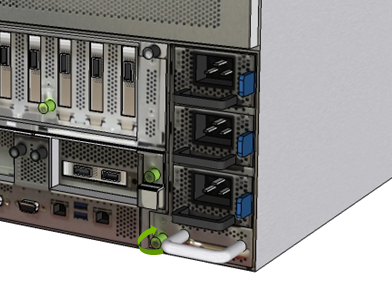
- Identify the power supply carrier using the diagram as a reference.
- Power off the system.
- Remove the power cords from the three power supplies in the carrier to be replaced.
- Remove the failed power supply carrier and place on a solid, stable work surface.
- Move the power supplies to the new carrier.
- Insert new power supply carrier and secure in place with the thumbscrew.
- Insert the power cords and make sure the LEDs light up green (IN/OUT).
- Use the BMC to confirm that the power supply carrier, power supplies, and fans are working correctly.
- Power on the system.
Identifying the Failed Power Supply Carrier
- Log on to the BMC.
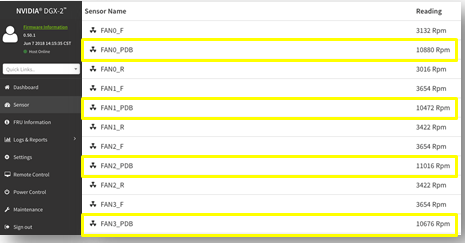
- Click Sensor from the left navigation menu and review the PDB entries. The following diagram shows the PSU carrier location corresponding to each PSU carrier fan (FANx_PDB). If necessary, work with NVES to identify the failed power supply carrier – this could be due to a power distribution board failure.
- Request a new power supply carrier from NVES.
- When the replacement arrives, unpack the item and save the packaging.

Replacing the Power Supply Carrier
- Identify a solid work surface where the components can be rested for the procedure.
- Power off system before replacing power supply carrier.
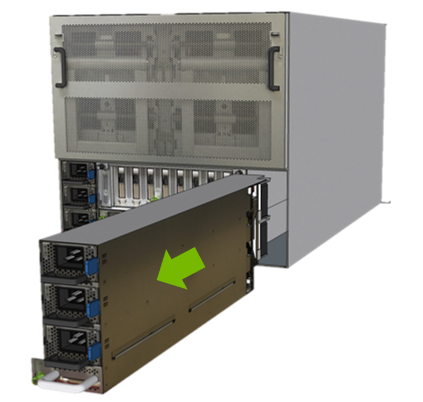
- Unplug the three power cords connected to the power supply carrier cage.
- Remove the power supply carrer.
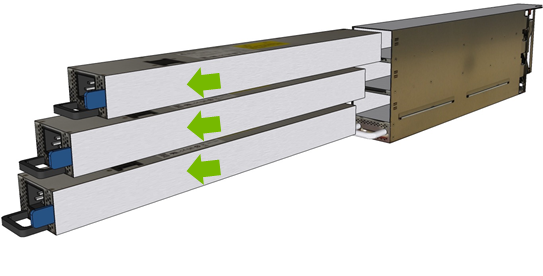
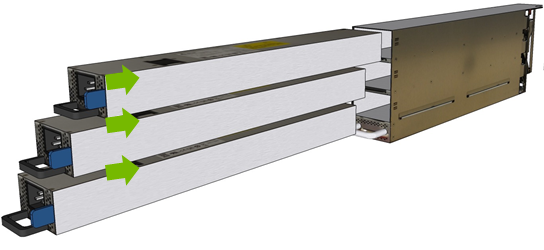
- Move the power supply units to the new carrier.
- Replace the power supply carrier.


Verifying the PSU Carrier is Working
This section describes the steps needed to verify that the PSU carrier has been replaced correctly.
- Plug in the three power cords that were previously unplugged.
- Confirm power supply LEDs light up (IN and OUT).
- Log on to the BMC.
- Go to sensor information and confirm the new power supply carrier is
operational.
Power distribution board, PDB fans and power supplies should be active and working.
- Power on the system.