Motherboard Tray Battery Replacement
Motherboard Tray Battery Replacement Overview
This is a high-level overview of the procedure to replace the DGX-2 System
motherboard tray battery.
- Get a replacement battery - type CR2032.
- Shut down the system.
- Label all motherboad cables and unplug them.
- Remove the motherboard tray, place on a solid, flat surface.
- Remove the left PCI riser card.
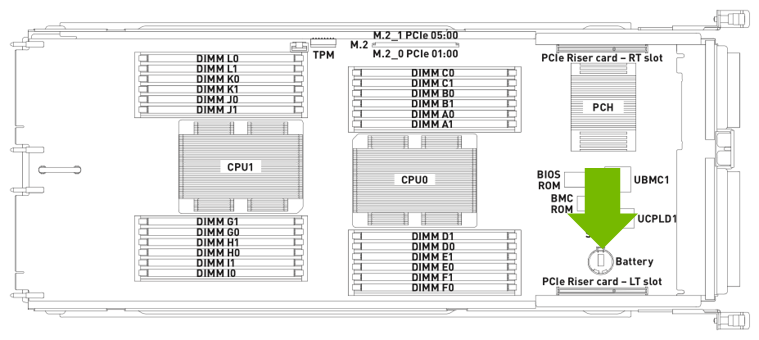
- Use the reference diagram on the lid of the motherboard tray to identify the battery placement.
- Replace the dead battery with the new one.
- Replace the left PCI riser card.
- Insert the motherboard tray into the system.
- Plug in all cables using the labels as a reference.
- Apply power to the system and then boot the system.
- Verify the date and time on the system BIOS.
Replacing the Motherboard Tray Battery

- Power down the system.
- Label all cables connected to the motherboard tray for easy identification when reconnecting.
- Unplug the cables.
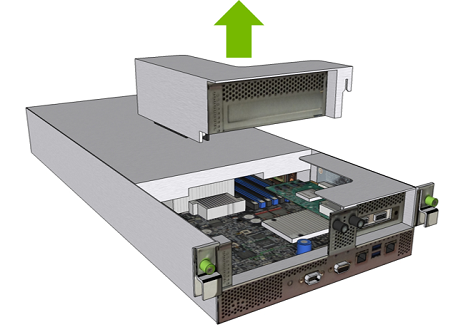
- Remove the motherboard tray.
Refer to the instructions in the section Removing the Motherboard Tray.
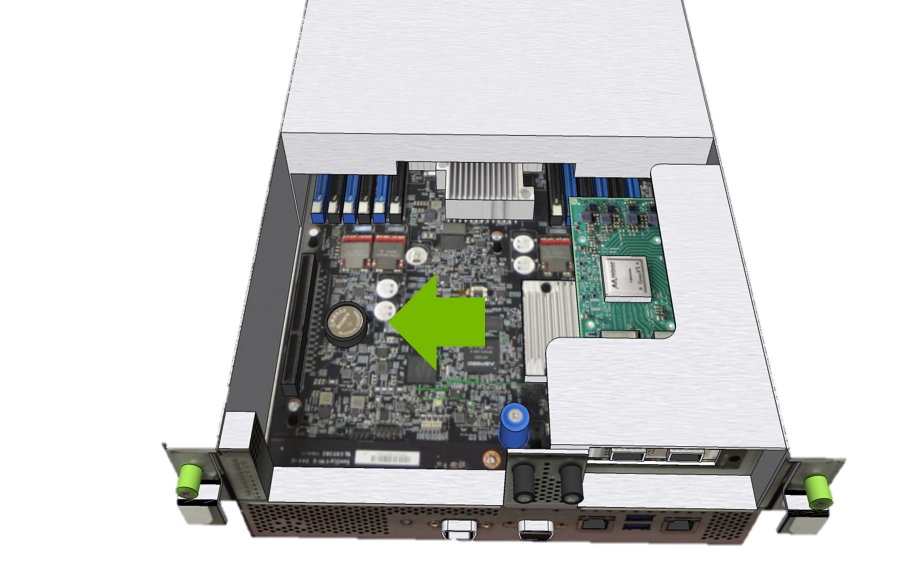
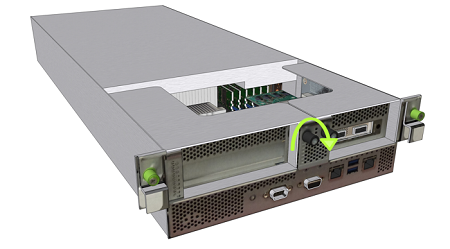
- Remove the left PCI card riser by turning the left black screw.
- Remove left PCI riser card from the motherboard tray.
- Replace the battery.
- Replace left PCI riser card on the motherboard tray.
- Tighten the black screw on the left PCI card riser.
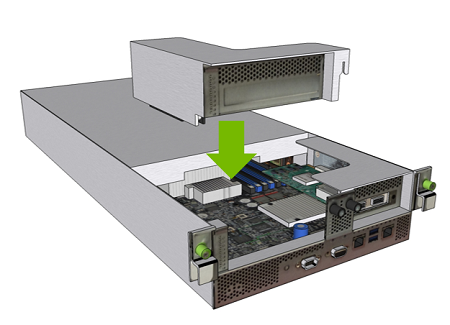
- Replace the motherboard tray.
Refer to the instructions in the section Installing the Motherboard Tray.
- Connect all the cables to the motherboard tray.
- Apply power to the system and then log in.
- Restore the date on the system.
- Set the date.
$ sudo date [MMDDhhmm[[CC]YY][.ss]]
- Sync the date and time to the hardware real time clock.
$ sudo hwclock -w
- Reset the BMC
$ sudo ipmitool mc reset cold
- Set the date.