Step #4: Dataset Creation (Download from S3)
There are many scenarios where datasets are stored in an object storage solution, either cloud-based or on-prem. There are a few different APIs commonly used to authenticate and access object storage, with the S3 API the most commonly used. The following examples will show you how to interact with a cloud-based S3 bucket without authentication. The steps will be comparable to the “Download from Internet” section, but instead of using a command line tool already built into the image, we’ll need to download and install a CLI tool as part of the job commands.
On the same system already authenticated with the target environment, submit the following batch run - it will download the awscli tool, unzip it, install it, and submit an s3 sync command to a publicly available dataset.
            $ ngc batch run --name "aws-dl-cli" --preempt RUNONCE --instance dgxa100.80g.1.norm --commandline "curl 'https://awscli.amazonaws.com/awscli-exe-linux-x86_64.zip' -o 'awscliv2.zip'; unzip awscliv2.zip; ./aws/install -i /usr/local/aws-cli -b /usr/local/bin; aws s3 sync --no-sign-request --region=us-east-1 's3://safecast-opendata-public-us-east-1' '/results'" --result /results --image "nvidia/pytorch:22.04-py3"
--------------------------------------------------
Job Information
    Id: 2870152
    Name: aws-dl-cli
    Number of Replicas: 1
    Job Type: BATCH
    Submitted By: Joseph Handzik
Job Container Information
    Docker Image URL: nvidia/pytorch:22.04-py3
Job Commands
    Command: curl 'https://awscli.amazonaws.com/awscli-exe-linux-x86_64.zip' -o 'awscliv2.zip'; unzip awscliv2.zip; ./aws/install -i /usr/local/aws-cli -b /usr/local/bin; aws s3 sync --no-sign-request --region=us-east-1 's3://safecast-opendata-public-us-east-1' '/results'
    Dockerfile Image Entrypoint: False
Datasets, Workspaces and Results
    Result Mount Point: /results
Job Resources
    Instance Type: dgxa100.80g.1.norm
    Instance Details: 1 GPU, 30 CPU, 244 GB System Memory
    ACE: nv-launchpad-bc-sjc-ace
    Team: nvbc-tme
Job Status
    Created at: 2022-05-02 17:07:31 UTC
    Status: CREATED
    Preempt Class: RUNONCE
--------------------------------------------------
Submitting an ngc batch list command will list this job - once the Status becomes FINISHED_SUCCESS, we can proceed.
            $ ngc batch list
+---------+----------+------------+----------+------------------+----------+----------------+
| Id      | Replicas | Name       | Team     | Status           | Duration | Status Details |
+---------+----------+------------+----------+------------------+----------+----------------+
| 2870152 | 1        | aws-dl-cli | nvbc-tme | FINISHED_SUCCESS | 0:00:21  |                |
+---------+----------+------------+----------+------------------+----------+----------------+
Using the Id value from the above output, issue an ngc dataset convert command.
            $ ngc dataset convert --from-result 2870152 s3-dl-from-cli
Dataset with ID: '99885' created in ACE: 'nv-launchpad-bc-sjc-ace'.
Verify the new dataset’s existence with an ngc dataset list --owned command - s3-dl-from-cli should be at the top of the list.
            $ ngc dataset list --owned
+-------------+------------+-------------+-------------+------------+--------+-----------+-----------+------------+-------+---------+
| Id          | Integer Id | Name        | Description | ACE        | Shared | Size      | Status    | Created    | Owned | Pre-pop |
|             |            |             |             |            |        |           |           | Date       |       |         |
+-------------+------------+-------------+-------------+------------+--------+-----------+-----------+------------+-------+---------+
| r3KPjT13TgC | 99885      | s3-dl-from- |             | nv-        | No     | 260.82 MB | COMPLETED | 2022-05-02 | Yes   | No      |
| Fw3a8Jvljow |            | cli         |             | launchpad- |        |           |           | 17:29:25   |       |         |
|             |            |             |             | bc-sjc-ace |        |           |           | UTC        |       |         |
| D9xMj6VNR-O | 99209      | linux-      |             | nv-        | No     | 1.03 GB   | COMPLETED | 2022-04-19 | Yes   | No      |
| itmadRHwFig |            | kernel-     |             | launchpad- |        |           |           | 17:27:47   |       |         |
|             |            | from-web-ui |             | bc-sjc-ace |        |           |           | UTC        |       |         |
| cHCMiESgRVe | 99164      | linux-      |             | nv-        | No     | 1.03 GB   | COMPLETED | 2022-04-18 | Yes   | No      |
| duwq8vFfIRQ |            | kernel-     |             | launchpad- |        |           |           | 21:11:38   |       |         |
|             |            | from-cli    |             | bc-sjc-ace |        |           |           | UTC        |       |         |
+-------------+------------+-------------+-------------+------------+--------+-----------+-----------+------------+-------+---------+
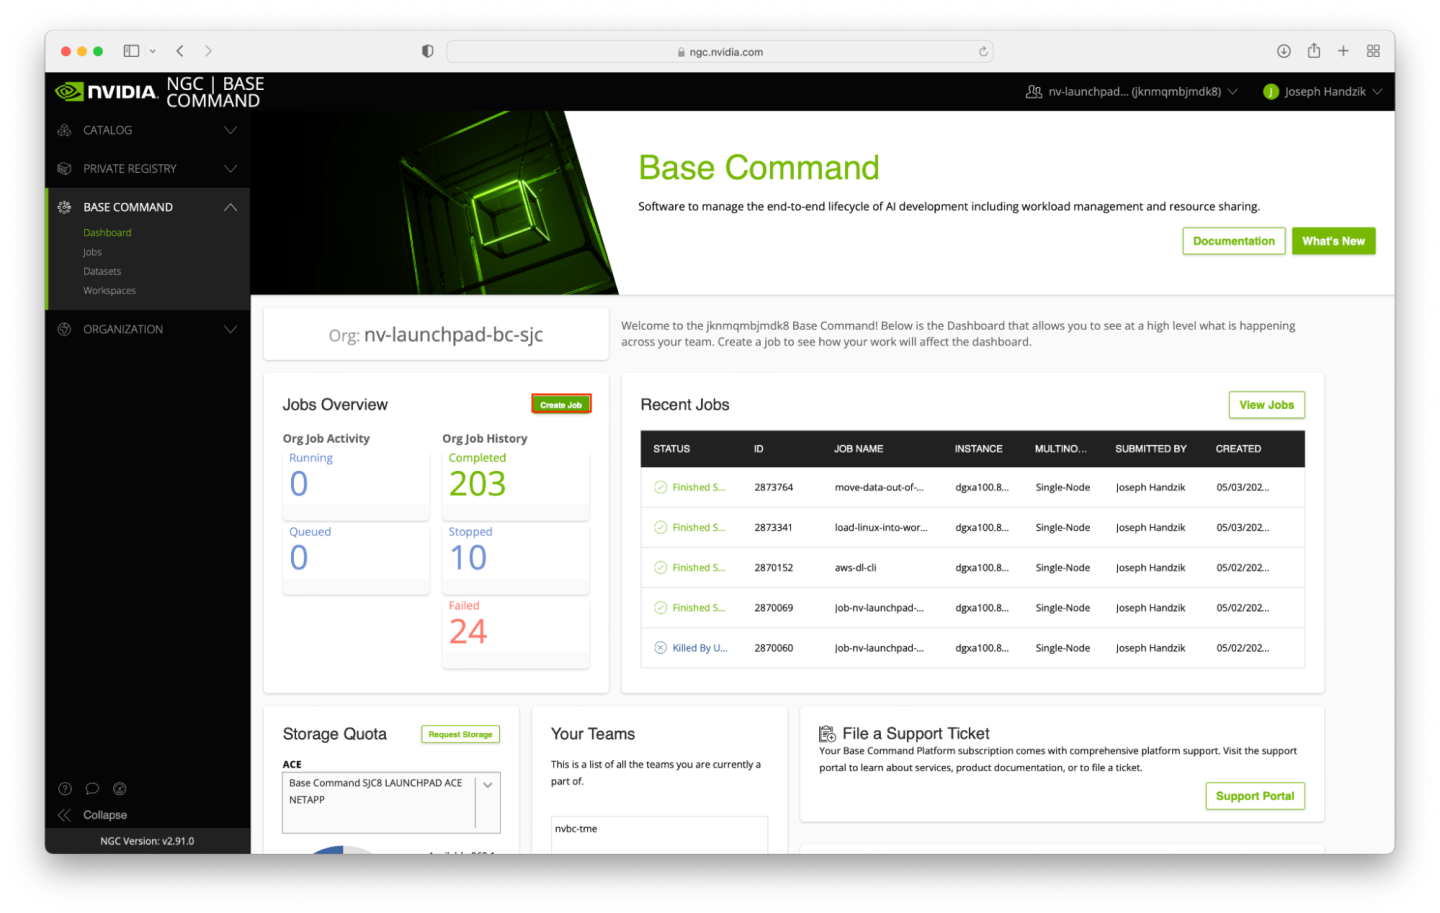
As with the previous rounds of data creation, we can step through the same process using the Web UI. Starting from the Base Command Dashboard screen, click the Create Job button in the Jobs Overview pane.
Populate the Create Job form as follows.
Select your ACE from the list.
Select dgxa100.80g.1.norm in the INSTANCE table.
Ignore the Datasets and Workspaces input tables for now.
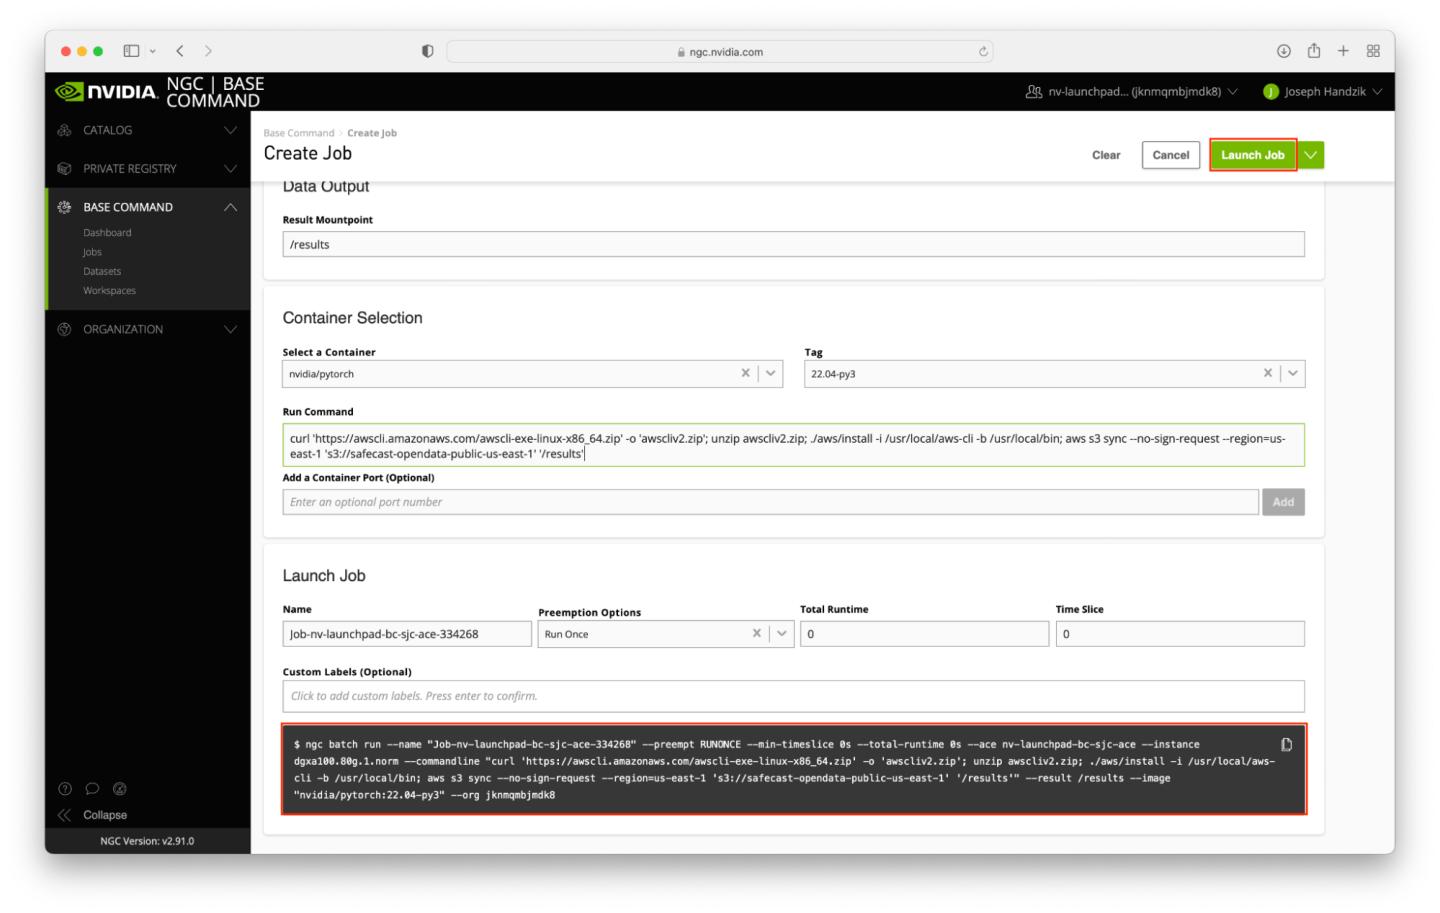
Enter
/resultsfor the Data Output field.Select the
nvidia/pytorchcontainer.Select the tag value of
22.04-py3.For the command, copy the following:
curl 'https://awscli.amazonaws.com/awscli-exe-linux-x86_64.zip' -o 'awscliv2.zip'; unzip awscliv2.zip; ./aws/install -i /usr/local/aws-cli -b /usr/local/bin; aws s3 sync --no-sign-request --region=us-east-1 's3://safecast-opendata-public-us-east-1' '/results'
The remainder of the form can be left with the default values.
To verify that the correct options were selected, check the ngc batch run command on your screen with the values in the screenshot below (the --name argument will differ, and --ace and --org arguments may differ too). When ready, click the Launch Job button near the top right corner of the page.
The job shouldn’t take long to run - around 5 minutes assuming the ACE is relatively idle. You may need to refresh the page to verify that the job status is Finished Success.

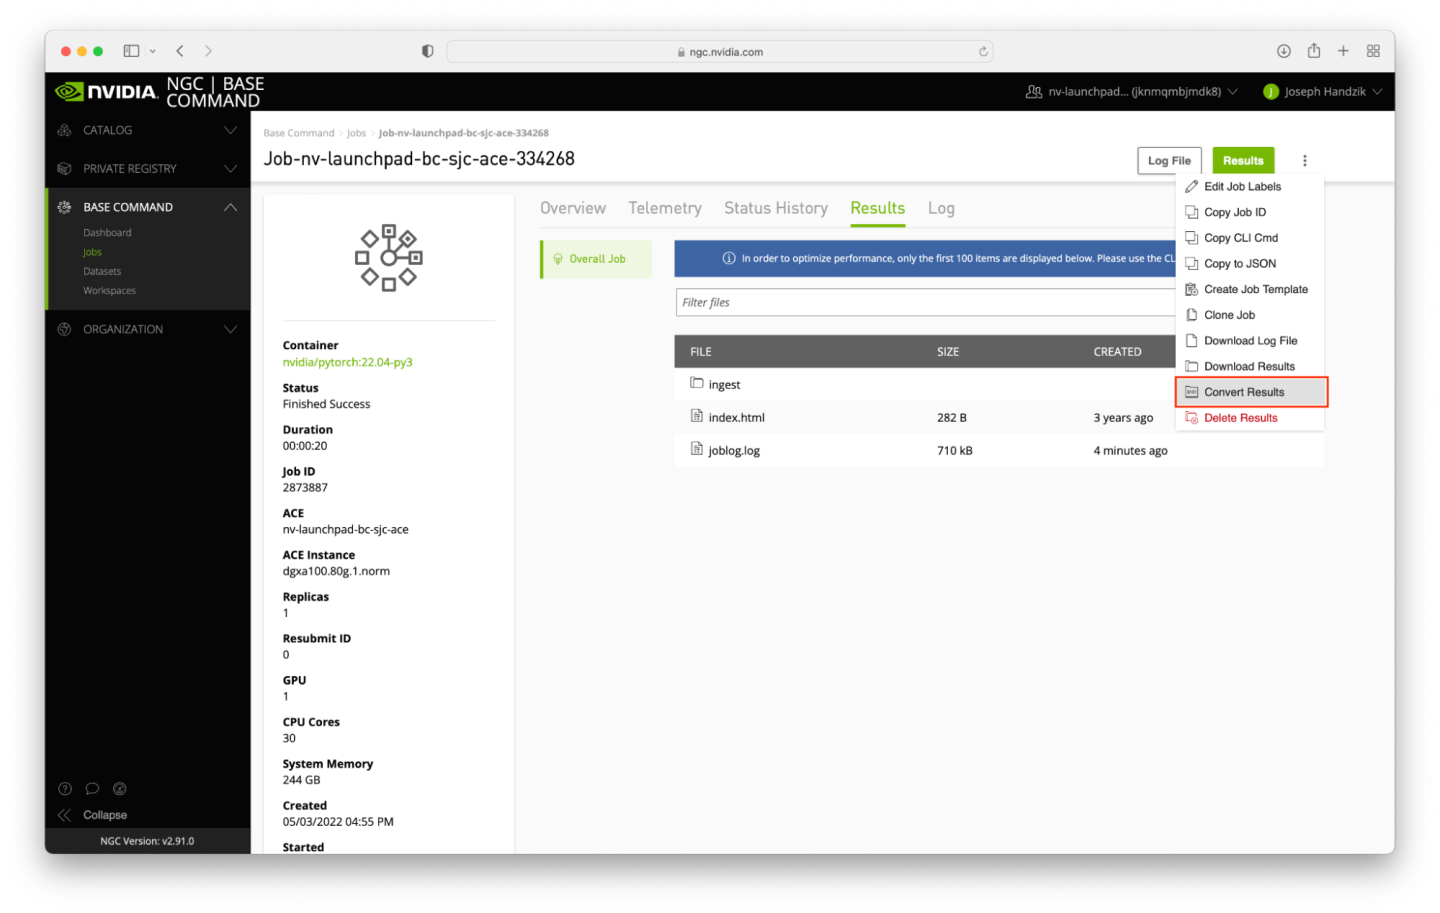
Click on the newly-completed job, and navigate to the Results tab to verify that the downloaded data has been successfully downloaded.
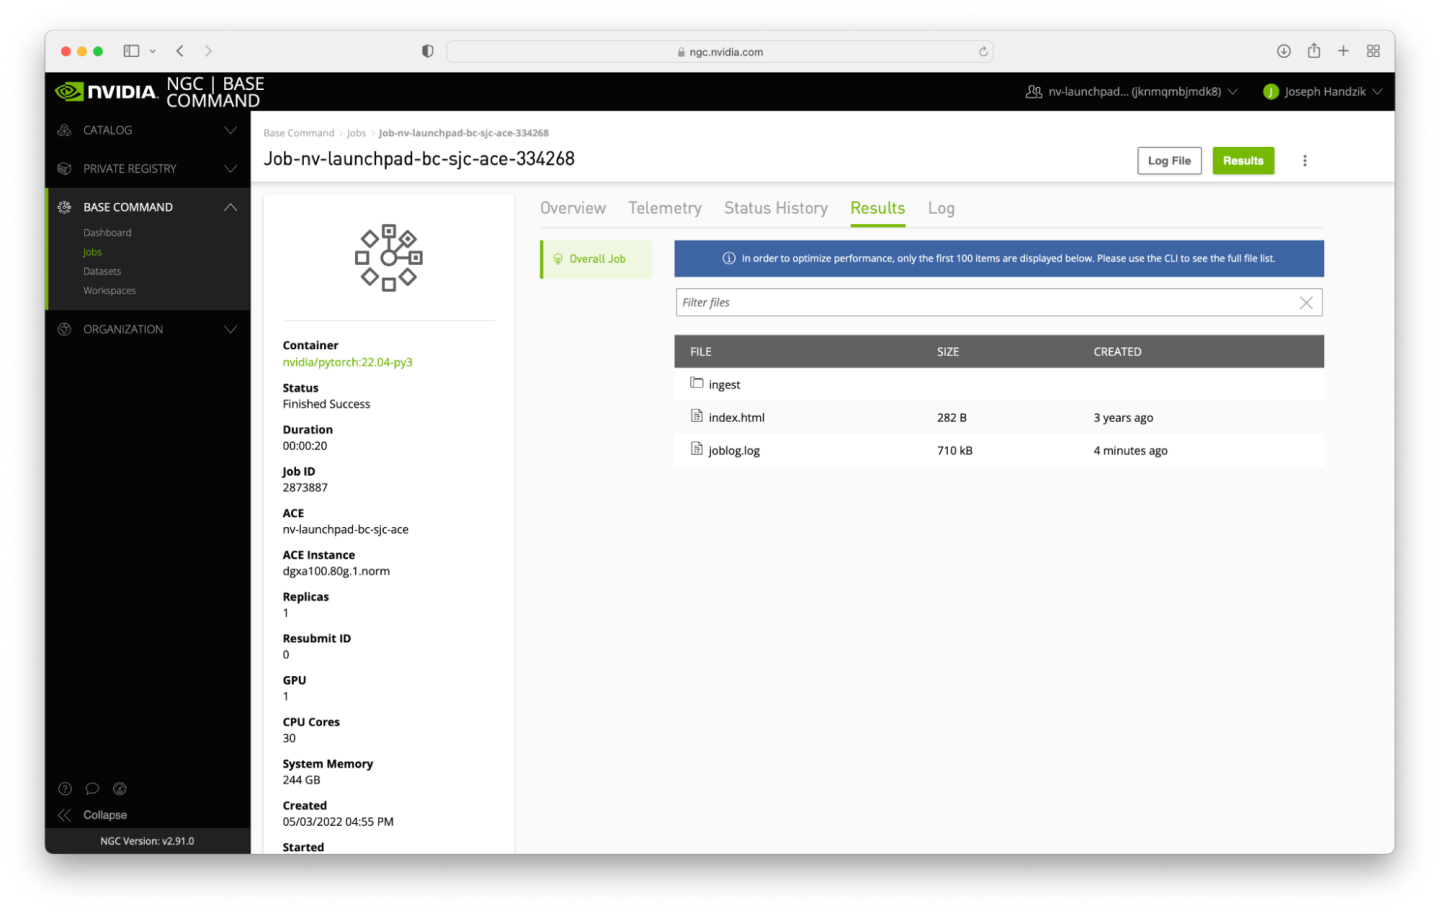
To convert the results directory to a dataset, click on the vertical ellipsis near the top right corner of the page and click the Convert Results button.
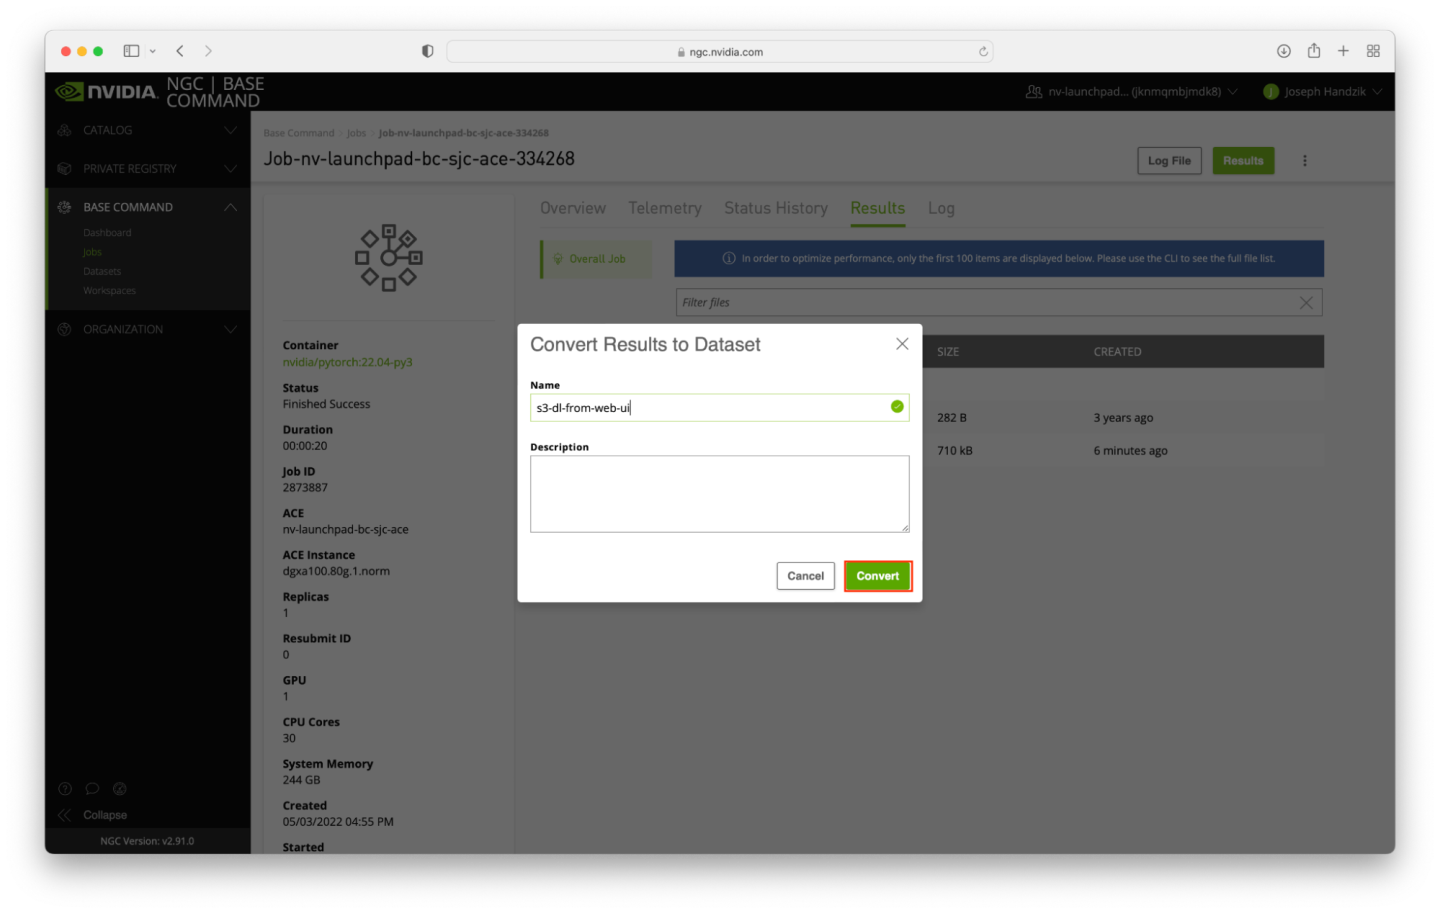
A dialog box will appear - enter s3-dl-from-web-ui in the Name field, and click the Convert button.
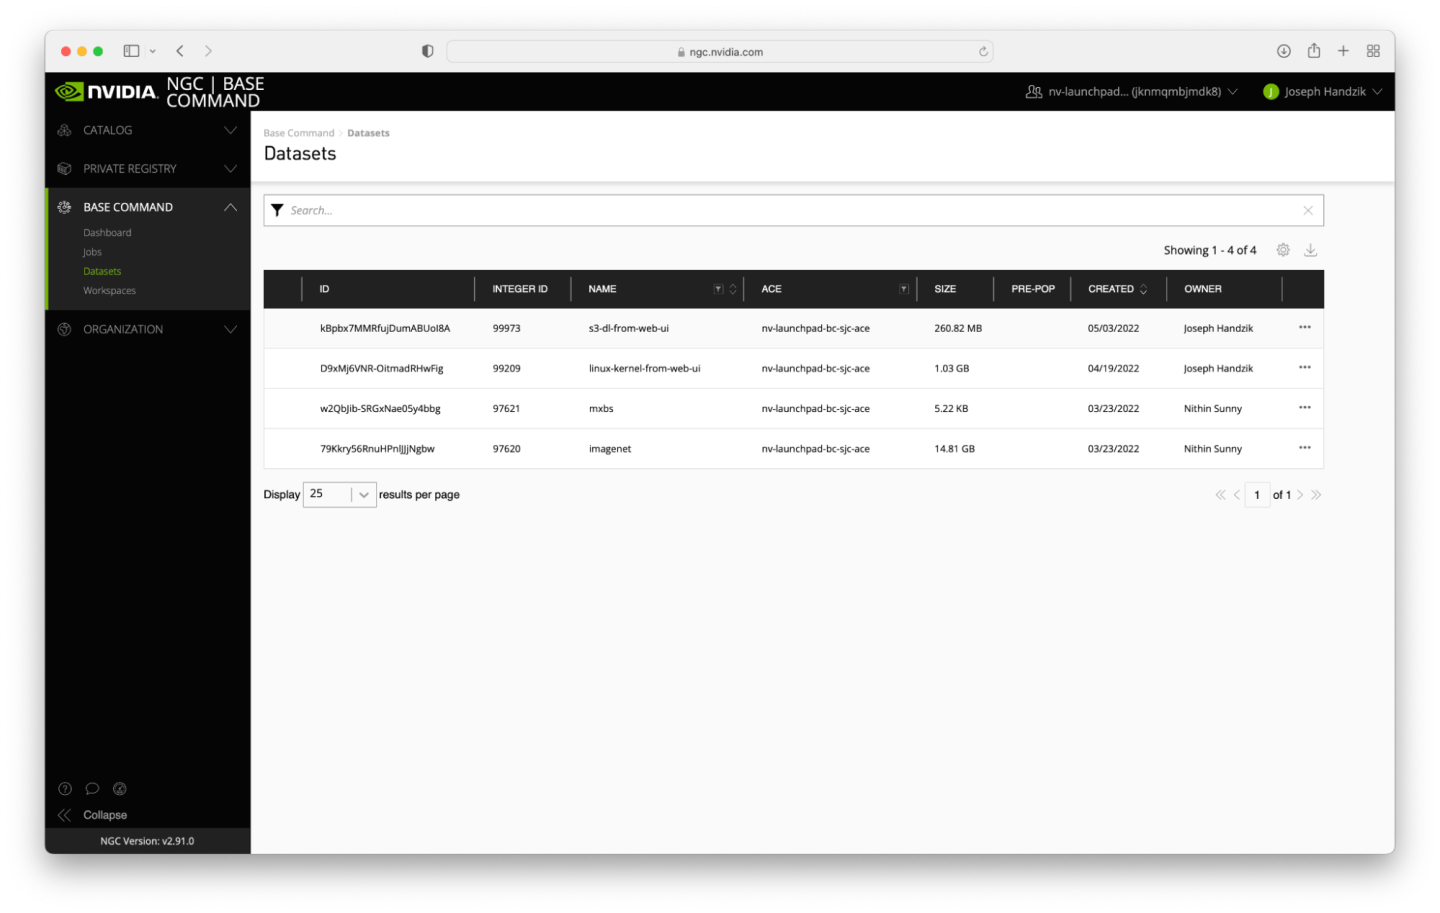
After a short period of time, the Results directory for the job used to create the dataset will become empty, which indicates the dataset conversion has been executed. Click the Datasets link in the navigation pane, just below the Jobs link that has been previously used.
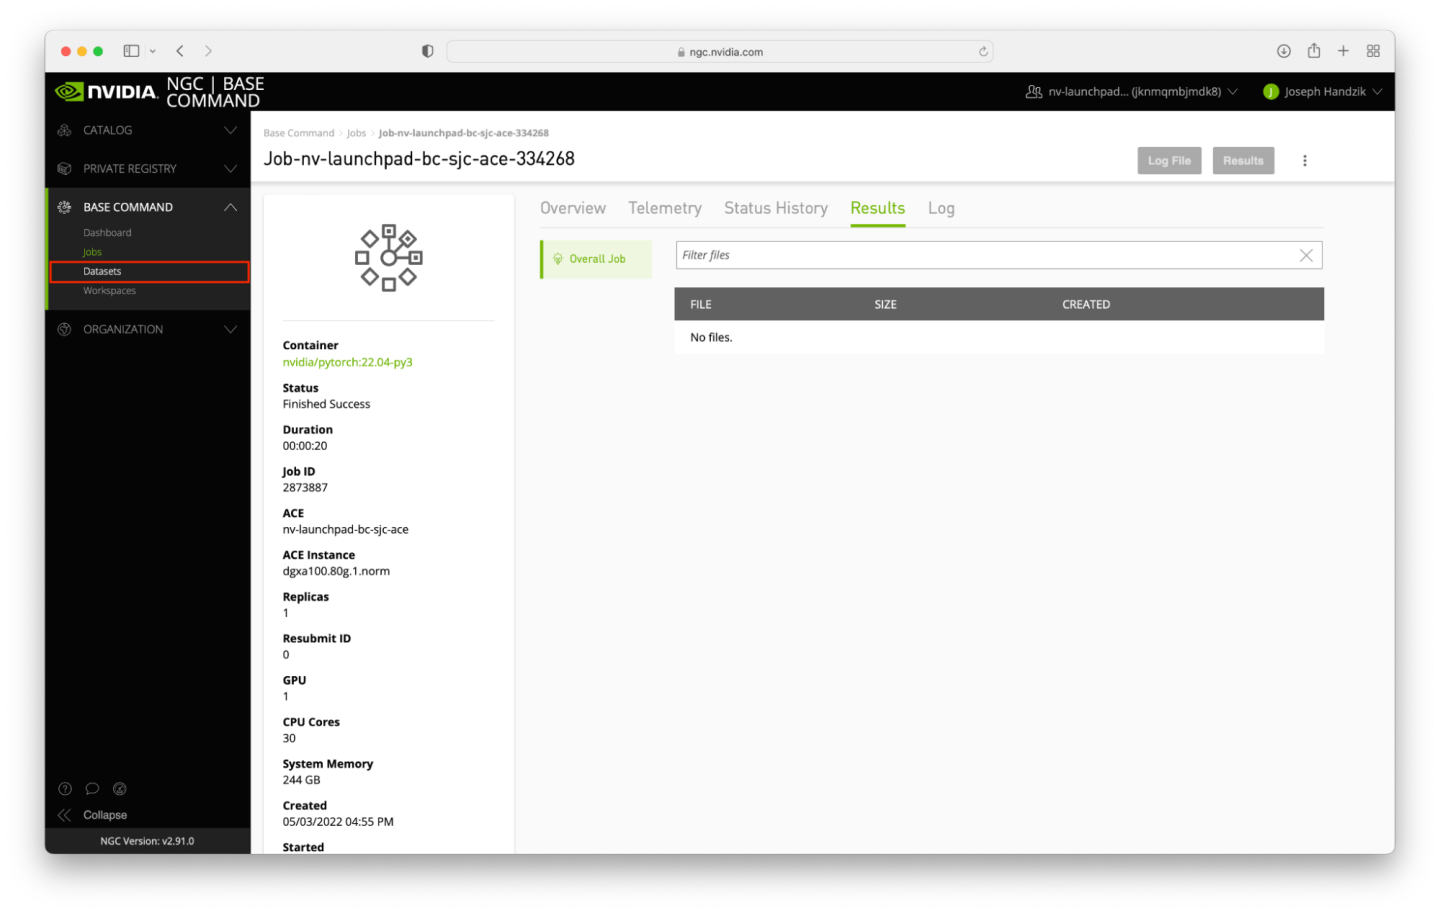
The new dataset should be present in the table on the Datasets page on the top data row.