Step #1: Start a JupyterLab job
Base Command jobs can launch services to enable various workflows - one of which is JupyterLab. This step enables a running environment to pull Jupyter notebooks into and interact with them.
We will launch this job from the Web UI, given that much of the remainder of the lab requires a UI to be useful.
Starting from the Base Command Dashboard screen, click the Create Job button in the Jobs Overview pane.

Populate the Create Job form as follows.
Select your ACE from the list.
Select dgxa100.80g.1.norm in the INSTANCE table.
Ignore the Datasets and Workspaces input tables for now.
Enter
/resultsfor the Data Output field.Select the
nvidia/tensorflowcontainer.Select the tag value of
22.09-tf2-py3.For the command, copy the following:
jupyter lab --ip=0.0.0.0 --allow-root --no-browser --NotebookApp.token='' --notebook-dir=/ --NotebookApp.allow_origin='*' & date; nvidia-smi; sleep 1d
Add a container port just beneath the command of value
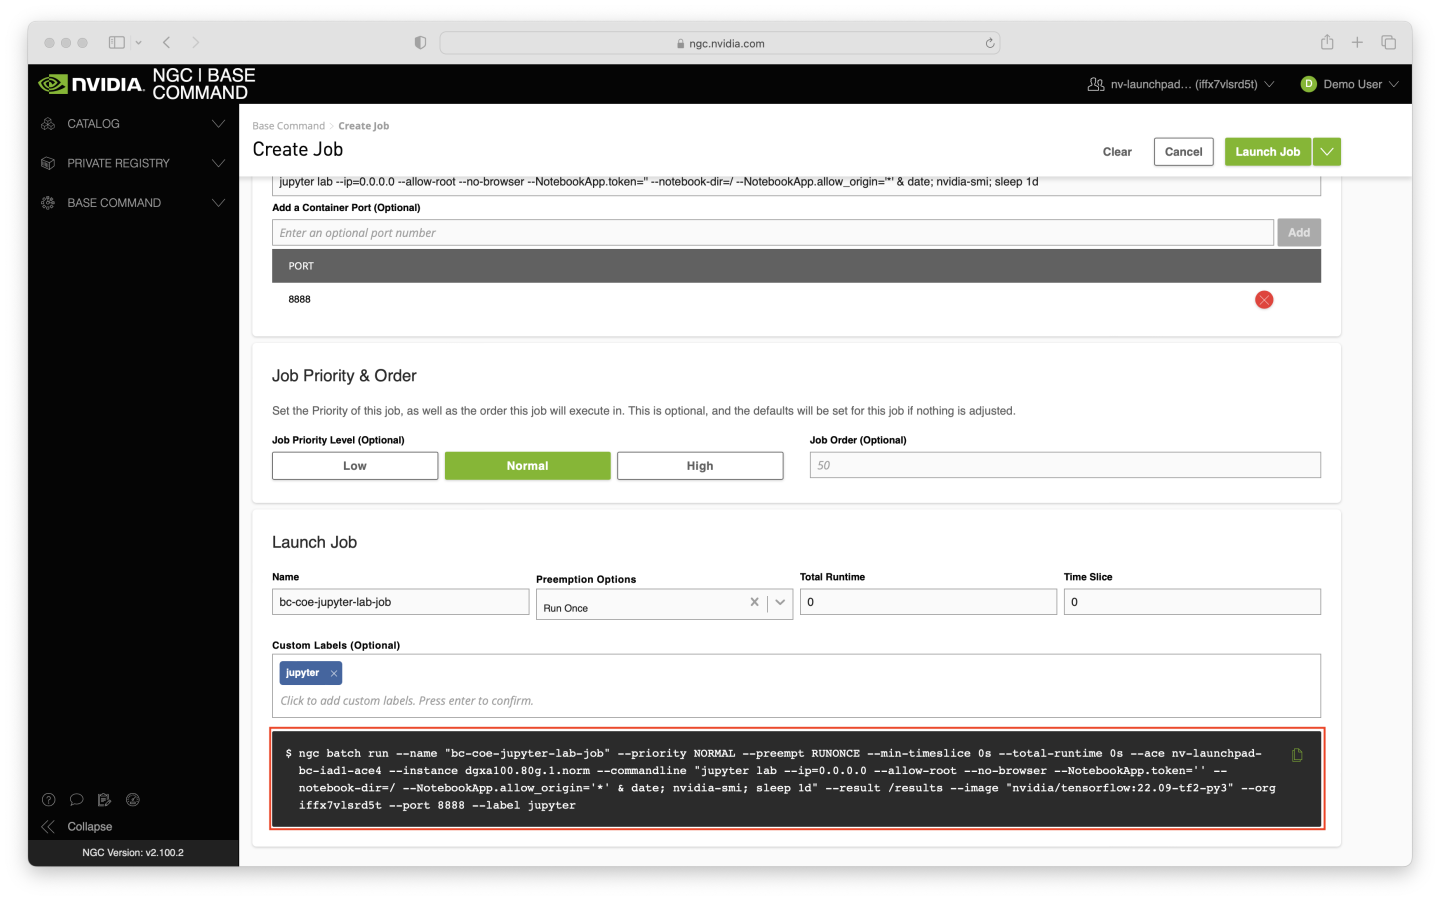
8888- be sure to click the Add button to the right of the text box.The remainder of the form can be left with the default values - but if you like, you can change the job name and add a label to make filtering easier in the future.
To verify that the correct options were selected, check the ngc batch run command on your screen with the values in the screenshot below (the --name argument will differ, and --ace and --org arguments may differ too). When ready, click the Launch Job button near the top right corner of the page.
The job shouldn’t take long to start - around 5 minutes assuming the ACE is relatively idle. You may need to refresh the page to verify that the job status is Running.

In the next step, we will find content in the NGC Catalog to run in the job that was just launched.