Step #6: Testing the modified image on Base Command
With the modified image built, we can now run a test of our application on Base Command. To do so, navigate back to ngc.nvidia.com and click Jobs from the Base Command menu on the left of the screen.

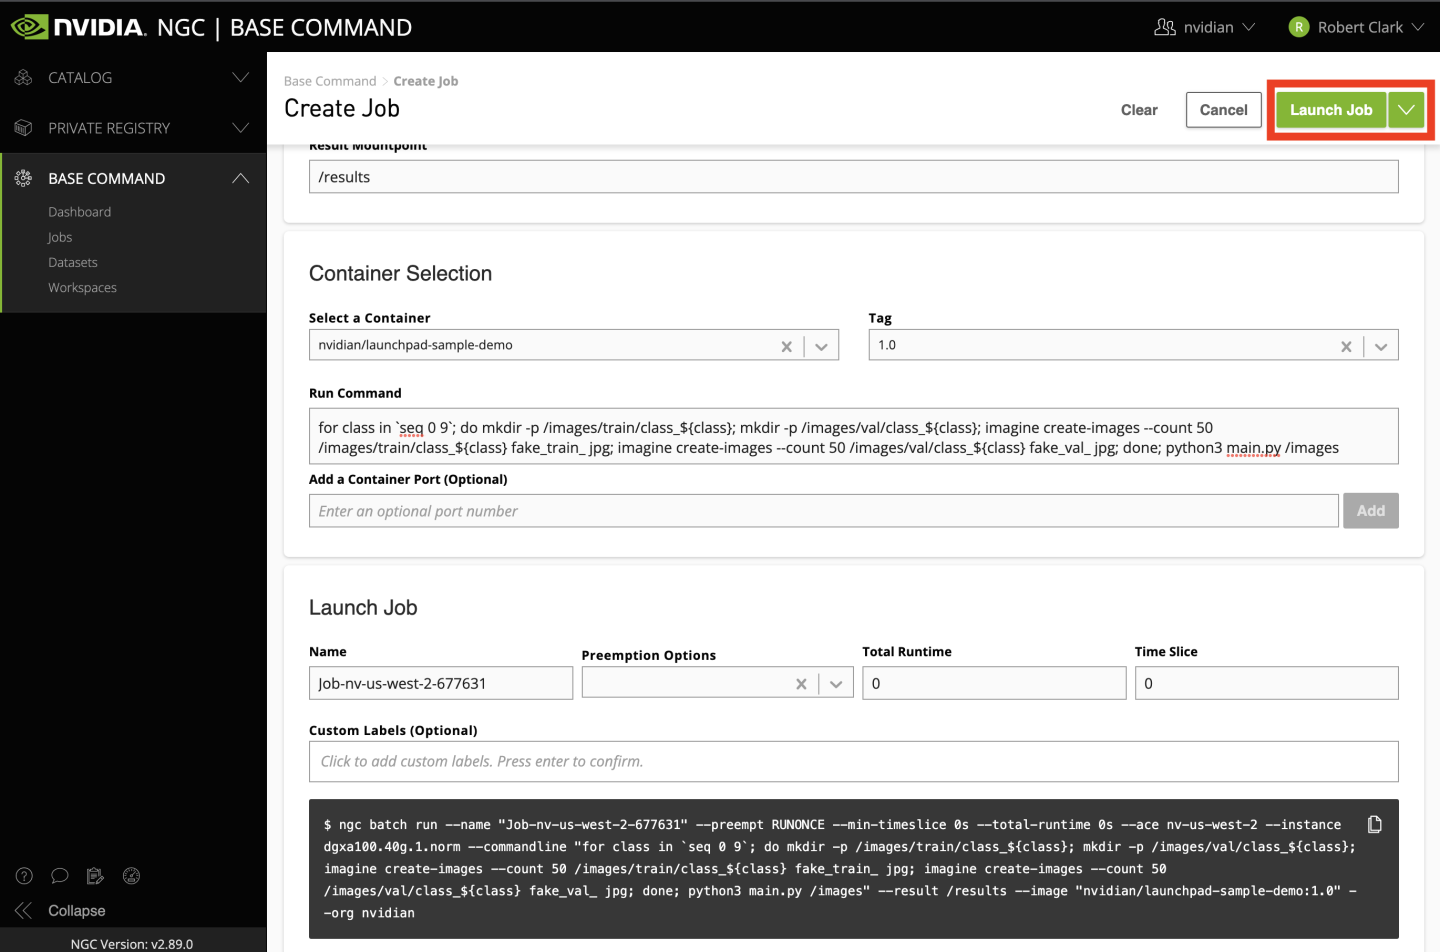
In the new page, click Create Job. Next, fill out the information on the page as follows:
Select your ACE from the list.
Select dgxa100.80g.1.norm in the table. This specifies we want to use a single 80GB A100 GPU from a DGX A100 with 30 CPU cores and 122GB of CPU memory which is enough for our needs.
Ignore the Datasets and Workspaces input tables for now. We will generate data using a tool inside the container. While this method suits our needs for this tutorial, the suggested path for real workloads is to create and upload a dataset to LaunchPad. By uploading a dataset to LaunchPad, it can be shared with team members and be mounted automatically in a container so it doesn’t need to be re-downloaded any time a job is run on LaunchPad.
Enter
/resultsfor the Data Output field. We won’t need this for our sample application, but this is a good place to store results to be viewed and saved later for real workloads.Select the name of your container in the corresponding field. This will match the
nv-launchpad-orgname/sample-imageformat withoutnvcr.io/or the tag from earlier when the image was pushed.Select the tag you pushed in the corresponding field.
For the command, copy the following:
            for class in `seq 0 9`; do mkdir -p /images/train/class_${class}; \
  mkdir -p /images/val/class_${class}; \
  imagine create-images --count 50 /images/train/class_${class} fake_train_ jpg; \
  imagine create-images --count 50 /images/val/class_${class} fake_val_ jpg; \
done; \
python3 main.py /images
This creates a fake image dataset using the Imageinary application from NVIDIA which was installed in our custom image. The fake dataset consists of 10 different image “classes’’ in the /images/train and /images/val directories with each class consisting of 50 random images. After creating the dataset, it will train an image classification application for 90 epochs.
The remainder of the form can be left with the default values. Click Launch Job in the top right corner of the form to start the job.
After submitting the job, you will be taken to the Jobs page where you can view the status of the job. By clicking on your job, you will be taken to the job status page where you can view job details, telemetry, log output, status, and more. Depending on resource availability, it might take some time before the job is launched.
After the job is launched, open the Log tab to view the job logs. The logs will first show creation of the dataset followed by displaying training status including throughput, accuracy, learning rate, and loss values. When the application finishes, you will see a summary similar to the following:
            DLL 2022-03-29 21:29:46.494937 - Summary: train.loss : 39.76681  train.compute_ips : 361.89 img/s train.total_ips : 296.99 img/s train.lr : 0.00010000000000000003  val.top1 : 10.00 % val.top5 : 50.00 % val.loss : 73093182325260.28125  val.compute_ips : 1238.29 img/s val.total_ips : 1231.07 img/s val.compute_latency : 0.20187 s
  DLL 2022-03-29 21:29:46.495764 - Summary: train.data_time : 0.18867 s train.compute_time : 0.72340 s val.data_time : 0.00118 s val.compute_latency_at100 : 0.20902 s val.compute_latency_at99 : 0.20631 s val.compute_latency_at95 : 0.20581 s
  Experiment ended
As anticipated, our accuracy (see the val.top1 and val.top5 percentages) is very poor and is equivalent to randomly guessing a class given our images are fake noise, but this is enough to demonstrate basic functionality.