

The Isaac Lab CLI#
The Isaac Lab command-line interface (CLI) lets you work with your project from
a terminal. You’ll use it to check simulation tasks, train policies, and run
saved policies. In this module, commands start with uv run isaaclab: uv run
uses your project’s Python environment, and the next word you type (such as
random_agent) tells Isaac Lab what you want to do.
You don’t need to learn every command now. Let’s look at a few examples so you can recognize the pattern. Use the project you created in Project Generation, and run task commands from its root folder.
Read an Isaac Lab Command#
Most commands follow this pattern:
uv run [uv options] isaaclab <command> [command options] [configuration selectors]
The command changes as you move through a task’s lifecycle:
Start with the
zero_agentto check that the task runs without errors.Next run
random_agentto see how random actions affect the simulation.Then use
benchmark runtimeto measure simulation speed.When you’re ready to train a policy, use
train.Finally, run
playto see a saved policy in action.
Get Help for a Command#
The built-in help is a useful place to start when you want to explore a command’s options. Start with the interface overview, then ask about a specific operation:
uv run isaaclab --help
uv run isaaclab random_agent --help
Your generated project also provides a helper for finding task IDs and presets:
uv run python scripts/list_envs.py --show_presets
That command runs a Python script in your project rather than an Isaac Lab CLI command. Its output helps you choose the task to pass to the CLI.
Run a Short Simulation Check#
You’ve already tried the zero-action agent. The random agent gives the cart random forces, letting you check how actions affect the simulation:
uv run isaaclab random_agent               \
  --task IsaacLabTutorial-Balance-Cartpole \
  --num_envs 16                            \
  --max_steps 300                          \
  --visualizer newton
Here’s how to read the command:
random_agentchooses random actions for the task.--taskselects the task registered by your generated project.--num_envs 16runs sixteen independent copies of the cartpole task.--max_steps 300stops the check after 300 control steps.--visualizer newtonopens a viewer. Use--visualizer noneon a machine without a display.
The carts will move irregularly. This checks that actions reach the simulation; you’ll train a policy to balance the pole in later lessons.
Recognize Options and Selectors#
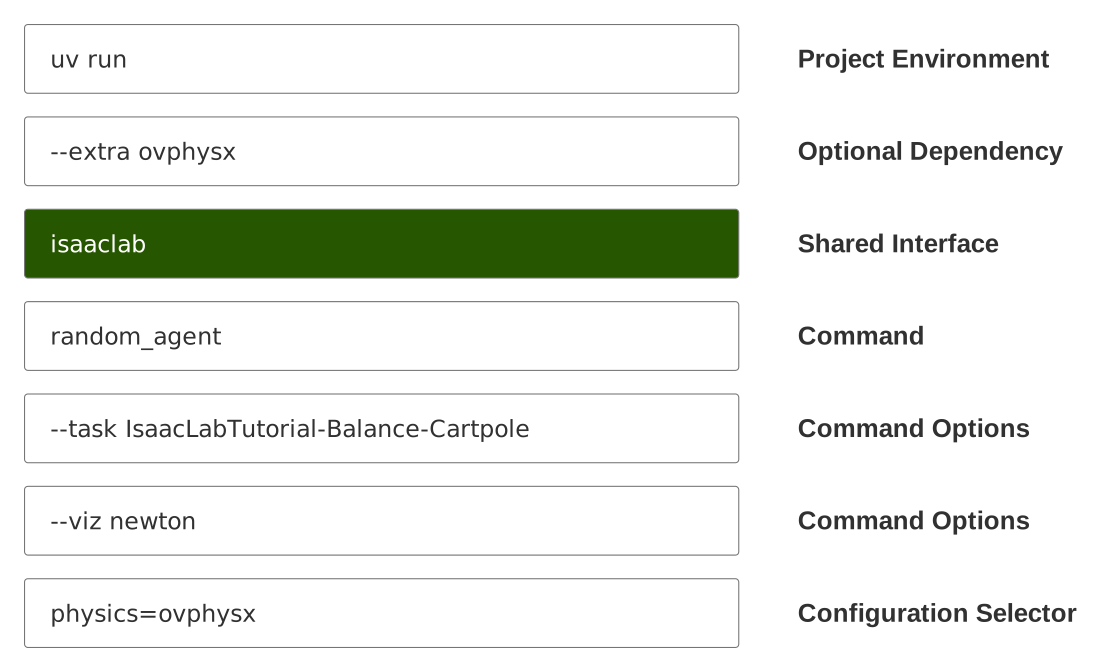
Read each layer in order. This example makes OV PhysX available with a uv
extra, then selects it with a task configuration selector.#
Command options use hyphens, like --num_envs 16. Task configuration selectors
use key=value: physics=<backend> chooses physics, renderer=<backend>
chooses how camera images are produced, and presets=<name> applies a
task-specific preset. The --visualizer option separately chooses how you view the
simulation. Available choices depend on the task and installed dependencies.
Optional integrations may need a project extra. A uv option such as
--extra <extra> goes before isaaclab; a selector goes after the
command options. Making an integration available and selecting it for a task
are separate steps. Check your project’s pyproject.toml and command help for
supported extras and selectors. Keep the generated defaults while you establish
a working baseline.
We’ll introduce many more commands throughout the module, along with the options you need for each activity. For now, focus on recognizing the command structure and knowing where to find help. Each lesson will explain its commands when you’re ready to use them.
Review#
Check Your Understanding#
Which option limits the number of control steps in a random-agent run?
Answer
--max_steps limits the number of control steps in the random-agent run.
Apply What You Learned#
How would changing --num_envs 16 to --num_envs 1 affect the short simulation
check? Explain your prediction and which settings remain fixed. If you tried
both runs, compare your prediction with the output.
Agent Tutor Prompt
Copy this prompt and include your answer:
Review my answer to this question: How would changing
--num_envs 16to--num_envs 1affect the short simulation check? Explain your prediction and which settings remain fixed. If you tried both runs, compare your prediction with the output.My answer: [paste your answer here].
Check my reasoning about operation, task, environment count, step limit, and prediction versus observed output if supplied. Ask for missing context rather than assuming it. Identify what I explained well, point out one gap or misconception, and ask a follow-up question that helps me improve my answer. Let me revise it before supplying a complete answer.
Key Takeaways#
Read commands in layers:
uvoptions, the Isaac Lab operation, command options, and task selectors.Run task commands from your generated project’s root folder and use built-in help to explore options.
Use the same task across checks, benchmarking, training, and playback; the module introduces each command as you need it.
Resources#
Isaac Lab quickstart — An overview of the interface and optional integrations.