

SO-101 Robot#
In this lesson, we’ll add the SO-101 robot to the scene and inspect the results. We’ll begin with the SO-101 on an empty floor so its shape and joints are easy to inspect. The SO-101 is a five-joint robot arm with a two-finger gripper. The arm is mounted on a fixed base, and the gripper can open and close to grasp objects.
This module uses an SO-101 asset with a wrist-mounted camera. The teacher first uses simulation state, and the distilled student later uses that camera image and robot joint state.
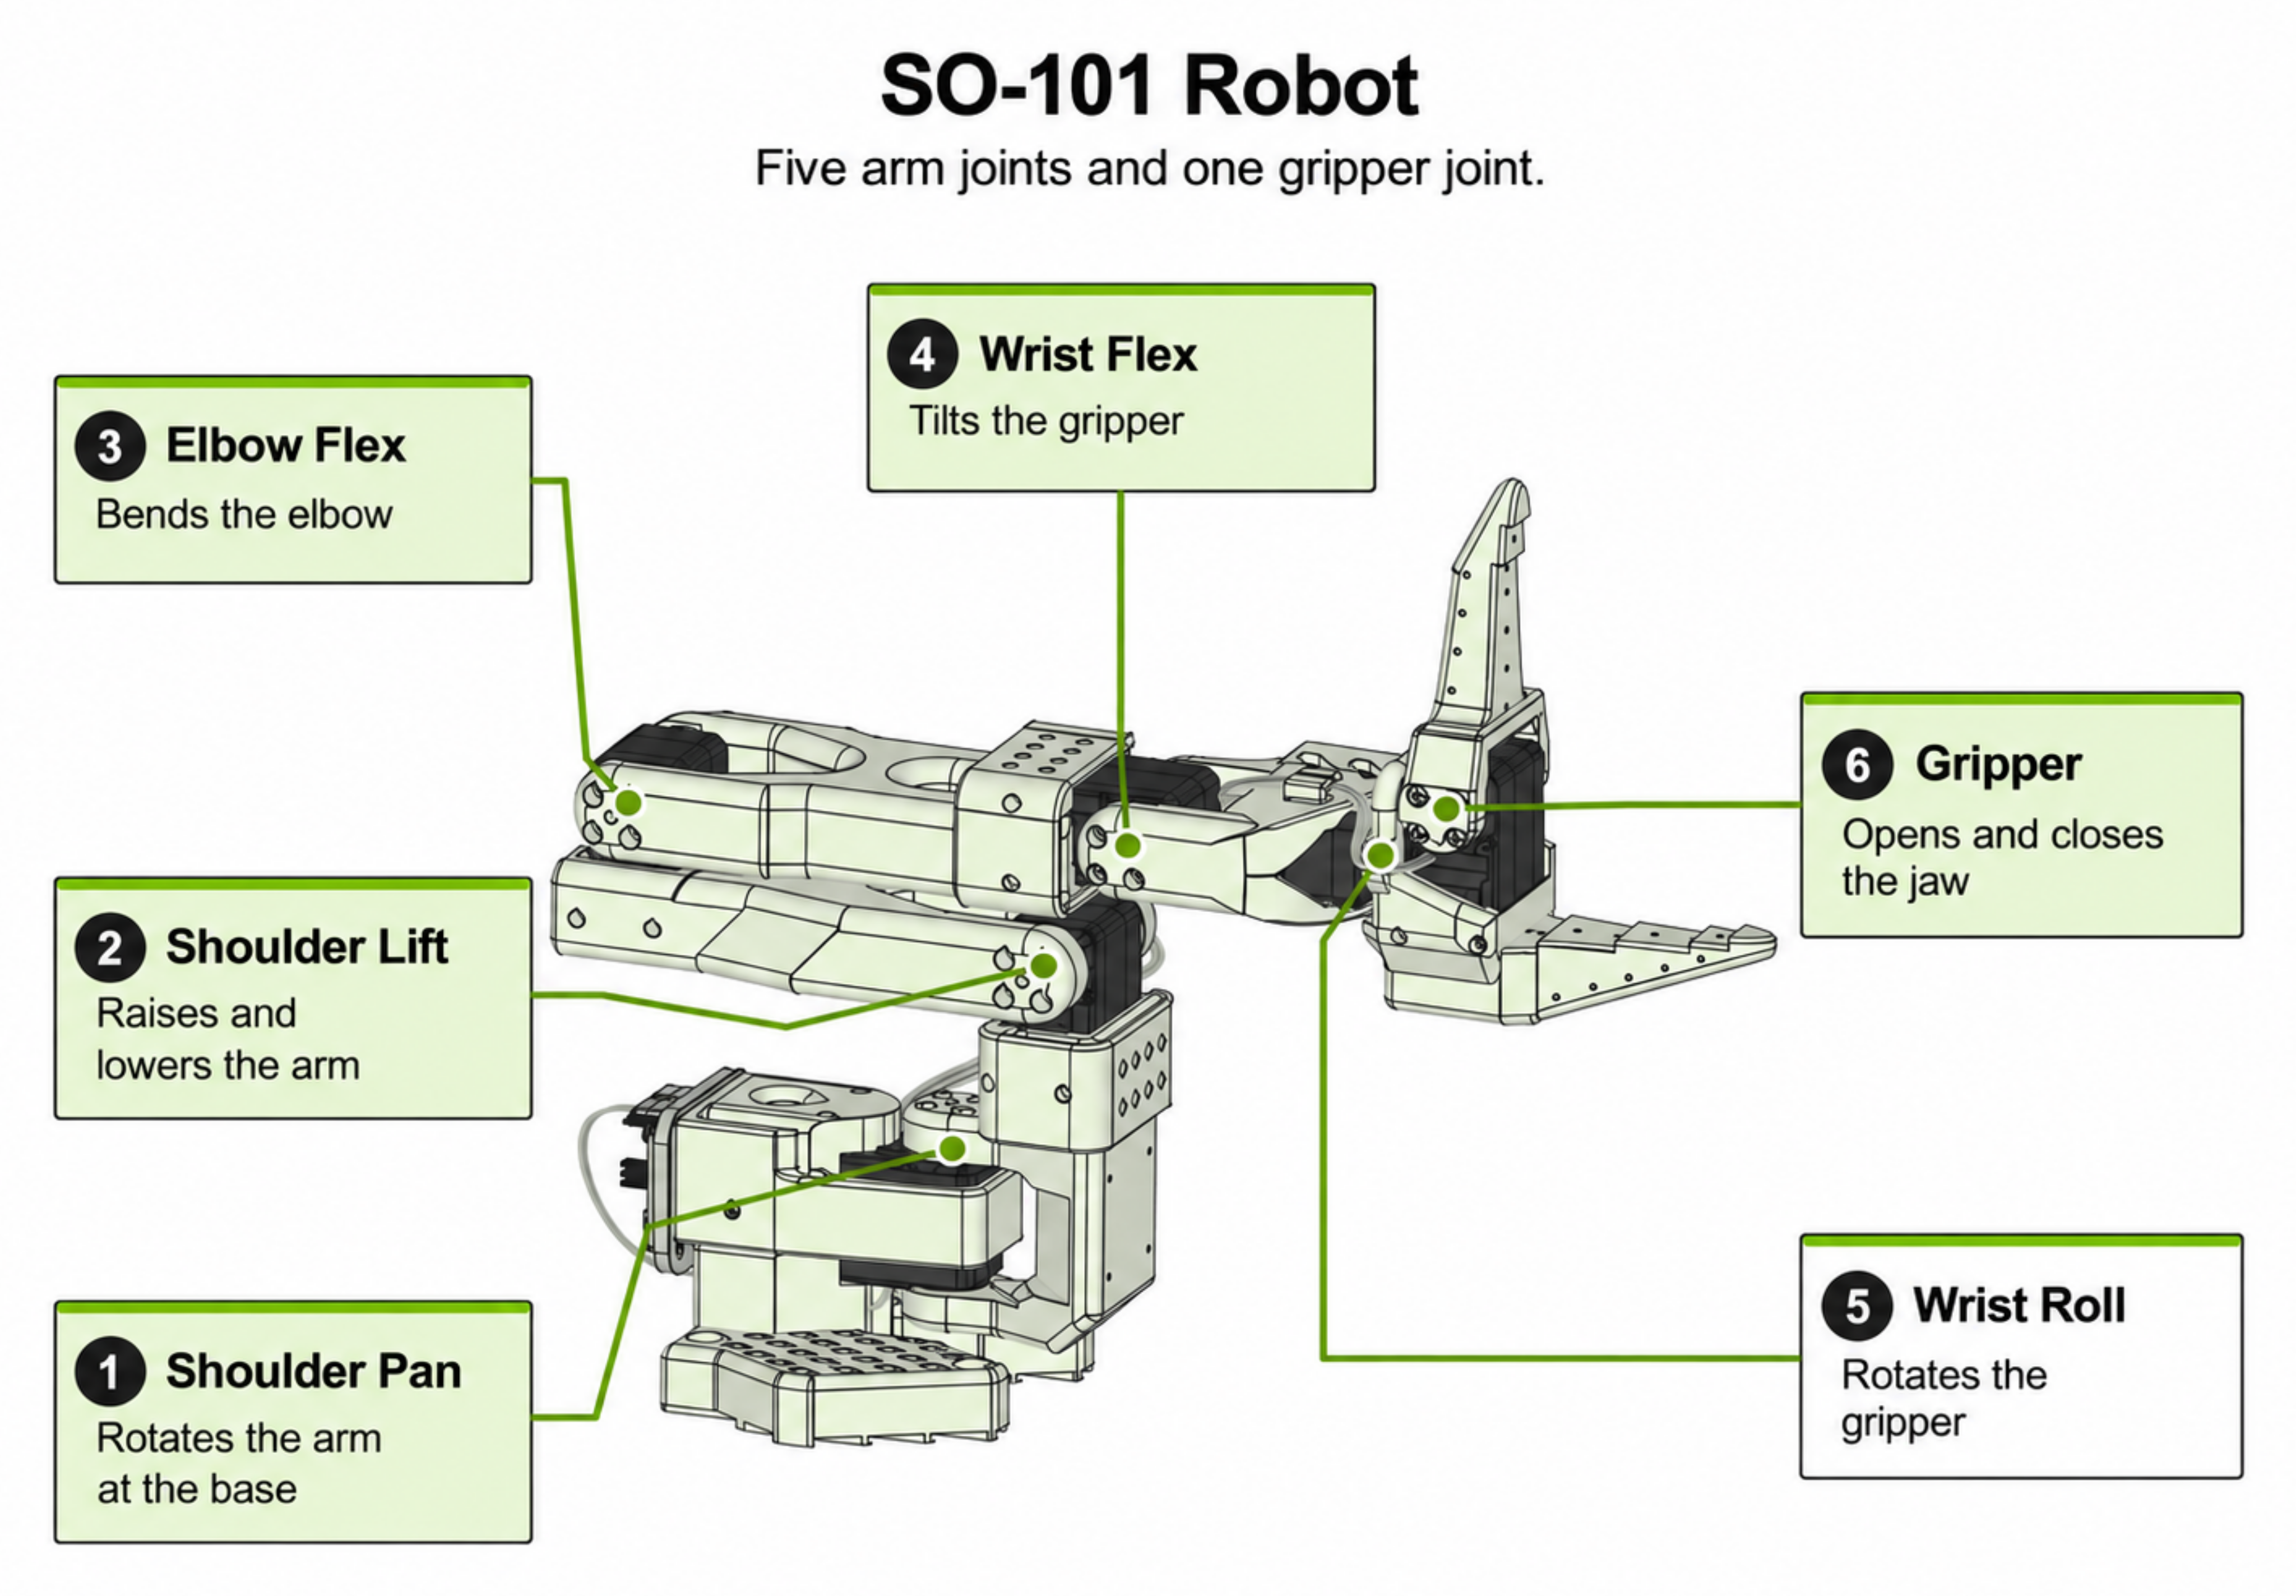
The SO-101 arm has five arm joints and a gripper.#
The SO-101 is a popular choice for education because it is affordable, easy to assemble, simple to control, and small. The arm is designed to be lightweight and compact, making it suitable for desktop use. The SO-101 design is open source, but you can find commercial versions from various vendors. See LeRobot’s SO-101 guide for the physical arm and assembly details.
Describing the Action Space#
The robot has six actuators: five for the arm and one for the gripper. Unlike cartpole’s force command, these actuators use joint-position targets: angular positions for the arm joints and the gripper. Joint controllers then move the robot toward those targets.
Hint
As you look at the robot, think about what a policy could observe and control. What inputs and outputs would you choose for a learned policy?
Looking at the arm from its base to its fingers, a pan joint near the base moves the gripper through a large arc. Shoulder and elbow joints let the robot reach out, a wrist joint changes how the fingers approach an object, and the gripper opens and closes to grasp. Coordinating those motions will matter when the robot needs to turn a horizontal vial upright.
SO-101 Robot Configuration#
Note
Stay on the learning-path branch with the preceding lesson’s changes in place.
Replace only the marked regions named below. You can compare your working copy
with the completed reference at any time with:
git diff main -- src/
We’ll next look at the important aspects of the SO-101 scene. The physics
configuration below is already supplied in env_cfg.py (it does not need to
be copied into the project).
 1# src/isaaclab_tutorial/tasks/place_vial/config/so101/env_cfg.py
 2@configclass
 3class PhysicsCfg(PresetCfg):
 4    newton_mjwarp = NewtonCfg(
 5        solver_cfg=MJWarpSolverCfg(...),
 6        collision_cfg=NewtonCollisionPipelineCfg(),
 7        num_substeps=2,
 8        debug_mode=False,
 9    )
10    default = newton_mjwarp
Notice the parallels with the cartpole physics configuration. Return to that lesson if you need a refresher on Isaac Lab’s physics configuration. Or see the Isaac Lab docs for more details.
Now let’s look at the interactive scene configuration, which defines the robot’s initial state, including its position, orientation, and joint positions. The configuration also includes a light source for the scene.
In the case of the SO-101, the tutorial starts with Isaac Lab’s SO101_CFG and supplies a custom
configuration with calibrated geometry, contact settings, and selected colliders.
The scene below uses that supplied configuration. If you are curious, you can find the full implementation in the
Isaac Lab source
code.
If you want to define a custom robot configuration, that file is a good example
to follow.
Replace the contents
File:
src/isaaclab_tutorial/tasks/place_vial/config/so101/env_cfg.pyMarkers:
# BEGIN lesson-02-robotand# END lesson-02-robot
Paste the code below between the markers. Keep both marker comments so that you can check your work against the reference solution.
    robot = SO101_CFG.replace(
        prim_path="{ENV_REGEX_NS}/Robot",
        init_state=SO101_CFG.init_state.replace(
            pos=preset(default=(-0.05, 0.0, 0.0), sim2real=(-0.05, 0.0, BASE_HEIGHT_CORRECTION)),
            # +90 degrees about world Z (XYZW).
            rot=(0.0, 0.0, 0.7071068, 0.7071068),
            joint_pos=dict(zip(JOINTS, WORKSHOP_INITIAL_JOINT_POSITION, strict=True)),
        ),
        soft_joint_pos_limit_factor=0.98,
    )
Here SO101_CFG is the tutorial’s supplied configuration, based on Isaac Lab’s
SO101_CFG; among other adjustments, it sets the wrist-camera clipping range
when the robot spawns. The scene then replaces its prim path and initial state
with values specific to the vial placement task. This is
a convenient way to customize the robot without defining a new configuration
from scratch.
At this stage, the only event we need is a reset to the default scene state.
This is already supplied in lesson_scaffold.py.
1# src/isaaclab_tutorial/tasks/place_vial/config/so101/lesson_scaffold.py
2@configclass
3class LessonEventsCfg:
4    reset_scene = EventTerm(
5        func=mdp.reset_scene_to_default,
6        mode="reset",
7        params={"reset_joint_targets": True}
8    )
The function mdp.reset_scene_to_default is provided by Isaac Lab. You can find
the description in the Isaac Lab
documentation.
The Isaac Lab API provides many useful functions for interacting with the scene, including resetting the scene, getting observations, and applying actions. Before writing a utility from scratch, take a look at the Isaac Lab API—you may find a function that already does what you need.
The supplied JointObservationsCfg in lesson_scaffold.py defines an observation
space that includes the robot’s joint positions and velocities. The action space stays empty until the
simple-agent lesson.
1# src/isaaclab_tutorial/tasks/place_vial/config/so101/lesson_scaffold.py
2@configclass
3class JointObservationsCfg(ObsGroup):
4    joint_pos = ObsTerm(func=mdp.joint_pos, params={"asset_cfg": SceneEntityCfg("robot")})
5    joint_vel = ObsTerm(func=mdp.joint_vel, params={"asset_cfg": SceneEntityCfg("robot")})
6
7    def __post_init__(self):
8        self.enable_corruption = False
9        self.concatenate_terms = True
The robot configuration completes the scene used by the supplied
SO101InspectionEnvCfg(ManagerBasedRLEnvCfg) for
inspecting the scene without agent control. The Isaac Lab manager-based
environment
tutorial
explains the underlying configuration pattern.
At this stage, the scene contains the robot and light, with no vial or rack.
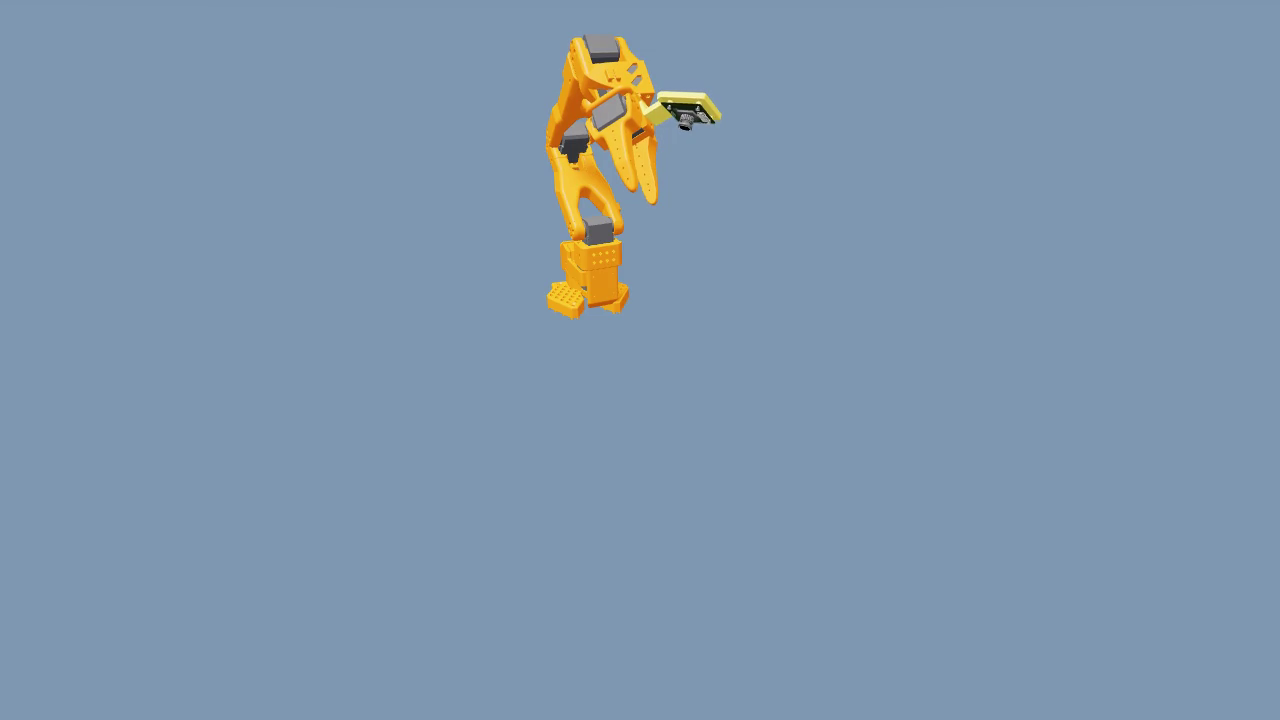
The initial scene contains only the robot and the floor.#
In the next lesson, we’ll add a vial, a rack, and a desk to the scene. In the lesson after that, we’ll add the actions and observations needed for simple agents.
Inspect the Robot#
Run the scene from the tutorial repository root:
uv run --with 'moviepy<2'            \
  isaaclab zero_agent                \
  --task IsaacTutorial-Inspect-SO101 \
  --num_envs 1                       \
  --max_steps 120                    \
  --visualizer newton                \
  presets=newton_mjwarp,record_video
The inspection task has zero action values and 12 joint observations. It advances
physics for 120 steps without a learned controller. Inspect the newest recording
in videos/inspection: the robot should be present, with no vial or rack.
If validation reports a missing robot, check the lesson-02-robot region.
Keep --with 'moviepy<2' so you can save the video.
Review#
Check Your Understanding#
Does the robot’s actuator count define the policy’s action space?
Answer
No. The action configuration defines how policy outputs map to selected joint commands, including their order and scaling. The robot asset defines the joints and actuators.
Apply What You Learned#
How would the robot’s initial pose and actuator settings affect vial placement? Choose one initial joint position or actuator setting, predict an effect, and explain which limits or action mappings matter.
Agent Tutor Prompt
Copy this prompt and include your answer:
Review my answer to this question: How would the robot’s initial pose and actuator settings affect vial placement? Choose one initial joint position or actuator setting, predict an effect, and explain which limits or action mappings matter.
My answer: [paste your answer here].
Check my reasoning about joint names, initial state, limits, gains, and distinction between asset mechanics and action mapping. Ask for missing context rather than assuming it. Identify what I explained well, point out one gap or misconception, and ask a follow-up question that helps me improve my answer. Let me revise it before supplying a complete answer.
Key Takeaways#
The SO-101 has five arm joints and a gripper actuator.
The action mapping and the robot mechanics are separate parts of the configuration.
The module asset includes the wrist camera used later by the student policy.