Appendix – NEO-Nutanix Prism Plug-in
The NVIDIA ® NEO ® -Nutanix Prism plug-in is a software add-on that offers enhanced functionality to NVIDIA and Nutanix customers. As of NEO v2.5, the plug-in is bundled with NEO and will be automatically activated when enabling Prism integration in the bring-up wizard or the virtualization settings.
Nutanix Prism offers enhanced network capabilities, including a set of APIs to use Prism's accumulated VM data. NVIDIA uses these new APIs to develop an integrated solution between Nutanix Prism and NEO, which adds network automation for Nutanix Virtual Machine life-cycle management.
This integration addresses the most common use-cases of the Nutanix hyperconverged cloud: VLAN auto-provisioning on NVIDIA switches for Nutanix VM creation, migration and deletion.
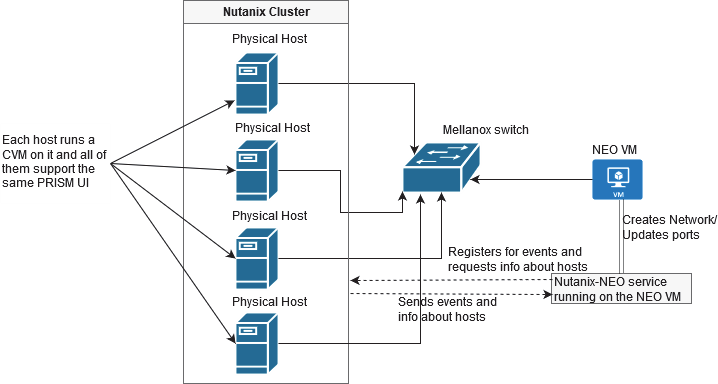
NEO-Nutanix Prism plug-in purpose is to synchronize between a Nutanix cluster deployed with NVIDIA switches, using the Mellanox NEO platform. By using this plug-in, users can start a service to listen to Nutanix cluster's events and have the infrastructure VLANs provisioned transparently. The plug-in can be installed and run on any RHEL/CentOS server (v6 or above) that has connectivity to both Nutanix Prism and the NEO API (including the NEO server itself).
|
Name |
Description |
|
Nutanix AOS |
Nutanix Acropolis Operating System |
|
Nutanix Node |
A hypervisor server with Nutanix AOS installed |
|
Nutanix Cluster |
A group of nodes with Nutanix AOS installed |
|
CVM |
Controller Virtual Machine. Each cluster node has a CVM. Commands can be executed in CVM to take effect on the node |
|
Prism |
The web interface of Nutanix Cluster for network configuration, that creates VMs, etc. It can be accessed using any CVM IP address: https://<CVM_IP>:9440/console |
The plug-in enables the following functionalities:
Registering and listening to Nutanix Prism events
Supporting auto-sync and switch auto-provisioning in the following events:
VM Creation
VM Deletion
VM (live/non-live) migration
Periodically
Upon service start
Subnet Creation
Subnet Deletion
Supporting the following switch port modes:
LAG port channel
MLAG port channel
Port splitters
Supporting the following NVIDIA switch systems:
NVIDIA SN2000 series of Ethernet switch systems
NVIDIA SX1000 series of Ethernet switch systems
Supporting Cumulus switches
Make sure the following requirements are fulfilled in order for the Nutanix Prism plug-in to work properly:
Nutanix Appliance v5.0.0.2 or above installed over cluster nodes with aspects documented in Nutanix website
NEO v2.1 or above installed in the network
SNMP and LLDP enabled on NVIDIA switches
NVIDIA NEO-Nutanix Prism plug-in installed, configured and running
All Nutanix nodes connected to the NVIDIA switch
IP connectivity between Prism and the NEO VM where the plug-in is installed
Typical Configuration
Cluster Nodes Configuration
Enable LLDP on the switches of the environment:
            # conf t
# lldp
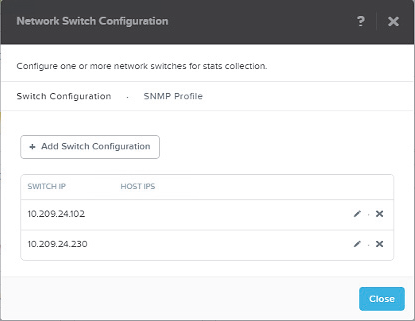
Add the switches to the Nutanix Prism web UI. Click the wrench symbol on the right -> Network switch.
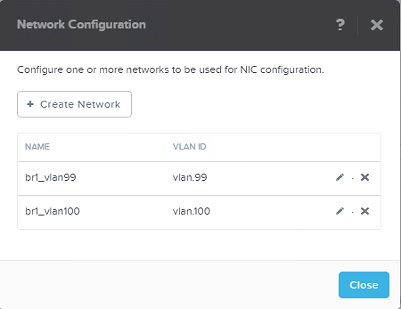
Create the Nutanix cluster network using Prism. Click the wrench symbol on the right -> Network Configuration. Make sure to edit the new network and identify the IP ranges if needed.
Assign a virtual IP to the Nutanix cluster. Click the wrench symbol on the right -> Cluster Details -> CLUSTER VIRTUAL IP ADDRESS.
 Warning
For further information about Nutanix cluster network configuration, please refer to Nutanix Connect Blog.
Note:
When there is more than one connection to the same switch, configure the LAG as follows:
Configure Link Aggregation Control Protocol (LACP) on the switch.
Add the LACP configuration as follows:
For LACP bond type:
# ovs-vsctl set port br0-up lacp=active
For normal bond type:
# ovs-vsctl set port br0-up lacp=off
NEO Virtual Machine Configuration
Add the Nutanix cluster connected switches to the NEO devices using NEO UI.
By default, the plug-in is installed with NEO on the same machine, and is managed by NEO. In case you want to install the plug-in independently on another machine, download the plug-in from the MyMellanox portal, and install the Mellanox NEO-Nutanix Prism plug-in rpm. Run:
# yum install nutanix-neo-<version>.x86_64.rpm
For example:
# yum install nutanix-neo-2.5.0-3.x86_64.rpm
When working with the plug-in that is bundled with NEO, all the configuration can be done from the web UI (see Prism AHV Configuration). This configuration will be saved in /opt/neo/controller/conf/nutanix-neo-plugin.cfg file. In case you work with an independent plug-in, follow the steps below:
Fill in the required details in the plug-in configuration file: /opt/nutanix-neo/config/nutanix- neo-plugin.cfg:
            # Section: NEO server info
# username:                 (required) NEO username
# ip:                       (required) NEO server IP or NEO virtual IP in case
#                           of NEO HA
# password:                 (required) NEO password
#                           The password should be encrypted by the util/encrypt_config tool
# session_timeout:          (required) timeout of user session (default 86400)
# timeout:                  (required) timeout of connection (default 10)
# auto_discovery:           (required) auto add switches that are discovered in
#                           Nutanix cluster to NEO. Should be boolean
# add_host_credentials:     (optional) set Nutanix host's username and password
#                           in NEO
# host_ssh_username:        (optional) SSH login username for Nutanix hosts,
#                           required if add_host_credentials is True
# host_ssh_password:        (optional) SSH login password for Nutanix hosts,
#                           required if add_host_credentials is True
#                           The password should be encrypted by the util/encrypt_config tool
# vlan_ip_order:            (optional) The order in which reserved IPs
#                           should be taken from the subnet start/end
# vxlan_mtu:                (optional) MTU to be used for vxlan interface
#
# fast_migration:           (optional) True will make a fast migration

[NEO]
ip =1.2.3.4
#Protocol for communicating with NEO. Valid values are http/https.
#This property is optional, default is https.
protocol=https
# Port for communicating with NEO.
# This property is optional, default for https is 443 and for http is 80.
port =443
username = NEO-Nutanix-User
password = FB4M3HWCS6DGSC5TVCACFA2VDSZEPLVZ5FBYX3C42IWEL7TQ2MCQ====
session_timeout = 86400
timeout = 10
auto_discovery = True
add_host_credentials = False
host_ssh_username = root
host_ssh_password = SV5Y2RNPX3VIMIHT3UPWQUX7SFNHZIU5TRYSMQX7NCB5DUQ2SXYQ====
switch_ssh_username =
# The password should be encrypted by the util/encrypt_config tool
switch_ssh_password =
vlan_ip_order = end
vxlan_mtu = 9216
fast_migration = true
# When VLAN provisioning is disabled, the plugin will only add the
# cluster devices to NEO.
# When VLAN provisioning is enabled, in addition to device adding, the plugin
# will notify NEO on any change in VM that requires VLAN re-configuration.
# Valid values: true/false. Default is true.
vlan_provisioning = true
# When DCI is enabled, switch IPs are sent to NEO on network creation
# for VXLAN configuration on the switches.
# Valid values: true/false
dci_enable = False
dci_mode= L2


# Section: Nutanix PRISM Central and cluster info
# username:                 (required) Nutanix prism central username
# ip:                       (required) CVM IP or Virtual IP
#                                      of Nutanix prism central
# password:                 (required) Nutanix prism central user password
#                           The password should be encrypted by the util/encrypt_config tool
# requests_retries:         (required) maximum API requests retries
# cluster_default_username: (required) Nutanix cluster default username
# cluster_default_password: (required) Nutanix cluster default password
#                           The password should be encrypted by the util/encrypt_config tool
# cluster_<ip>_username:    (optional) Specific Nutanix cluster username
#                                      (overrides cluster_default_username
#                                       for the given IP)
# cluster_<ip>_password:    (optional) Specific Nutanix cluster password
#                                      (overrides cluster_default_username
#                                       for the given IP)
#                           The password should be encrypted by the util/encrypt_config tool
[PRISM]
username = admin
ip =4.3.2.1
password =OXBLXJO4U36CE5CVMRTBFII53I45N4RGPZQCCFGTW6ORS7AZPIRQ====
requests_retries = 40
cluster_default_username = username
cluster_default_password = BSCKG3ETU2Q3N7WZH4LIK2M2U3C2UXGVTKXBCMQOMHEPUVDTJLVQ====


# Section: Server where plugin installed
# ip:   (optional) IP of the server from the same subnet as the Nutanix Cluster.
#       if the ip left empty, then the plugin will obtain the server's interface
#       ip that is connected to same network as Nutanix cluster.
# port: (required) TCP port on server should be unused to receive events from
#       from Nutanix cluster.
#       if the port is used, then the plugin will kill the process that uses
#       the port and reclaim it.
[SERVER]
ip =
port = 8080
WarningThe passwords in the output above are encrypted. To update/change them, use the following encryption command:
/opt/nutanix-neo/utils/encrypt_config.py --section <configuration file section> --option <configuration option name> --value <clear text value>
For example: /opt/nutanix-neo/utils/encrypt_config.py --section PRISM --option password --value my_password
Start the service after installing the plug-in:
# service nutanix-neo start
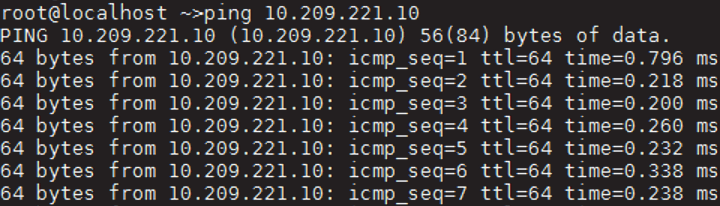
The service will now apply the required changes in VLANs with interfaces assigned to them through NEO APIs. If two VMs are created over the same network, PING must work between the two VMs despite the Nutanix node hosting it in the cluster. In case of VM migration, the plug-in will apply the changes required on the switch to maintain connectivity.
Examples:
VM Creation:
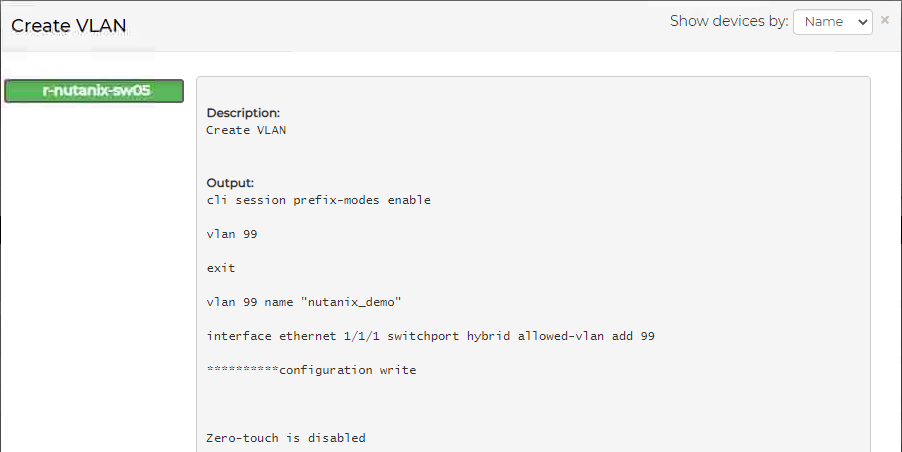
The user creates a VM on the Nutanix cluster over a new VLAN ID 99 that did not exist on the switch before. Prism web UI will show the following output: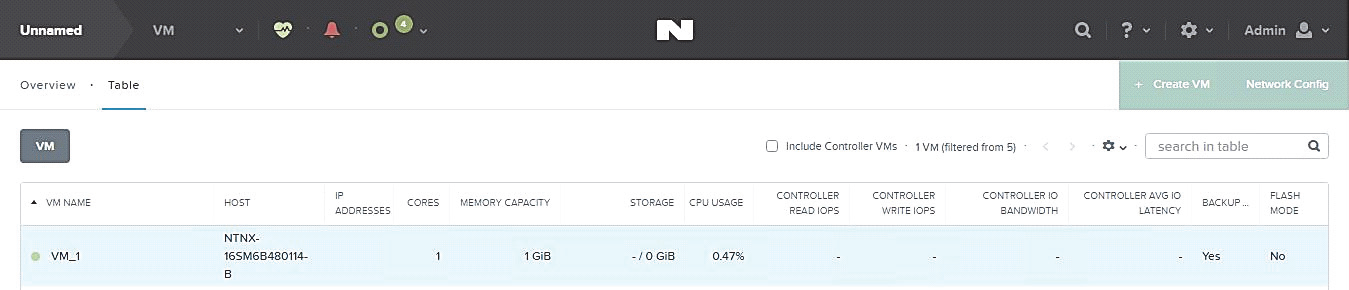
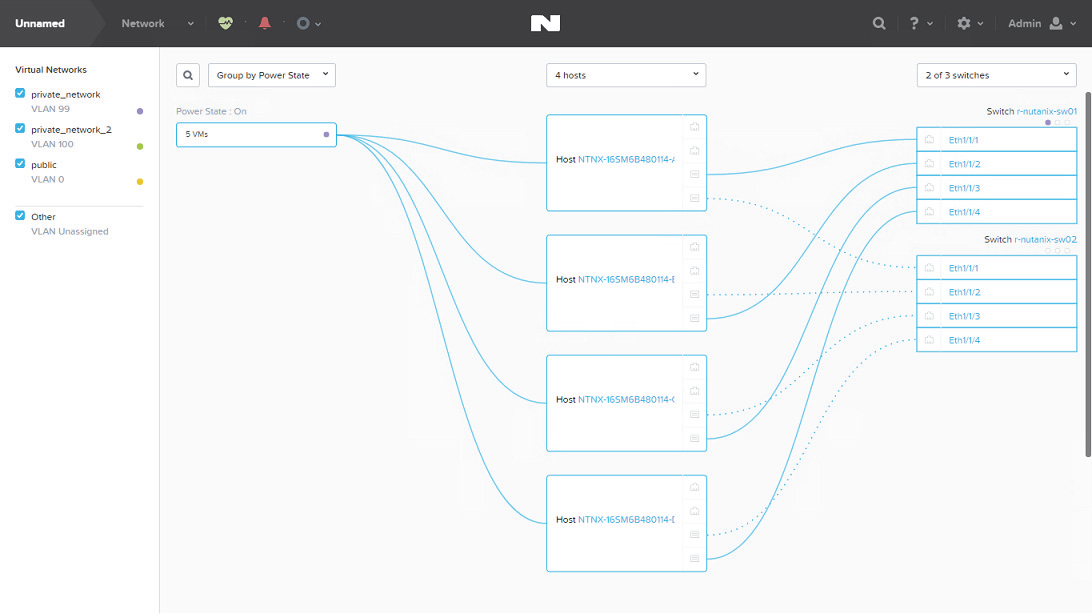
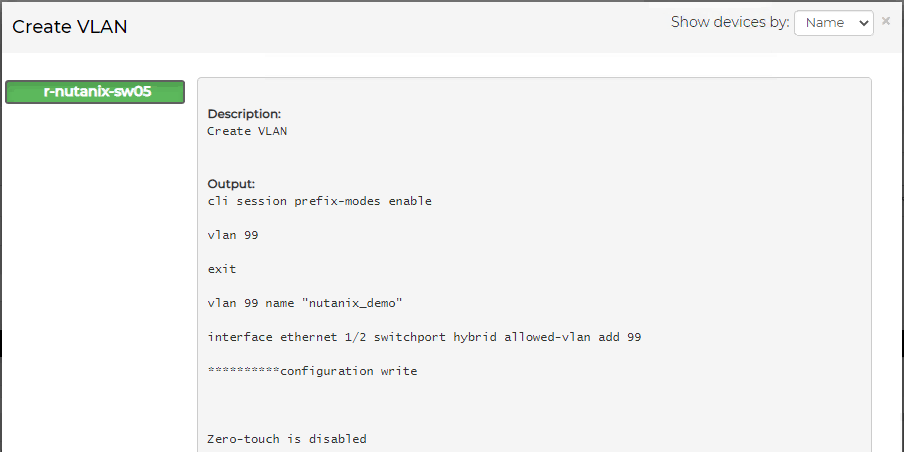
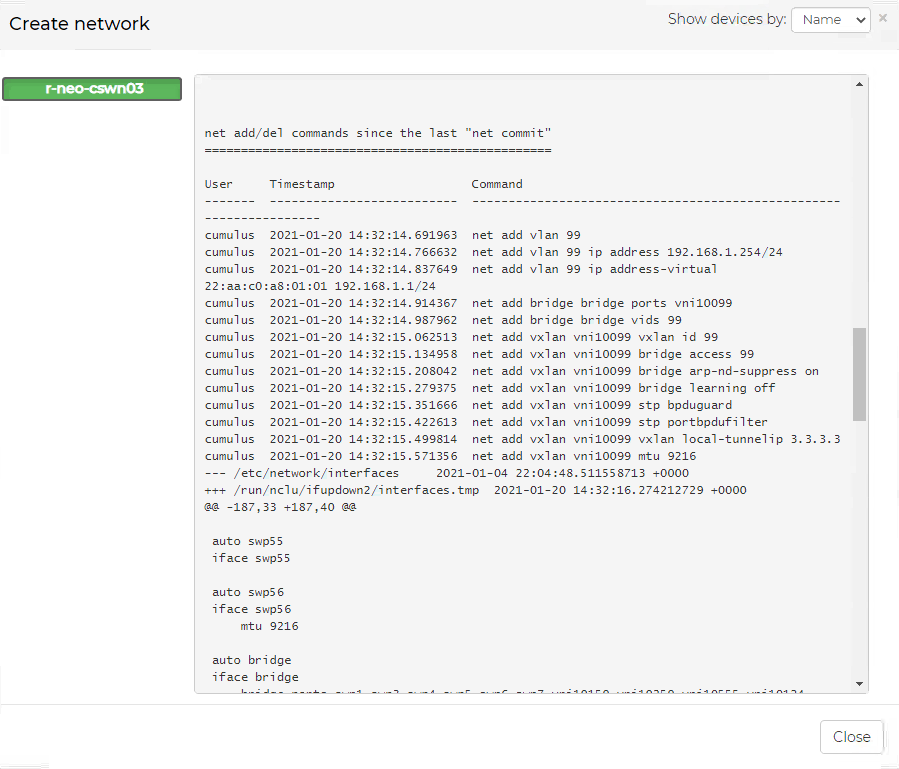
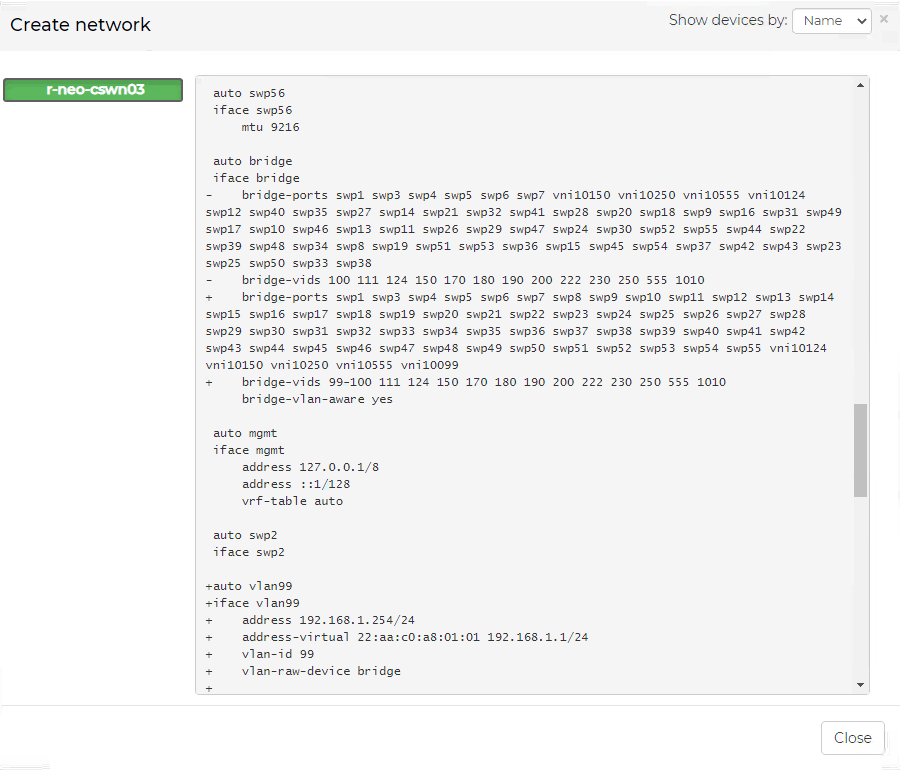
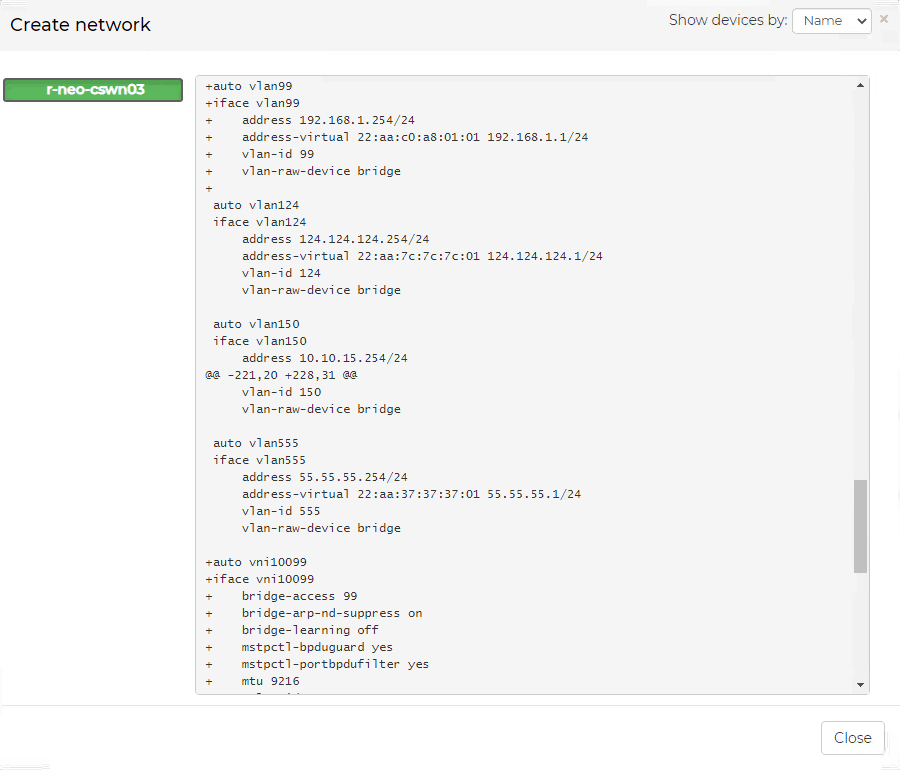
The Nutanix-NEO service sends APIs to NEO to implement a job that will update the switch side about adding VLAN ID 99 to the switch with relevant Nutanix host ports, as follows:
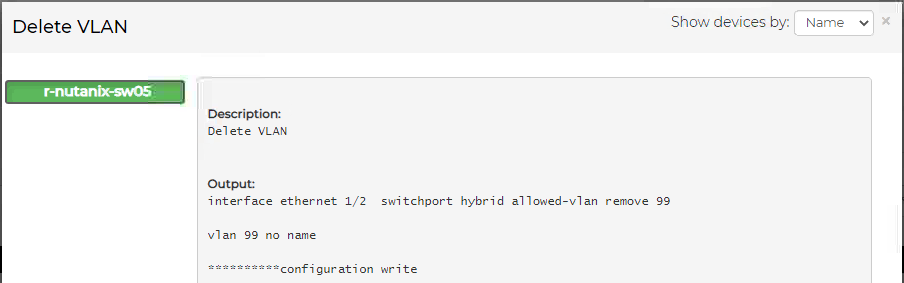
VM Migration:
VM will be migrated to an automatically chosen host through Nutanix Prism web UI, as follows: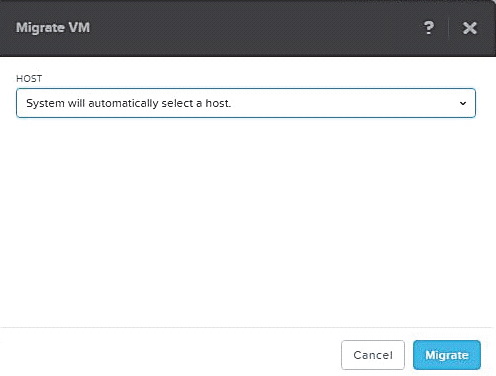
The Nutanix-NEO service will send APIs to NEO to trigger jobs that will update the switch side with the new changes (adding VLAN ID for new host details/removing VLAN ID from old host details) as follows:
Note: Nutanix-NEO service only detects running VMs.
/var/log/nutanix-neo/console.log
/var/log/nutanix-neo/nutanix_neo_server.log
For the VXLAN support to operate, the plug-in must be running when you create the VXLAN on Nutanix. In addition, the VTEPs must be configured on the switches, and ping all VTEPs from all switches.
Vlan ID 0 is not allowed, since it is the native network.
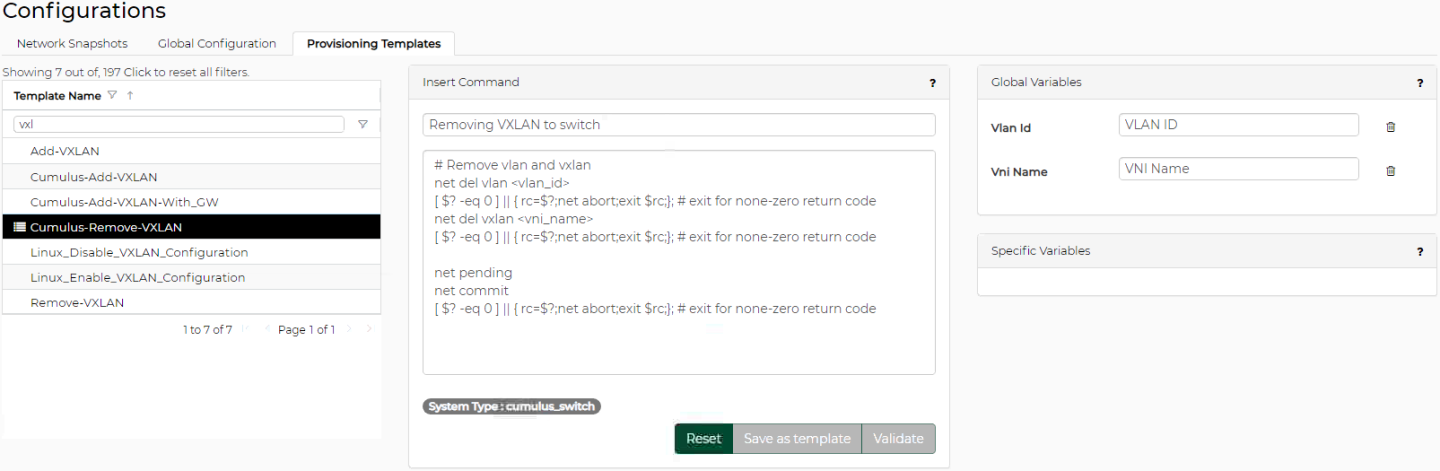
NEO VXLAN Templates
NEO has templates for creating and removing VXLAN from a Cumulus or ONYX switches. When you create a network on the Nutanix tool, it will run a provisioning job for NEO to add a VXLAN, using a designated template.
"Cumulus-Add-VXLAN" template:

"Cumulus-Remove VXLAN" template:
"Onyx-Add-VXLAN" template:

"Onyx-Remove-VXLAN" template:

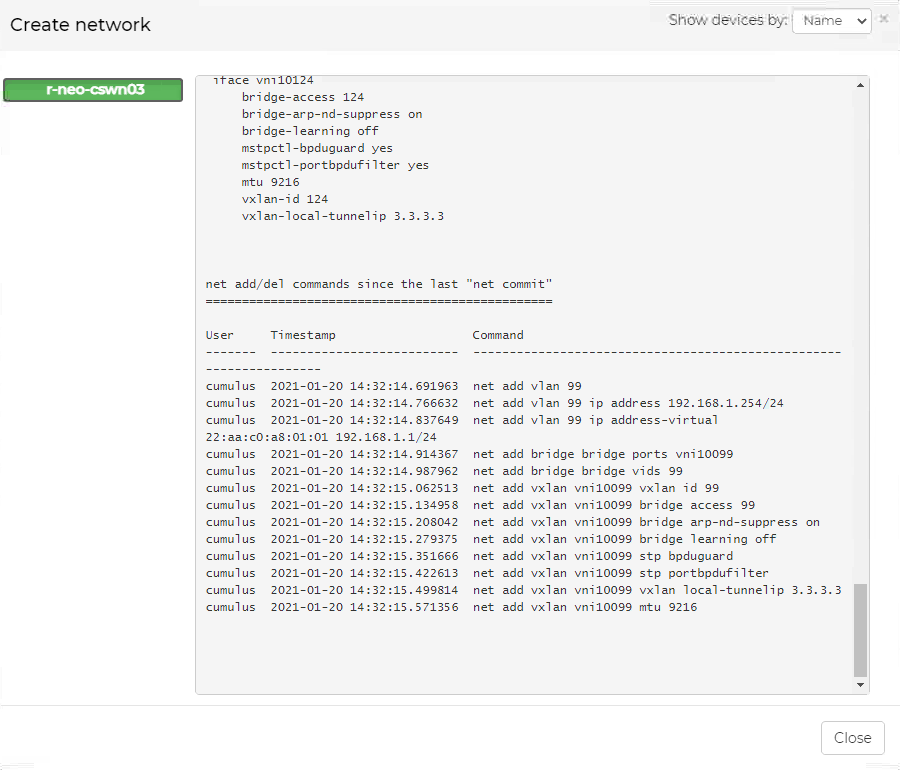
"VXLAN" template running results:
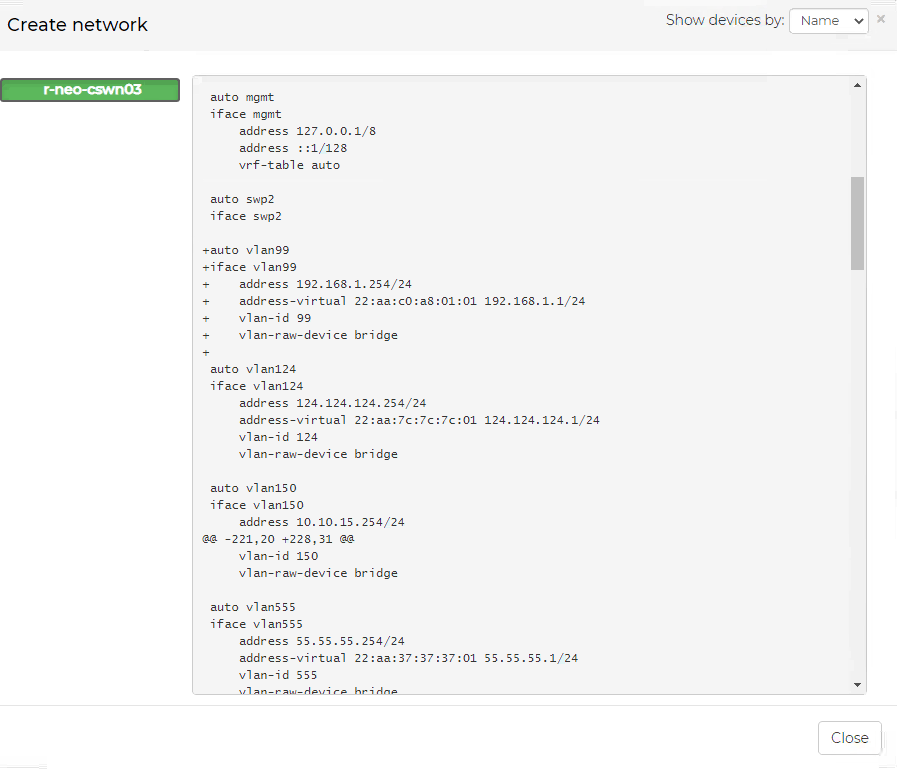
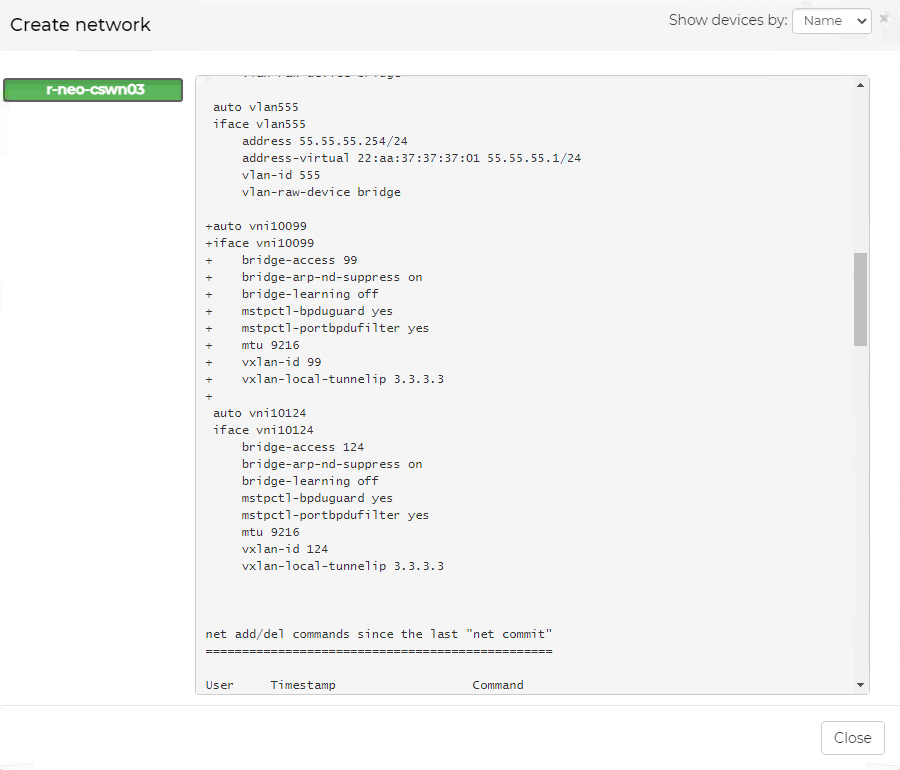
The network must be created on both Nutanix clusters with the same VLAN ID, subnet and gateway.
Examining the Connection
Once the networks on the Nutanix tool and the VMS are created, and a NIC is connecting between the network to the VMs, the VM on Cluster 1 must be able to ping the VM on Cluster 2: