Settings
This section describes the different Settings tabs.

NVIDIA ® NEO ® supports two methods of device discovery:
Auto-Discovery – periodic automatic discovery of devices
IP Scan – manual discovery of devices
When running NEO for the first time, devices are not automatically discovered, unless the following discovery buttons are used:
Agent Discovery button – when turned on, NEO enables automatic discovery of NVIDIA ® Onyx ® switches. For further information, refer to "Auto-Discovery" method under "IP Discovery" in Providers.
LLDP Discovery button – when turned on, NEO enables automatic discovery of switches and hosts on which LLDP is enabled. For further information, refer to "ETH Discovery" under Providers.
"+ Add" button – using this option, users are able to add a device either by manually typing its IP address, or by scanning a range or a subnet of IP addresses:
Discover by IP:

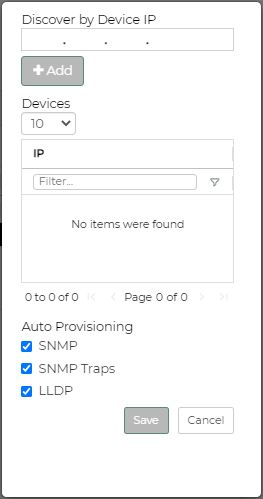
Insert the Device IP address, select its type, and click the "+Add" button to add the device. Repeat the action for all devices you wish to add. Once all devices are added, click "Submit".
A window with the devices that have been added will be displayed. Clicking one of the devices will show the system status.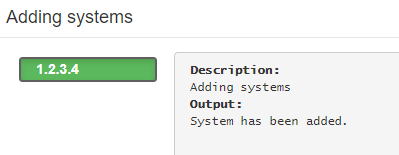 Warning
Each newly added device under this window will automatically appear in the "Allowed" list under Settings → Discovery, in a grayed-out row.
Discover by Range/Subnet:

Insert the IP range or subnet address to scan for devices, and select the device types to discover, and the discovery methods to use.LLDP – when checked, NEO discovers all devices found within the range specified and on which LLDP is enabled
Multicast – when checked, NEO discovers all Onyx switches found within the range specified using multicast
You can optionally specify a tier for the devices discovered by the scan. The tier is used to present the network map in a hierarchical structure.
Auto-provisioning – users may define some provisioning actions that run automatically on all the added devices:
SNMP – configure the device to listen and respond to SNMP requests (SNMP version 2c). Supported for Cumulus switches.
SNMP Traps – configure device to send SNMP traps to NEO. The SNMP trap version (2c/3) is decided by the Onyx global SNMP credentials used. Supported for Onyx switches.
LLDP – configure device to enable LLDP protocol. Supported for Onyx and Cumulus switches.
WarningIf a device is not applicable for a certain auto-provisioning task, NEO will skip this device.
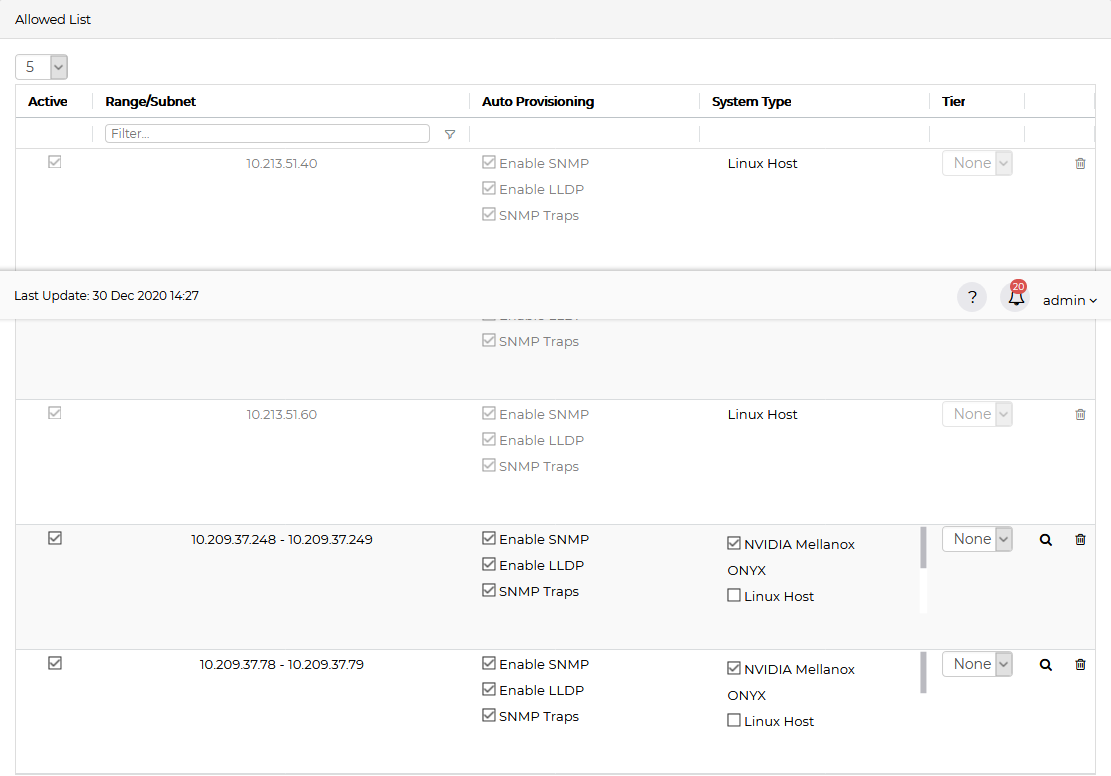
Once a discovery operation is created, it will be added to the "Allowed" list, where all checkboxes/fields can be edited:
Notes:
When removing a row using the

icon, devices that were discovered in the range specified in that row will be removed from NEO
When adding a device through the Devices window under Managed Elements, it will be added to the same list, without the option to edit the relevant row. When removing the device from NEO, the row will be removed from the list.
When removing a device from NEO, it will automatically be blacklisted under the Blacklist tab. These devices can be removed from it by clicking the
icon.

Devices can be added to the blacklist manually by inserting the device’s IP under the Blacklist tab.
"Scan All" option can be used when wishing to discover devices that belong to all device types specified in the in the "Select System Type" field.
Maintenance Mode
When turned on, this mode prevents the system from creating events.
Modifying Management IP Address
It is possible to edit the management IP of NEO. The management IP address is used for the purposes of the telemetry agent, configuring SNMP traps, and multicast discovery.
The management IP configuration is updated dynamically if not configured by the user and if the user has one management IP address or DNS resolve available.

Backup and Restore
The user can create backups of NEO and restore them:
Under Backup and Restore, the following actions can be performed:
Create a new NEO backup. This will create a backup of NEO’s settings and discovery data.
Import Backup. The user can import a backup that already exists.
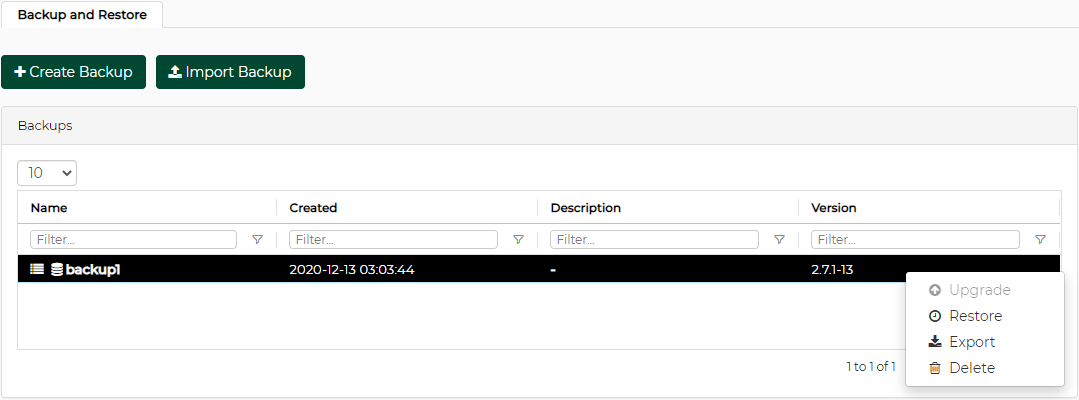
Backups table context menu:
Upgrade: upgrades an old backup file to work with the current NEO.
Restore: restores and applies the selected backup to NEO.
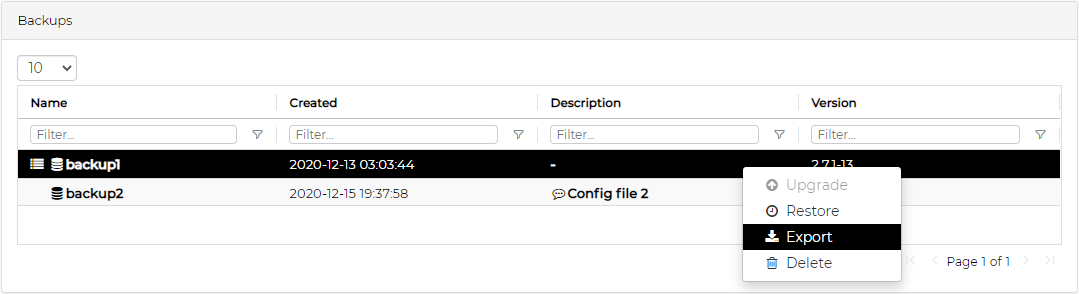
Export: exports selected backup as a tar file.
Delete: deletes the selected file.
Change a backup name or description after creating it.
How to create NEO backups and restore them:
In NEO GUI go to the Settings tab → System tab → Backup and Restore.
Create backup "NEOconfig2".

In order to move the backup to another machine/NEO in the fabric, you need to export the backup file to a Windows folder.
 Warning
When 2 backup images are created, the "Create Backup" and "Import Backup" buttons are grayed out.
This creates the tgz file "NEOconfig1.tar.gz".
WarningWhen using export, NEO saves the file on the NEO client (not on the server).
In order to restore the NEO backup, import the tgz file using the GUI.
WarningWhen using import NEO searches for the file on the NEO client (not on the server).
WarningRestoring a switch configured with NEO Agent to a snapshot without the agent, results with a switch with the Agent installed.
Saving Files on Remote Storage
NEO is able to save data files in a remote shared location. The following directories will be redirect to the shared location:
Data (for backup, built-in tasks configuration tool, groups notifications, reports, smtp, telemetry)
Logs
Templates
Activate:
To activate this feature, perform the following steps:
Stop NEO.
Mount a local drive to a remote shared location.
Edit:
/opt/neo/controller/conf/controller.cfg
From:
            [Controller]
share_location=LOCAL
to:
share_location=/new_location
Restart NEO.
Result:
If the shared location is empty, an initial copy of the shared location data will be saved to / new_location/neo.
All links to data, logs and templates will point to the relevant shared location. In case of HA file replication, stopping and activating the node will update the shared location.
Upgrade:
In case of upgrade, NEO will update the shared location data, so you will be able to continue working with it.
Disable:
To disable this feature, perform the following:
Stop NEO.
Edit:
/opt/neo/controller/conf/controller.cfg
to:
            [Controller]
share_location=LOCAL
Restart NEO.
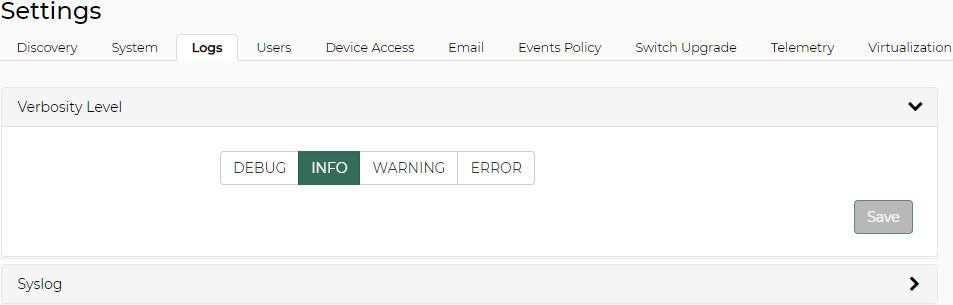
In order to configure the type of logs saved in the logging server, go to "Verbosity Level", and select the required type: DEBUG/INFO/WARNING/ERROR.
The verbosity level set in this menu applies only to the controller console log.
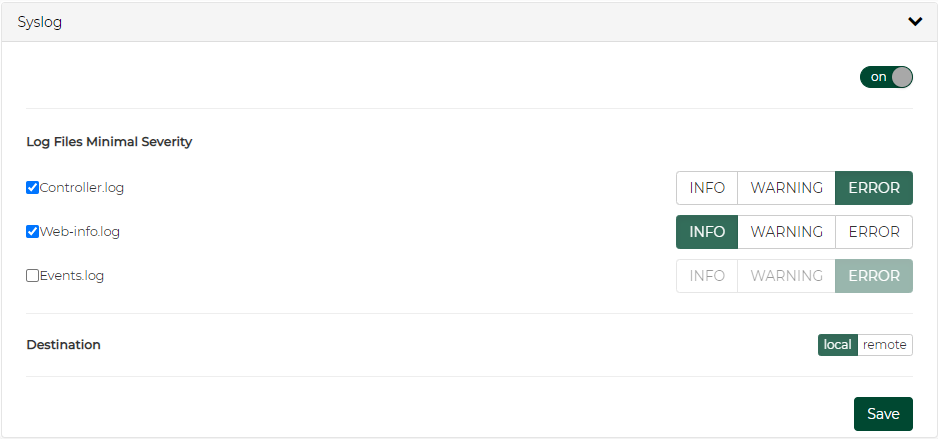
To send the log files to the local machine, check the desired log files (controller/web/events.log) with their severity from the radio buttons (INFO/WARNING/ERROR), make sure the destination radio button is set to local (

) and click "Save".
To send the log files to one or more remote machines (you may add as many as 5 destination machines using the icon), provide the destination/s IP address, port number, minimal severity and protocol (UDP/TCP), check the desired log files (controller/web/events.log) with their severity from the radio buttons (INFO/WARNING/ERROR), make sure the destination radio button is set to local (

) and click "Save".
Please note that the only log files that can be send to the syslog are the following NEO controller files:
Controller.log
Web-info.log
Events.log
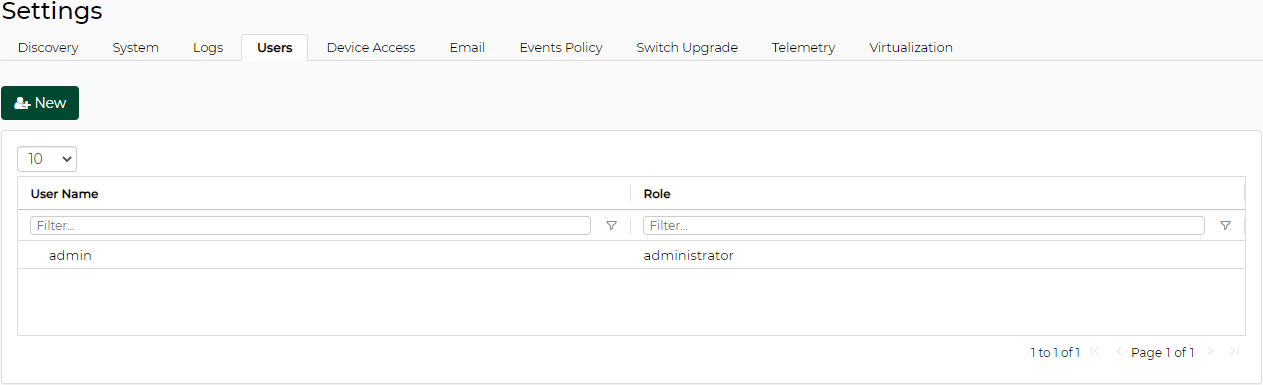
The "Users" view lists the system’s users and their roles, and allows adding new users. Administrators can also remove users from the list, upgrade users’ level to administrators and downgrade administrators’ level to users. The "admin" administrator is the only user that cannot be removed or downgraded.
Unlike administrators, standard users cannot:
Change credentials
Access the "Notifications" tab
Access the "Logs" tab
Access the "Providers" tab
Access the "Tools" tab
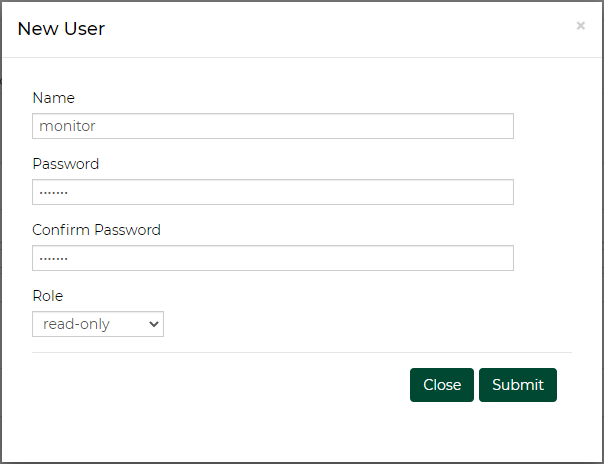
To add a new user, click "New" and fill in the required credentials (see NEO GUI Fields Validations).
The "Device Access" view allows administrators to change the default global access credentials for each protocol (HTTP, SSH, SNMP and SNMPv3), and change the connection settings for SNMP and SNMPv3 protocols. Such changes will only apply to devices for which no unique access credentials are defined (either exclusively or in association to a group).
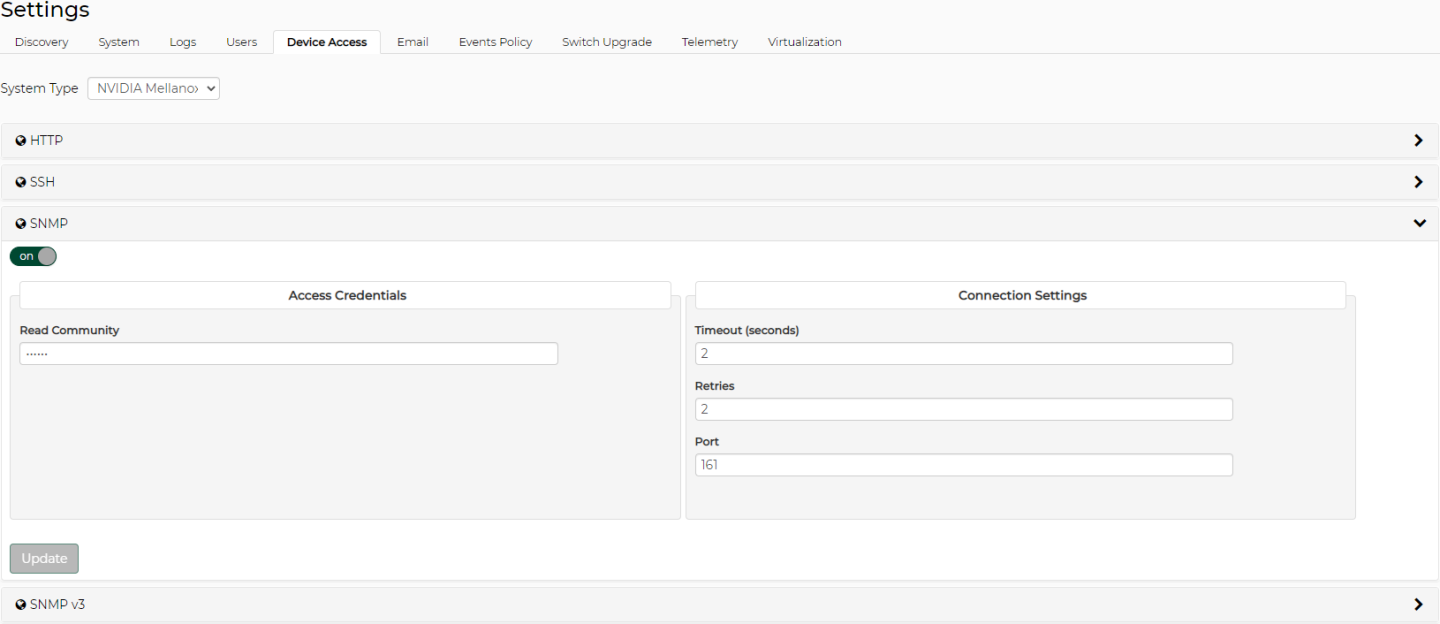
Note that only one of the SNMP protocols can be activated at the same time. These protocols can be activated/deactivated using the on/off button.
The active Onyx SNMP protocol version also affects the SNMP protocol version that NEO uses to listen to SNMP traps. This SNMP version is also used to configure switches when checking the "SNMP Traps" auto-provisioning option.
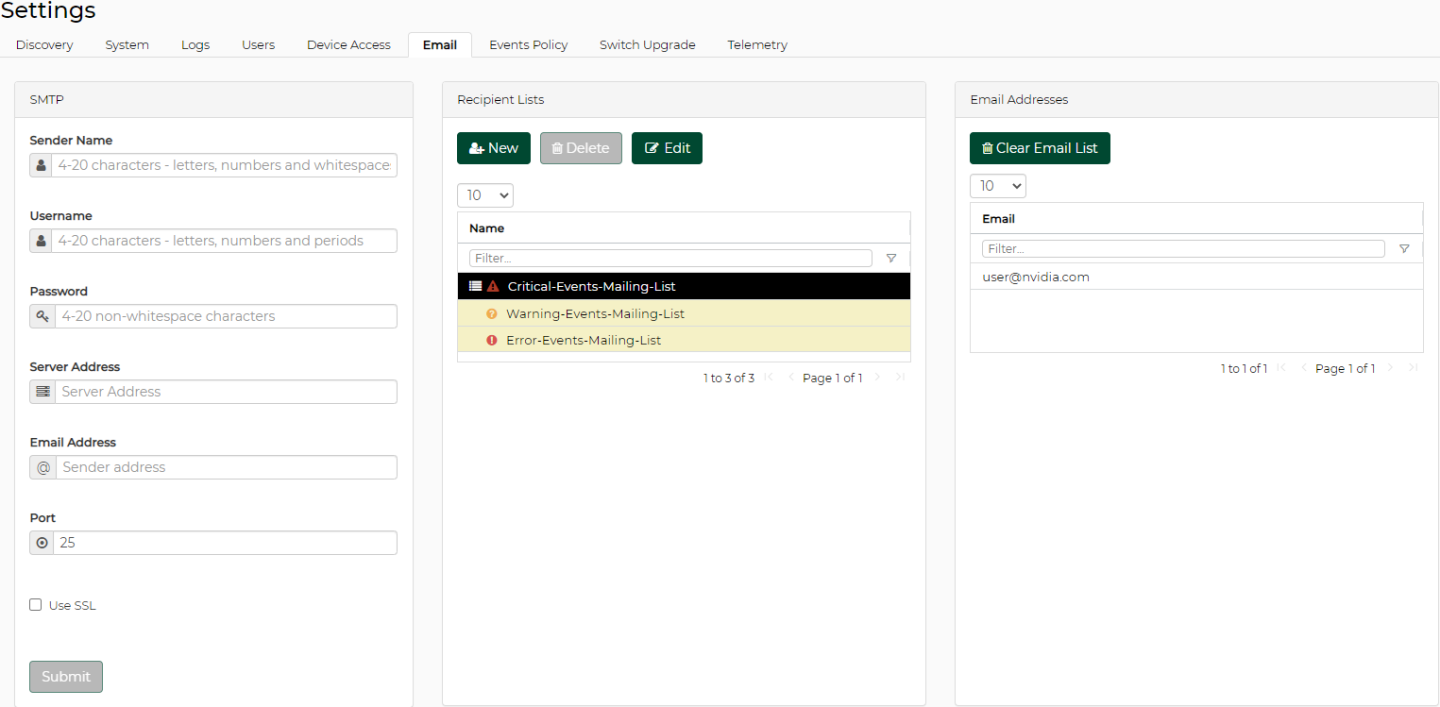
The Email view is divided to two sections:
The SMTP section allows administrators to configure a default email client to be used by NEO for event notifications. Once the requested SMTP parameters are filled, the user can select the type of events for which email notifications are generated. For more information, see Events section.
The Recipient Lists section allows the user to add email addresses lists to be used to distribute specific event alerts. To add a new list, click on the "New" button, insert a list name and a list of the desired email addresses, separated by commas (with no spaces).
Configuring Email Notifications According to Event Severity
User are able to add an email to predefined mailing lists for events with different severities (i.e. Critical/Error/Warning). Once emails are added to a certain recipient list, NEO will send email notification for all events with that particular severity destined to the addresses defined within the recipient list.

The "Events Policy" view allows the user to activate and deactivate events, and to define the severity, condition-value and description of each event. Clicking an event name displays its relevant Event Information table.
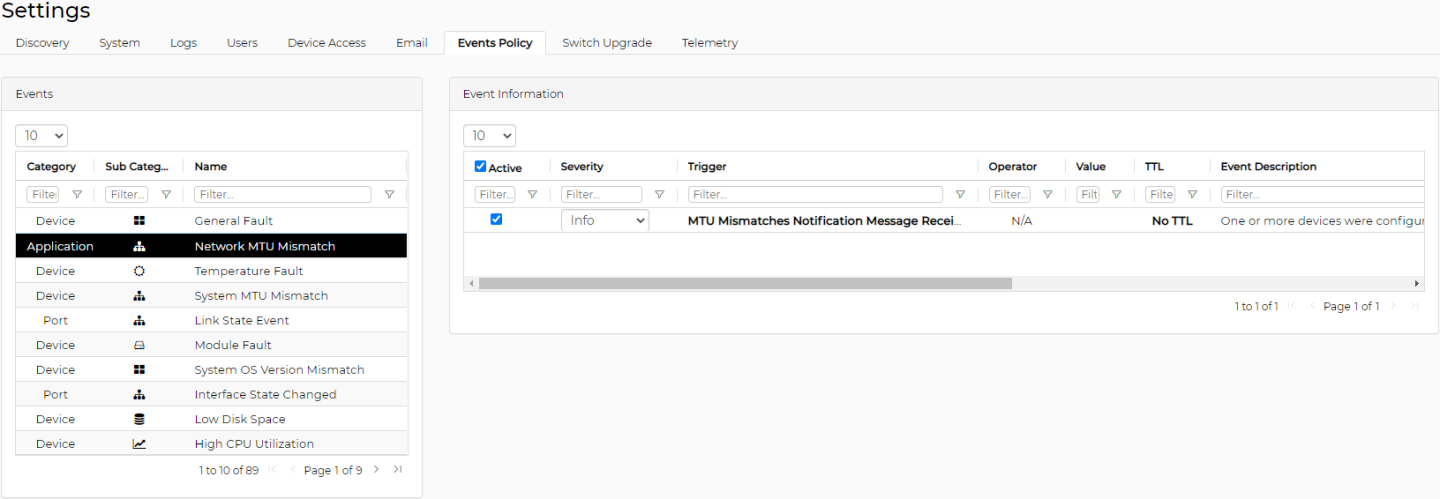
The Event Information table displays the following columns:
Active – check or uncheck boxes to activate or deactivate events as desired.
Severity – there are 5 severity types: Info, Notice, Warning, Error and Critical. You may match each of the events to the appropriate severity type, as you see fit.
Trigger, Operator, and Value – these 3 parameters are used to define the circumstances which lead to the event’s generation. The "Value" is configurable, and may be a single number, or a range of values, depending on the event type.
TTL – time to live (TTL) is used for setting a time frame within which an event that is taking place will become auto-acknowledged.
"No TTL" is set as default for most device evens and indicates that no TTL has been set for a specific event. To set a TTL, click the "No TTL" description and set the time frame in seconds, minutes, or hours, and click the checkmark icon.
"24h" is set as default for most application events and indicates an auto-acknowledgment within 24 hours. This time frame can be edited by clicking the "24h" description and setting any other number of seconds/minutes/hours and then clicking the checkmark icon.
Event Description – a brief definition of the event. You may edit the event description by clicking it.
Task – associate an existing task to the selected condition. If a task is not assigned to objects, it will run on the objects on which the event took place.
Filter – select a specific group for which the conditional event will apply. If no filter is set, the event will apply on all devices/ports in the network and will appear under the "Events" window. If a filter is set for a certain group, the event will only apply on the devices/ports in that group.
To create a new filtered condition, either click the "+" icon, or right click the event you wish to clone. Choose "Create a new filtered condition", and select the groups you wish to apply the new conditional event on.
Email Notification – set recipient lists to which alert emails will be sent when the event occurs, by clicking on the plus sign adjacent to the relevant event.
MCare – this column is enabled for setting only after operating the MCare feature.
WarningMCare is a special service requiring a license. To obtain a license, please contact NVIDIA Support.
For all the events with a checked MCare box, NEO generates and sends a regular email to a NOC with details of these events. (Note that the boxes of some events are checked by default.)
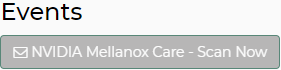
The MCare email is sent at the frequency defined in the MCare configuration ("sending_interval" parameter), and contains an aggregate of event occurrences during the last "scanning" interval. The details of the events are kept in a NEO database that is cleared each time an email is sent. Note that if no events occur during a scanning interval, no email will be sent for this interval. NEO enables the user to "induce" a MCare email and not wait for the entire scanning interval to expire. To do so, go to the Events menu (left pane) and click the " NVIDIA MCare - Scan Now " button (see below). This generates and sends an email to NOC with the aggregated events since the last sent email. The events database will be cleared after this email too.
Further information on events can be found in Application Events and Device Events.
Through the Image Profiles view, users can define profiles with parameters required for NEO to execute switch software (Onyx) upgrade, driver install, Docker image load or generate switch dump file.
These profiles will become available under Managed Elements → Devices (right-click a host/ device) → Onyx Software Upgrade/Driver Install/Load Docker/Remote Folder → (dialog window) Profiles drop down menu.
To create a profile:
Click the "Add" button.
Fill in the data, including the type of profile (Onyx Software Upgrade/Driver Install/Docker Container/Remote Folder), and click "Save".
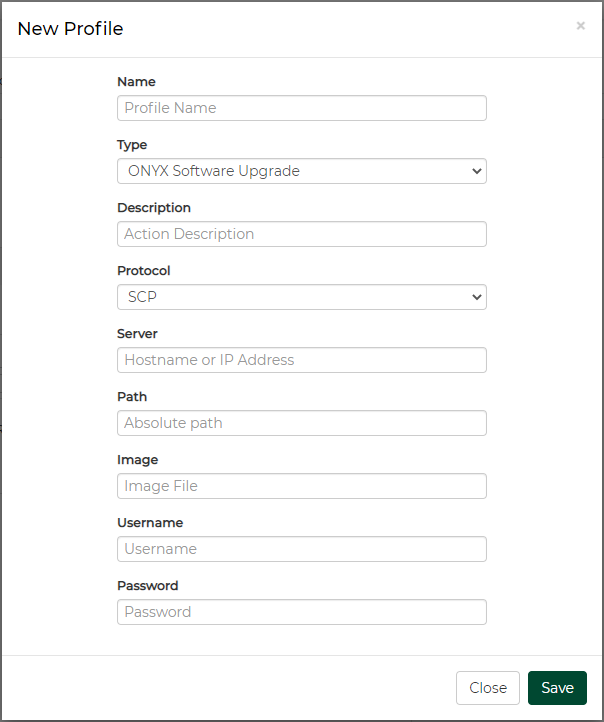
A new profile with user-defined parameters will be created.

To edit an existing profile, click it, modify the parameters on the right pane, and either click "Save" to overwrite it, or click "Save As" to create a new profile
To remove a profile, right-click it and select "Remove"
These profiles will become available under Managed Elements → Devices (right-click a host/ device) → Onyx Software Upgrade/Driver Install/Load Docker → (dialog window) Profiles drop down menu.
Users can create up to 200 SW Upgrade/Docker Container/Driver Install profiles.
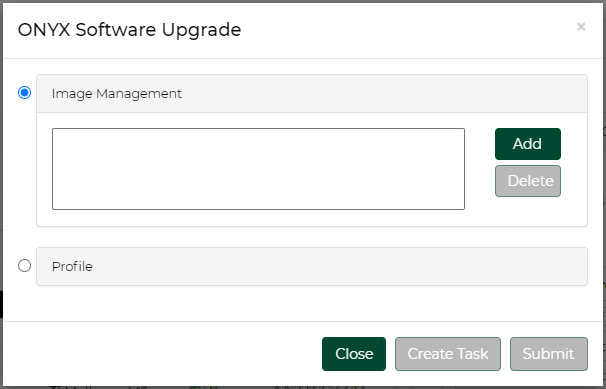
An alternative option to Image Profile, image management allows users to upload an NOS image directly from their local machine to the NEO management system.
Users may reach the Image Management screen by following any of the following procedures:
Managed Elements → Devices → Right-clicking one of the listed devices → Install → Onyx Software Upgrade
Tasks → +Add → Operation tab → Onyx Software Upgrade operation → Objects tab → Adding devices to be upgraded → Parameters tab
Settings → Switch Upgrade tab
By clicking the Add button, users are able to browse their local machine's directories and select the NOS image they would like to load.
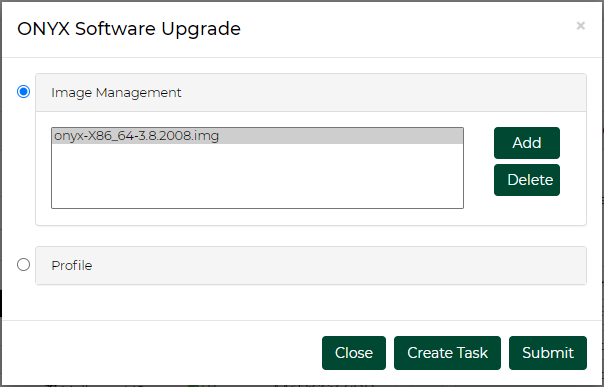
Users are able to upload up to 2 images to have on hand by clicking Add again and selecting a new image file.
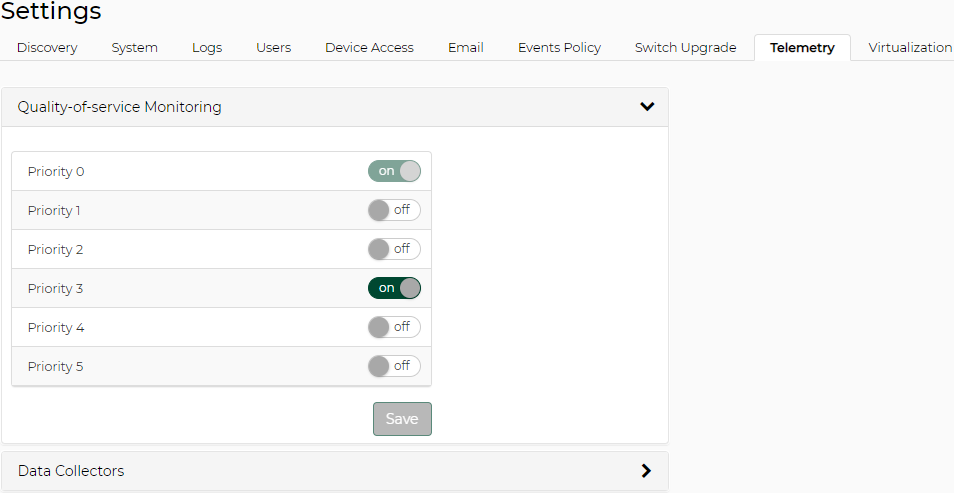
Priority Counters
This section shows the priorities available for monitoring and usage in RoCE configuration. Each priority level has an on/off switch next to it, to enable or disable its usage. Priority 0 is always available and only one additional priority can be selected at a time. These priorities are used in the Telemetry wizard if Spectrum switches are monitored. If a priority level is enabled, it can be selected for the Telemetry operation.
Displays access credentials for the specific NVIDIA device in four protocols – HTTP, SSH, SNMP, SNMP v3.
Data Collector
The Data Collector is the IP and port of the server that will collect the telemetry raw data.

NEO is configured to a number of default collectors, which cannot be removed.
Collectors that are related to sessions cannot be removed.
Make sure to add a collector before creating a session.
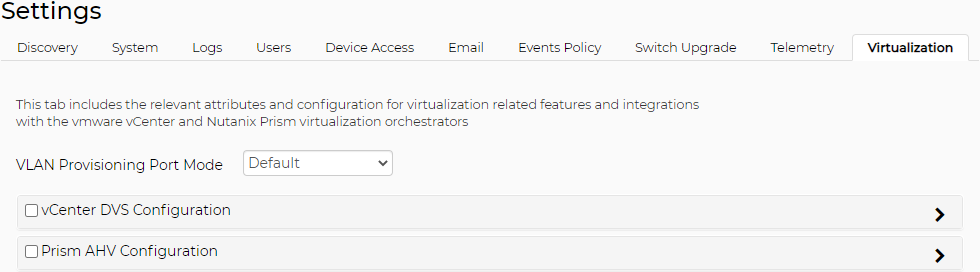
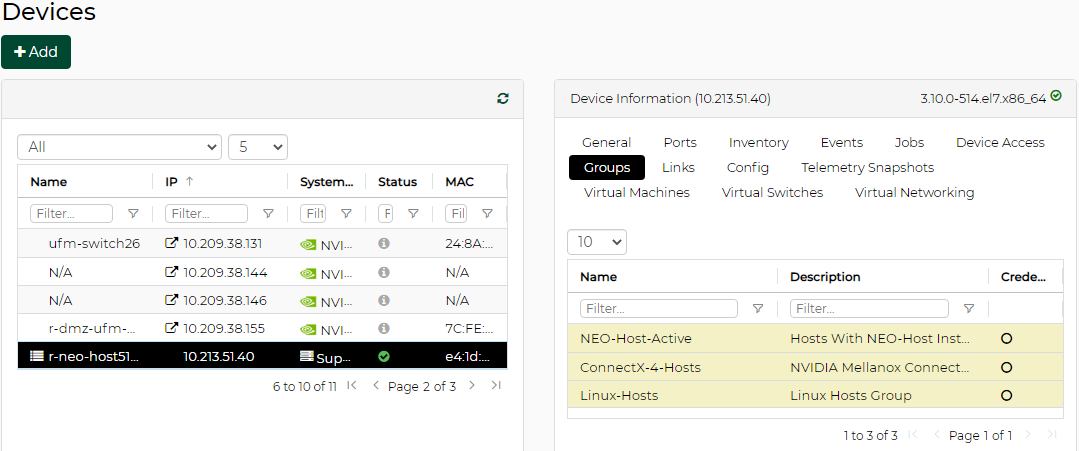
In this page, the user can define integration with various hypervisors. This can help NEO acquire information about the VMs running on them and handle VM lifecycle events to proper VLAN configuration on the switches.
VLAN provisioning operations can be viewed under jobs (Jobs with the description Create/Delete VLAN, Create/Delete Network and Create/Delete Cluster are VLAN Provisioning jobs).
VLAN Provisioning Port Mode – the user can select what mode the switch ports are working with (Hybrid/Trunk). This will be used when using NEO to handle VM lifecycle events and change switch VLAN configuration accordingly.
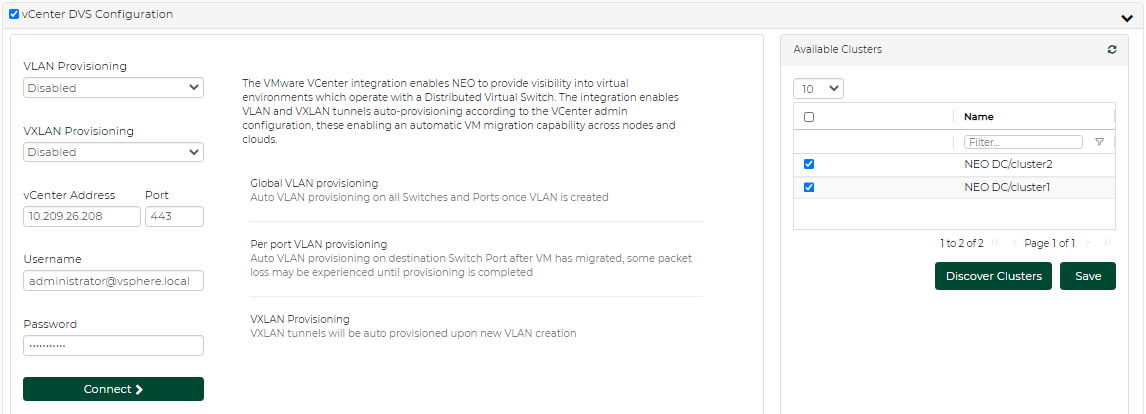
VMware vCenter DVS Configuration
vCenter Server is the centralized management utility for VMware, and is used to manage virtual machines, multiple ESXi hosts, and all dependent components from a single centralized location. In this section, the user can define VMware vCenter connectivity information, which allows managing ESXi hosts.
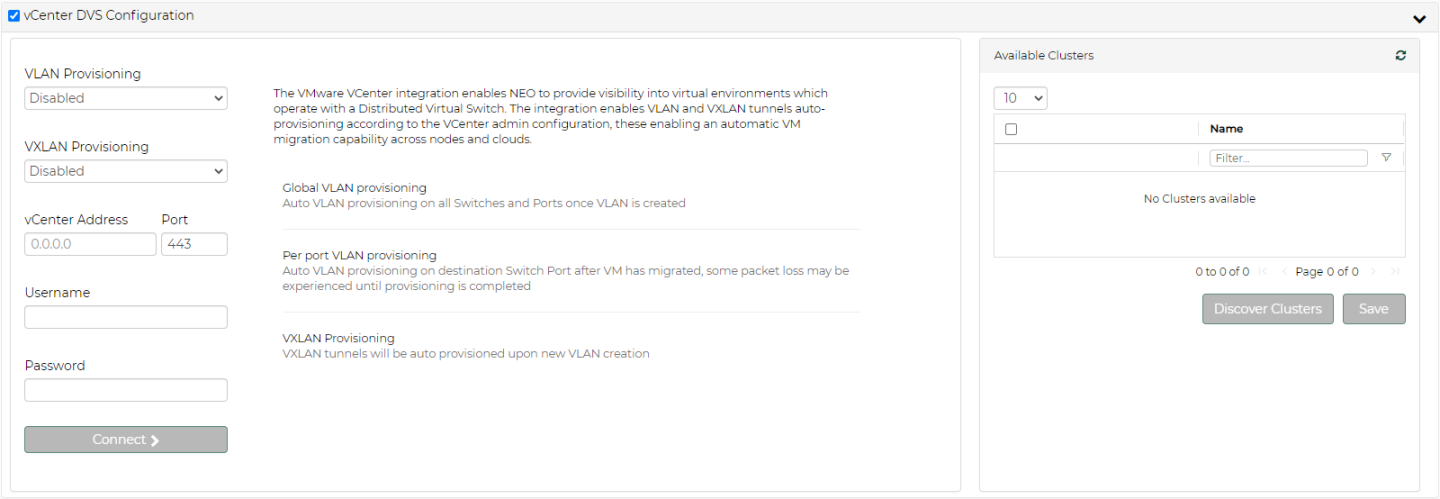
The VLAN Provisioning drop down contains the following options:
Disabled – VM lifecycle events will not be handled. NEO will only retrieve VM information from vCenter.
Global VLAN provisioning – NEO will listen to network events. In case of a network change event (e.g. adding or removing a network), NEO will add or remove VLANs to/from all switch ports. VLANs will be removed from the ports but will not be removed from the switch.
This is the recommended VLAN provisioning mode when working with Live Migration.
In this mode, the VLANs' auto-provisioning is performed upon network creation (before the VM migration event) therefore, it prevents traffic lose.
Per port VLAN provisioning – NEO will listen to VM lifecycle events. In case of a VM change (e.g. VM added, removed or migrated) which required changes in VLANs, NEO will add or remove the VLAN accordingly from the relevant switch ports.
Some packet loss may be experienced until provisioning is completed.
The VXLAN Provisioning drop down contains the following options:
Disabled –VXLAN tunnels will not be configured on VM lifecycle events.
L2 – VXLAN tunnels will be configured on VM lifecycle events, and NEO will treat them as layer 2, without gateway configuration.
Upon filling the vCenter IP address, port, username and password, the user should click the Connect button to make sure the details are correct and NEO can connect the vCenter.
The Connect button should be clicked after every change so the new information will be processed by NEO.
Limitations:
Regular Virtual Switches are not supported (this capability supports only Distributed Virtual Switches)
Old events are not supported
Removing network adapters while VM is ON is not supported
Network configuration changes (DVS changes) are not supported
NEO allows adding a list of ESXi manually or by choosing a cluster. For each cluster that will be chosen, a group will be created for the dedicated cluster.
To add a ESXi device manually:
To add a cluster:
If the connection to vCenter is successful, a list of clusters managed by vCenter will be shown in the Clusters table.
Under Available Clusters a list of available clusters will be shown, mark the ones that you want to discover.
To refresh the list, click Discover Clusters.
To save and discover the Clusters, click Save and new ESXi hosts will be discovered under Managed Elements:
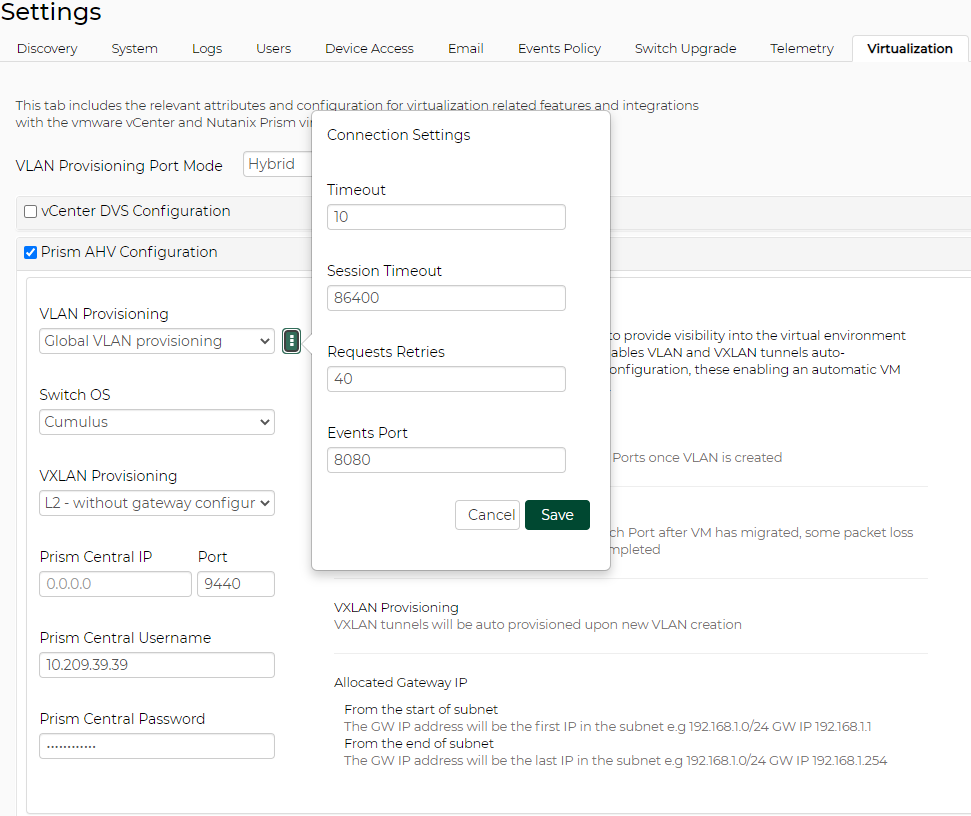
Prism AHV Configuration
In this section the user can define Nutanix Prism Central and Prism Element connectivity information. NEO uses it to get information from Prism regarding devices, VM information and lifecycle events. For further information, refer to NEO-Nutanix Prism Plug-in.
The VLAN Provisioning drop down contains the following options:
Disabled – VM lifecycle events will not be handled. NEO will only retrieve VM information from vCenter.
Global VLAN provisioning – NEO will listen to network events. In case of a network change event (e.g. adding or removing a network), NEO will add or remove VLANs to/from all switch ports. VLANs will be removed from the ports but will not be removed from the switch.
This is the recommended VLAN provisioning mode when working with Live Migration.
In this mode, the VLANs' auto-provisioning is performed upon network creation (before the VM migration event) therefore, it prevents traffic lose.
Per port VLAN provisioning – NEO will listen to VM lifecycle events. In case of a VM change (e.g. VM added, removed or migrated) which required changes in VLANs, NEO will add or remove the VLAN accordingly from the relevant switch ports.
The VXLAN Provisioning drop down contains the following options:
Disabled –VXLAN tunnels will not be configured on VM lifecycle events.
L2 – VXLAN tunnels will be configured on VM lifecycle events, and NEO will treat them as layer 2, without gateway configuration.
L3 - VXLAN tunnels will be configured on VM lifecycle events, and NEO will treat them as layer 3, with gateway configuration. (supported only for Cumulus OS)
Allocated Gateway IP – chooses whether the allocated gateway IP will be in the beginning of the subnet or in the end
Prism Central IP - IP, port, username and password are used to connect to the Prism Central. In case of working without Prism Central, put the Prism Element details instead.
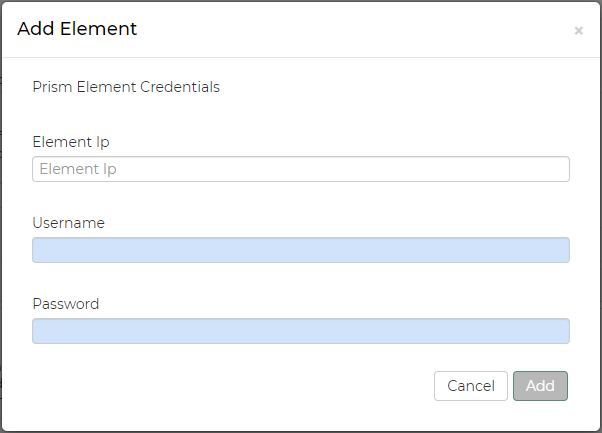
Prism Elements Credentials – in this table the user should fill the username and passwords of each Prism Element in the network. Use "default" to fill the same credentials to all Prism Elements or specify credentials per Prism Element IP.
Upon filling the Prism Central IP address, port, username and password, and the Prism Element credentials, the user should click the Connect button to make sure the details are correct and NEO can connect the Prism. If the connection is successful, the switches and Nutanix hosts known to Prism will be added to NEO. This might take a couple of minutes.
The Connect button should be clicked after every change so the new information will be processed by NEO.
When enabling VLAN provisioning, the user can also set some advanced properties that affect the communication with Prism:
Add a device either by manually typing its IP address, or by scanning a range or a subnet of IP addresses.
Start the Restore task by right click on the image.