Managed Elements
The Managed Elements tab provides a list of devices, inventory, ports, cables, groups, sites virtual machines and virtual switches.
Devices information includes the IP address of each device, the device’s name, system type, status, health and MAC address.

Device Information List
|
Device Information |
Description |
|
Name |
The device's name |
|
IP |
The device's IP address Warning
For NVIDIA switches, when clicking on the IP address, you will be redirected to the switch’s web page, in which you will be able to configure the switch as desired.
|
|
System Type |
NVIDIA device ( 
) – displayed with its type. For example: MSN2100. |
|
Non-NVIDIA device ( 
) – displayed with its name For example: Arista/Cumulus Linux/Cisco/Juniper. |
|
|
Host ( 
) – displayed with its type For example: Windows/Linux/Nutanix The switch icon will also appear for hosts with a bridge interface |
|
|
Status |
The device's status, which can be any of the following:
|
|
Health |
The device's health status, represented by the following icon colors:
|
|
MAC Address |
The device's MAC address |
Additional Device Information
When clicking a single device, a list with the following information will appear on the right side of the screen:
The "OS", "Events", "Jobs" and "Device Access" displays are not available for systems that are detected via the ETH Discovery provider.
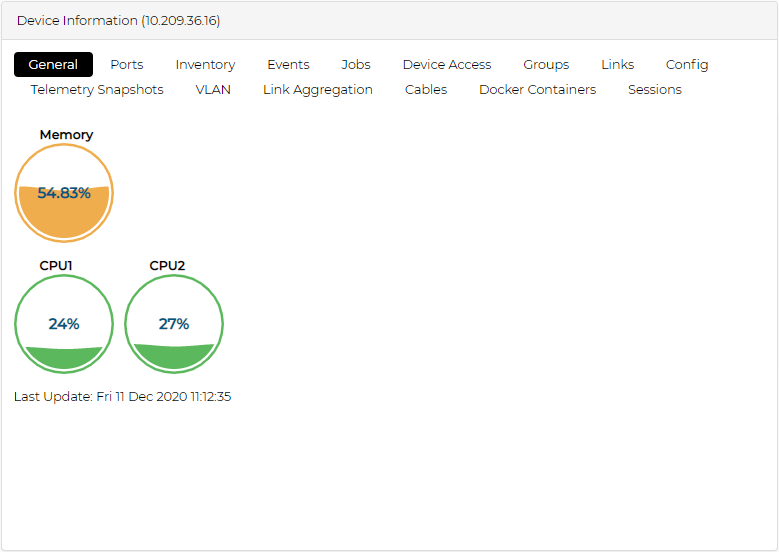
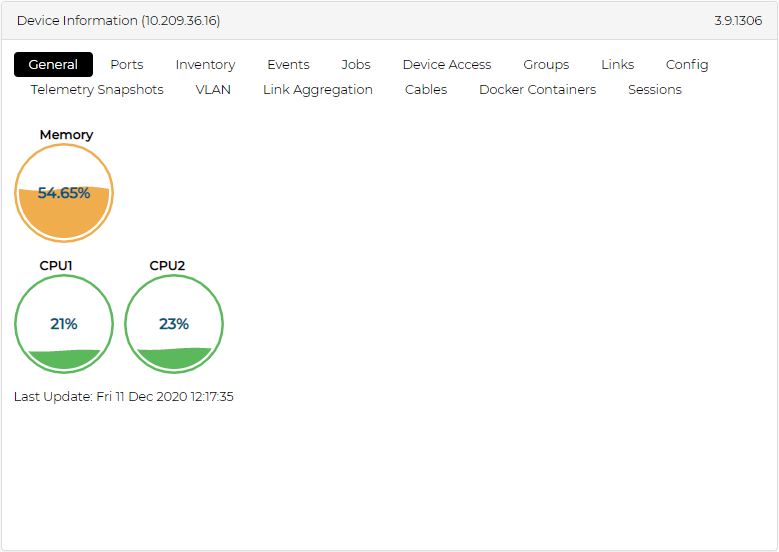
General Tab
Provides information about the device’s CPU and memory usage in a gauge view. The colors are changed according to the utilization percentage as follows:
0-50%: Green
[> 50]-70%: Orange
[> 70]%: Red
For hosts on which NEO-Host is installed, a table with information about the Linux server will be displayed:
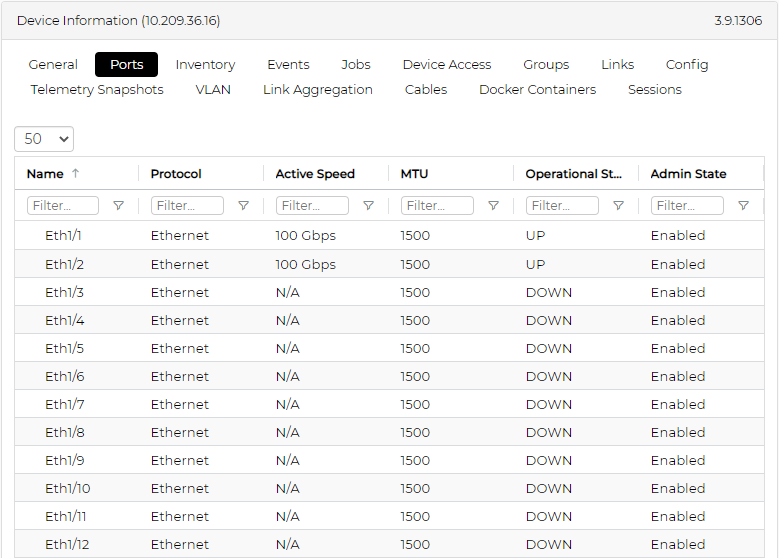
Ports Tab
Provides details on each port of the device.
A right click on one port or more will enable performing live/history monitoring and provisioning on those ports. For information on these actions, refer to "Ports Actions".
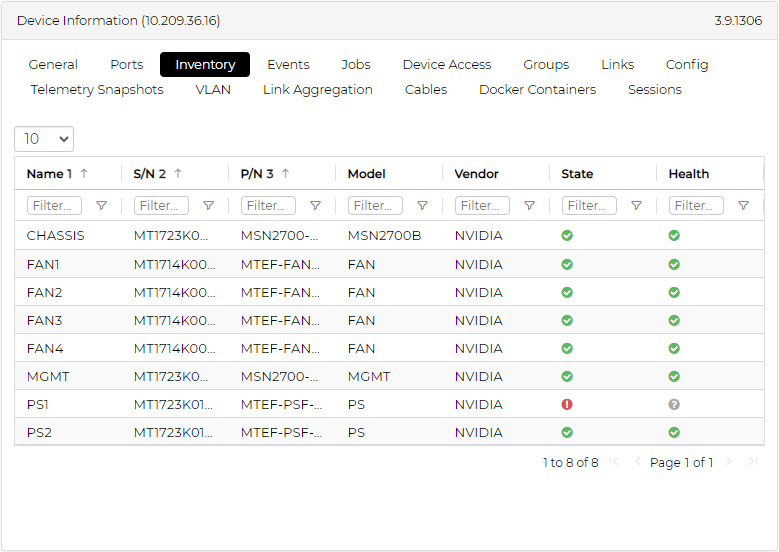
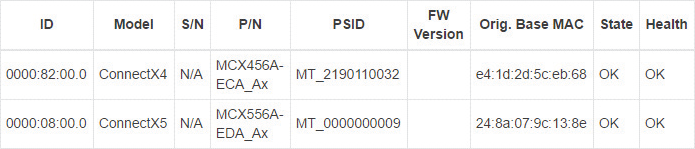
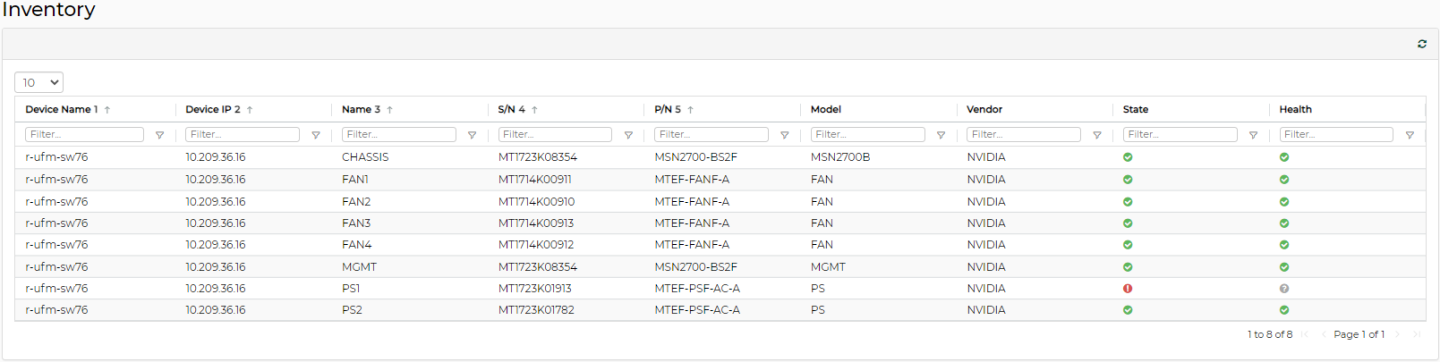
Inventory Tab
Provides details on switch parts, such as FAN and CPU.
For Linux hosts on which NEO-Host is installed, a table with information about the NVIDIA adapter cards will be displayed:
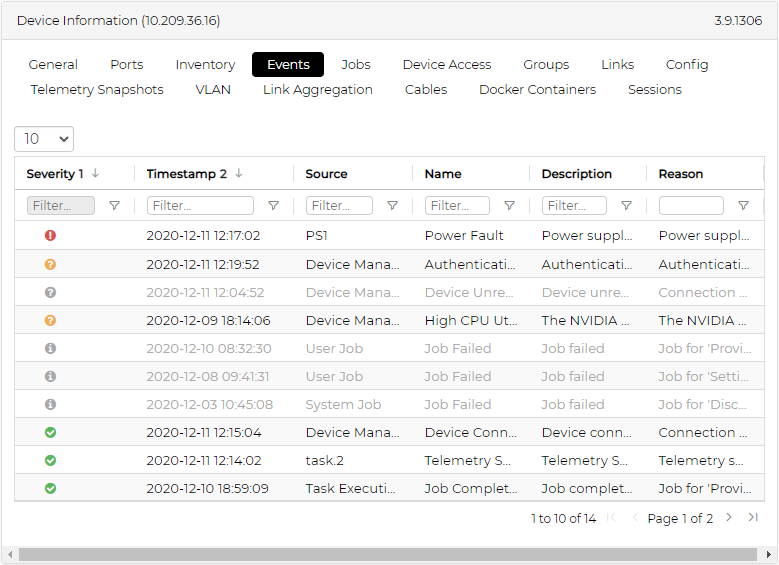
Events Tab
Lists specific switch related events.
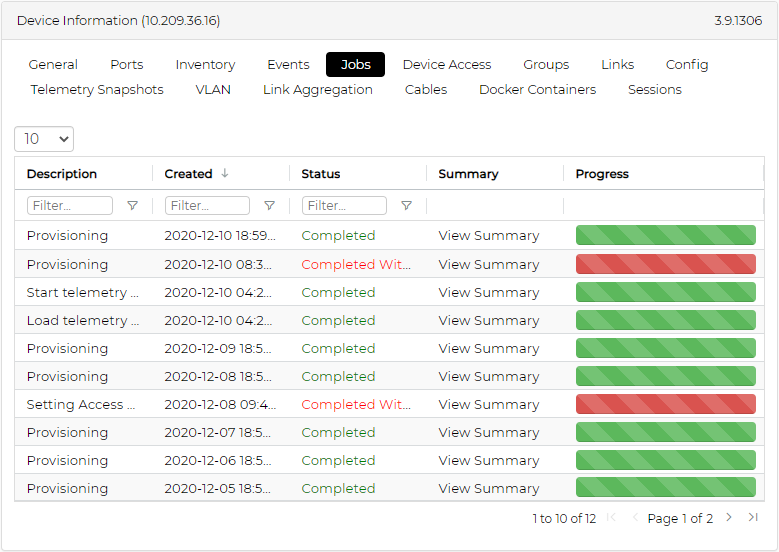
Jobs Tab
Lists switch jobs and their status.
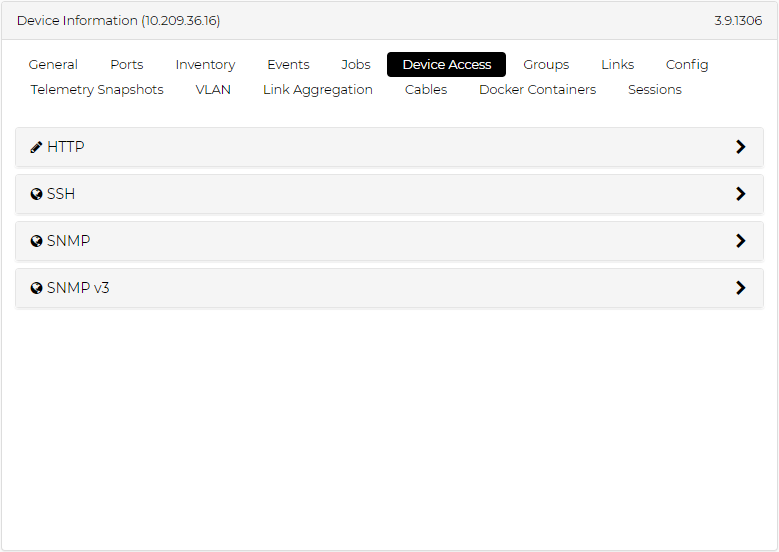
Device Access Tab
Displays access credentials for the specific device in the applicable protocols – HTTP, SSH, SNMP, SNMP v3.
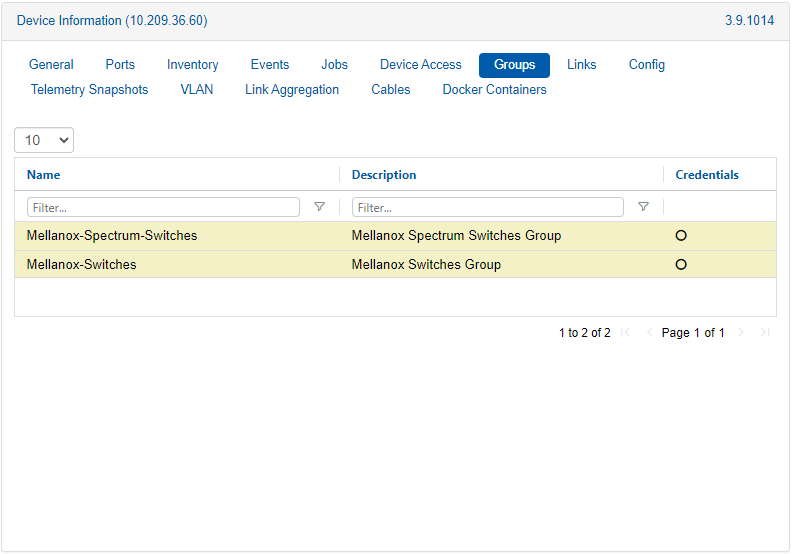
Groups Tab
Lists the groups of which the specific device is a member.

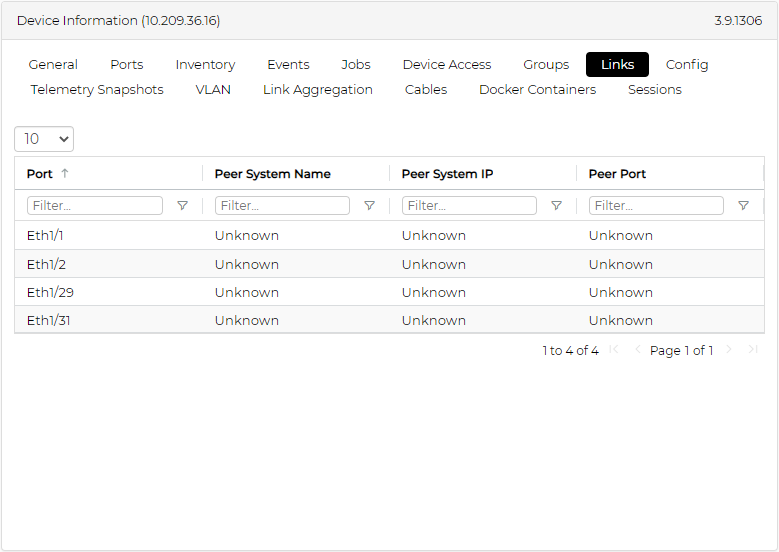
Links Tab
Details the active links of the specific device. The "Peer Name" and "Peer IP" columns specify the management peer and name, and the "Peer Port" column refers to the port to which the interface is connected. If the "Peer Port" is "Unknown", the interface is up, but no ETH discovery (LLDP) connection information is available.
Config Tab
Enables users to perform the following:
Take snapshots of running configuration files of a specific system in NEO. Configuration files provide general information about hosts.
Manage existing snapshots and device specific configuration files.
Configuration Management can be accessed from two main windows in NEO; this Config tab, and the Configuration Management window from the left pane. For information on the latter window, please refer to "Configuration Management".
In the Config tab under Devices, there are multiple buttons with different functionalities and purposes, explained in the tables below.

Config Tab Components
|
Icon |
Name |
Description |

|
Compare Config Data |
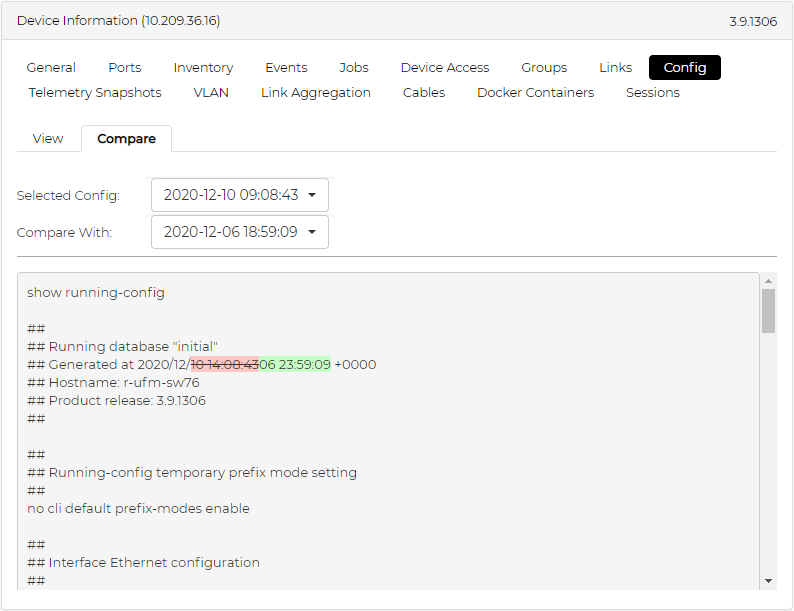
Allows comparing two configuration files or snapshots and tracks the changes between them (added information will be colored in green, and removed information will be colored in red and crossed out). See related Figure 4 below. |

|
Show Config Data |
Displays configuration files content. See related Figures 3 and 4 below. |

|
Download |
Downloads the chosen configuration file or snapshot to the user's computer. |

|
Upload |
Uploads a device specific configuration file to NEO's repository. Note that snapshots cannot be uploaded. |

|
Fetch Config Data |
Fetches information about the selected system’s running configuration file. This icon is used for the first information retrieval request, and will be replaced with the next icon below. |

|
Refresh Config Data |
Retrieves the content of the current running configuration on the system. If the content retrieved is different from the latest snapshot for that system, it will create a new snapshot. Otherwise, it will only update the "Last Verified" date to the time when the last snapshot was taken. These snapshots are also taken by NEO as it refreshes the configuration files of all devices every 24 hours. By default, NEO saves up to 7 snapshots for each device. Note: Hosts do not have running configuration files like switches. Therefore, "refreshing" a host will return general information about it. |

|
Apply Config |
[Applicable to NVIDIA Switches only] Applies the chosen configuration file or snapshot on the switch. The apply operation replaces the current running configuration. The operation might take a few minutes. |

|
Edit Config |
Enables editing an existing configuration file of a specific system in NEO, and saving it for future use. The new configuration file can be saved as a new file using the "Save Config As" icon, or can overwrite the existing one, using the "Save Config" icon. |

|
Delete |
Removes selected configuration files. This icon is only available for device specific configuration files (edited snapshots). |
Related Figures:
|
Figure 1- Selected Config Drop Down Menu |
Figure 2 - Configuration File Variables |
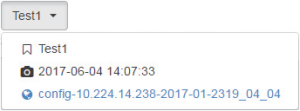
The Config drop down menu displays a log archive menu of all device specific configuration files ( 
), snapshots ( 
) of the chosen device, and global configuration files ( 
). |
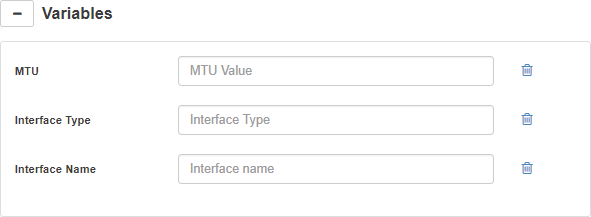
In order to apply the configuration file selected from the drop-down menu, values should be provided for the previously defined variables (if applicable). |
|
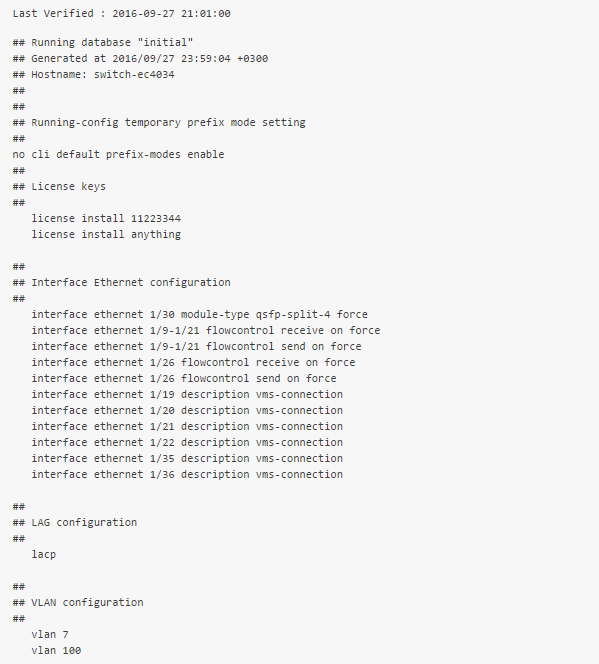
Figure 3 - Configuration Content Example |
Figure 4 - Compare Config Data Output |
|
|
|
Figure 5 - Last Verified |
|

The "Last Verified" marks the last time the snapshot was known to be the current configuration on the device. The snapshot can be updated by clicking the "refresh" button, or when an auto-refresh takes place. |
|
Snapshots cannot be deleted, but when removing a system, all its snapshots, including the edited snapshots (device specific configuration files) will be permanently removed as well.
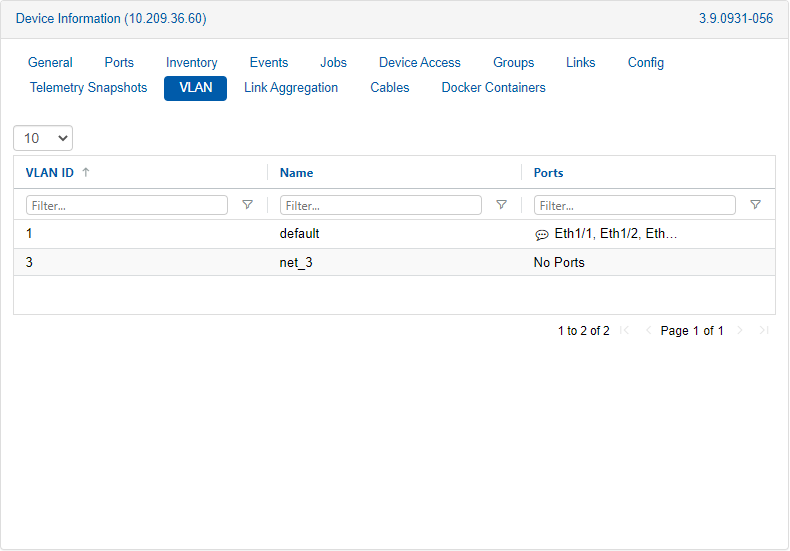
VLAN Tab
Lists all VLANs of which a certain device is a member.
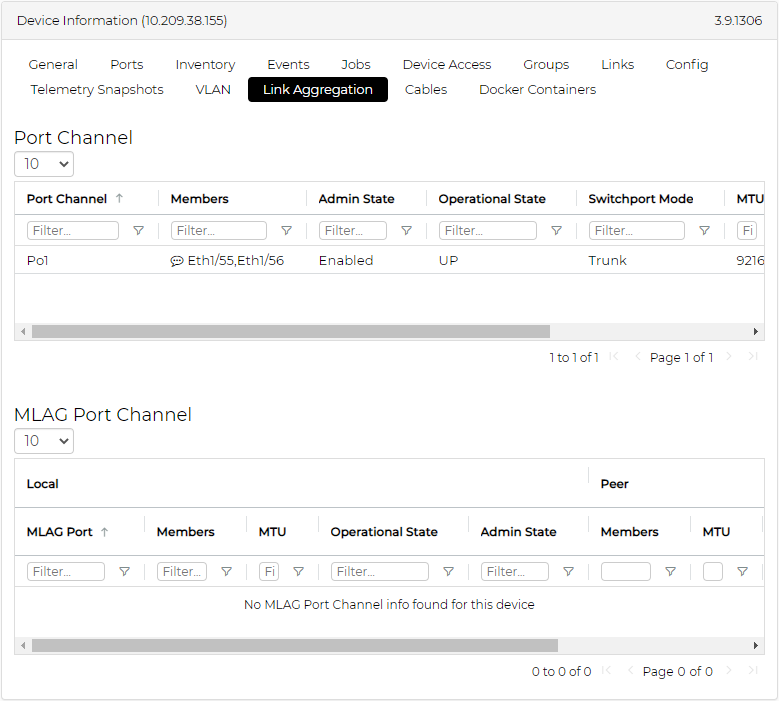
Link Aggregation Tab
The top table lists all LAG information of the selected device. The bottom table lists MLAG ports for the selected device and their corresponding ports in the peer device.
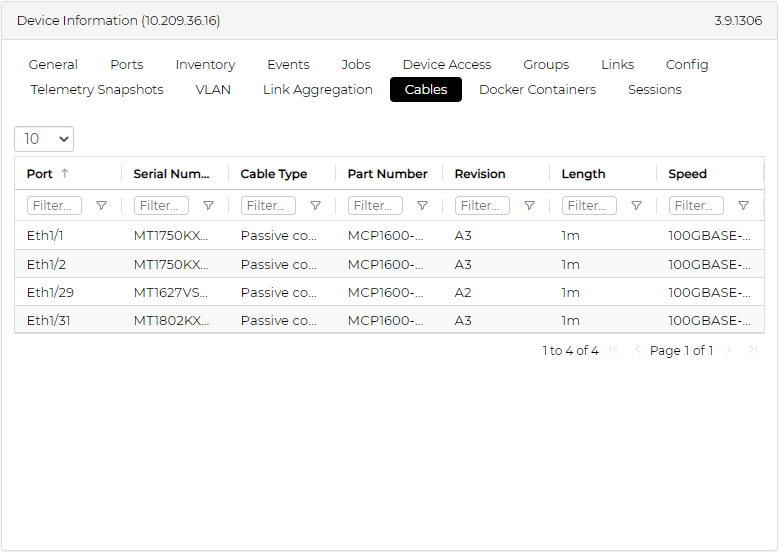
Cables Tab
Lists the cables connected to an NVIDIA/Cumulus switch of communication status "OK", and provides the following information about each cable: the port to which it is connected, its serial number, cable type, part number, revision, length, and speed.
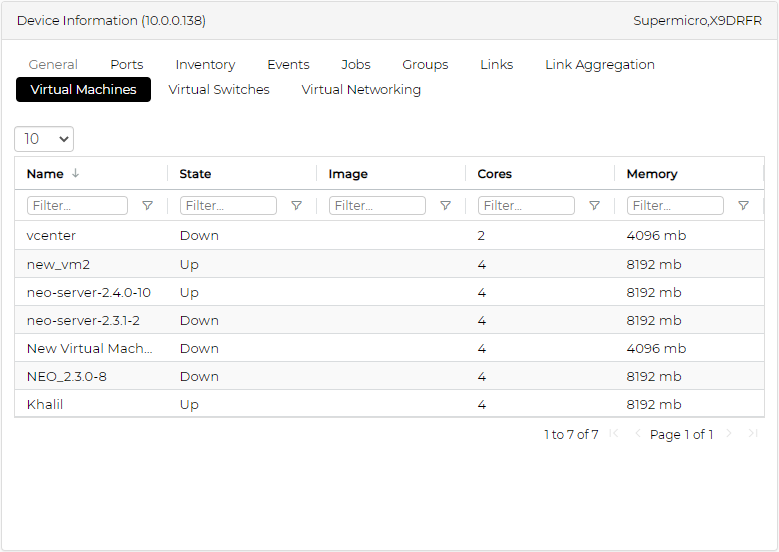
Virtual Machines Tab
This tab is available only for Linux KVM/Nutanix/ESXi hypervisors. When clicking a hypervisor machine, a list of all VMs that run on that machine will appear, and the following VM information will be provided: the VM name, its state, the image the VM runs, the number of cores the VM has, and the VM memory size.
When clicking a VM, a list of its virtual interfaces will be displayed with information about its name, type (Normal/SR-IOV), physical ports and VLAN ID.
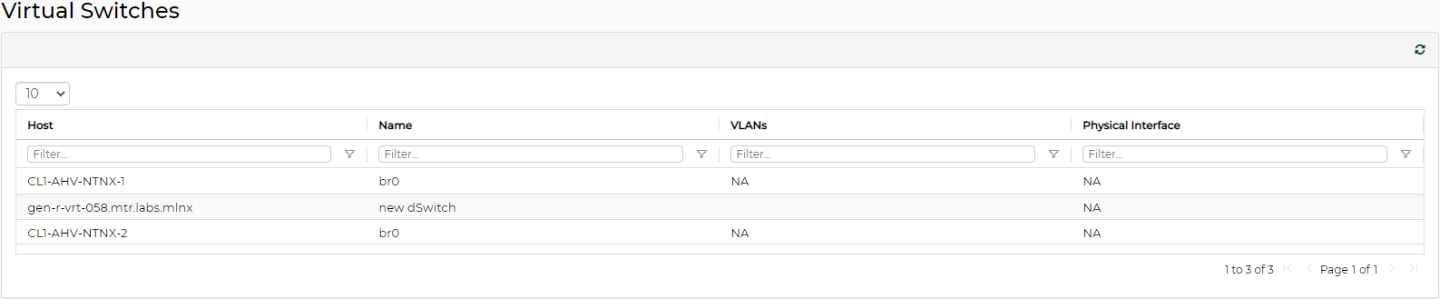
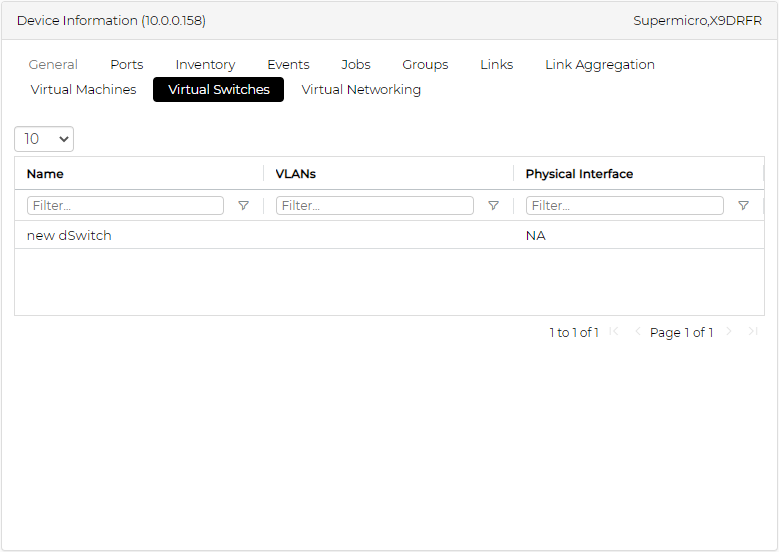
Virtual Switches Tab
This tab is available only for Linux KVM/ESXi hypervisors. When clicking on a hypervisor machine, a list of all Virtual Switches that run on that machine will appear, and the following Virtual Switches information will be provided: the virtual switch name, VLAN ID and physical interface.
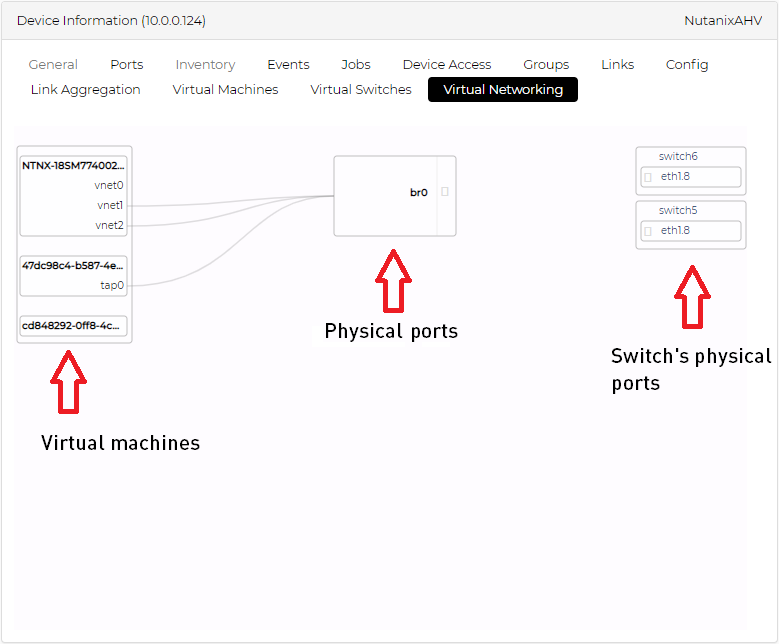
Virtual Networking Tab
This tab is available only for Linux KVM/Nutanix/ESXi hypervisors. When clicking on a hypervisor machine, a simplified host visualization network map will appear, and the following visualization information will be provided:
The virtual machines in the selected hypervisor
The physical ports that are connected to these VMs through virtual interfaces. These ports are blue colored, and when clicking them, you will be redirected to the Ports page, where port information will be provided in a table
The switch ports that are connected to the physical ports - available only for Linux KVM hosts
Docker Containers Tab
Enables the user to manage, deploy, remove, start and stop the docker images and instances, and to discover current images and instances. This tab is available only for NVIDIA® Spectrum® switch systems that possess docker capability, using NVIDIA® Onyx® or Cumulus OS (for the OS versions, please refer to the latest Release Notes document).
When clicking on this tab, a table that contains the docker instances is displayed. The table includes the following attributes: Instance Name, Image Name, Version and Uptime, as well as multiple buttons for multiple functionalities, as described in the following table.
Docker Instances
|
Icon |
Name |
Description |

|
Create Instance |
Starts a new instance from a loaded docker image. |

|
Stop Instance |
Stops a running instance from the switch. |

|
Images |
|
When clicking on the "Image" button, a list of loaded images is displayed.
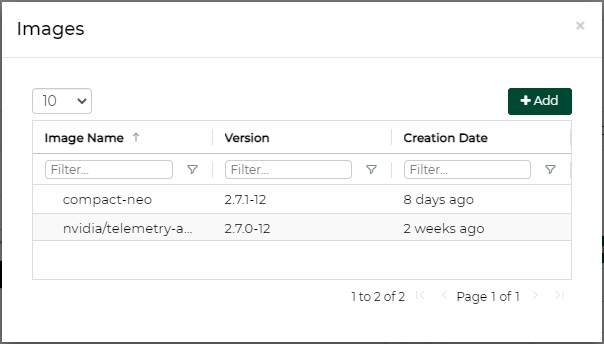
When clicking on the "Add" button, a new popup will allow to load a new docker image.
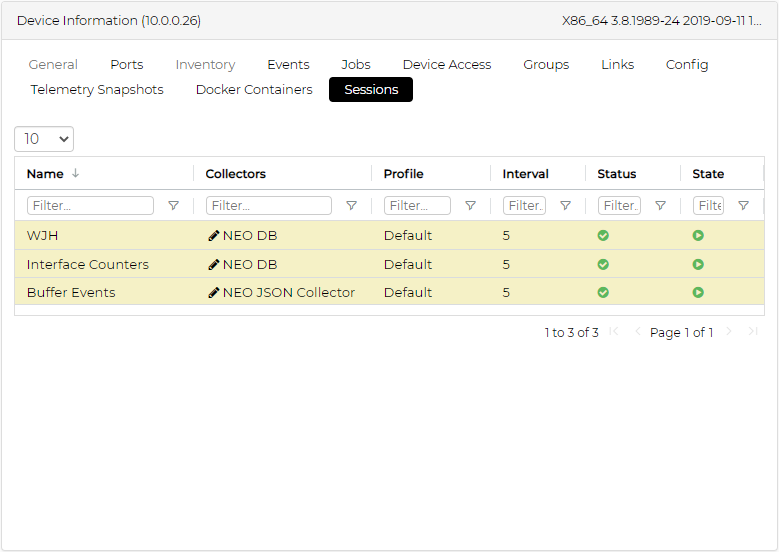
Sessions Tab
Lists all telemetry related sessions of the selected device, including default telemetry sessions (highlighted in orange) and user defined telemetry session (shown in gray).
Possible Device Actions
Right clicking on a device will show the actions that can be done on it, depending on the device type and capabilities:
Acknowledge
Acknowledges all events related to the selected device(s). This action will gray out the selected device events.
Reboot
Reboots the device. When choosing "Reboot", a dialog box appears, requiring the users to confirm their choice or create a reboot task.
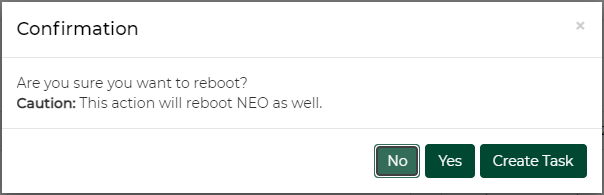
When reboot is started, the device’s status will turn into "Rebooting", and an event named "Reboot Started" will be created. If the operation is completed successfully, a "Reboot Completed" event will be created. If the operation fails, a "Reboot Failed" event will be created.
Onyx Software Upgrade
Enables the user to upgrade the device’s software. When choosing "Onyx Software Upgrade", a dialog box appears, requiring the users to fill in the relevant details in order to perform the upgrade.
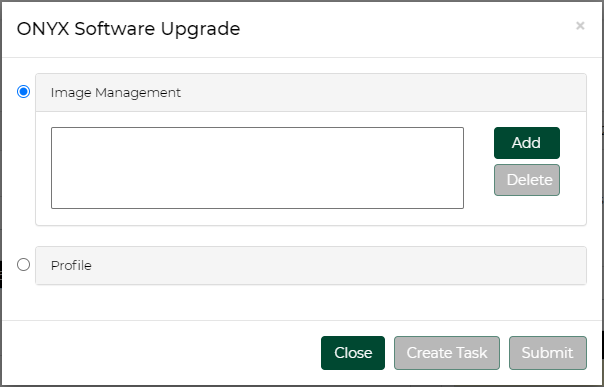
"Create Task" directs the user to the Tasks page
"Submit" directs the user to the Jobs page and starts the upgrade process immediately
After the Onyx Software Upgrade is completed successfully, the device’s status will turn into "Pending Reboot", meaning that SW upgrade will only take place after rebooting the device.
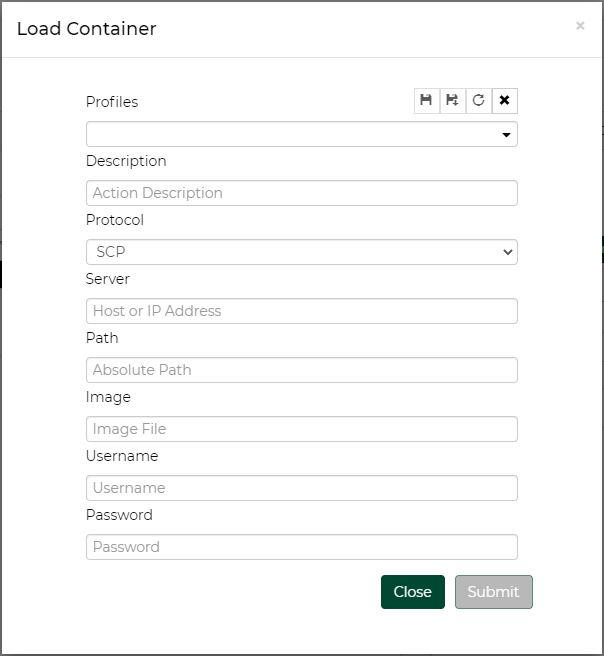
Load Docker Image
Enables the user to load new docker image on the device's. When choosing "Docker Container", a dialog box appears, requiring the users to fill in the relevant details in order to load a docker image.
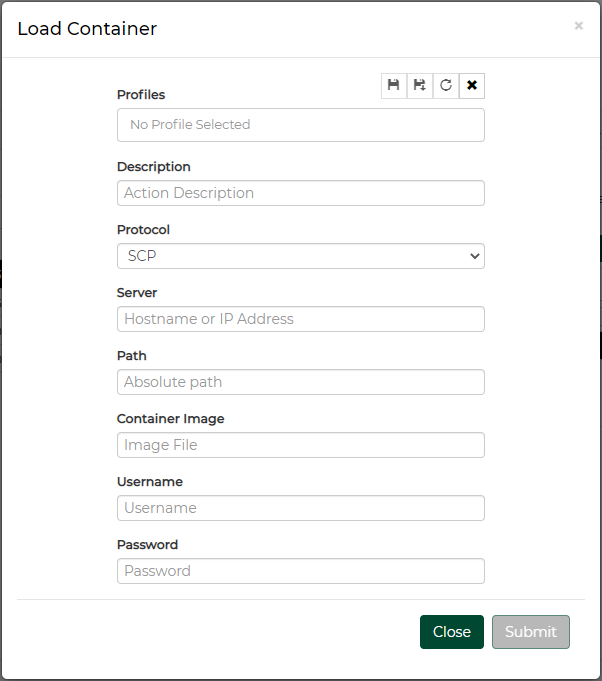
"Submit" directs the user to the Jobs page, and starts the loading process immediately.
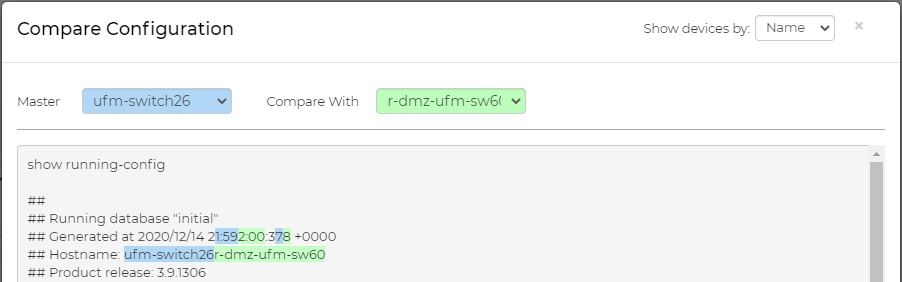
Compare Configuration
This enables users to compare the configuration of several switch systems through NVIDIA® NEO®.
Mark at least two systems.
Right-click the selected systems and click Compare Configuration.

It is also possible to do this from the Network Map screen.

Select a master system.
Select a system to compare the master with.
The differences in configuration are displayed in color.
Provisioning
Provisioning enables the user to perform actions via the CLI player. The actions can be sent to one or more devices. NEO provides provisioning templates with common CLI commands. Clicking on "Provisioning" opens a dialog box where the user is required to fill in the desired CLI commands and job description or select a predefined template.

"Templates" will open a dialog with a list of the available provisioning templates.
Typing string into the Filter box (at the top right corner) will filter the list.
The templates table contains two columns: the left column for a template name and the right column for a matching validation template.
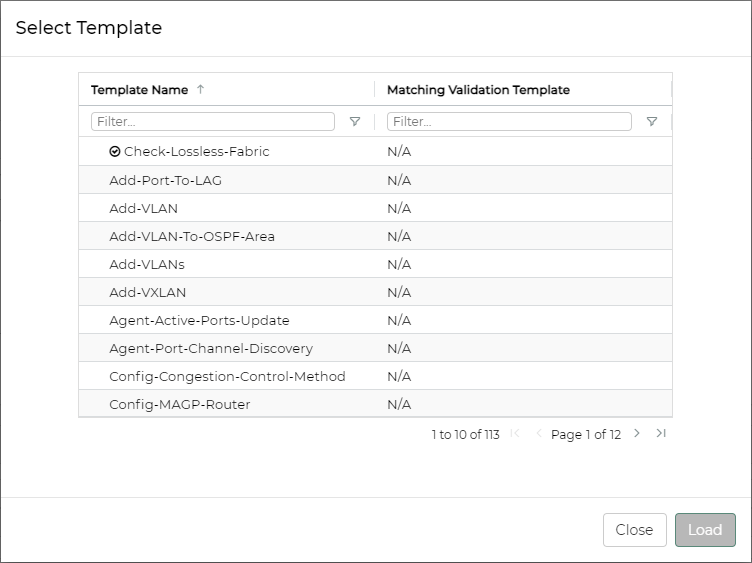
|
Template Type |
Icon |
Description |
|
Provisioning |
No Icon |
Applies configuration or commands to the selected devices |
|
Validation |

|
Checks that a specific configuration still exists on the selected devices |
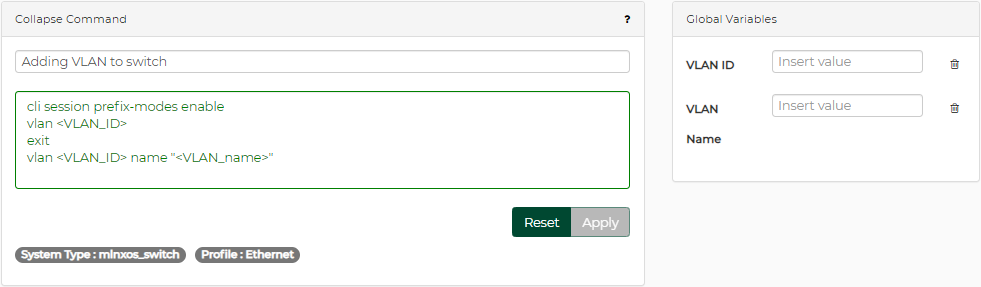
If you wish to edit an existing template, click "Edit command" and edit it as desired.
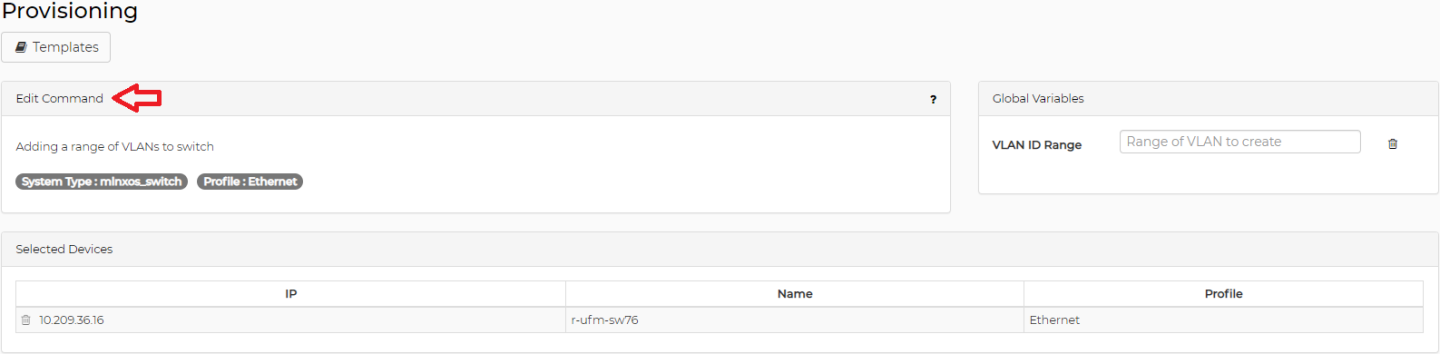
When adding invalid variables, a validation mechanism will notify you in case the variable’s value is invalid, and will instruct on the correct options in order to avoid the occurrence of a failed job (see image below). This mechanism also provides description of the variable used. For example:
VLAN ID – number of VLANs to create
VLAN Name – textual name of the VLAN
"Create Task" directs the user to the Tasks page.
"Start" directs the user to the Jobs page and starts the provisioning process immediately.
The three boxes on the bottom-left corner can be checked when loading a template that involves changes in the system configuration or when creating/editing a template.
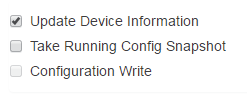
Update Device Information – This box is checked by default. When checked, it refreshes NEO's device information after the provisioning execution. Otherwise, the devices are refreshed every 15 minutes by the Device Manager. The refresh operation might take up to one minute.
Take Running Config Snapshot – When checked, a snapshot of each device's configuration will be taken before the provisioning execution.
Configuration Write – This checkbox is enabled only when applying pre-defined templates. When checked, it sends the 'configuration write' command after the provisioning execution. This command makes all changes persistent, which means that they will still be valid after switch reboot.
For further information on the provisioning of devices, please refer to "Providers".
Connectivity Check
Connectivity Check allows the user to verify their device's connectivity across multiple communication protocols (i.e. ICMP, SSH, HTTP, and SNMP).
Clicking "Connectivity Check" opens up a window showing the connectivity status of your device over the supported protocols.

Hovering over the status icons provides a description of the status indicated by that icon.
This can also be done from the Network Map view and the Managed Elements > Groups window.
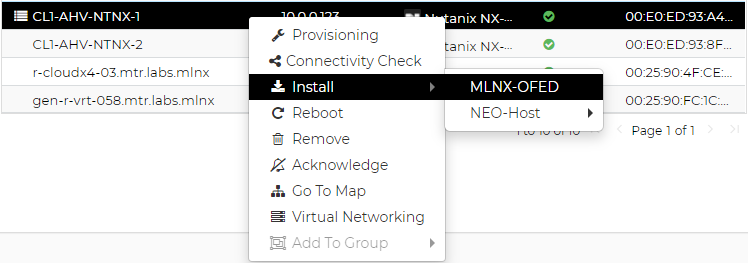
Install
NVIDIA Driver
Allows users to perform MLNX_OFED/MLNX_EN driver installation or upgrade on hosts. Follow the steps below to perform a driver install/upgrade.
Right-click one or more hosts, and choose "Install" → "MLNX-OFED"
Fill out the required data. There are two ways to do so:
Choose a pre-defined profile, in which case all data will automatically be filled out. If a profile is selected, it can be edited in the same dialog window. Clicking any of these

icons will enable saving the changes and overwriting the profile selected, saving and creating a new profile, or reloading and reverting to the initial data. For more information on the profiles, see "Image Profiles Settings".
Skip "Profiles" and manually fill in the required fields. If no profile is selected, provide description, then choose the desired protocol in the dialog window:
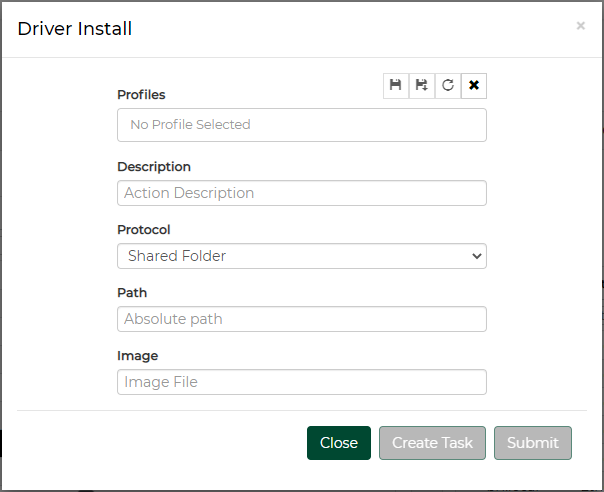
For the Shared Folder protocol – provide the path and image name. The image should be located in a shared folder that can be accessed by the hosts.
For the SFTP server protocol - provide the credentials, path and image name. The image should be located in an SFTP server that can be accessed by the NEO machine.
Clicking "Create Task" will generate a driver install task that can be executed at any time. Clicking "Submit" will perform an immediate driver installation. Note that the procedure might last for several minutes.
In order to view the current driver version of the hosts, choose the host or any of the hosts for which you installed the driver under "Devices", and refresh the Config tab. You will be able to see the driver version as part of the configuration content.
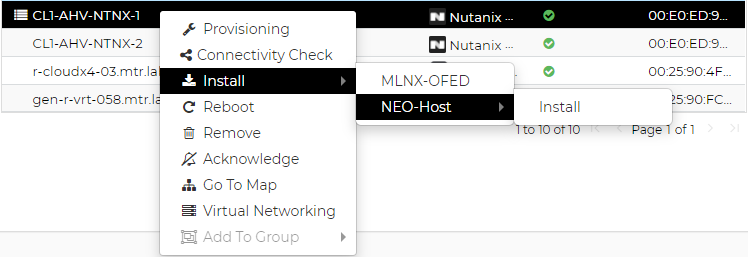
NEO Host
Allows users to install/uninstall NEO-Host on a Linux machine.
Follow the steps below to perform a NEO-Host install/uninstall/upgrade.
Right-click one or more hosts, and choose "Install > NEO Host > Install/Upgrade/Uninstall".
Confirm the install/upgrade/uninstall by clicking "OK".
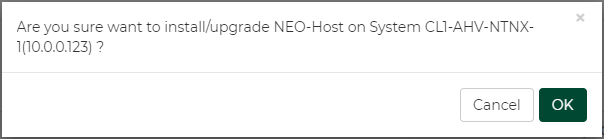
A job will be created for this operation.
NEO Telemetry Agent
Allows users to install NEO Telemetry Agent on switches that supports Docker capability.
Before deploying the Telemetry Agent on a Cumulus switch, make sure to install docker on the switch and that it is running.
The switch's clock must be synchronized with NEO's clock. A lack of synchronization may prevent certain telemetry features from working properly.
To perform a NEO Telemetry Agent installation, right-click one or more switches and navigate to "NEO Telemetry Agent → Install".
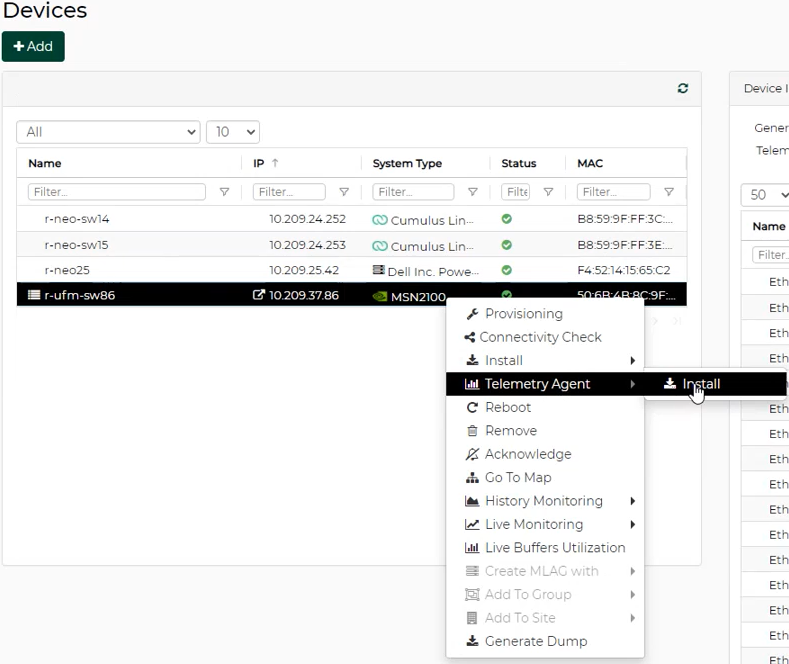
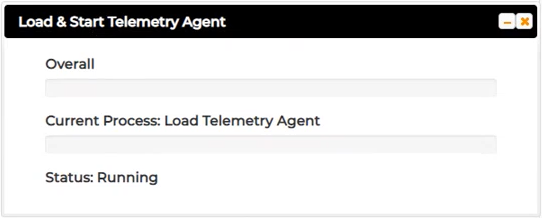
The agent will be installed on the switch, and the session will be started.
For further information, please refer to "Activating Switch Telemetry Using the NEO Telemetry Agent".
History Monitoring
Provides a report of the device attributes values history. For further information on the history monitoring of devices, please refer to "Providers".
Live Monitoring
Provides a live report of the device attributes values.
Create MLAG
Allows users to configure an MLAG with devices that have at least two links to this device. This action is applicable for NVIDIA Ethernet switches only.
Generate Dump
Allows the user to generate a debug dump file for the device and upload it to a remote folder. Available for Onyx switch systems. When choosing "Generate Dump", a dialog box appears, requiring the users to fill in the relevant details in order to perform the dump generation.
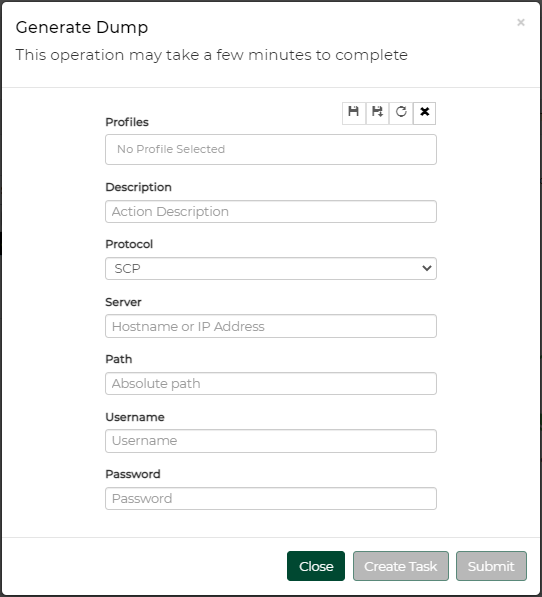
"Create Task" directs the user to the Tasks page
"Submit" directs the user to the Jobs page and starts the dump generation and upload process immediately.
Adding Devices
To add a device click the + Add"" button above the Devices Information list. You can add a device either by manually typing its IP address, or by scanning a range or a subnet of IP addresses.
Discover by IP


Insert the Device IP address, select its type, and click the "+ Add" button to add the device. Repeat the action for all devices you wish to add.
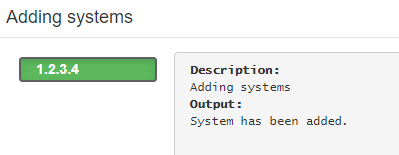
Once all devices are added, click Submit.
A window with the devices that have been added will be displayed. Clicking one of the devices will show the system addition status.
Each newly added device under this window will automatically appear in the Allowed list under Settings → Discovery, in a grayed-out row.
Discover by Range/Subnet


Insert the IP range or subnet to scan for devices, and select the device types to discover, and the discovery methods to use.
Discovery method options:
LLDP – when checked, NEO discovers all devices found within the range specified and on which LLDP is enabled
Multicast – when checked, NEO discovers all Onyx switches found within the range specified using multicast
You can optionally specify a tier for the devices discovered by the scan. This tier is used to present the network map in a hierarchical structure.
Auto-Provisioning
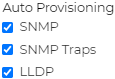
Whether you added the devices by specifying IP or by scanning, the following provisioning actions are enabled by default on all added devices:
SNMP – configure the device to listen and respond to SNMP requests (SNMP version 2c)
WarningSupported for Cumulus switches.
SNMP Traps – configure device to send SNMP traps to NEO. The SNMP trap version (2c/3) is decided by the Onyx global SNMP credentials used.
WarningSupported for Onyx switches.
LLDP – configure device to enable LLDP protocol
WarningSupported for Onyx and Cumulus switches.
Adding Devices with Onyx v3.9.2006 and Above
Onyx 3.9.2006 added two new features, Password Hardening and Management VRF, that require further action from the user in order for the Onyx device to be successfully managed by NEO.
Password Hardening
SSH into the switch via CLI
Go through the initial Configuration Wizard and set an admin password that meets certain criteria.
WarningPlease refer to the latest NVIDIA® Onyx® user manual for more information.
Configure global default credentials for accessing Onyx switches to match the password you set by navigating to Settings > Device Access on the Web UI.
WarningYou may override this for certain switches with either of these methods:
Using the Device Access tab
By configuring a new Group with unique credentials
Management VRF
SSH into the switch via CLI.
Enter config mode.
            switch > enable
switch # configure terminal
switch (config) #
Run the following command:
            switch (config) # no vrf definition mgmt
Warning - confirming will cause system reboot and all configuration will be saved
Type 'YES' to confirm VRF deletion: YES
switch (config) #

System shutdown initiated -- logging off.
Removing Devices
To remove a device, right-click it, and click "Remove". A job will be created automatically.
In some cases the "Remove" operation is blocked because the device is used or is running Telemetry Agent. If so, remove the agent or any other usage of the device and retry removing the device.
Each removed device is automatically dropped from the "Allowed" list under Settings → Discovery.
When removing a device from NEO, it is automatically moved to the blacklist in the Discovery settings. These devices are not added automatically to NEO when scanning for new devices.
NEO removes itself as an SNMP trap listener from Onyx switches when they are removed.
Inventory page provides a detailed presentation of each device part (such as CPU and FAN), part number, SKU and serial number.

Ports Information
The Ports page provides the following details on each device port..
Device Port Details
|
Details |
Description |
|
Device |
The device name |
|
Name |
The port name |
|
Protocol |
Shows the port’s used protocol. It can be either Ethernet or InfiniBand |
|
Active speed (Mbps) |
The actual speed in which the port operates |
|
MTU (Maximum Trans- mission Unit) |
The standard MTU is 576, however ISPs often suggest using 1500 |
|
Operational State |
Up/Down |
|
Admin State |
Enabled/ Disabled |
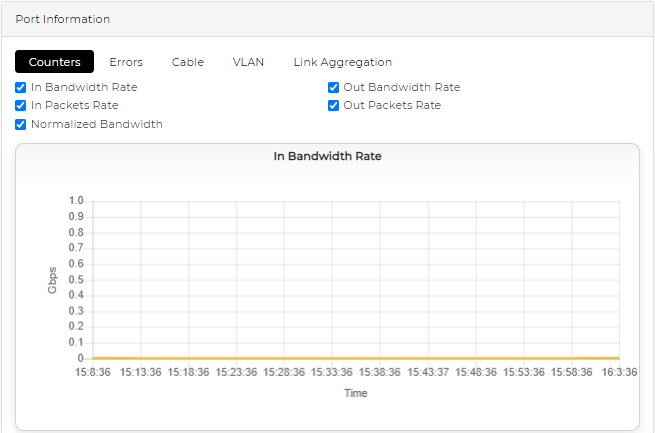
Once a port is selected, a window with the available Port Information will be displayed:
Counters: The user can choose to view the following counters:
In Octets Rate – Received Data Rate in MBps
Out Octets Rate –Transmit Data Rate in MBps
In Packet Rate
Out Packet Rate
Normalized Bandwidth – Percentage of Bandwidth utilization in %
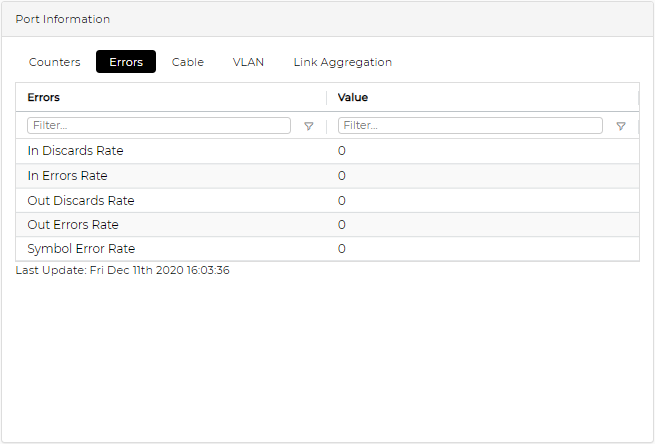
Errors: The "Errors" tab includes the following counters:
In Discards
In Errors
Out Discards
Out Errors
Symbol Errors
Cable: Provides information about the cable connected to the selected port, if available.
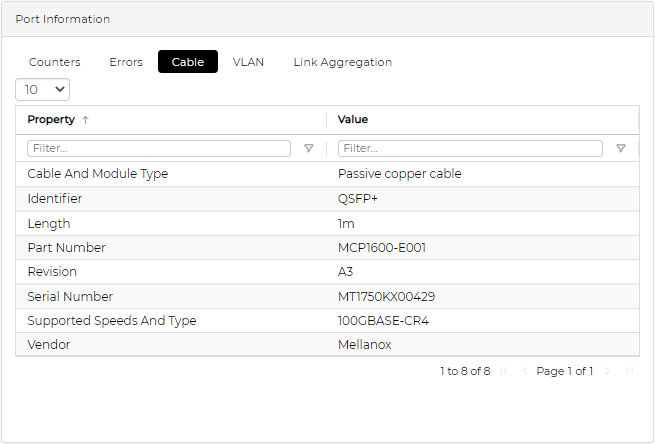
VLAN: Provides VLAN information of the selected device, if available.

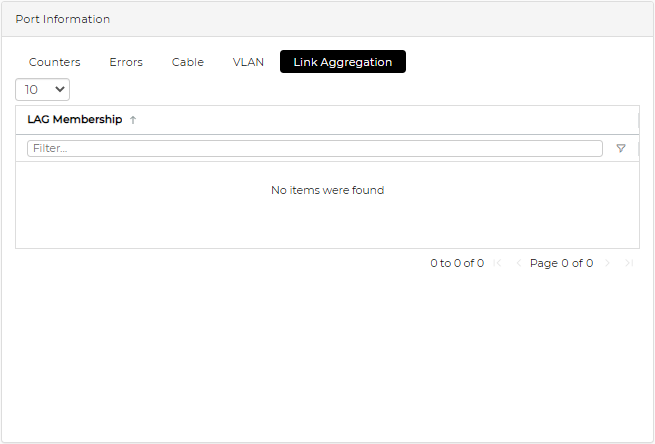
LAG: Provides LAG information of the selected device, if available.
Ports Actions
A right-click on a port will enable performing the following actions:
History/Live Monitoring:
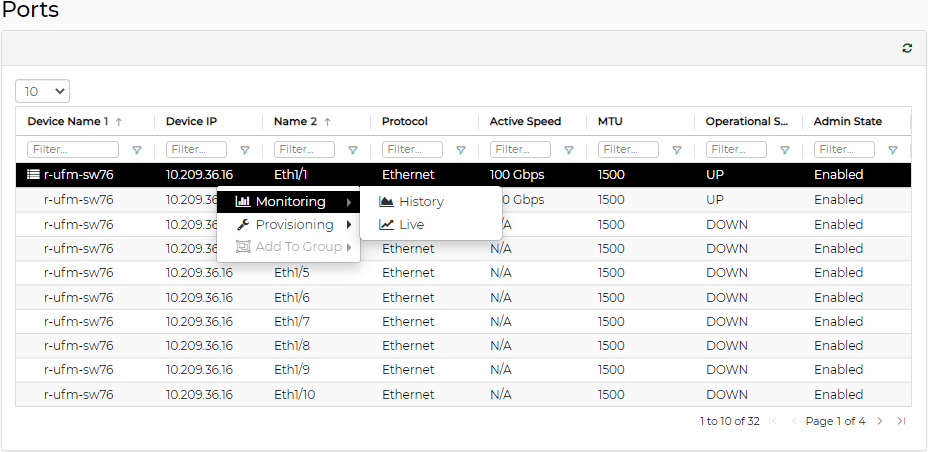
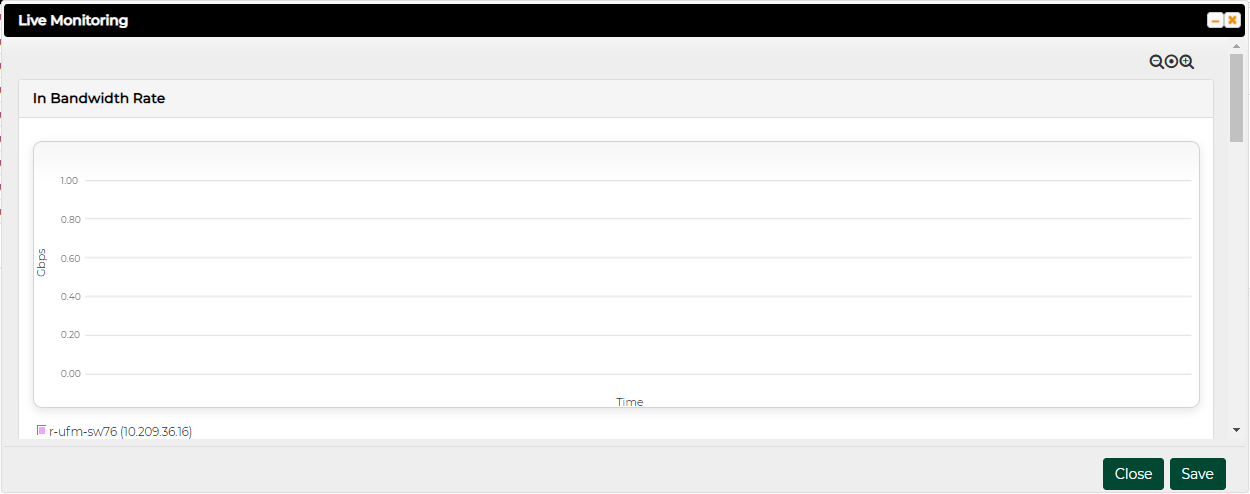
For information on Live/History Monitoring, refer to sections "History Monitoring" and "Live Monitoring".
Provisioning: NEO allows performing port provisioning on ports of NVIDIA switches. This can be performed on one or more ports of the same NVIDIA switch.
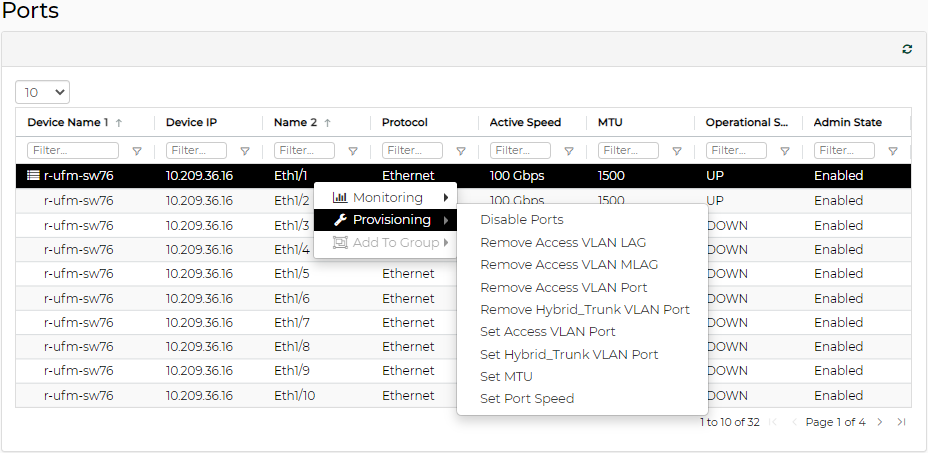
Some templates might require additional details to be completed (see example below).
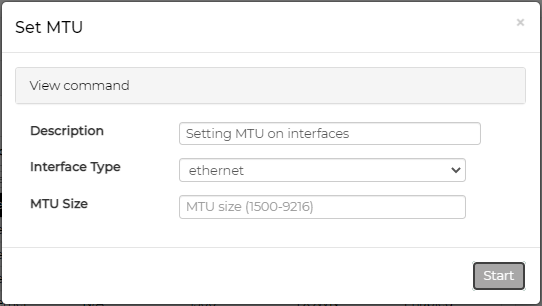
Clicking Start launches a port provisioning job.
WarningAfter the port provisioning job is completed, it might take up to a minute for NEO tables to be updated with the new data.
The Cables window provides information on the cables and modules connected to devices in the network.

The Groups window includes 17 predefined groups for hosts/switches/ports with information about the groups members and credentials (if defined). The Members column indicates the group type: Device/Port.
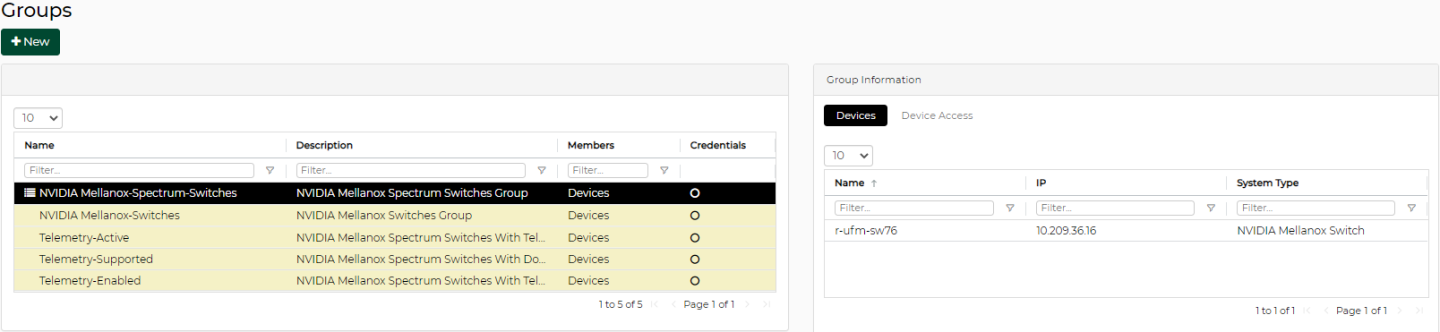
This window also allows creating new groups.
To create a group of a number of devices/ports:
Click the "New" button under "Groups".
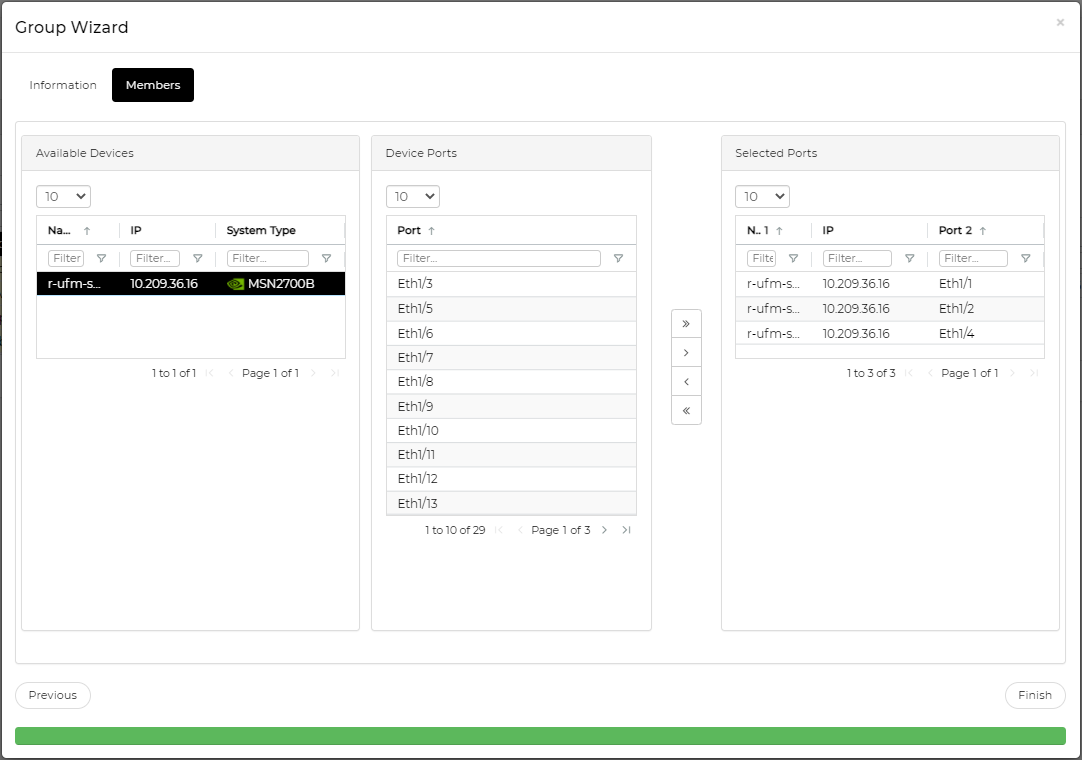
Select the Group Members (Devices/Ports), fill in the Group Name and Group Description in the Group wizard, then click "Next".
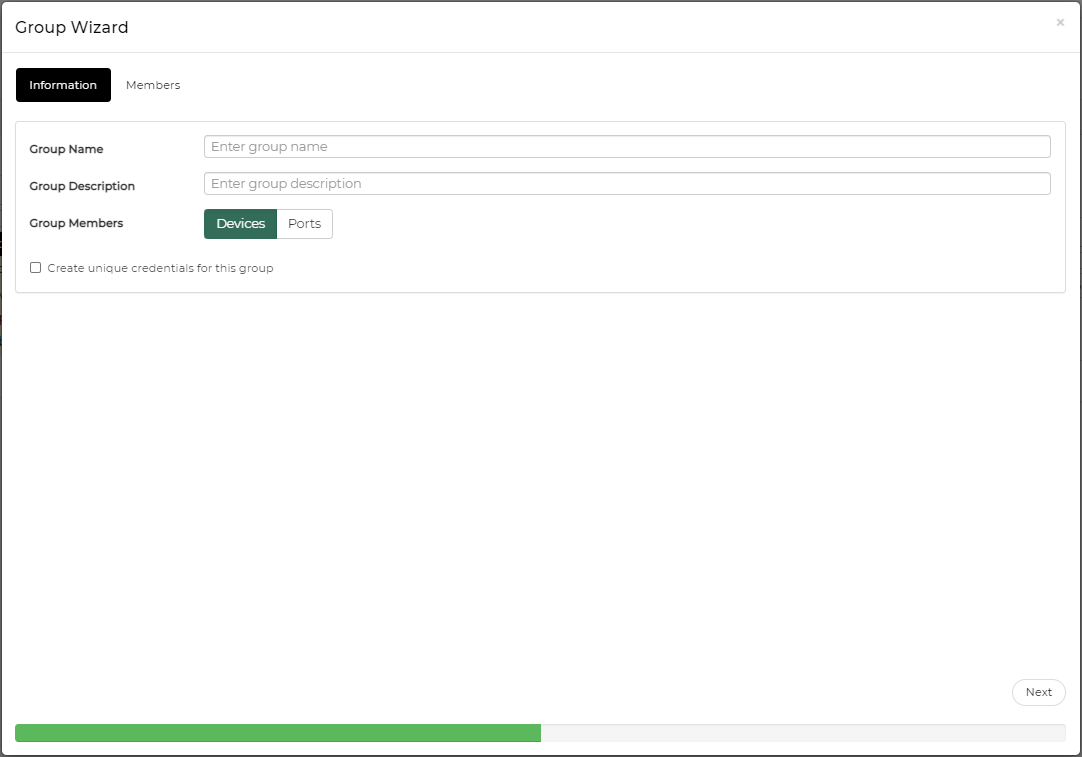
The "Create Unique Credentials For This Group" checkbox is only available for devices groups. If checked, you will be able to create new credentials for the group members which will overwrite the global default credentials (set under Settings > Device Access), and the device credentials (set under Devices > Device Access). Any of the three credential levels (global, group, and device) can overwrite each other.
Choose the members of the group under "Members" by moving the devices from Available Devices to Selected Devices/Ports, and click "Next".
Ports group - example:
WarningGrouping ports is supported for NVIDIA/Cumulus ports. Note that when creating a port group, you can group the ports of one device or more, provided that the ports are of the same type (for example: Eth type). Select one device, then its ports, and move them under "Selected Ports", then repeat the action for all devices you wish to add to the same group.
Devices group - example:

If you checked the Credentials button for the devices group, you will be asked to provide the new credentials as a final step.
Once you click "Finish", the group will be displayed on the left pane, and the Group Information will be displayed on the right pane.
Note that you can view the device information of a device in a group by clicking the device under Group Information in the "Groups" window.
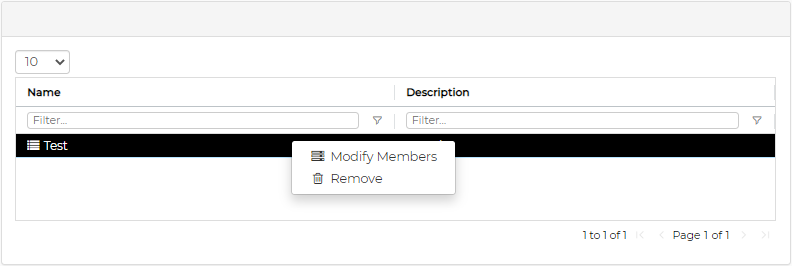
In addition, a right-click on a specific group will offer the following selection of actions:
Modify Members: Opens the Group Wizard in which members can be removed and added to the group.
Delete: Clicking the OK button in the dialog box removes the group from NEO.
Provisioning: allows applying a command or a sequence of commands on all group members at once, or on specific group members, per user selection. For further information on Provisioning, refer to "Provisioning".
WarningWhile the user may create a task for the entire group, the changes will apply to members included in the group at the time of the task’s execution.
Provisioning templates of specific arguments cannot be applied on groups.
WarningProvisioning templates of specific arguments cannot be applied on groups.
Reboot: upon clicking on the "OK" button in the dialog box, all the devices in the group will be rebooted.
Note: This action can be performed on groups that contain NVIDIA switches.
Onyx Software Upgrade: when selecting this option, a dialog box will appear, requiring the user to fill in the relevant details in order to perform the upgrade on all devices in the group. For further information on SW Upgrade, refer to "Onyx Software Upgrade".
Note: This action can be performed on groups that contain only NVIDIA switches.
Generate Dump: When selecting this option, a dialog box will appear, requiring the user to fill in the relevant details in order to perform the dump generation for all devices in the group. For further information on generating system dumps, refer to "Generate Dump".
Note: This action can be performed on groups that contain only NVIDIA switches.
Driver Install: When selecting this option, a dialog box will appear, requiring the user to fill in the relevant details to perform the installation/upgrade on all hosts in the group.Note: This action can be performed on groups that contain only Linux hosts.
Acknowledge: acknowledges all events related to the devices in the selected group.
History Monitoring: Provides a report of the devices’ attributes values history.
Note: This action can be performed on groups that contain only NVIDIA switches.
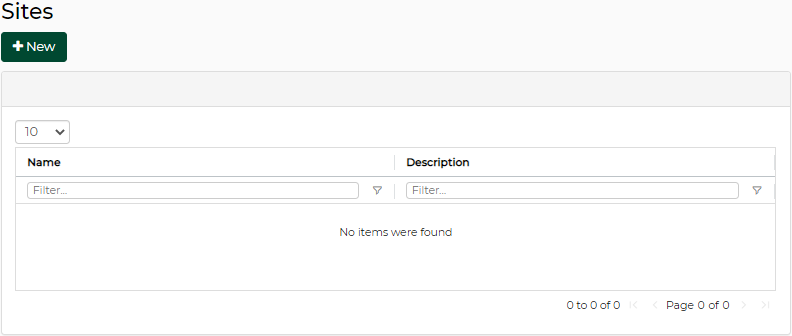
The Sites window allows you to define physical locations of devices with information about the site’s members. This window also allows creating new sites.
To create a site of a number of devices:
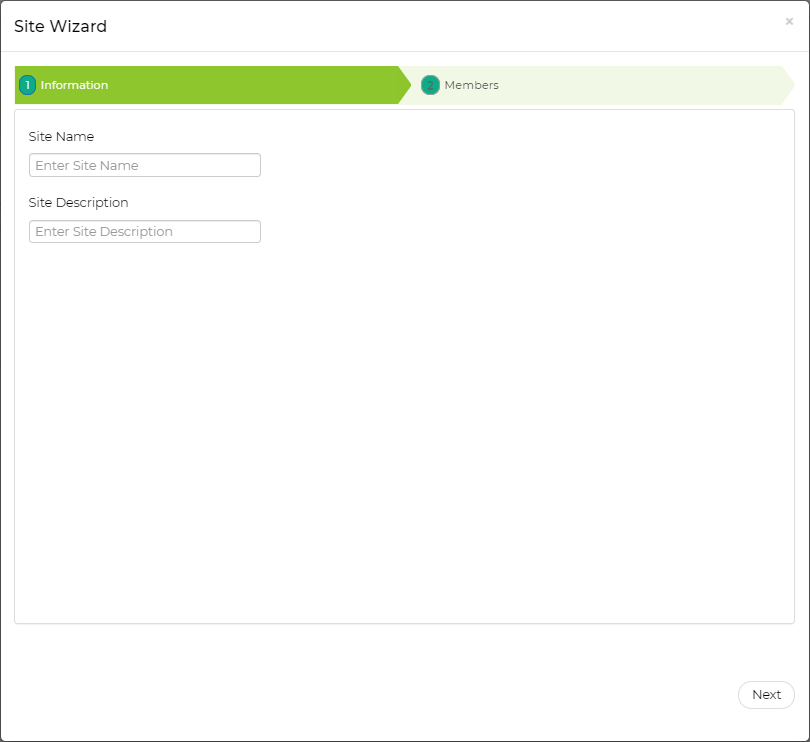
Click the "New" button under "Sites".
Select the Site Members. Fill in the Site Name and Site Description in the Site wizard, then click "Next".
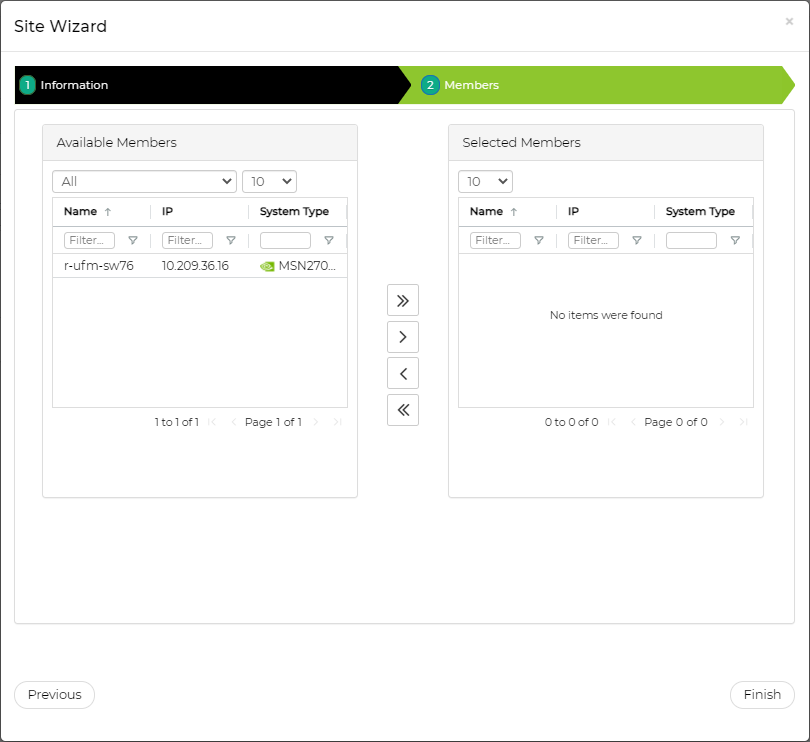
Choose the members of the site under "Members" by moving the devices from Available Devices to Selected Devices/Ports, and click "Next".
Once you click Finish, the site will be displayed on the left pane, and the Site Information will be displayed on the right pane.
Note that you can view the Device Information of a device in the site by clicking the device under Site Information in the "Sites" window.
In addition, a right-click on a specific site will offer the following actions:
Modify Members – opens the Site Wizard in which members can be removed and added to the site
Remove – upon clicking on the "OK" button in the dialog box, the site will be removed from NEO
The Virtual Machines window lists all the Virtual Machines (VMs) that run on all KVMs in the network, and provides the following details of each VM.
|
VM Info |
Description |
|
Host |
Name of the KVM |
|
Name |
Name of the VM |
|
State |
State of the VM |
|
VLANs |
VLAN IDs |
|
Image |
The image run by the VM |
|
Cores |
VM number of cores |
|
Memory |
VM memory size |
The Virtual Switches window lists all the Virtual Switches that run on all KVMs in the network, and provides the following details of each virtual switch:
|
VM Info |
Description |
|
Host |
Name of the KVM |
|
Name |
Name of the virtual switch |
|
VLANs |
VLAN ID |
|
Physical Interface |
Physical port |