Exercise: Author Scenegraph Instancing#
Introduction#
In this exercise, you will learn how to enable scenegraph instancing on component assets and measure its performance impact. You’ll use a Python script to toggle instancing, observe how instances and prototypes appear in usdview, and compare startup times to demonstrate the significant performance benefits of instancing in USD workflows.
See also
While this will be an imperfect measurement of performance due to a number of variables that can come into play, it should at least indicate some improvement in performance when using instancing. For a more robust way to measure performance, we recommend the usdmeasureperformance.py script included with OpenUSD.
For more information about measuring performance, checkout OpenUSD’s Performance Metrics document.
Exercise Steps#
Let’s start by opening the warehourse scenario where we will be enabling instancing.
Run in the terminal:
Windows:
.\scripts\usdview.bat .\instancing\ex_sg_author_inst\Scenario.usd --camera ExCam_01
Linux:
./scripts/usdview.sh ./instancing/ex_sg_author_inst/Scenario.usd --camera ExCam_01
Note
This time we launched usdview with --camera ExCam_01. This automatically selects the Camera prim named “ExCam_01” as the active camera for the viewport.
Tip
Click Camera > Select Camera > ExCam_01 if you ever lose your place in the scene or want to get back to this camera position.
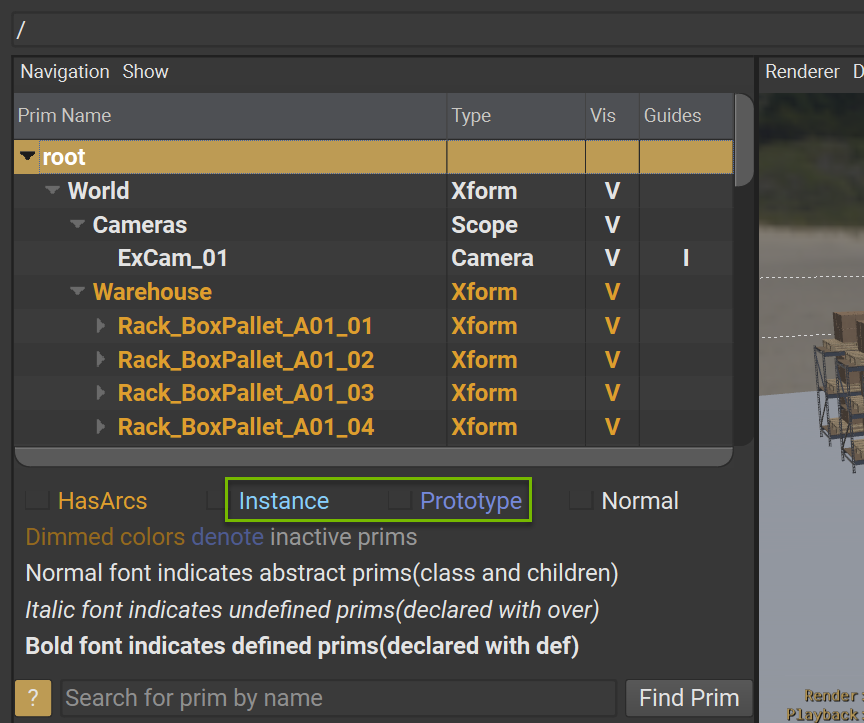
Click on the ? button on the bottom right of the Tree View panel.
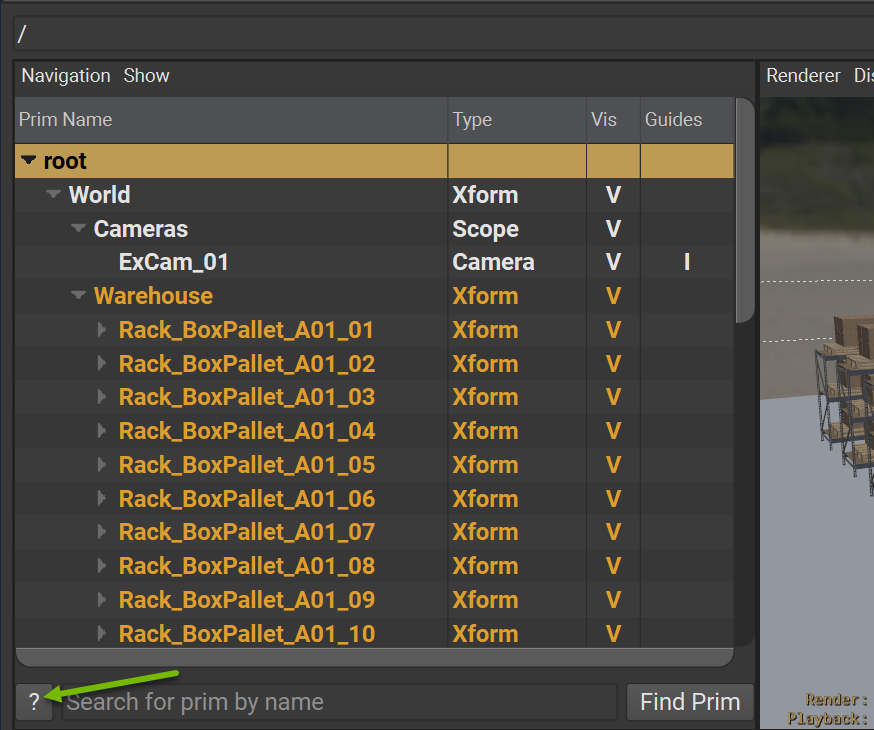
This will open up the Prim Legend drawer. This legend indicates that scenegraph instances are have light blue text and Prototypes have dark blue text in the Tree View. In this case, we have not enabled instancing yet, so you can see that the stage has no instance prims if you explore the Tree View.
Click Window > Interpreter to open the Interpreter window.
Run the following code in the Interpreter window:
1from pprint import pprint
2stats = UsdUtils.ComputeUsdStageStats(usdviewApi.stage)
3pprint(stats)
This should print to the Interpreter window some USD statistics like this:
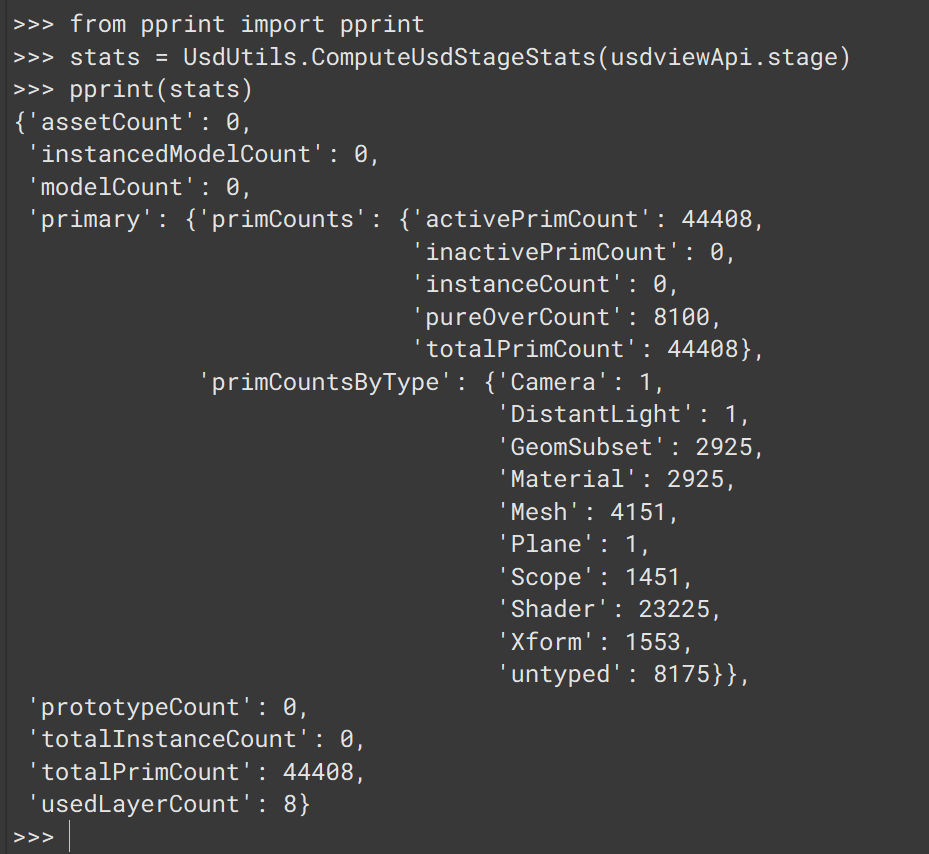
These stats are a useful overview of the contents of your stage including instancing statistics. In this case, we will focus on: totalPrimCount, totalInstanceCount, and prototypeCount to understand the impact of different modifications we make to our stage. Here’s a summary of the stats so far:
Scenario |
Prims |
Instances |
Prototypes |
|---|---|---|---|
No Instancing |
44408 |
0 |
0 |
Instancing |
- |
- |
- |
Close usdview.
The USD statistics can be a useful frame of reference, but we should also measure performance so we can understand what kind of productivity gains we could expect from using scenegraph instancing.
Run in the terminal:
Windows:
Measure-Command { .\scripts\usdview.bat .\instancing\ex_sg_author_inst\Scenario.usd --quitAfterStartup }
Linux:
time ./scripts/usdview.sh ./instancing/ex_sg_author_inst/Scenario.usd --quitAfterStartup
Measure-Command and time are being used to measure how long it takes to execute usdview. usdview is an interactive app, but with the --quitAfterStartup flag we can just time the startup and the time to first frame with the Storm renderer. You can run the command a few times and take an average for a more reliable result. My average was 27.77 seconds on a mid-end laptop.
Open
instancing/ex_sg_author_inst/toggle_inst.pyin VSCode to inspect its code.
16import argparse
17from pathlib import Path
18
19from pxr import Usd, Kind
20
21exercise_dir = Path(__file__).parent
22
23def set_component_instancing(instance):
24    stage = Usd.Stage.Open(str(exercise_dir / "Scenario.usd"))
25
26    for prim in stage.Traverse():
27        # Check if the prim is a component asset
28        model_api = Usd.ModelAPI(prim)
29        is_component = model_api.GetKind() == Kind.Tokens.component
30        if is_component:
31            prim.SetInstanceable(instance)
32    stage.Save()
33
34if __name__ == "__main__":
35    parser = argparse.ArgumentParser()
36    parser.add_argument("instance", type=int, default=1, choices=[0,1])
37    args = parser.parse_args()
38    set_component_instancing(bool(args.instance))
This script opens Scenario.usd, traverses the stage to find all component models, and sets instanceable to enable or disable scenegraph instancing based on a commandline argument.
Let’s try it out.
Run in the terminal:
Windows:
python .\instancing\ex_sg_author_inst\toggle_inst.py 1
Linux:
python ./instancing/ex_sg_author_inst/toggle_inst.py 1
With the 1 argument, this script now sets all component models in Scenario.usd to instanceable=true. Let’s open usdview to see what happened.
Run in the terminal:
Windows:
.\scripts\usdview.bat .\instancing\ex_sg_author_inst\Scenario.usd --camera ExCam_01
Linux:
./scripts/usdview.sh ./instancing/ex_sg_author_inst/Scenario.usd --camera ExCam_01
Note that the component assets in the Tree View now have light blue text. This indicates that they are now instances according to the Prim Legend.
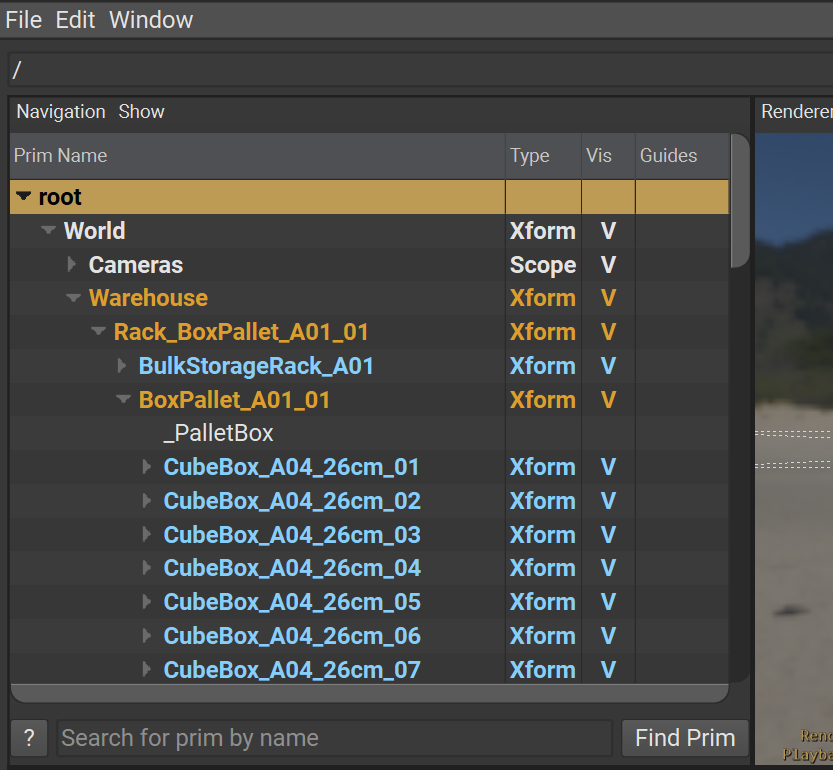
Click the triangle icon to the left of “World” in the Tree View to collapse that prim hierarchy.
Warning
If the prototypes are not showing, ensure you have gone through the Setup instructions to enable Show > Prototype Prims among other settings for a smooth experience when following our instructions.
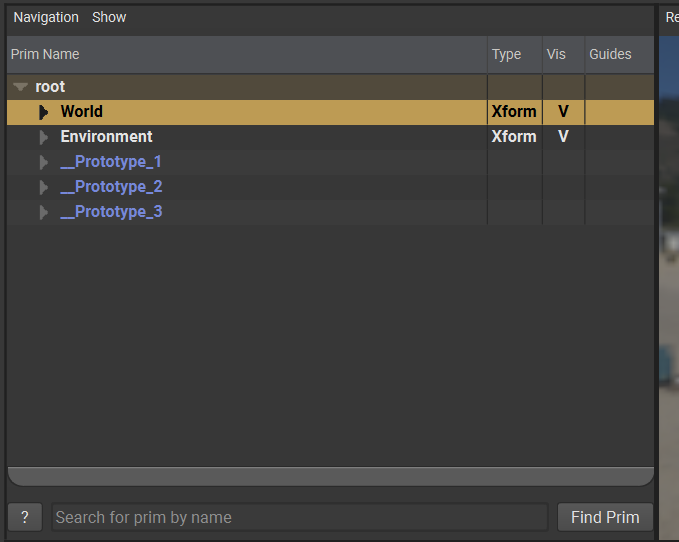
Note the three prototypes in dark blue at the bottom. All of the instances in this stage are based on three prototypes. Can you guess what they are?
We enabled instancing on the component models and we have three component models with distinct composition arc configurations:
CubeBox_A04_26cm
BlockPallet_A07
BulkStorageRack_A01
This is the basis for our prototypes.
Click on the top left box closest to the camera in the Viewport.
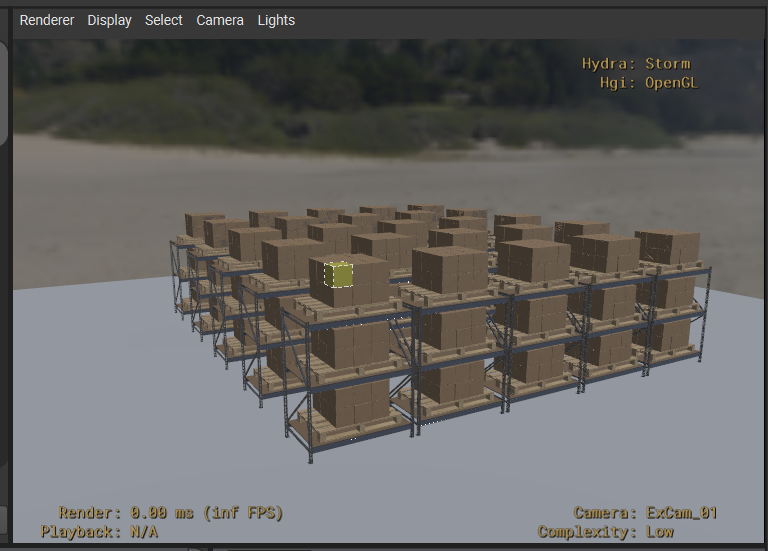
Hover your mouse over the Tree View panel and press the “F” key to frame the selected prim in the Tree View.
You should see “CubeBox_A04_26cm_18” selected in the Tree View panel.
Click the triangle to the left of the select prim in the Tree View to expand the select prim’s hierarchy.
Note that it’s ancestors are dark blue. These are prims based on a prototype. These are instance proxies.
Let’s check the USD stage statistics to see what sort of impact this instancing had.
Click Window > Interpreter to open the Interpreter window.
Run the following code in the Interpreter window:
1from pprint import pprint
2stats = UsdUtils.ComputeUsdStageStats(usdviewApi.stage)
3pprint(stats)
How have the stats changed now that the component assets are instanced? Here is a summary of the results comparing the stats of the Scenario stage with and without instancing:
Scenario |
Prims |
Instances |
Prototypes |
|---|---|---|---|
No Instancing |
44408 |
0 |
0 |
Instancing |
1711 |
1450 |
3 |
That’s a considerable reduction in prim count! What about performance?
Close usdview.
Run in the terminal:
Windows:
Measure-Command { .\scripts\usdview.bat .\instancing\ex_sg_author_inst\Scenario.usd --quitAfterStartup }
Linux:
time ./scripts/usdview.sh ./instancing/ex_sg_author_inst/Scenario.usd --quitAfterStartup
This will measure how long it takes to execute usdview. My average was 18.98 seconds on a mid-end laptop. That’s roughly a 46.3% speed up to render the first frame with usdview and the Storm renderer compared to no instancing.
Scenario |
Execution Time (sec) |
Improvement (%) |
|---|---|---|
No Instancing |
27.77 |
0% (Baseline) |
Instancing |
18.98 |
+31.7% |
Your numbers will differ depending on your hardware and other factors, but you should still see an increase in performance.
Conclusion#
You’ve successfully enabled scenegraph instancing and witnessed its dramatic performance improvements. By reducing 44,408 prims to just 1,711 prims through instancing, you’ve seen how USD’s instancing system can deliver substantial performance gains while maintaining visual fidelity in complex scenes.