

Profile Image Generation Models with AIPerf
Overview
This guide shows how to benchmark image generation APIs using a Docker-based server and AIPerf. You’ll learn how to:
- Set up the server
- Create an input file and run the benchmark
- View the results and extract the generated images
References
For the most up-to-date information, please refer to the following resources:
Setting up the server
Login to Hugging Face, and accept the terms of use for the following model: FLUX.1-dev.
Export your Hugging Face token as an environment variable:
Start the Docker container:
Set the server arguments:
The following arguments will setup the server to use the FLUX.1-dev model on a single GPU, on port 30000. You can modify these arguments to use a different model, different number of GPUs, different port, etc. See the SGLang Diffusion CLI Reference for more details.
Start the server:
Wait until the server is ready (watch the logs for the following message):
Running the benchmark (basic usage)
Text-to-Image Generation Using Input File
Create an input file:
Run the benchmark:
Done! This sends 3 requests to http://localhost:30000/v1/images/generations
Sample Output (Successful Run):
Text-to-Image Generation Using Synthetic Inputs
Done! This sends 3 requests to http://localhost:30000/v1/images/generations
Sample Output (Successful Run):
Understanding the Metrics
Image generation endpoints report a focused set of metrics. Unlike LLM text endpoints, there are no token-level streaming metrics (TTFT, ITL) since the image is returned as a single response.
To increase throughput, raise --concurrency. Each concurrent worker sends requests independently, allowing multiple images to be generated in parallel.
Running the benchmark (advanced usage)
Create an input file:
Run the benchmark:
--export-level raw to get the raw input/output payloads.Viewing the generated images
Extract the generated images:
Copy the following code into a file called extract_images.py:
Run the script:
The script is setup to use the default directory and file names for the input and output files, but can be modified to use different files.
Usage: python extract_images.py <input_file> <output_dir>
Output:
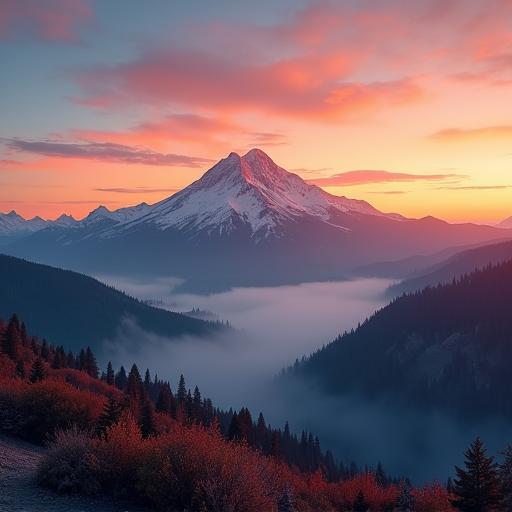
View the generated images:
Prompt:
Prompt:

Prompt:

Conclusion
You’ve successfully set up an image generation server, run your first benchmarks, and learned how to extract and view the generated images. You can now experiment with different models, prompts, and concurrency settings to optimize your image generation workloads.
Now go forth and generate!