How to Launch and Connect to Your Application#
To analyze an application, Nsight Graphics requires the launching of applications through its launching facilities. The sections below describe creating a project, launching the application, and connecting to it so that you can perform your analysis.
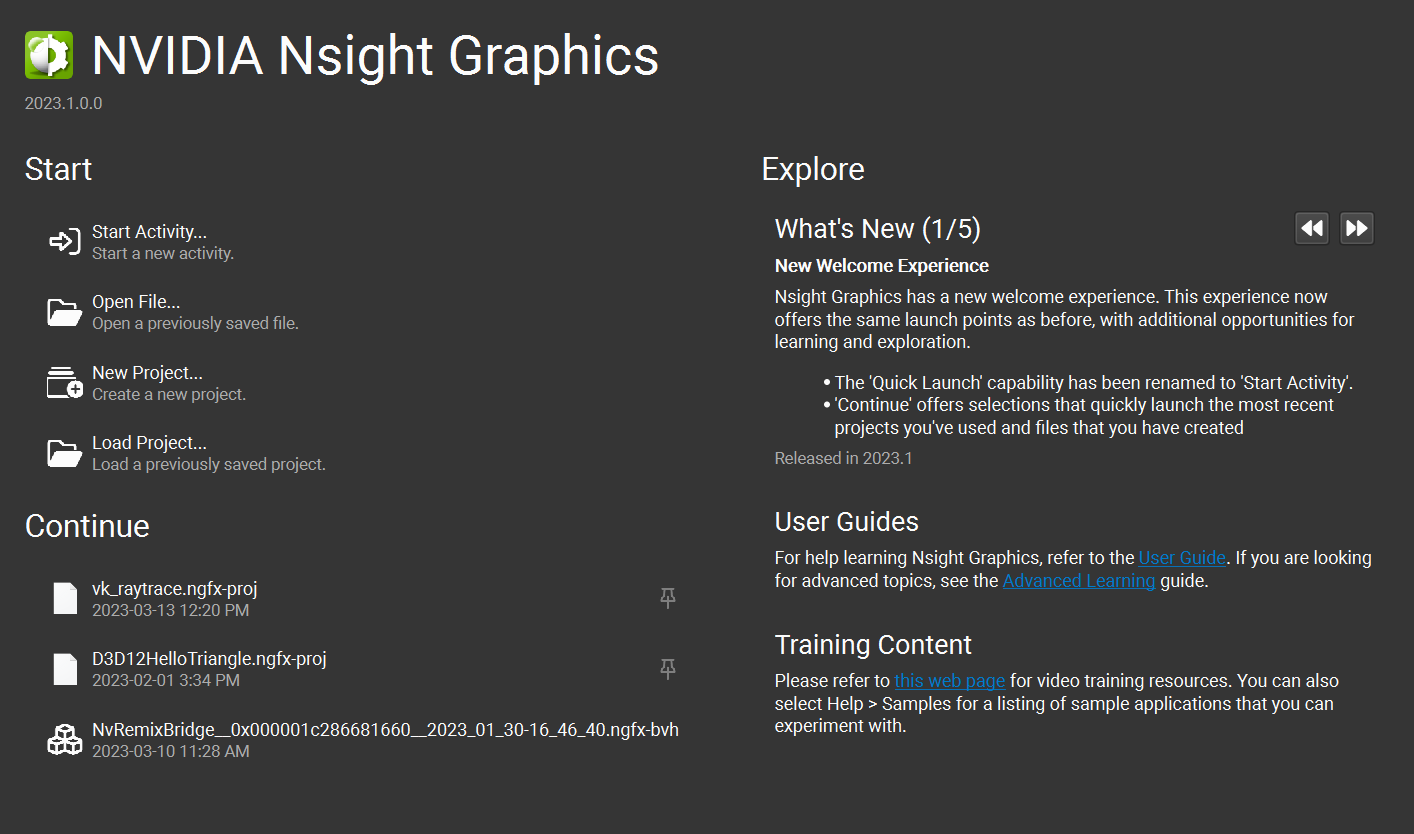
Upon starting Nsight Graphics, you are presented with the option to create a project. If you are using Nsight Graphics for the first time, skip project creation by selecting continue under Start Activity.
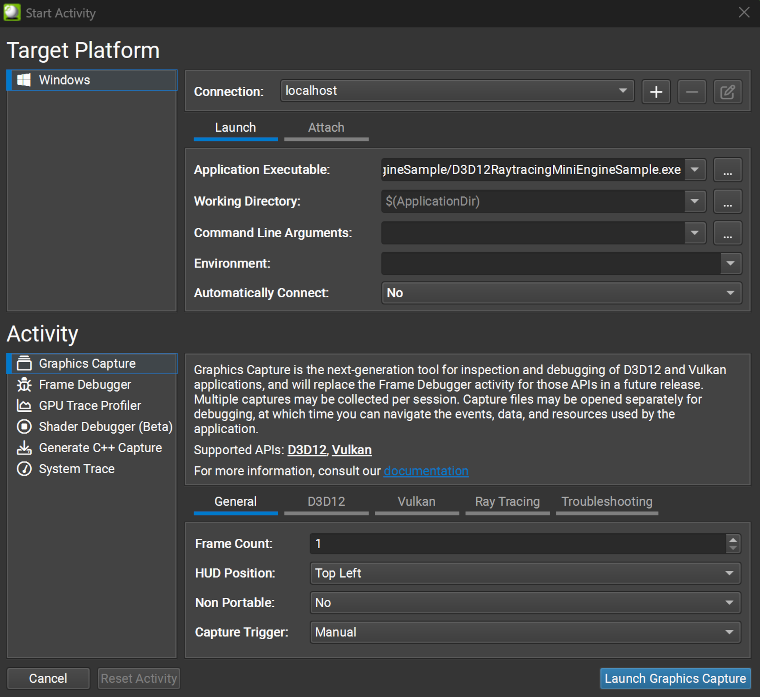
Once selected, you are presented with a target-specific dialog that allows you to configure the application to launch. Browse and select the activity you wish to run and then proceed to the target-specific instructions below to configure the application to analyze.
The target-specific sections below describe how to launch and connect on each specific platform. While the process may be different on different targets, there are many commonalities between all systems. In particular, once a process is launched, the Nsight Graphics host must attach to that process in order to analyze it. This logical separation of launch and attach facilities allows for complex use cases including remote targets, launching though command lines, reattaching to previous sessions, etc. However, the Nsight Graphics host does simplify many common cases by supporting user-controlled automatic connection to processes that were just launched. The sections below cover these uses cases and more, in turn.
Process Launch and Connection on Windows Targets#
On the Windows platform, Nsight Graphics supports debugging and profiling of x64 native applications as well as x86 (32-bit) launchers (e.g., Steam, Origin) that start x64 (64-bit) applications.
Launching an Application with Automatic Attach#
Nsight Graphics supports automatic attach to processes of interest. It accomplishes this by identifying the processes in a process hierarchy that perform graphics work, signaling that these are of interest.
To launch your application, perform the following steps:
Set the application executable to the path of your application. This path may be any executable or batch file.
If your application requires a working directory that is different from your application’s directory, adjust it now.
Adjust the environment (if necessary).
Leave Automatically Connect as Yes.
Click Launch.
Once launched, you are presented with a dialog that notes the launching and attaching of your application. After the launch completes, you are ready to begin your analysis.
Connecting to an Application with Manual Attach#
There may be some cases where a manual attach to an application is desired. These situations include:
Using the command line launcher to launch applications (see Process Launch from a Command Line)
Automatic attach is attaching to an application other than the one you want
Connecting to an application that has previously been detached and reattach to the analysis session is desired
If the application is already launched, perform the following steps:
Click the Connect button.
Select the Attach tab.
Select the application you wish to analyze in the attach tab and click Attach.
After the launch completes, you are ready to begin your analysis.
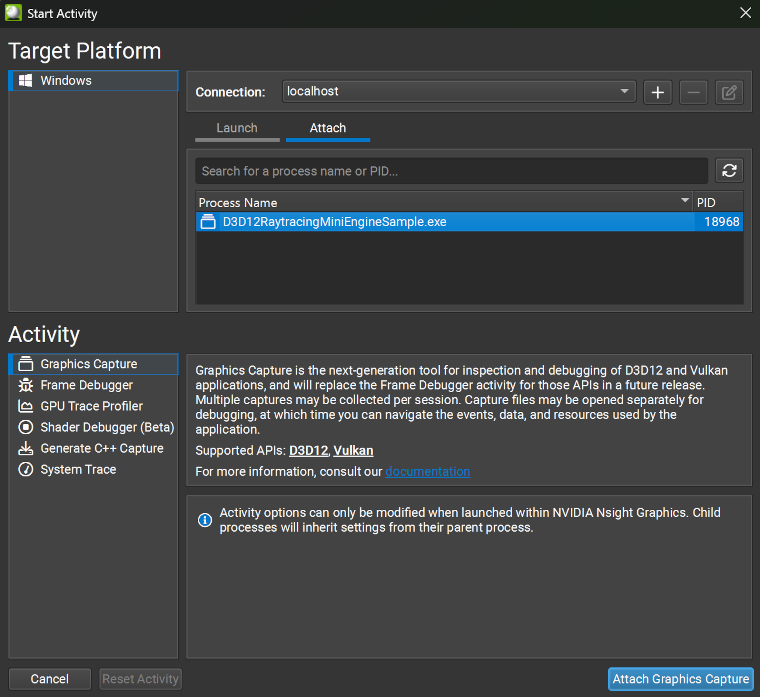
In the example image above, D3D12RaytracingMiniEngineSample.exe had been launched with Automatically Connect set to “No”. Selecting D3D12RaytracingMiniEngineSample.exe and clicking Attach Graphics Capture would allow you to open it in Graphics Capture. This approach can also be used when the specified executable is an intermediary application, such as a game launcher, which itself launches the application that you want to attach to. In that case you can select the child application from the list to attach to.
Remote Launching#
Remote debugging is supported on Nsight Graphics on Windows through use of the Nsight Remote Monitor. This is a process that runs on a target machine to allow connections to be started on that machine.
To run the remote monitor, install Nsight Graphics on the target machine. Then, launch the remote monitor on that machine by Start > NVIDIA Corporation > Nsight Remote Monitor.
Once the monitor is launched on the remote machine, you need to add the remote monitor as a connection in Nsight Graphics. By default, launches are done on the localhost machine. To add another machine, click the + button.

This brings up a dialog in which you can add a machine name or IP address.
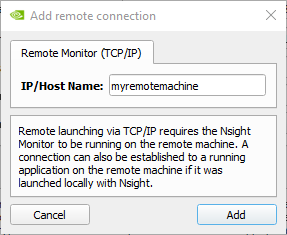
Enter the machine name in IP/Host Name. Click Add to add the connection. The machine you just added is listed as the target connection at this time.

Any number of connections may be added; connections can be removed by clicking - on the selected connection. The connections may be switched between any of the added connections before launch or attach. Connections are globally persisted and may be applied to any project once they are added.
Process Launch and Connection on Linux Targets#
Remote debugging on Linux is supported through SSH connections. Enter your SSH information when establishing the connection to connect to the target machine.
Process Launch from a Command Line#
Nsight Graphics offers a command line interface (CLI) to facilitate launching on applications for which the environment setup can be complex to transfer to the host application. Currently it also provides a non-interactive way to Generate C++ Capture from a Command Line or Generate GPU Trace Capture from a Command Line).
This executable is located in the host application folder:
Windows
<install directory>/host/windows-desktop-nomad-x64/ngfx.exe
Linux
<install directory>/host/linux-desktop-nomad-x64/ngfx
CLI Arguments Details#
To understand how to launch, start by launching the CLI with the --help argument. This will display what a general options the CLI has.
Several of these arguments are optional, while some are required. The full argument list is the following:
Option |
Description |
|---|---|
|
Display all available general arguments. |
|
Display all available arguments, including all activity specific arguments. |
|
Select the target activity to use. This argument is always required. Note: “activity name” must be the exact name in “Activity” section of connection dialog. The available activity names can also be found in the help message ( |
|
Select the target platform to use. This argument is recommended to be set, otherwise the local platform is used as a default. Note: “platform name” must be the exact name in “Target Platform” section of connection dialog. The available platform names can also be found in the help message ( |
|
Select the device on which to launch the application. Default value is “localhost.” This argument is required if trying to launch the application in a machine with |
|
Set the executable path on target device. Note: This argument is usually required, but can be implicitly deduced from project settings if a project has been loaded (see |
|
Set the working directory of the application to be launched. |
|
Set the additional environments of the application to be launched. These arguments should be in the form of “FOO=1; BAR=0;”. |
|
Set the arguments passed to the application to be launched. |
|
Select an Nsight Graphics project to load. If a project has been successfully loaded, some arguments (e.g., If there’s a dedicated project for a certain application, and there are changed and saved options for adjusting the activity, it is preferred to run the CLI with this argument. |
|
Set the output folder to export/write data to. If not specified, the default document folder on the Nsight Graphics GUI is used. |
|
Enable verbose mode to display more messages. |
|
By default, operations (e.g., launch) are bound to proper timeouts; disable timeouts if some applications can take a long time to perform operations. Note: This argument is not used for simply launching the target application. |
|
Run the CLI as a command line launcher; the CLI exits after launching the target application. You may attach to the application with the Nsight Host after it has been launched. |
There are also activity-specific options beyond the general options above. For examples on launching with a specific activity, as well as referencing these activity specific options, see the follow sections:
Generate C++ Capture activity options (see Generate C++ Capture from a Command Line)
GPU Trace activity options (see Generate GPU Trace Capture from a Command Line)
If you wish to simply launch an application, without automatically performing a capture, the CLI can launch an application with commands in the form of the below command.
ngfx.exe --launch-detached [general_options]
Examples:
ngfx.exe --activity="Frame Debugger" --platform="Windows"
--project="D:\Projects\Bloom.ngfx-proj" --launch-detached
Launch an application in the local host, with using the launch options and activity options read from an Nsight Graphics project.
ngfx.exe --activity="Frame Debugger" --platform="Windows"
--hostname=192.168.1.10 --exe=D:\Bloom\bloom.exe --launch-detached
Launch an application on a remote machine.
Using Nsight Graphics With WebGL#
Nsight Graphics has the ability to debug and profile WebGL applications running in a browser. However, there are some setup steps that must be taken to ensure compatiblity and provide as much API contextual information as possible. This is important because many browsers, especially on Microsoft Windows, use graphics APIs other than OpenGL for the backend rendering. Because of this, when you attempt to debug your application, you may see some DirectX calls that do not map easily to the WebGL calls you originally made. Using the correct settings can force an OpenGL backend, which looks more similar to what you are expecting and aid in debugability.
To get started, make sure you close out all browser windows. This is necessary due to the method that Nsight Graphics uses for injecting code into your application. Specifically, Chrome tends to launch a child process from one of the other, already running processes. If that initial process is not injected, then the child process is not either, even if you launched it from the Nsight Graphics Connection dialog. So, close out any browser windows and use Task Manager to ensure that no Google Chrome processes (or other browser processes) remain.
Next, you should set the browser to use the OpenGL backend. In Chrome, you need to:
Type chrome://flags/ in the address bar to bring up the settings.
Search the settings for OpenGL.
For the ANGLE graphics backend, choose OpenGL.
Finally, browsers typically need additional settings to ensure tool compatibility. For Google Chrome, you need to specify the following additional command line options when launching the browser:
Option |
Description |
|---|---|
–no-sandbox |
Disable some of the Chrome security checks to allow process injection to work. |
–disable-gpu-watchdog |
Disable the Chrome GPU activity check. This allows for the application to be paused live and not have Chrome exit. |
–disable-features=RendererCodeIntegrity |
Disables the renderer code integrity feature that interferes with graphics overrides from Nsight Graphics. |
–gpu-startup-dialog |
Optional: This flag causes a dialog to display on launch of the graphics process, to help find the process you want to debug. Note that Nsight Graphics can typically find the process without resorting to manual intervention. |
Automatic Cleanup of Launcher Processes#
There are some processes that have the potential of interfering with the launch of an analysis session of your application. These processes are typically long-lived application launchers — they often perform a coordinated launch between a child process and the parent launcher. In some cases, this coordinated launch can interfere the process by which Nsight Graphics injects itself with the approach analysis settings.
To mitigate this problem, Nsight Graphics attempts to detect processes that are known to interfere and to offer you an opportunity (dialog shown below) to terminate the processes before launch, thereby allowing a launch without interference.
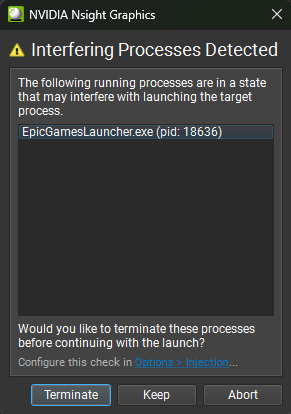
The buttons on the dialog perform the following actions:
Yes — terminate the processes and continue launching.
No — do not terminate the processes, but continue to launch the application.
Abort — cancel the launch entirely.
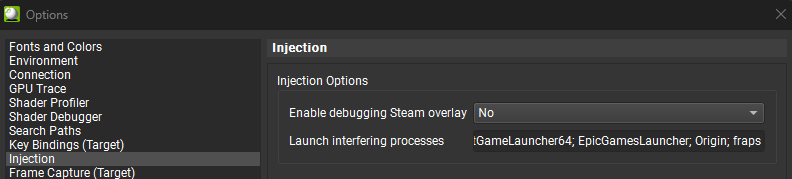
To edit the list of processes that are detected, add an entry to the list in Tools > Options > Injection.